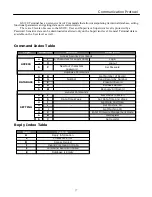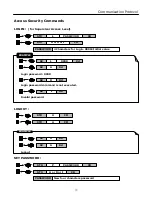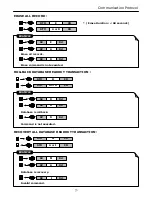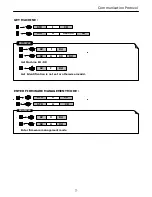
Technical and Operational Description
Operational Description
1. Powered by Battery
For normal use, the unit is powered by battery. Push the Power Switch Button
for about 2 seconds to turn on the
unit. Also push the Power Switch Button for about 2 seconds to turn off the unit at Switch Mode. After the unit is
turned on, the power would be turned off automatically if there is no scanning a card on the unit in 30 seconds (default) at
Auto Power Off Mode. This means the unit would be turned off if no scanning a card again in every 30 seconds (default)
after every card scanning. It would have Low Battery Detect/Warning indication when the unit is powered by battery.
2. Powered by Cable
3. Real Time Clock Setting
4. Low Battery Detection
When GS120 is connected/disconnected to external power adapter by the WAS-T0017 RS232 cable or USB port by the
WAS-1571 USB cable,, it would be turned On/Off automatically. When the unit is connected with the PC through the
communication Cable (WAS-T0017 or WAS-1571) and the PC is running GS120 software and the unit is turned on.
Then you can do the unit Setting, Configuration or data downloading. When the device is powered by cable from PC, the
Power Switch would have no function and the unit would have no Low Battery Detect/Warning function.
Before start using the unit, you must set the Real Time Clock (RTC) inside the unit to your local time. If there is no
battery for quite a while or it is powered by cable for quite a while this would cause Real Time clock (RTC)
malfunctioned due to no power supply. When put on the battery to turn on the unit and the Red/Green LED take turns to
blink, this means the RTC is malfunctioning and you must do the RTC time setting before you use the unit.
When the device is powered by battery, it would have Low Battery Detection function. When the battery goes low, the
LCD would display “ “ and you must change battery immediately ; otherwise, the unit would shut down any time
without pre-warning.
5. Scan RFID Card
6. Operating for Calendar
7. Memory Full Warning
Log database memory is full. You are not able to add any new records. Free the log database memory by uploading
the data to the PC.
9. Firmware Management Mode (FMM)
FMM allows you to quickly upgrade your GS120 internal firmware via com port and also check the validity of
currently loaded firmware. Contact your dealer for the most recent firmware upgrade files.
“ “
“ “
“ “
8. Communication by WAS-T0017 (RS232 cable)
You must use an external power adaptor when the PC connects to GS120 by a WAS-T0017 RS232 cable, Otherwise
when GS120 is not connected with an external power adaptor , the corresponding key for power on GS120
needs to be pressed all the time during the communications with the PC.
When GS120 is in showing the current date and time on screen, it will enter scanning mode by pressing scan key function
“ “ , After presenting a RFID card to GS120 reader, GS120 is displaying card ID and record(s) information on the
screen immediately. You could present next RFID card in “ Continuous “ scan mode (good for 10 seconds) or press scan
key function “ “ and then read next RFID card in “ Button “ scan mode, When GS120 is not working for next card
scan , GS120 reader will go back to default screen automatically.
Before setting calendar function, please delete remaining records from GS120 reader, If there is any record stored in the
memory in the GS120 , ” Record no empty” will display on the GS120's screen during your operation.
10


