Hardware Installation
- 12 -
1-3 Installing the CPU and CPU Cooler
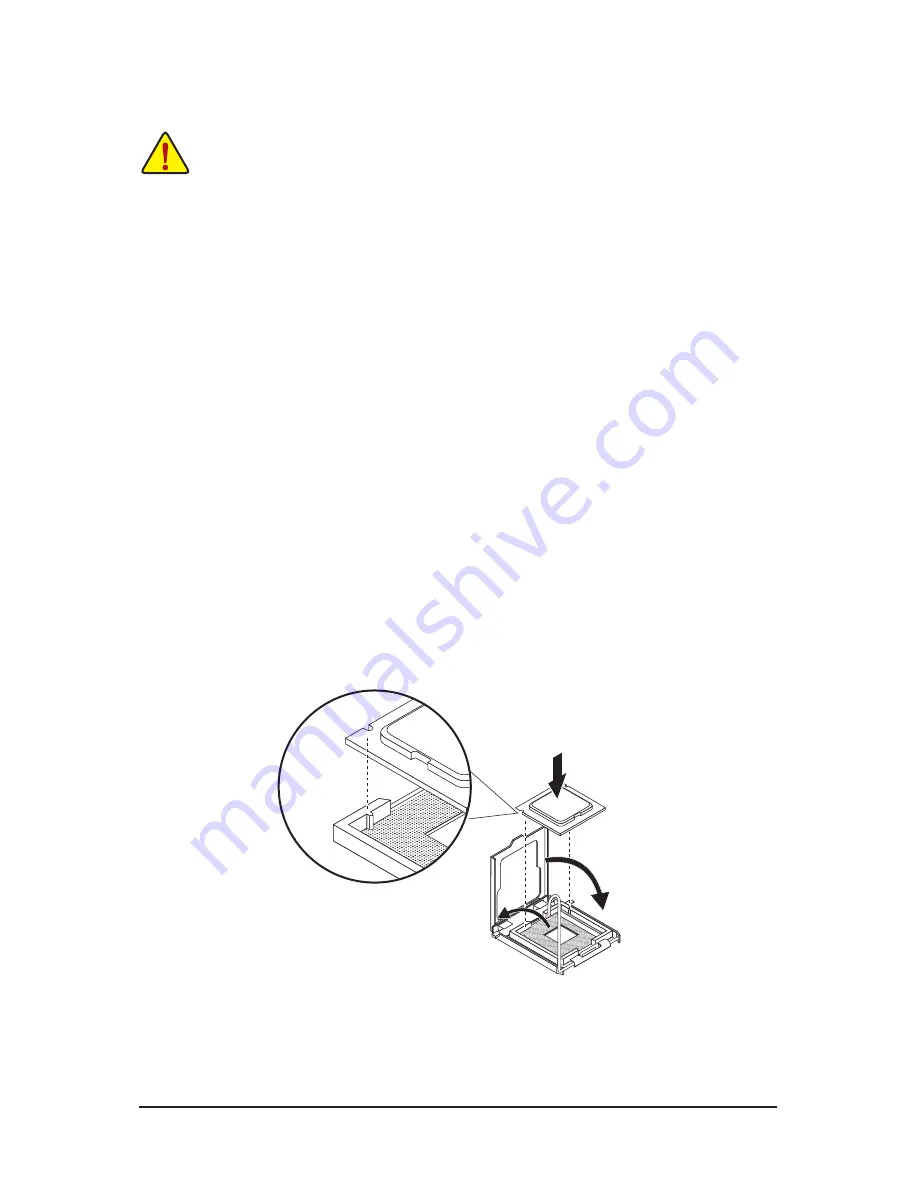
1-3-1 Installing the CPU
Step 1. Raise the metal locking lever on the socket.
Step 2. Remove the plastic covering on the CPU socket.
Step 3. Lift the metal cover.
Step 4. Insert the CPU with the correct orientation. The CPU only fits in one orientation.
Step 5. Please replace the metal cover and push the metallever back into locked position.
Read the following guidelines before you begin to install the CPU:
•
Make sure that the motherboard supports the CPU.
(Go to GIGABYTE's website for the latest CPU support list.)
•
Always turn off the computer and unplug the power cord from the power outlet before installing
the CPU to prevent hardware damage.
•
Locate the pin one of the CPU. The CPU cannot be inserted if oriented incorrectly. (Or you may
locate the notches on both sides of the CPU and alignment keys on the CPU socket.)
•
Apply an even and thin layer of thermal grease on the surface of the CPU.
•
Do not turn on the computer if the CPU cooler is not installed, otherwise overheating and
damage of the CPU may occur.
•
Set the CPU host frequency in accordance with the CPU specifications. It is not recommended
that the system bus frequency be set beyond hardware specifications since it does not meet the
standard requirements for the peripherals. If you wish to set the frequency beyond the standard
specifications, please do so according to your hardware specifications including the CPU,
graphics card, memory, hard drive, etc.
Содержание GA-7PESE3
Страница 1: ...GA 7PESE3 LGA1356 socket motherboard for Intel Xeon series processors User s Manual Rev 1001 ...
Страница 42: ...BIOS Setup 42 2 2 3 CPU Configuration ...
Страница 49: ... 49 BIOS Setup 2 2 7 Super IO Configuration ...
Страница 51: ... 51 BIOS Setup 2 2 8 Serial Port Console Redirection ...
Страница 57: ... 57 BIOS Setup 2 3 1 1 IOH Configuration ...
Страница 72: ...BIOS Setup 72 6 BIOS update ...


