Giga-Byte Communications GSmart F180 Скачать руководство пользователя страница 6


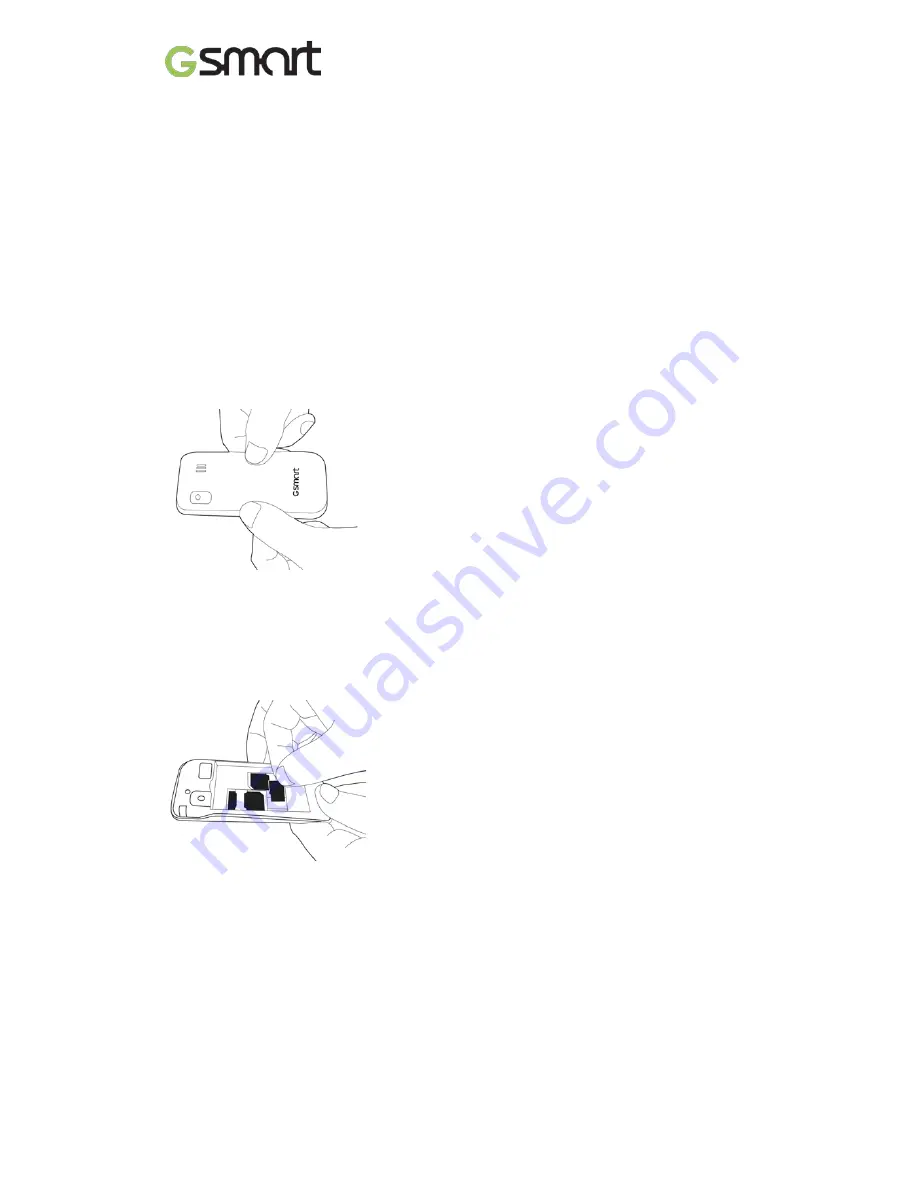
To remove the SIM card 

(1)  Please turn off your phone and remove battery first.   
(2)  Use your finger to slide the SIM1 card out of card slot. 
(3)  Open the SIM2 card holder and use your finger to slide the SIM2 card out of card slot. 

 
Battery 

Your phone comes with a rechargeable battery. Battery life varies depending on the network 
and the type of connections attached to your phone. 
 

To install the battery 

Make sure the contact of the battery is close to connectors in the battery slot. 
 

To remove the battery 

Use your fingertip to lift the battery, and then remove it. 

 
To replace the back cover 

(1)  Insert the cover into the slot from the bottom. 
(2)  Then, press all around back cover fully until hearing clicks. 


Memory card 

You may need a microSD card to store photos, music, videos and other data.   

 
To install the memory card 

(1)  Insert the memory card with the gold contact facing down. 
(2)  Push the memory card until into slot bottom. 


To remove the memory card 

Use your finger to slide the SIM card out of card slot. 

 
1.3 Charging the Battery 

When you take your phone out of box for the first time, the battery isn’t at full power. Please 
charge the battery fully before using.   
(1)  Connect the USB cable to the AC adapter, and then, connect to the device via the USB 

cable. 

(2)  Plug the AC adapter to a socket to start the charge. 
(3)  For phone’s safety, please only use the original charger that comes with your device. Any 

possible damage caused by using non-original charger or any other equipment will not be 
under GIGABYTE Communications Inc.’s responsibility.   

F180

5


Содержание GSmart F180

Страница 1: ...GSmart F180 F180 0 ...

Страница 2: ...text music and pictures are owned by or authorized by original manufacturers to GIGA BYTE COMMUNICATIONS INC Reproduction transfer distribution or storage of part or all of the contents in this document in any form without the prior written permission of GIGA BYTE COMMUNICATIONS INC is prohibited GIGA BYTE COMMUNICATIONS INC F180 1 ...

Страница 3: ...h the touch screen It is not covered by the warranty that you crack the touch screen because of the improper usage When you use the device for a long time such as talking on the phone browsing online or charging the battery the device may become warm In most cases this condition is normal Refer servicing to the provider or an authorized technician under the following conditions 1 The device has be...

Страница 4: ... or Off 6 1 5 Lock Unlock 6 1 6 Stand by Screen Display Explanation 6 1 7 Main Menu Explanation 7 1 8 Text Input 7 1 9 Contacts 7 2 Phone Functions Messages 8 2 1 Make and answer a call 8 2 2 Call history 8 2 3 Message 8 3 Multimedia Applications 10 3 1 Camera 10 3 2 Music 10 4 Managing Your Phone 11 4 1 Managing Basic Settings 11 4 2 Protecting Your Phone 11 4 3 Reset Your Phone 12 5 Specificatio...

Страница 5: ...hone number memory storage and details of network service To install the SIM card There are two slots for SIM cards Upper slot is for SIM1 lower slot is for SIM2 To install the SIM1 card The gold contact is facing down and the cut off corner is facing toward the outside Slide the SIM card into the slot and push it to the end To install the SIM2 card Open the SIM card holder The gold contact is fac...

Страница 6: ...er fully until hearing clicks Memory card You may need a microSD card to store photos music videos and other data To install the memory card 1 Insert the memory card with the gold contact facing down 2 Push the memory card until into slot bottom To remove the memory card Use your finger to slide the SIM card out of card slot 1 3 Charging the Battery When you take your phone out of box for the firs...

Страница 7: ...ls Lock Unlock the keypad Tap Menu key and to lock keypad Tap Unlock key and to unlock keypad To set the keypad to lock automatically after a defined length of time when the device is not being used select Menu Settings Security Auto keypad lock to set the time 1 6 Stand by Screen Display Explanation Icon Description Battery power level Level of network reception Alarm has been turned on Meeting m...

Страница 8: ...rs press 1 repeatedly To access the list of special characters press To insert a space press 0 1 9 Contacts You can save names and phone numbers in the device memory or on the SIM card Add a contact 1 Select Menu Phonebook Options New 2 Tap Scroll key then select each field to fill out the contact information 3 Tap Save to save it NOTE The SIM card contact can t add caller ringtone to contact info...

Страница 9: ...ill have a number inside parentheses beside it showing the number of calls Delete a missed call 1 Select Menu Call logs Missed calls 2 Select one of missed call that you want to delete it 3 Tap Options Delete 4 Tap OK to confirm it Call Time This calculates the duration of your last call all of your outgoing calls all of your received calls and total call time You can use these times as a referenc...

Страница 10: ... Edit Message Content Editing the Recipient You can choose to add telephone numbers or contact to increase the number of recipients Editing the Theme Add Text Photo Music Attachment After editing is completed you can press Options Send to send the MMS message F180 9 ...

Страница 11: ...s 6 shots White Balance Auto Incandescence Fluorescent Sunny day Cloud Self Timer Disable 3 sec 10sec Monochrome mode General B W Blue Green Yellow Red Sepia Negative Recording a video 1 Select Menu Multimedia Video recorder 2 Tap Scroll key to start to record tap again to pause recording 3 Tap Stop key to save the video 3 2 Music You have to copy your audio files to the storage card before playin...

Страница 12: ...will operate even if the Phone is turned off as long as it has sufficient battery power If you turn off the Phone at night the alarms that you have set will still wake you up in the morning Calendar Calendar can help you keep track of meetings to attend friends and relatives birthday important anniversaries or dates Have everything prepared in advance and be the one everyone can rely on Add a new ...

Страница 13: ...en you reset your phone the data stored in your phone may be erased 1 Tap Menu Settings Phone settings Restore factory settings 2 Input phone password then tap OK 3 Tap OK to reset your phone NOTE Before resetting your device please remember to back up all your data and information F180 12 ...

Страница 14: ...vary depending on the availability of local networks and the individual usage Radio Band Standard GSM GPRS EDGE 850 900 1800 1900MHz Connectivity USB Micro USB Audio Jack 3 5 mm stereo audio jack Digital Camera Rear Camera VGA Color Camera External Memory Memory Card microSD supports up to 16GB Temperature Operating 0 C to 40 C SIM Card Slot Dual SIM card slot NOTE 1 Specifications are subject to ...

Отзывы: