background image

20

5.4


REVERB AND CHORUS


Your digital piano has the possibility to mix in various special effects to the sounds with the 

reverb or chorus & others feature


  •  Some sounds already feature a factory preset reverb or chorus effect making the  


sound more lively and realistic.


  •  By pressing the reverb and/or chorus & others button you can deactivate or activate  


the effects as described.


  •  The edited effect settings remain active until the digital piano is switched off.  


When the instrument is switched back on, all factory settings are set back to their  


factory default values .

5.4.1


REVERB


The reverb (or hall-) effect simulates the sound in various room environments.


Your digital piano comes with the following reverb effects:

  Display reading  

Description 

  Room 1  

Sounds like in a medium size living room

  Room 2  

Simulates a slightly larger room

  Stage  

Stage type experience

  Hall 1  

Concert Hall

  Hall 2  

Larger Concert Hall

OPERATION

REVERB AND CHORUS


Press the reverb on/off button to activate or deactivate the effect. The reverb-Effect is 

active when the LED light of the reverb button lights up. If the reverb function has been 

activated the effect type is shown in the display.Changes become effective immediately.


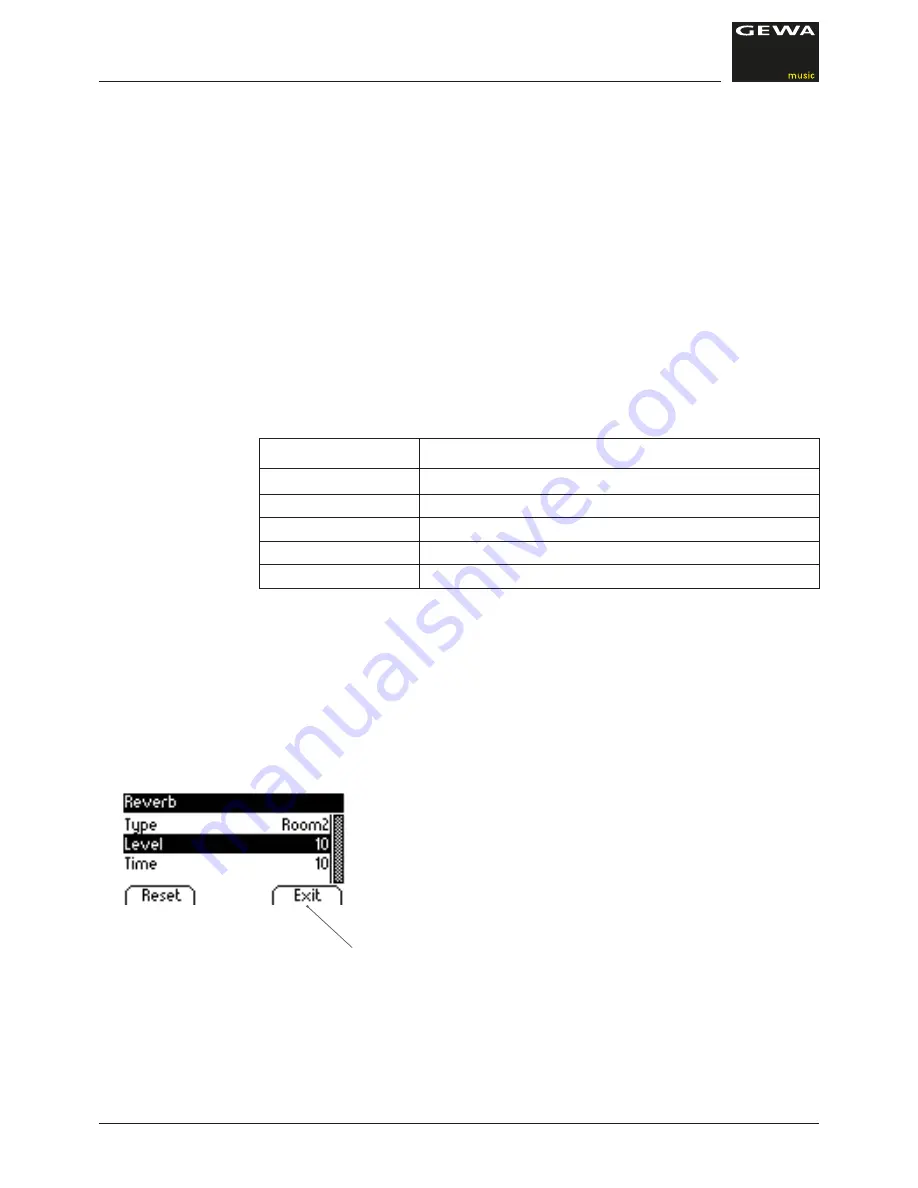
To edit the reverb effect, please press and hold the reverb button down until this reading is 

shown in the display. The up/down cursor buttons are then used to navigate to the desired 

edit item


–  “Type“ lets you select a reverb preset.


–  “Level” determines the volume ratio level to the sound


–  “Time” defines the size of the simulated room


Use the “EXIT“ softbutton to leave the menu

Содержание UP 280 WK

Страница 1: ...ienungsanleitung Owners manual Mode d emploi Manual de instrucciones www gewapiano com Please read this user manual carefully before operating the instrument and take note of the safety information Please keep the user manual for reference purposes ...

Страница 2: ...Manufacturer GEWA music GmbH Werkstraße 1 08626 Adorf GERMANY www gewamusic com Version 1 0 Latest Release 01 09 2016 ...

Страница 3: ...er DSP Effects 21 5 5 Metronome 22 5 5 1 Switching the Metronome on off 22 5 5 2 Editing the Metronome 23 5 5 3 Time Signature Change 23 5 5 4 Setting the Metronome Volume 23 5 5 5 Editing the Metronome Tempo 23 6 FUNCTION MENU 24 6 0 List of Settings 25 6 1 Brilliance Settings 26 6 2 Transpose 26 6 3 Fine tune 26 6 4 Max Phones Level 26 6 5 Input Reverb 27 6 6 Start Up Settings 27 6 7 Piano Infor...

Страница 4: ...diting Recordings 35 8 CONNECTING ACCESSORIES 36 8 1 Connecting Headphones 36 8 2 Connecting a Playback Device 36 8 3 Connecting an external Amplifier 36 8 4 Connecting a PC 36 8 5 Bluetooth Audio 37 9 ADDITIONAL INFORMATION 38 9 1 Glossary 38 9 2 Warranty 39 10 TROUBLESHOOTING 40 11 TECHNICAL INFORMATION 40 ...

Страница 5: ...ank you for purchasing our GEWA UP 280 digital piano With the GEWA UP 280 you have selected a top quality digital digital piano giving you a highly impressive sound and playing experience with a huge extra set of additional and easy to use sounds and functions Your safety is very important to us So please read the safety information carefully and take good note of the given information We suggest ...

Страница 6: ...apter 11 technical data 1 3 IMPROPER USE Exposing the digital piano to an open air or moist rainy environment Setting up the piano in damp rooms Using power supplies not authorized by GEWA music or connecting the piano to an electrical outlet in spite of mismatching local voltage specifications Playing the piano close to electrical or electronic devices such as stereo systems TV sets radios or mob...

Страница 7: ... the piano Never insert water or liquids into the digital piano or the keyboard Never clean the digital piano with a wet cloth Never plug in or unplug the piano with wethands and never pull on the cable as it may be damaged If liquids or water accidentally get into the digital piano unplug it immediately In all of the above cases have the digital piano checked by your authorized GEWA customer serv...

Страница 8: ...digital piano completely form the electrical system 1 5 CE LABEL Your GEWA digital piano complies with the requirements of the EU directives 2004 108 EC on the approximation of the laws of the Member States relating to electromagnetic compatibility and repealing Directive 89 336 EEC Compliance with the above directives is confirmed by the CE label on the device The declaration of conformity can be...

Страница 9: ...dset Rest 1 4 Pedalboard with connector cable 1 5 Left side panel 1 6 Right side panel 1 7 Power supply and cable 1 8 Recessed head screw M6 9 9 Recessed head wood screw 10 10 Manual 1 11 Self adhesive cable clips 2 2 PARTS SUPPLIED WITH THE PIANO Check the content of the package for completeness before starting with the assembly ...

Страница 10: ...illustration 2 By using the recessed head screws M6 10 connect the side panels 6 and 7 with the pedal board 4 3 Apply the bracing of the pedal board 3 to the backside of the pedal board so that it snaps into the notch Then screw it on using 4 recessed head screws 4 Now screw on the bracing on to the back rear panel 2 with 4 recessed head screws 5 Insert the console from above and flush mount it wi...

Страница 11: ...thout the use of force to the socket on the bottom side of the console 1 and plug the power supply 8 into the power socket on the rear of the piano without image 10 Please set up the music rest as shown below THIS IS HOW TO OPEN THE KEYBOARD LID Please make sure to always use both hands to open or close the lid To open the lid please follow below drawing In the opposite way the lid can then be clo...

Страница 12: ... of the piano should not be touched by the stand For the connection with a standard sustain pedal you can use the 6 3mm jack socket on the rear panel NOTE 4 GETTING STARTED Now let s have a look on to the controls of your GEWA digital piano 4 1 THE CONTROLS OF YOUR DIGITAL PIANO Your GEWA digital piano features the following controls Console View A Volume slider on off toggle switch View A Speaker...

Страница 13: ... HINWEIS Bevor Sie einschalten empfiehlt es sich diesen Regler mittig zu stellen 1 2 3 4 5 6 7 8 9 10 Volume 11 12 GETTING STARTED FUNCTION KEYS AND PEDALS 4 2 FUNCTION KEYS AND PEDALS View A 1 Display provides settings and status information 2 Softbuttons Function dedicated Buttons 3 Cursor buttons Navigation to and within functions and function groups Recording related buttons 4 play stop Start ...

Страница 14: ...epressed while playing a key or a number of keys this key or the keys is are sustained until the pedal is released again Unlike the damper pedal It sustains only those notes that are being held down when the pedal is depressed allowing future notes played to be unaffected Damper sustain pedal right The damper sustain pedal simulates the removal of the dampers from the strings like on an acoustic p...

Страница 15: ... pedal cord here View C 1 MIDI connector Connect MIDI devices here to utilize the MIDI functions of your digital piano 2 USB B connector Connect your digital piano to your PC with this interface 3 LINE IN Connect an output device e g MP3 player to your digital piano here The signal is looped through your digital piano for a combined output with the sounds being played This can be used e g for Play...

Страница 16: ...udio recording playback device 5 Mains Power Supply Connect your digital piano with the supplied power adapter 6 SUSTAIN 6 3 jack socket for the connection of any standard sustain pedal OR the supplied pedal The LINE IN and LINE OUT connectors are defined as separate stereo channels L left and R right Use appropriate wiring to output or input stereo audio signals 3 5 mm stereo jack NOTE ...

Страница 17: ...he right front of the digital piano lights up 3 Your GEWA digital piano is now ready to play 5 2 DEMO FUNCTION The DEMO function provides a fantastic overview of the various sounds of your digital GEWA digital piano This is how to activate the DEMO song function NOTE TIP 1 Press PLAYER function related softbutton 2 Press the upper and lower cursor keys to highlight the demo song line 3 Now press t...

Страница 18: ...gruppen 1 6 Piano E Piano Strings Choir Organ Bass Guitar Others Concert Grand Seventy Three Strings Church Organ 1 Acoustic Bass Clavi Bright Grand 1 E Piano 1 Slow Strings Church Organ 2 Bass Cymbal Vibraphone Mellow Grand 1 FM Piano Choir Drawbar Organ Finger E Bass Marimba Mellow Grand 2 Wurly Slow Choir Jazz Organ 1 Fretless Bass Celesta Upright Piano Synth Strings Jazz Organ 2 Picked Bass Fr...

Страница 19: ...6 Use the EXIT softbutton to leave the menu 5 3 1 SOUND COMBINATION SPLIT SOUND The UP 260 G can be set to playing two sounds in split mode meaning below and above the keyboard split point there will be two zones with different sounds In the following we will show you how to do this 1 Select a sound as described above 2 Press the EDIT Softbutton 3 With the up down cursor buttons you know decide wh...

Страница 20: ...he following reverb effects Display reading Description Room 1 Sounds like in a medium size living room Room 2 Simulates a slightly larger room Stage Stage type experience Hall 1 Concert Hall Hall 2 Larger Concert Hall OPERATION REVERB AND CHORUS Press the reverb on off button to activate or deactivate the effect The reverb Effect is active when the LED light of the reverb button lights up If the ...

Страница 21: ...te or deactivate the effect The chorus others Effect is active when the LED light of the chorus others button lights up If the chorus others function has been activated the effect type is shown in the display Changes become effective immediately To edit the chorus others effect please press and hold the chorus others button down until this reading is shown in the display The up down cursor buttons...

Страница 22: ... two kids of beats Typical metronome beats as a rhythmical rehearsal support Modern drum accompaniment grooves The following presets are available OPERATION METRONOME Beat Description 1 4 Typical Metronome Support Beat 2 4 Typical Metronome Support Beat 3 4 Typical Metronome Support Beat 4 4 Typical Metronome Support Beat 5 4 Typical Metronome Support Beat 3 8 Typical Metronome Support Beat 6 8 Ty...

Страница 23: ...ult 4 Use the EXIT softbutton to leave the menu 5 5 4 SETTING THE METRONOME VOLUME 1 Press and hold the metronome The display will show the current beat in use 2 Use the up down cursor buttons to navigate to the volume edit line You can then change the volume by toggling the left right cursor buttons 3 Press reset to instantly return to the previous settings Changes become effective immediately Af...

Страница 24: ... Press and hold the metronome This will take you to the following menu 2 Press the up down cursor button to navigate through the various edit functions 3 By pressing the right cursor button you are either directed to a submenu or you can directly change values 4 Changes become effective immediately After switching the piano off and back on again all edited values will be reset to default 5 Use the...

Страница 25: ...erament Equal Pythagorean Pure Major Pure Minor Mean Tone Werckmeister Kirnberger Root Note C Bb USB Menu USB Player Menu USB Song Select laut Datei Ordner Load Song laut Datei Ordner Load Lesson Book laut Datei Ordner Load Registration laut Datei Ordner Save Song USB Destination laut Datei Ordner Int Destination laut Datei Ordner Save Registration USB Destination laut Datei Ordner Delete File lau...

Страница 26: ... pressing the menu soft button 2 Press the right or left cursor button to reach the desired transpose setting 3 Use the EXIT softbutton to leave the menu 6 3 FINETUNING You can fine tune your digital piano in the following way 1 Enter the FUNCTION menu by pressing the menu soft button 2 Press the right or left cursor button to reach the desired fine tune setting 3 Use the EXIT softbutton to leave ...

Страница 27: ...termines the behavor of the playback start button This is how it is done 1 Enter the FUNCTION menu by pressing the menu soft button 2 Press the right or left cursor button to reach the desired input Start up setting 3 Use the EXIT softbutton to leave the menu 6 7 PIANO INFORMATION This information is useful when contacting the GEWA service staff 1 Enter the FUNCTION menu by pressing the menu soft ...

Страница 28: ...he piano settings menu Pressing the right cursor button will then take you to the various edit features 3 Use the left right cursor buttons to change details as curve touch dynamics Minimum Touch or the value for a constant value used e g for organs You can play the key to test the setting while editing 4 Use the EXIT softbutton to leave the menu The following Keyboard Response Settings are availa...

Страница 29: ...cursor buttons to change the setting You can play the key and press the pedal to test the setting while editing 4 Use the EXIT softbutton to leave the menu 6 8 3 SYMPATHETIC RESONANCE This feature allows you to change the sympathetic string resonance characteristic of your GEWA digital piano giving it a highly realistic appeal in conjunction with your preference and the room the piano is used in I...

Страница 30: ...diting 4 Use the EXIT softbutton to leave the menu FUNCTION MENU PIANO SETTINGS 6 9 PLAYER MENU Within the PLAYER menu you can edit the functions related to adding audio playbacks from a USB device las isted on page 26 These functions are Play Mode The way a playback is played Song Volume Volume of the playback in relation to your piano play Song Transpose Tonality adjustment to the key played on ...

Страница 31: ...ns displayed and use if required the left light cursor buttons 4 Use the EXIT softbutton to leave the menu 6 10 USB SETTINGS The USB menu features the following adjustable functions USB Player Menu USB Song Select Load Song Load song from a USB device Load Lesson Book Load a lesson book specially packaged e learning file from a USB device Load Registration Load user settings Save Song Save a song ...

Страница 32: ...nds in Dual Mode layered sounds are set to channel 4 while sounds on the left side of the key split point and sounds added to the base sounds of a layered Dual mode sound are then transferred on channel 5 Use the EXIT softbutton to leave the menu 6 12 2 LOCAL CONTROL The local Control Function enables you to mute the built in speakers of your digital piano while signals are still transferred via M...

Страница 33: ... 13 REGISTRATIONS Your GEWA UP 260 G Digital Piano can store up to 3 banks A B C 6 presets of user defined sound combinations These settings support you to maintain your most favorite instrument settings These are amongst various others a few examples of possibly registrable functions Sounds inc effect settings Combined dual sounds with all custom settings Split sounds incl the keyboard split poin...

Страница 34: ...s being played back you can play along with the recording A fantastic way to play four hand literature with a virtual second player 1 Select the recording see above 2 Press the Play Stop button to start the play 3 Press the Play Stop key again to stop the playback RECORD AND PLAYBACK FUNCTION 7 RECORD AND PLAYBACK FUNCTION Your GEWA digital piano can record your playing It can store up to 4 pieces...

Страница 35: ...own cursor buttons Be sure that you have selected to right song and then press the right cursor button to delete the song or the left button to abort the deletion You can save your recordings to an external USB device Here s how it s done 1 Enter the FUNCTIONS menu by pressing the menu soft button With the up down Cursor buttons you can then navigate to USB Settings 2 Then scroll down to Save Song...

Страница 36: ...ted headphones You can control the volume balance easily with the volume control 8 3 CONNECTING AN AMPLIFIER If you need your digital piano to play louder than with the built in speakers you can easily connect it to an amplification system using the LINE OUT outputs under the console 8 4 CONNECTING A PC You can link your digital piano with your PC with the USB B connection under the console This i...

Страница 37: ...io from external Bluetooth devices In the following we will explain how this is done 1 Enter the bluetooth menu of your player device and search for your GEWA digital piano 2 After the piano is displayed simply press connect 3 Now your GEWA digital UP piano is enabled to play audio files deriving from your playout device through the built in speakers ...

Страница 38: ...o this Recorded MIDI data can then be sent to a MIDI instrument e g a digital piano to make it audible again GM General MIDI defines a lot more than what is defined in the basic MIDI protocol It combines hardware and protocol specifications General MIDI also specifies content For this GM sets a minimum standard for the assignment of the instruments to 128 program places According to GM a compatibl...

Страница 39: ...er products such as e g rechargeable batteries strings skins or seals If you suspect to have a claim covered by the warranty terms regarding your GEWA digital piano please contact your dealer during regular business hours 10 TROUBLESHOOTING AND POSSIBLE SOLUTIONS With the tips listed here you can possibly fix occurring faulty behavior of your digital piano on your own Should your efforts still not...

Страница 40: ...Medium Hard1 Hard2 and Constant Pedals Soft Sostenuto and Piano Pedal Sound source GEWA music Samples 6 Layer Polyphonie Max 256 tones Number of internal sounds 37 Amplifier output RMS 2 x 20 Watt Speakers 2 pcs Fullrange Stereo speakers Recording function integrated 8 track recorder Recording format Standard MIDI file Format 0 SMF Connections Connection for mains adapter MIDI IN MIDI OUT Aux In A...

Страница 41: ...41 NOTIZEN ...

Страница 42: ...Manufacturer GEWA music GmbH Werkstraße 1 08626 Adorf GERMANY www gewamusic com Version 1 0 changes and errors excepted ...

Отзывы: