P.15
P.14
Cleaning and Maintenance
Cleaning and Maintenance
WARNING!
Before maintenance and repair, turn off the product, unplug from the power source, and wait till the
product has completely cooled down.
1. The oven should be cleaned after every use. When cleaning the oven, turn on the oven lighting so
that you can see the oven cavity clearer.
2. The oven cavity should only be wiped clean with soft cloth moistened with warm water and a small
amount of dish detergent.
3. After cleaning the oven cavity, wipe it dry with a dry cloth.
Note:
DO NOT use cleaning products containing abrasive materials when cleaning the glass door and control
panel.
Steam Cleaning:
1. Pour 200 ml of water into a bowl, place it on the oven’s lowest rack, and close the oven door.
2. Set the oven on Grill function, set temperature to 200°C and heat for 15 minutes, then set tem-
perature to 0°C and let oven stand idle for 15 minutes.
3. Open the oven door, gently wipe down the oven cavity with soft cloth or sponge moistened with
warm water and diluted dish detergent.
Note:
During steam cleaning, moisture or water residue may condense on the bottom of the oven cavity.
Please dry off with a dry cloth.
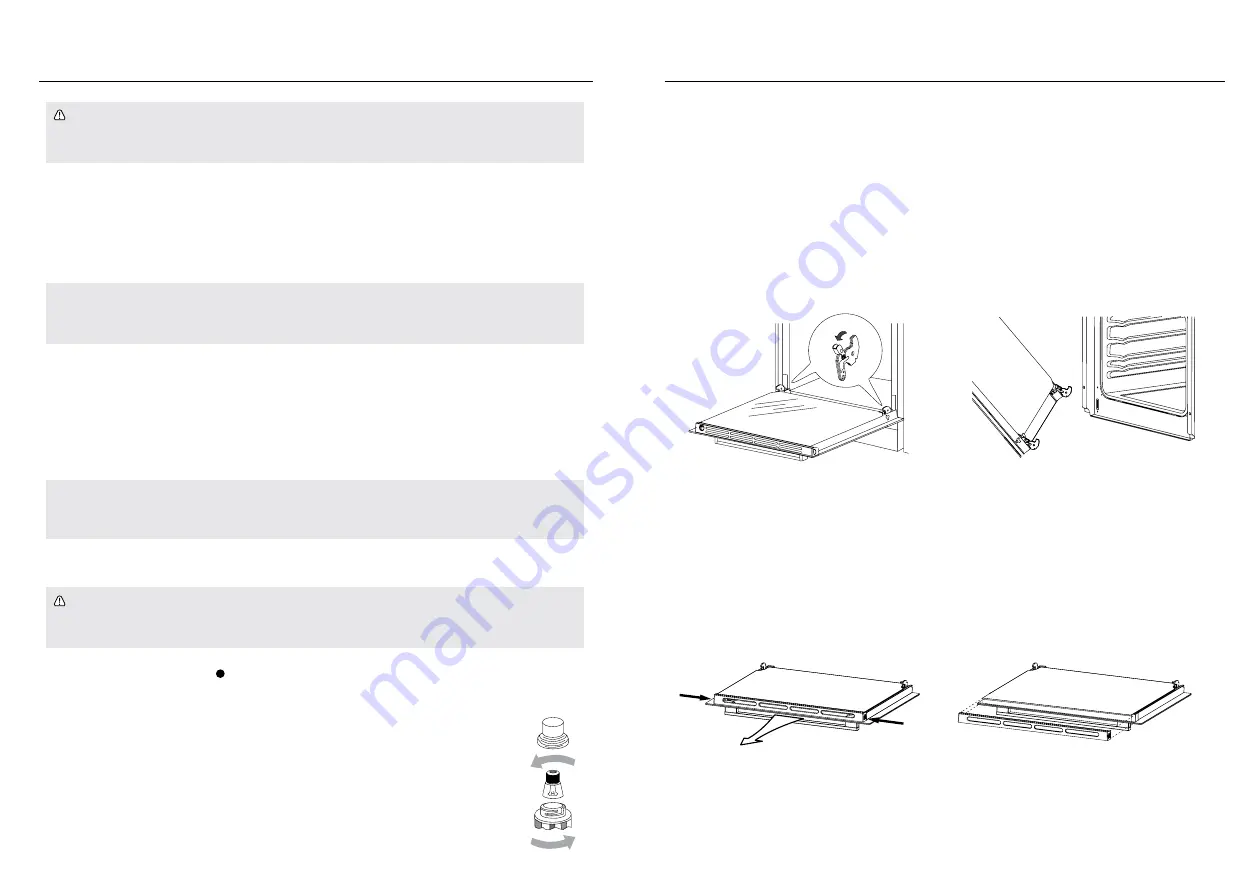
Replacing Oven Light Bulb
WARNING!
To avoid the possibility of electric shock, unplug the oven from the power source before replacing the
oven light bulb.
1. Turn both control knobs to position and disconnect the mains plug.
2. Unscrew and wash the lamp cover then wipe it dry.
3. Unscrew the light bulb from the socket, replace with a new high temperature bulb (300°C) that
meets the following parameters:
•Voltage 220-240V
•Power 25W
•Thread E14
4. Screw in the bulb, make sure it is properly inserted into the lamp socket.
Screw on the lamp cover.
Removing The Oven Door
1.
Open the oven door fully to horizontal position, lift the latch hinges completely.
2. Grip the door tightly on both sides, and slowly close the door. Carefully lift the door upwards and
outwards to unhinge the door from the oven.
3. After cleaning, align the hinges with the oven door. Latch and push the door inwards until it
catches. Make sure the hinges and door are properly aligned to avoid damaging the door.
4.
With the oven door fully opened to the horizontal position, lock the latches down to their initial
positions.
5. Close the oven door and make sure it is properly installed.
Removing The Inner Glass Panel
1. Press and hold the two sides of the grid with both hands to unlock the grid. Gently pull out the
grid. Slide the inner glass out for cleaning.
2. Remove the two glass stoppers on the sides for cleaning.
3. After cleaning, reinsert stoppers, then gently place back the glass panel, and make sure it is
securely locked into the stoppers.
Right
Left
Содержание EVC-282
Страница 12: ...P 23 P 22 Built In Oven EVC 282 3 1 220 240V 50 60Hz 2 1 2 220V 240V PE 220V 240V L 3 N 5 PE LED...
Страница 13: ...P 25 P 24 Built In Oven EVC 282 1 2 3 4 250 30 LED LED 50 250 0 250...
Страница 15: ...P 29 P 28 1 2 3 1 200 2 200 15 0 15 3 1 2 3 300 220 240V 25W E14 4 1 2 3 4 5 1 2 3...


