


Using Hotkeys
If you have installed the Windows operating system from
Microsoft, you can use hot keys to connect directly to the
Internet (Illustration [1]),
or access your email (Illustration [2]).
Step 4: Driver Installation
To make installation of the drivers easier, we offer an auto
installation method for the Microsoft Windows system. To
install the driver for the system, the attached CD disk
contains the driver installation, user’s manual.
Follow the step-by-step procedures to execute the
"AutoRun" application by selecting the topic of "Driver
Installation". Select the drivers that you desired and follow
the instructions on the screen.
The drivers will be installed in the system automatically.
During the installation, it is very normal that the system may
restart.
Step 5: Shutting down your computer
1.
2.
1.
2.
This computer support software shutdown. In most
situations, the operating system will automatically follow
instructions to shut down the computer and it does not
need to be shut down manually.
If a manual shutdown is necessary, users only have to
hold the power switch for 4 seconds and the computer
will shut down.
Step 6: Installing an External Computer Screen
This computer can also be connected to an external
computer screen if necessary.
The external computer screen signal line must first be
connected to the VGA connector at the rear of the
notebook. Then press "Fn" + "F12" simultaneously to
connect the display to the external screen.
Step 7: Connecting a TV screen
If you would like to watch VCD or DVD films on a bigger TV
screen, you only need to connect an S-jack signal line to the
S-jack ends on both the TV and notebook and the system
will automatically transmit the display to the TV screen.
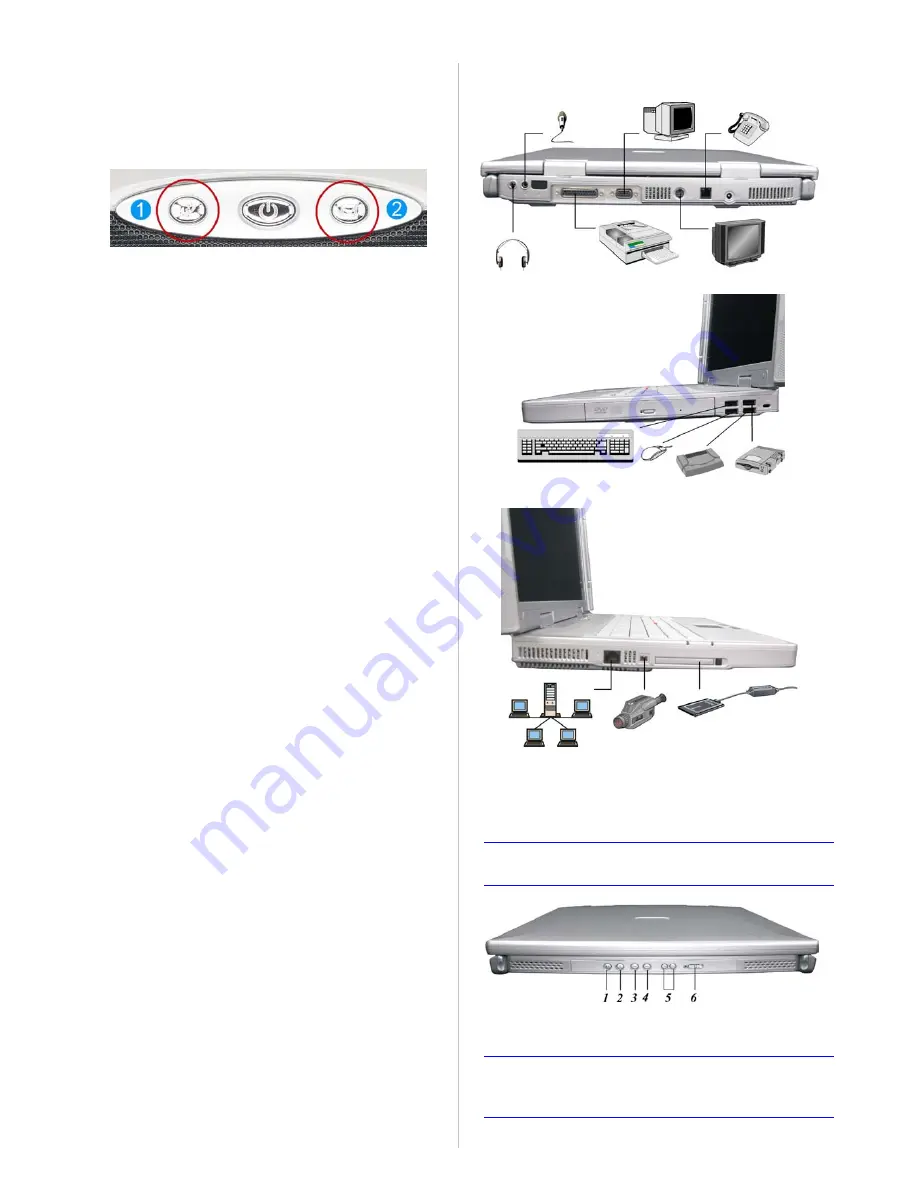
Other External connectors
To expand your computing capabilities, you can add a
variety of external devices to your computer. You may, for
example, want to add a mouse, modem, or a printer.
The computer is equipped with several interface ports,
including an enhanced parallel (printer) port, a serial port,
and USB ports. These are provided as a means of
connecting peripheral devices to the computer.
The following illustration shows the locations of different
external connectors.
Step 8: Audio DJ Function (Optional)
Your notebook provides you with an Audio DJ application that
basically function the same as when you are using the
Windows based Media Player in playing a music CD.
Note:
This application does not apply when the system is
power on.
The functions are: [1] Play/Pause button, [2] Stop/Eject
button, [3] Previous track button, [4] Next track button, [5]
Volume button, and [6] the Audio DJ Power button.
Note:
You will not be able to use these buttons to turn off the
Windows based CD Player application when the notebook
computer is in operation.
Содержание G732E
Страница 7: ......


