background image


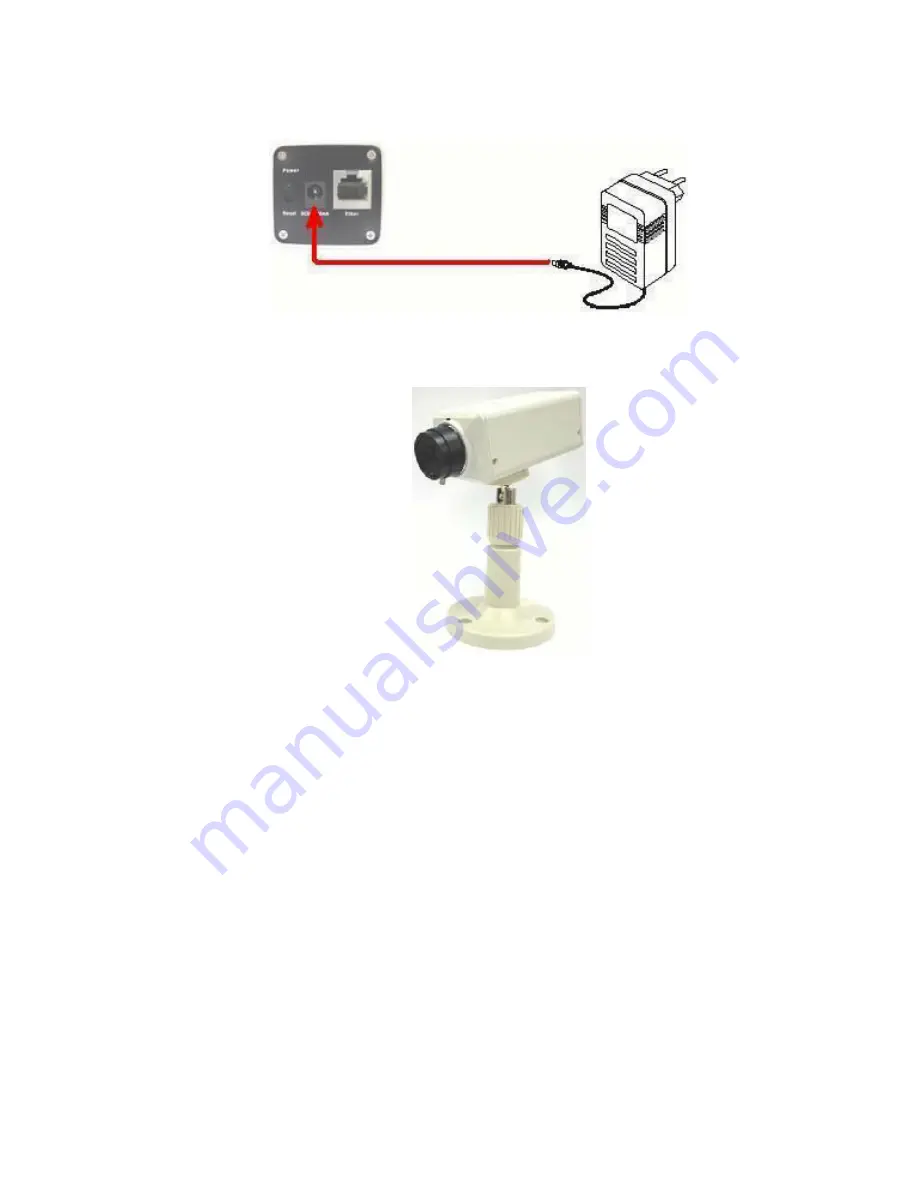
2.    Attach the external power supply       

Attach the external power adapter to the DC power input connector located   
on AWS2100’s rear panel and connect it to your local power supply.   


3. Install the stand   

Follow the instructions to assemble the stand and connect the stand to the base of   

Internet Camera.   


Security  


Internet Camera is a network camera. After connecting to the network, users can log   
in remotely. To protect your data, please change your password when you use   
Internet Camera for the first time. You can also change the password after resetting   
the system default to protect your data.   
   

Software Installation 


This section shows you how to set up Internet Camera via Internet browser.   

Содержание SD-220

Страница 1: ...Internet Camera SD 220 User s Guide ...

Страница 2: ...t Server that allows users to set up and monitor remotely by PC or Notebook via the Internet Fields of applications Security and burglarproofing for households offices stores banks factories warehouses etc Care for the elders children etc Admittance control for shopping lots schools communities etc Shopping via the Internet System Requirement JAVA supportive and compatible Browser DVR supporting W...

Страница 3: ...ability allows any Internet client device supports JAVA such as PC PDA Smart phone can access home surveillance anytime and anywhere 9 Video quality up to VGA resolution 10 QVGA 320 240 5 frame per sec VGA 640 480 1 frame per sec 11 Advanced video compression to save PC storage A 20G HDD will hold up to one months pictures 1fps 12 Bundle professional DVR software 13 No Server is needed the highly ...

Страница 4: ... of up to 25 cameras on a PC screen b Only one voice can be heard 5 Flexible recording schedule for any hour any date a Allow selection of a particular hour or hours continuous or not during a day 6 Playback a Allow viewing of archived files b Preview of 6 sections simultaneously each section representing a period of 10 minutes within that hour c Support picture Print Pause Fast Forward Stop and R...

Страница 5: ...dress by sending emails d Recording To view and record the remote pictures e Playback to select a remote file and playback allowing to pause stop or fast forward 12 Net DVR a To integrate all DVR Servers and network cameras into a network surveillance system for centralized surveillance and administration b Allows the system to be installed and administered in a flexible manner and enhances expans...

Страница 6: ...be replaced with any stand C or CS type lens 1 Wind the lens to remove the lens 2 Turn the new lens all the way to the end Turn the lens slowly and adjust the focus until the picture becomes clear Rear Panel Reset button Push reset button for 3 seconds the system will be reset to default value Network Cable Connector The Internet Camera has a RJ45 connector for connection to 10 100Base TX Fast Eth...

Страница 7: ...onto Internet Camera by attaching the screw head on the camera stand into the mounting cavity Internet Camera Hardware Installation 1 Connect an Ethernet cable Connect an Ethernet cable to the network cable connector located on Internet Camera s rear panel and attach it to the network ...

Страница 8: ...nd and connect the stand to the base of Internet Camera Security Internet Camera is a network camera After connecting to the network users can log in remotely To protect your data please change your password when you use Internet Camera for the first time You can also change the password after resetting the system default to protect your data Software Installation This section shows you how to set...

Страница 9: ...tion Your PC has to be on the same subnet as the Internet Camera defaulted address for example PC s IP address192 168 0 100 A Internet Camera IP address 192 168 0 99 2 Log in Enter the defaulted password user to activate the Internet Camera User mode setup page Enter the defaulted password admin to activate the Internet Camera Administrator mode setup page ...

Страница 10: ...Caution Please change your password right after login for the protection of your data and system 3 System setup Image Parameter ...

Страница 11: ...adjust the frequency 50HZ or 60HZ 3 Image Quality You can adjust Image s quality for High Middle Low 4 Image Brightness You can adjust Image s brightness for High Middle Low 5 Image Orientation You can adjust Image Orientation for Normal or Upside Down Network Configuration Administrator mode only ...

Страница 12: ......

Страница 13: ...xed IP to connect just fill the IP Address as you want to set 3 If you use ADSL PPPoE you can fill the User s ID and User s Password that provide by your ISP Fill the email address and SMTP server can let Internet Camera alert you the new IP Address ...

Страница 14: ...only Enter old password enter new password Press Save Complete MONITOR Please make certain that your browser supports Java JVM 1 3 1 and above For details of JVM please refer to http java sun com Browser environment 1 Windows 98 2000 Me ...

Страница 15: ...XP If your browser is a new version under Windows XP and cannot support JVM please check http java sun com products archive for downloading and installation 2 Netscape Mozilla G If your browser is Netscape or Mozilla please check whether your Plugins support JAVA Applet If not please connect to http wp netscape com plugins index html Choose MIME TYPE application x java applet ...

Страница 16: ...Please select the proper version for downloading and installation according to your operation system ...

Отзывы: