Getting Started
3
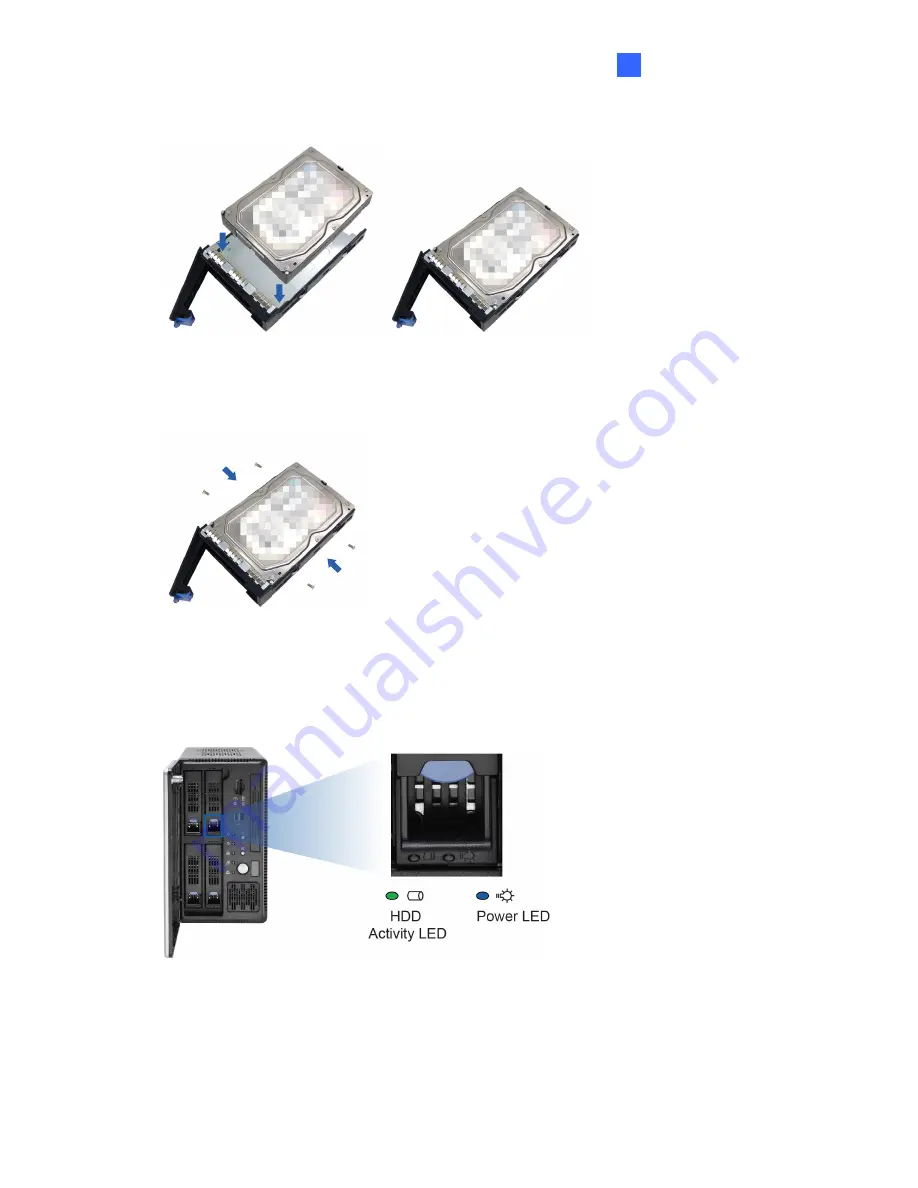
4. Insert the hard drive in the drawer.
Figure 3-6
5. Secure the hard drive with the 4 screws, and make sure all screw heads flush with the
surface.
Figure 3-7
6. Put the drawer back in the drive bay of the GV-Tower DVR/NVR System, and push the
latch until
it locks.
13
7. When the Power LED on the drawer shines blue, the hard drive is now ready to use.
Figure 3-8


