background image

Part I: Use “Quick Install”

Select 

Quick install

, and choose 

RAID level

 from the drop-down list. Click 

Next

.

1.

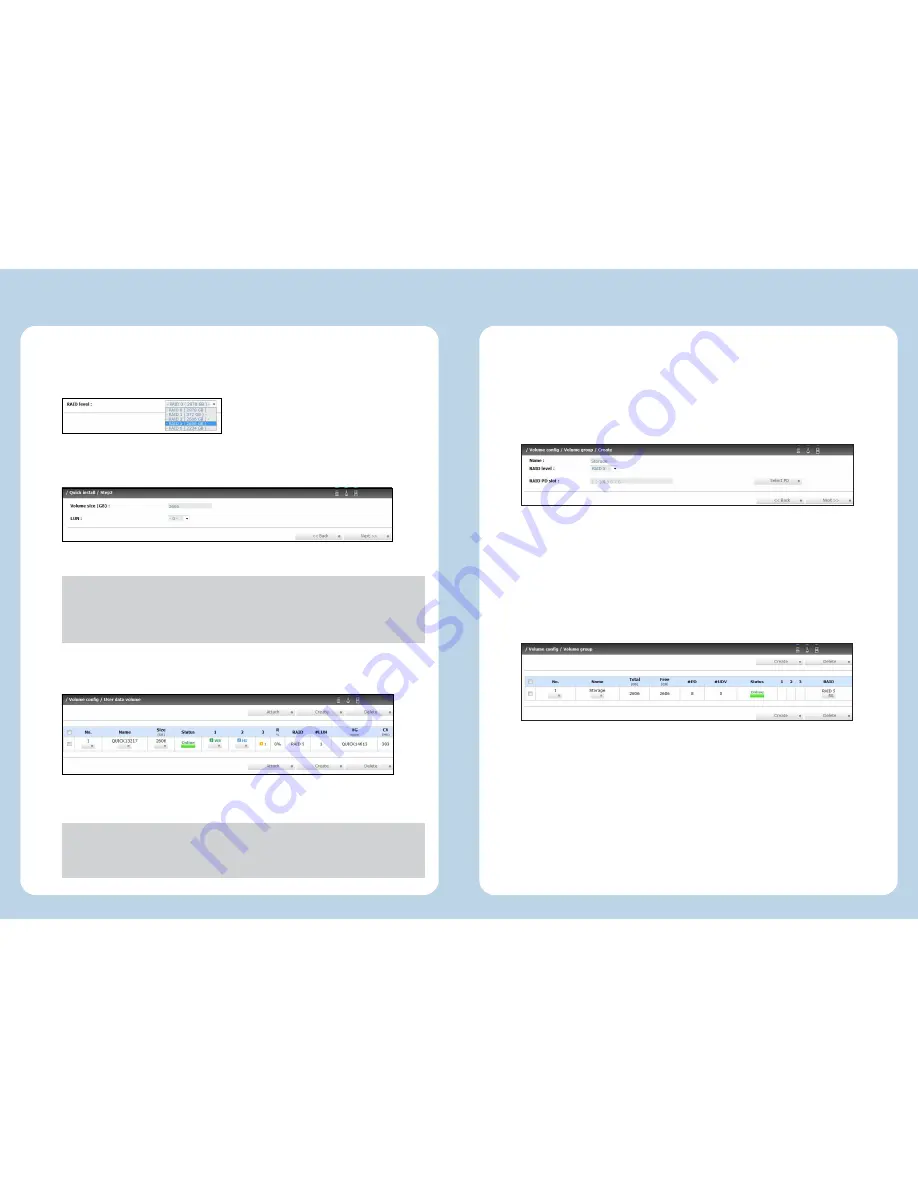
(Figure: the maximum volume size is 2606GB, and 1 LUN (No. 0) is attached.)

(Figure: a RAID 5 user data volume with the UDV name “QUICK13217”, named by the 
system itself, with the total available volume size 2606GB, and attached with 1 LUN.)

Click 

Confirm

 if all setups are correct. Then a page with the “User data volume” is 

created.

Note:

 The UDV (user data volume) created by “Quick Install” is accessible by 

every host. Access control of host would show as a wildcard “*”. To see and 
modify the volume, select 

\ Volume config \ Logical unit

.

Note:

 If using OS such as Windows XP, Windows 2000 or Windows Vista 32 

bits, click 

Cancel

 when this warning message pops up "

LBA 64 Support? 

Choose Cancel. It will change the sector size to 4K. The maximum capacity is 
up to 16 TB. This volume can not be Dynamic Disk.

"

3.

Part II: Create an independent volume for each host

In this example, three UDVs (user data volume) are created in one VG, and assigned for 
three different hosts DVR system, Video Server and Compact DVR for data storage.

Create VG (Volume Group).

1.

Select 

/ Volume config / Volume group

.

Click 

Create

.

Type a VG Name, select a RAID level, press 

Select PD

 to choose the RAID 

PD slot(s), and then press 

Next

.

Check the outcome. Press 

Confirm

 if all setups are correct. 

A VG has been created.

(Figure: Create a RAID 5 with 8 physical disks, named “Storage”. The total size is 
2606GB. Because of no related UDV there, free size still remains 2606GB.)

a.

b.

c.

d.

e.

Type 

Volume size

 and select a 

LUN

 number. By default, the maximum volume size 

is shown. Click 

Next

.

2.

Содержание GV-Storage System

Страница 1: ...in getting immediate results from the GV Storage System For advanced information on how to use the GV Storage System please refer to GV Storage System User s Manual 2008 March GeoVision Inc All rights reserved SRV1 QG 1 GV Storage System RoHS The Vision of Security ...

Страница 2: ...ver Backup Viewer Gigabit Ethernet GV Storage System AC Power Cord x 2 Lock Key x 2 Self Stick Rubber Pad x 4 GV Storage System User s Manual on software CD GV Storage System Quick Start Guide on software CD Package List Package List Check Certification List in Appendix to confirm the hardware setting is fully supported A DVR server of GV System version 8 2 with a network interface card NIC CAT 5e...

Страница 3: ...ters Use lower case letters for Host name in the storage system otherwise you cannot establish the connection between the storage system and DVR Order of Hard Drive Slots Remember the order of hard drive slots on the storage system When you see the warning message Error Disk slot is failed remove the failed hard drive in the correct slot If you remove the hard drive in the wrong slot you could suf...

Страница 4: ...t server open the browser and enter the default IP http 192 168 0 200 Click any function on the left side of window enter the default login name admin and password admin Step 4 Create a RAID Volume Step 4 Create a RAID Volume 1 4 There are two methods to create a RAID volume Before creating a volume please make sure all hard disks are installed in the system properly by selecting Volume config Phy...

Страница 5: ...cel when this warning message pops up LBA 64 Support Choose Cancel It will change the sector size to 4K The maximum capacity is up to 16 TB This volume can not be Dynamic Disk 3 Part II Create an independent volume for each host In this example three UDVs user data volume are created in one VG and assigned for three different hosts DVR system Video Server and Compact DVR for data storage Create VG...

Страница 6: ...ctdvr can access UDV 3 is attached to LUN 2 which only initiator node named videoserver can access Create UDV User Data Volume 2 Select Volume config User data volume Click Create Type a UDV name choose a VG Name and enter a size to the UDV Decide the stripe height block size read write mode and set priority Finally click Confirm A UDV has been created Do one more time to create another UDV a b c ...

Страница 7: ...oth data ports are used for connection to the DVR host add two data port IPs respectively 3 Click the Targets tab and click Log On 4 Select Automatically restore this connection when the system boots and click Advanced 5 Select Local Adaptor to Microsoft iSCSI Initiator select Source IP to the host IP and select Target Portal to iSCSI data port 1 If the CHAP authentication is enabled at the storag...

Страница 8: ...ep 13 If the iSCSI data port 2 is used for connection to the DVR host click Details and keep on the following steps 7 Click Connections 8 Click Add 9 Click Advanced 10 Select Target Portal to iSCSI data port 2 set up the CHAP authentication if necessary and click OK 11 Now you can see the status of both Source Portals displays Connected Click Apply 12 Figure In this example the iSCSI data port 2 i...

Страница 9: ...k OK to automatically configure the iSCSI drive to the recording path 2 3 To verify the iSCSI drive is added successfully check if the status of the drive displays Standby Or in GV System click the Configure button point to General Setting select System Configure click the Set Location button and then select Storage Group Folder to confirm the new recording path 4 Step 6 Add the iSCSI Disk to Reco...

Отзывы: