


4
Chapter 3 Getting Started
3.1 Basic Installation
This section describes all the equipments required to program and operate the GV-Mini
System.
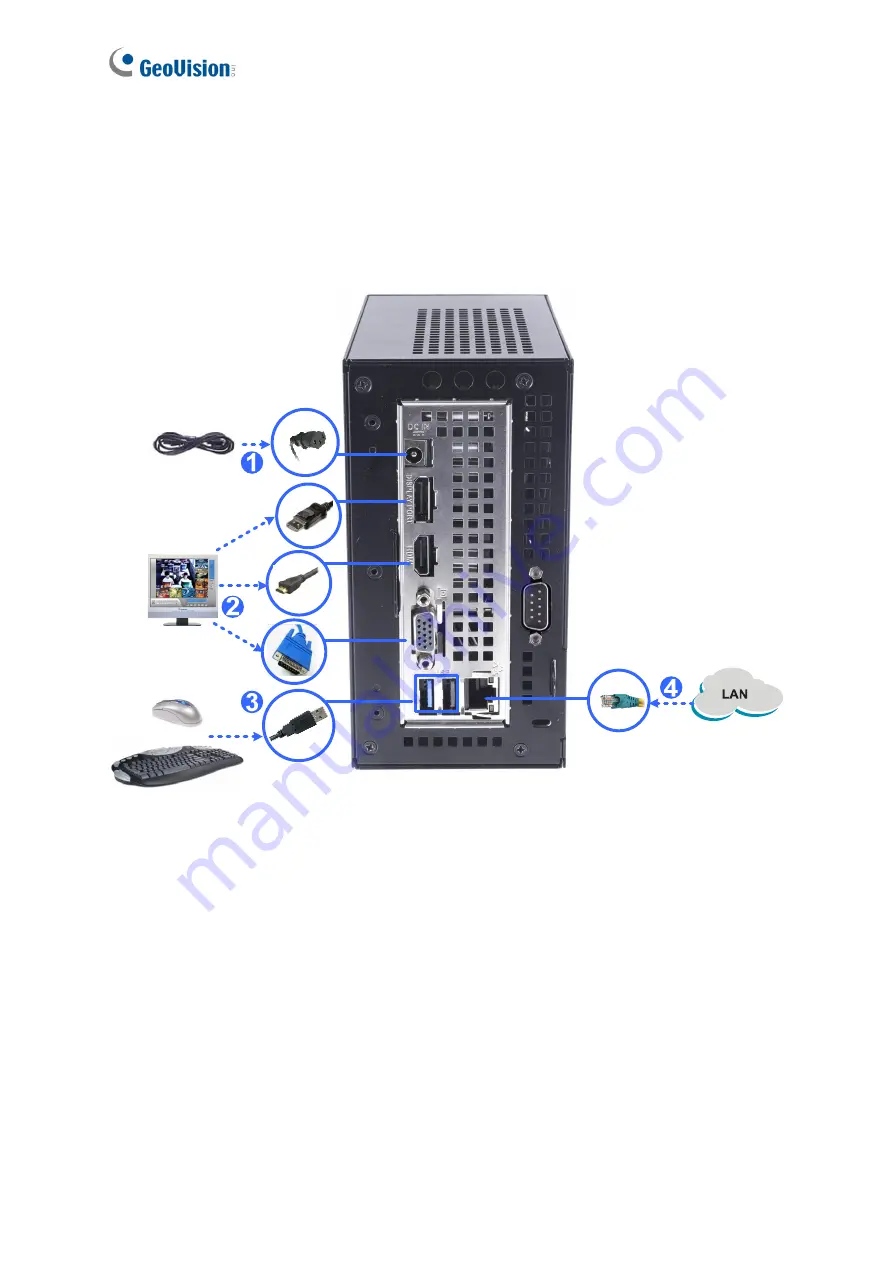
Figure 3-1
1. Using the supplied power cord, connect one end to the AC input and the other end to the
power outlet.
2. Using the DisplayPort / VGA / HDMI cable supplied by the monitor manufacturer, connect
up to 2 monitors for simultaneous displays.
3. Connect the mouse and keyboard to the USB ports.
4. Using the RJ-45 cable, connect one end to the Ethernet port and the other end to Network.
Once the above hardware is properly connected, press the Power button on the front panel to
start the system. It takes about 1 minute for startup.
Содержание GV-Mini
Страница 1: ...GV Mini System Use User s Manual MI UM A...


