ENGLISH
1
1. Setting-up your Speed Wheel RV (FF)
Follow these steps to install your
Speed Wheel RV(FF)
:
(1)
Use the four suction cups on the bottom of the wheel base to firmly position the
wheel and shifter module by just pushing down hard on a smooth surface like a t
Conne
able.
(2)
ct and tightly screw the ‘’Y-type’’ mounting clamp to the edge of the table and
(3)
l RV(FF)
using
We
you use both steps (1 & 2) to position the wheel firmly and
ower is on.
he setup program will
(3)
able connector to the USB port on your computer.
lation
(6)
aming Options”icon.
h location.
(8)
ing wheel.
the “Game controller” or “Gaming Options” screen.
will work with the DirectX 7.0a or newer version in the PC system. Check the DirectX version on your system, and
-
curs according to game software.
built in to the
Speed Wheel RV(FF)
Series
and each has a different function depending on your
through the two hidden holes on the front panel of the wheel’s base.
Connect the gas/break pedal and shifter module to your
Speed Whee
the cables
.
recommend
make sure that the wheel will not come loose during game playing.
2. Installation for PC system
(1)
Make sure your computer p
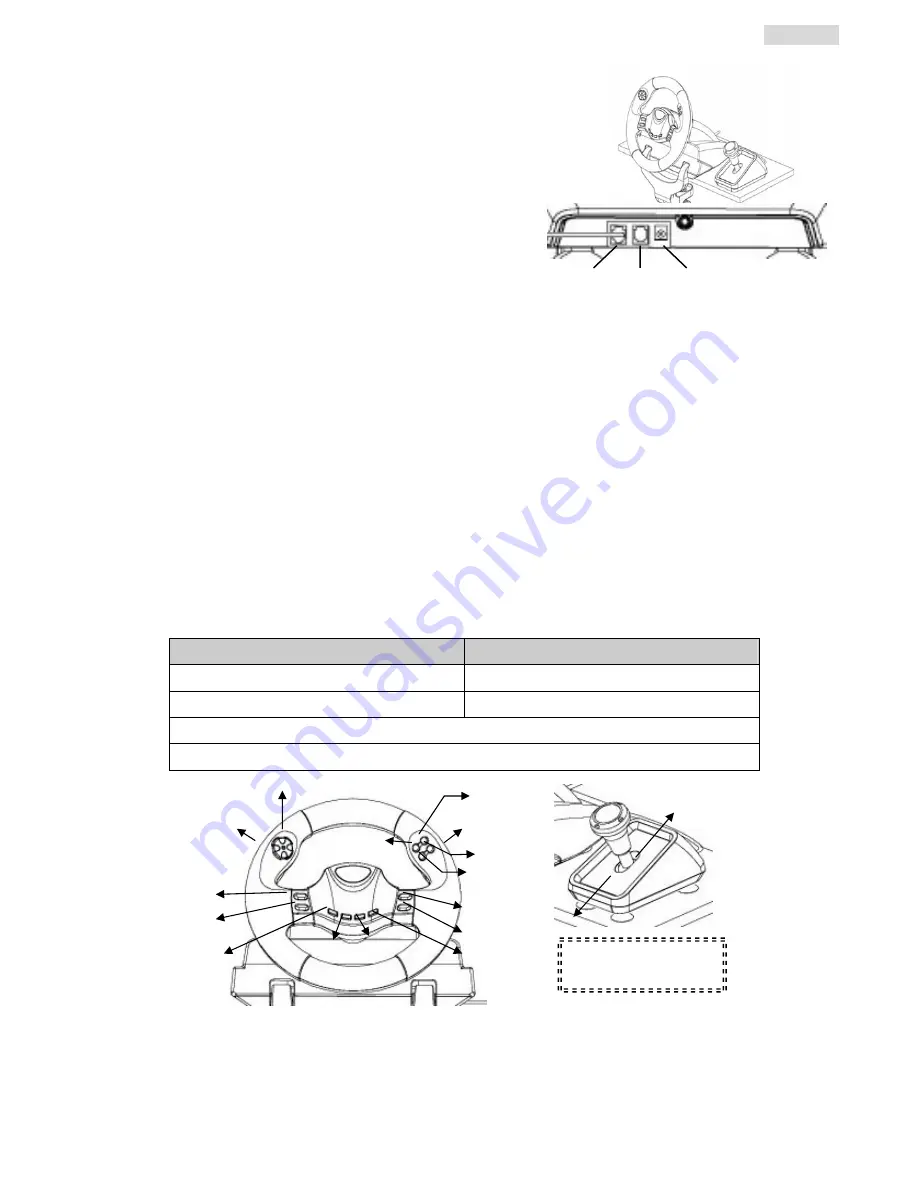
SHIFTER PEDAL
POWER
(2)
Insert the driver disc into the CD-ROM drive, and t
start automatically. If not, start the setup program manually by selecting
Start/Run and type in “E:\setup” (where “E” represents the location of the
Follow the instructions on the screen to finish the driver installation.
CD-ROM drive), then press the Enter key.
(4)
After the soft installation is completed, you can plug the USB wheel c
(5)
Connect the AC Adapter power with the steering wheel chassis. At this moment the wheel will turn right and left for regu
and testing, so please don’t touch the wheel. (for Force Feedback Model only)
Click Start / Setting / Control Panel and double click on“Game controller”or“G
(7)
Make sure the wheelbase is positioned firmly and place the pedals on the floor in a convenient-to-reac
Note: Not on an easy-to-slip surface
Plug the pedal’s connector to the steer
(9)
You can calibrate and test your game controller in
(10)
When you finish the calibration and test, you can play any game.
Important:
- The driver
upgrade if necessary.
The vibration effect oc
3. Operation and function
There are 12 function buttons
gaming software.
Analog mode
Digital mode
LED indicator:
LED indicator: G
Red
reen
8 ways D-Pad
View Finder
(
POV
)
Button 1, 2, 3, 4, 5, 6, 7, 8, 9, 10, 11, 12
Mode Button, Turbo/Clear Button
urbo set up
old the Turbo button first.
t up in auto repeat or fast fire state (Turbo).
Turbo function, the LED mode LED is
(4)
urbo again. Now
T
(1) Press and h
(2) Press “
once
” the button you want to se
(3) After establishing the Turbo function, when you press the button that has become a
flashing.
If you don’t press any button set up to be a Turbo function, the LED mode will always be bright.
To remove the Turbo function, press and hold the Turbo button and press the button which was set up to be T
the LED mode will always be bright.
Button 1
Button 2
Button 3
Button 5
Button6
Button 4
Button 11
8 way D-pad/POV
Turbo
Button 2
Button 1
Button 8
Button 7
Button 10
Button 9
Mode
Button 12
*Gear Shifter Set only for
Speed Wheel RV FF.


