background image

 English  

-34- 

Section 4 

Playback Mode 

Press REC/PLAY button to switch from Record Mode to Playback Mode. 

The Playback Mode is for viewing and managing movies and pictures as well as 

listening to voice and music on the built-in memory or on an optional memory card. 


Operation Display 

Screen 

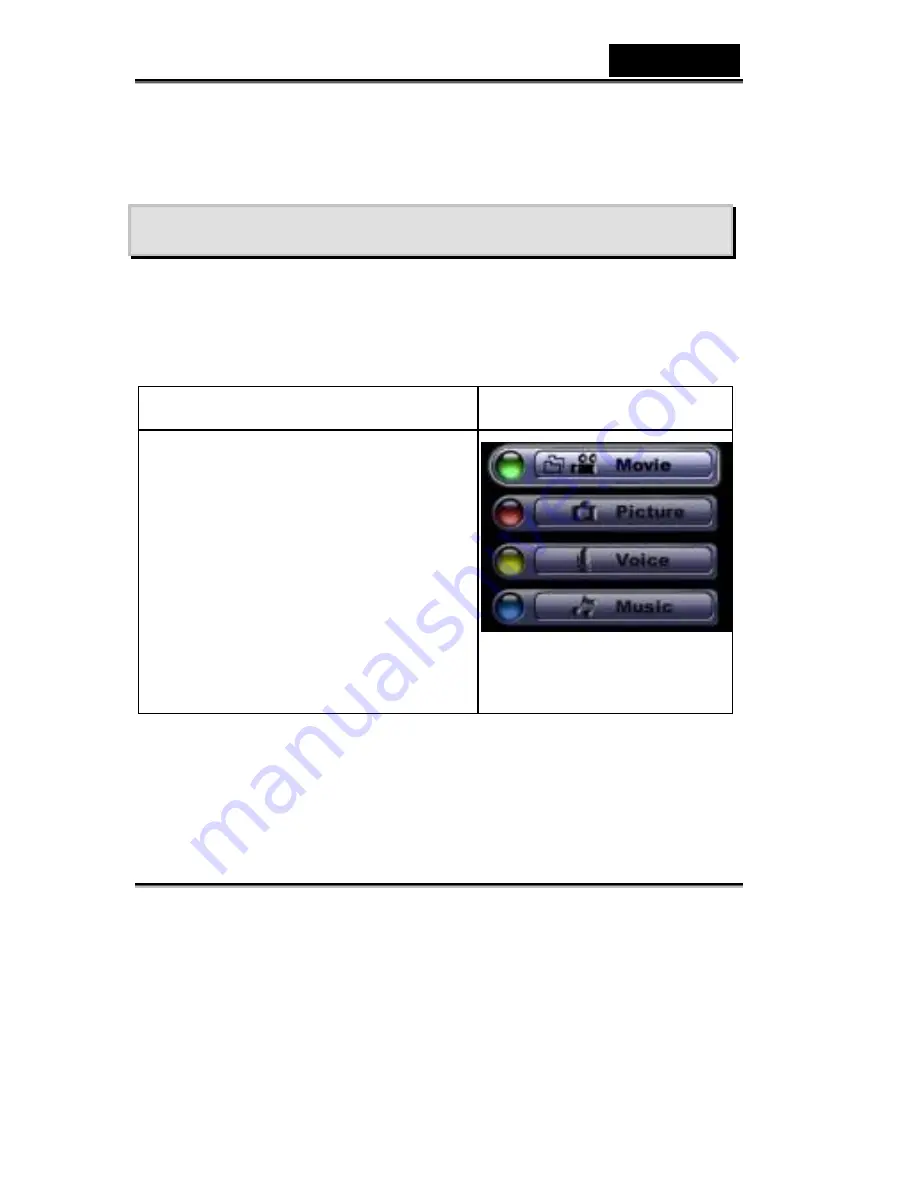
Press REC/PLAY button to switch from 

Record Mode to Playback Mode Main Menu. 

z


There are four options in the Playback 

Mode, movie, picture, voice, and music. 

z


A folder icon will be shown if there is any 

movie, picture, voice, or MP3 file stored. 

z


Up/Down or Mode button can be used to 

select the specific option. 

Press the Enter button to view 

movies/pictures or listen to voice/music.


Содержание DV610

Страница 1: ...cordance with the instructions may cause harmful interference to radio communications However there is no guarantee that interference will not occur in a particular installation If this equipment does cause harmful interference to radio or television reception which can be determined by turning the equipment off and on the user is encouraged to try to correct the interference by one or more of the...

Страница 2: ...into the Digital Video Camera through access points such as the SD memory card slot Do not attempt to modify this Digital Video Camera Never operate this Digital Video Camera in any way while driving a vehicle Do not cover or wrap the Digital Video Camera or the AC power adapter with a cloth or quilt Always use the Digital Video Camera and its accessories in well ventilated locations Handle the Di...

Страница 3: ...cord Mode 8 33 Button Function LCD Monitor Information MPEG 4 Movie Recording Picture Recording Voice Recording Taking Close up Pictures Using Digital Zoom Options for Record Mode Operations for Record Mode Default Setting and Validation Record Submenu Setting Movie Resolution Picture Resolution Effect White Balance Exposure Sharpness Setting Sound Setting Start Up Screen Time Setting Format Card ...

Страница 4: ...o the Digital Video Camera Listen to MP3 Music Listen to MP3 Music with earphone Section 6 Viewing MPEG 4 Movie on PC 53 54 MPEG 4 Movie View MPEG 4 Movie on PC Share MPEG 4 Movie Section 7 Viewing Pictures and Movies on a TV 54 55 Section 8 Transferring Data to a Computer 55 64 Installing the Data to a Computer Connecting Your Digital Video Camera to a Computer Mass Storage Device Mode PC Cam Mod...

Страница 5: ...sily Exposure and color balance can either be adjusted automatically or allowed to be changed manually A 8x digital zoom increases user control over the movies and pictures you take A MODE button can let you switch rapidly between taking movies taking pictures and recording voice The Digital Video Camera is also ideally suited for using as a PC Digital Video Camera hooked up to your home computer ...

Страница 6: ...d are included z Digital Video Camera z Power Adaptor z USB Cable z AV Cable z NP60 Rechargeable Lithium Ion Battery z Quick Guide z CD ROM Driver Ulead Software and User Manual z Earphone z Strap z Pouch z AC Plug Adaptor for EU to US NOTE Accessory and components may vary by different retailer ...

Страница 7: ...English 3 Front view 1 Lens 2 Flash 3 Sef Timer LED Rear View 1 TFT LCD 2 Shutter Button 3 Zoom In out 4 Direction Button 5 Mode Button 6 REC Play Button 7 Earphone AV out port 8 Mini USB Adapter Port ...

Страница 8: ...English 4 Side View 1 Strap eyelet 2 Speaker 3 LCD Panel Cover Top Bottom View 1 Microphone 2 Macro Portrait Landscape Switch 3 Power Button 4 Tripod Mount ...

Страница 9: ...rd Follow the battery injection direction according to the correct polarity marks or and plug the battery into Digital Video Camera 3 Close the battery SD Card Cover firmly NOTE NP60 is the widely used rechargeable Li ion battery developed by Nokia for mobile phone Charging Battery Please fully charge the Li ion Battery via power adaptor for up to ten hours before you use the Digital Video Camera ...

Страница 10: ...2 Insert the memory card until it locks into position To remove an installed SD card press the card inwards to release it When the card pops out gently remove it from its slot NOTE When a memory card is installed movies and pictures are saved on the card rather than in the built in memory Protecting Data on an SD Card The SD card is read only by locking the SD card No pictures movies and voice can...

Страница 11: ...press the shutter button to start taking pictures ÖTo record the voice press the MODE button to switch to Voice Record Mode and then press the shutter button to start the voice recording ÖTo view stored movies pictures or listen to stored MP3 and voice recordings press the REC PLAY button once to switch to Playback Mode Press a second time to return to Record Mode Turning the Digital Video Camera ...

Страница 12: ...p button Invalid Down button LCD Information ON OFF Enter button Menu ON Power button Press down for one second to turn on or turn off the Digital Video Camera REC PLAY button Switch between Record Mode and Playback Mode MODE button Press the MODE button to switch between Movie Picture and Voice Record Mode ...

Страница 13: ...er button Start to take a movie picture or record voice Macro switch Switch between Macro Mode Portrait Mode and Normal Mode LCD Monitor Information The indicators below may display on LCD when movies and pictures are recorded Record Mode 1 Movie Record Mode ...

Страница 14: ...ap Mode Two in One Mode AE Metering Mode Resolution Movie High Standard Low 2 Picture High Standard Low 3 Number of images or recording time of movie that can still be taken at current resolution 4 SD card inserted 5 Macro Position Focusing 6 Date Time YYYY MM DD HH MM ...

Страница 15: ...g a movie just by pressing the shutter button When a movie is recording a time indicator will display on LCD monitor To stop recording press the shutter button again To view stored movies press the REC PLAY button once to switch to Playback Mode The table below shows the approximate number of video recording that you can take at each setting based on 16MB internal memory 4MB available for image st...

Страница 16: ...to the shooting conditions and settings Picture Recording Press the MODE button to switch to Picture Record Mode The table below shows the approximate number of shots that you can take at each setting based on 16MB internal memory or using an optional memory card from 32MB to 512MB SD SD Memory Card Resolution Image Quality 16MB Internal Memory 32MB 64MB 128MB 256MB 512MB 2976x2232 High Quality 2 ...

Страница 17: ... 16 MB internal memory 32MB SD Card 64MB SD Card 128MB SD Card 256MB SD Card 512MB SD Card Voice Recording 30 min 1 hr 2 hrs 4 hrs 8 hrs 16 hrs The above data shows the standard testing results The actual capacity varies according to the shooting conditions and settings Taking Close up Pictures The Digital Video Digital Video Camera has two close up picture modes to allow you to take pictures at c...

Страница 18: ...onitor 3 Press the shutter button to take the picture NOTE Remember to turn the macro switch back to Normal when you are not taking close up pictures Using Digital Zoom The digital zoom magnifies images up to eight times when recording movies or taking pictures 1 To zoom in out press the Tele Wide button 2 The digital zoom can be set from 1x to 8x and the magnification ratio is shown on the LCD mo...

Страница 19: ... White Balance 4 Exposure 5 Sharpness 6 Setting 1 Flash 2 Self Timer 3 Multi Snap 4 Night Mode 5 AE Metering 6 Two in One 7 Resolution 8 Effect 9 White Balance 10 Exposure 11 Sharpness 12 Setting Operations for Record Mode Operation Screen 1 Press the Enter button when in Movie Picture Record Mode ...

Страница 20: ...ter Right buttons to enter submenu of main option you select 5 Press the Left button to exit main menu Default Setting and Validation The following table indicates the Digital Video Digital Video Camera s default settings as well as its validation 1 Always The setting always keeps valid 2 One Time The setting is only valid either once or till the Digital Video Digital Enter Button ...

Страница 21: ...el 5 Flash Always Off Self Timer One Time Off Multi Snap One Time Off Night Mode One Time Off AE Metering One Time Center Two in One One Time Off Sound Always On Start Up Screen Always Optional Format Card One Time Off TV System Always Depends on shipping area Language Always Depends on Shipping area Volume Always Level 6 Record Submenu Setting Record submenu includes Digital Video Digital Video C...

Страница 22: ...er Right buttons to switch to Resolution submenu 3 Use the Up Down buttons to move between three settings 4 Press the Enter button to validate the setting and exit Display Screen Video Resolution Option Picture Resolution To change Picture Resolution 1 In Picture Record Mode press the Enter button to switch to Picture menu screen 2 Use the Up Down buttons to select Resolution and then press the En...

Страница 23: ...tting 1 In Movie Picture Record Mode press the Enter button to switch to menu screen 2 Use the Up Down buttons to select Effect then press the Enter Right buttons to switch to Effect submenu 3 Use the Up Down buttons to move between three settings The change can be previewed immediately 4 Press the Enter button to validate the setting and exit Display Screen Effect Option Enter Button Enter button...

Страница 24: ...alance 2 Daylight Under outdoors 3 Fluorescent Under fluorescent light condition 4 Tungsten Under tungsten light condition To change White Balance Setting 1 In Movie Picture Record Mode press the Enter button to switch to menu screen 2 Use the Up Down buttons to select White Balance then press the Enter Right buttons to switch to White Balance submenu 3 Use the Up Down buttons to move between four...

Страница 25: ...circumstances you may wish to adjust the exposure compensation setting To change Exposure setting 1 In Movie Picture Record Mode press the Enter button to switch to menu screen 2 Use the Up Down buttons to select Exposure then the press Enter Right buttons to switch to Exposure submenu 3 Use the Up Down buttons to move between nine levels The change can be previewed immediately Enter Button ...

Страница 26: ...To change Sharpness setting 1 In Movie Picture Record Mode press the Enter button to switch to menu screen 2 Use the Up Down buttons to select Sharpness then press the Enter Right buttons to switch to Sharpness submenu 3 Use the Up Down buttons to move between nine levels The change can be previewed immediately 4 Press the Enter button to validate the setting and exit Enter Button ...

Страница 27: ...e Picture Record Mode press the Enter button to switch to menu screen 2 Use the Up Down buttons to select Setting then press the Enter Right buttons to switch to Setting submenu 3 Use the Up Down buttons to move between seven settings Display Screen Setting Option Seven options 1 Sound operation sound 2 Start Up Screen 3 Time Setting 4 Format Card 5 TV System 6 Language 7 Default Setting Enter But...

Страница 28: ...reen Sound Setting Sound oStart up Screen Customize the Start Up Screen with your favorite pictures Press the Up Down buttons to select the picture you want and press the Enter button to validate the setting and exit Submenu Display Screen Start Up Screen Start Up Screen If you do not want to customize the start up screen press the Up Down buttons and selects Non Start Up Screen ...

Страница 29: ...tween Date Time and Exit by using the Left Right buttons z Adjust date and time by using the Up Down buttons and then select SET to validate each change z Select EXIT to leave Time Setting without any change Submenu Display Screen Time Setting Time Setting ...

Страница 30: ...e SD Card built in memory No Default Do not format SD Card built in memory r TV System y Select TV System by using the Up Down buttons y Ensure that the appropriate TV standard of your area is selected either NTSC or PAL y Wrong TV system setting may cause image flicker y NTSC standard USA Canada Japan South Korea and Taiwan etc y PAL standard UK Europe China Australia Singapore and Hong Kong etc ...

Страница 31: ... TV System Options s Selecting Interface Language z Select Language by using the Up Down buttons Submenu Display Screen Language Options Language Options This option allows you to select the language for the menus and the text display on the LCD monitor ...

Страница 32: ...e Record Mode Only This Digital Video Digital Video Camera has two flash settings Change the flash setting with either the hot key Right button or Option Setting Auto flash the flash fires automatically according to lighting conditions Use this mode for general photography Flash Off the flash will not fire under any circumstances Use this mode when taking images in a place where flash photography ...

Страница 33: ...ate the setting and exit NOTE The flash will be disabled automatically when battery power is low Flash Flash Options Self Timer Picture Record Mode Only The self timer allows you to take pictures with a ten second time delay To activate the Self Timer with either the hot key Left button or Option Setting The self timer LED on the front of the Digital Video Digital Video Camera beneath the flash li...

Страница 34: ...imer Selt Timer Option Multi Snap Picture Record Mode Only With the Digital Video Digital Video Camera set to Multi Snap Mode you can take five continuous pictures Multi Snap Multi Snap Option Enter Button Enter Button ...

Страница 35: ...the Digital Video Digital Video Camera on a flat steady surface or use a tripod AE Metering Picture Record Mode Only There are three settings which are Multi segment Center weighted Spot AE Metering z Multi segment The exposure is determined by the entire screen z Center Weighted The exposure is determined mainly by the center of the screen z Spot The exposure is determined by the small area in th...

Страница 36: ...English 32 Display Screen AE Metering Option Two in One Picture Record Mode Only Enter Button ...

Страница 37: ...English 33 With Digital Video Digital Video Camera set to Two in One mode you can combine two snapshots into one picture Display Screen Two in One Option Enter Button ...

Страница 38: ... or on an optional memory card Operation Display Screen Press REC PLAY button to switch from Record Mode to Playback Mode Main Menu z There are four options in the Playback Mode movie picture voice and music z A folder icon will be shown if there is any movie picture voice or MP3 file stored z Up Down or Mode button can be used to select the specific option Press the Enter button to view movies pi...

Страница 39: ...ft button Go to the last movie picture Up button Invalid Down button Information ON OFF Enter button Enter to movie picture voice or music option menu REC PLAY button Switch to movie picture Record Mode Mode button Go back to playback main menu Tele Wide button Digital Zoom in and out LCD Monitor Information Indicators on the LCD screen while in Playback Mode ...

Страница 40: ...English 36 1 Mode Indicator Movie Playback Mode Picture Playback Mode Voice Playback Mode Music Playback Mode 2 Resolution Indicator Movie High Standard Low Picture High Standard Low ...

Страница 41: ...tes all of the movies voices MP3s are being repeated Indicates the slide show is playing 4 Current Number Total number of movie picture voice or music 5 Magnification Indicator Movie Playback Operation Display Screen 1 Use the Up Down buttons to select the Movie option 2 Press the Enter button to go to Movie Playback Mode ...

Страница 42: ...n to play and press it again to pause 5 Press the Enter button to go to the movie option menu 6 Use the direction buttons to select six options Thumbnail Delete Lock Repeat One Repeat All or Exit Thumbnail Function Operation Display Screen 1 Use the direction buttons to select the Thumbnail option ...

Страница 43: ...r button to view nine thumbnail movies 3 To play a movie use direction buttons to select the movie and press the Enter button to view Delete Movies Operation Display Screen 1 Use the direction buttons to select the Delete option ...

Страница 44: ...es will execute the operation No will cancel the operation 6 Press the Enter button to exit NOTE If a memory card is installed you can delete only those movies stored on the card Movies on a write protected memory card cannot be deleted The delete function will only erase unlocked movies Locked movies must be unlocked before being deleted Lock Movies Single or all movies can be locked This functio...

Страница 45: ...to the Lock menu 3 Use the Right Left buttons to select the movie 4 Use Up button to lock unlock all movies and Down button to lock unlock single movie 5 Before a movie is locked unlocked a confirmation screen will appear choosing Yes will execute the operation No will cancel the operation 6 Press the Enter button to exit ...

Страница 46: ...his function automatically repeats playing single movie or all movies in order Operation Display Screen 1 Use the direction buttons to select the Repeat One option or Repeat All option 2 Press the Enter button to start repeating ...

Страница 47: ...e Playback Mode 3 Use the Right Left buttons to go to the next or last picture 4 While the picture is selected use Tele Wide buttons to magnify 5 Use direction buttons to navigate the magnified picture 6 Press the Enter button to go to the picture option menu 7 Use the direction buttons to select six options Thumbnail Delete Slide DPOF Lock or Exit ...

Страница 48: ...o start the slide show Press it again to stop About DPOF This Digital Video Digital Video Camera supports DPOF Digital Print Order Format DPOF makes printing your pictures extremely easy After the DPOF is created on the memory card all of the selected pictures can be printed simply by inserting the memory card into the memory card slot of any DPOF compatible printer Operation Display Screen ...

Страница 49: ...l all DPOF pictures and Down button to set cancel single DPOF picture 5 Before a picture is set cancel DPOF a confirmation screen will appear choosing Yes will execute the operation No will cancel the operation 6 Press the Enter button to exit Lock Pictures Single or all pictures can be locked This function can prevent the pictures from being deleted accidentally Operation Display Screen 2 5 ...

Страница 50: ...e the Up button to lock unlock all pictures and Down button to lock unlock single picture 5 Before a picture is locked unlocked a confirmation screen will appear choosing Yes will execute the operation No will cancel the operation 6 Press the Enter button to exit Voice Playback Direction buttons In Voice Playback Mode the direction buttons have the following functions ...

Страница 51: ... last or next voice Up Down buttons Adjust the voice playback volume Enter button Switch to voice option menu Operation Display Screen 1 Use the Up Down buttons to select the Voice option 2 Press the Enter button to go to Voice Playback Mode ...

Страница 52: ...ss the Shutter button to start playing back the selected voice Press it again to stop 5 Use the Up Down buttons to adjust the volume 6 Press the Enter button to go to the voice playback option menu 7 Use the Up button to select the Delete option and Down button to select the Repeat option ...

Страница 53: ...g Repeat One option and Repeat All option 11 To delete a voice use Right Left buttons to select the voice 12 Use the Up button to delete all voice recordings and Down button to delete single voice recording 13 Before a voice is deleted a confirmation screen will appear choosing Yes will execute the operation No will cancel the operation 14 Press the Enter button to exit MP3 JC Somebody MP3 JC Some...

Страница 54: ...amera 1 Install the Digital Video Camera driver on your computer 2 Connect your Digital Video Camera to the computer USB port 3 The Red LED will light when the Digital Video Camera is connected to the computer and in Mass Storage Mode 4 Create MP3 folder as My Computer Removable Disk MP3 5 Transfer MP3 music to the MP3 folder 6 Once all the music is transferred disconnect the USB cable from the PC...

Страница 55: ...English 51 Listen to MP3 Music Operation Display Screen 1 In Playback Mode use the Up Down buttons to select the Music option 2 Use the Right Left buttons to select MP3 you want to play ...

Страница 56: ... repeat current MP3 8 Press Down button twice to repeat all MP3 9 Press Enter button to exit Listen to MP3 Music with earphone MP3 stored in the Digital Video Camera can be played either by the built in speaker Earphone or TV When the earphone cable is plugged in the Digital Video Camera the option menu of the Earphone TV pops out on the LCD Screen Choose earphone or TV and press the Enter button ...

Страница 57: ...this Digital Video Camera to take DVD quality MPEG 4 movies The MPEG 4 movie format of AVI is used in this Digital Video Camera View MPEG 4 Movie on PC When playing an MPEG 4 movie for the first time MPEG 4 Video Codec Xvid should be installed in the PC To do this 1 Insert the CD ROM into the computer s CD ROM drive Click Install Device Driver Install MPEG 4 Video Codec Xivd and follow the on scre...

Страница 58: ...ed movies and pictures on a television To connect to a television 1 Connect one end of the AV cable to your Digital Video Camera s AV Out port 2 Connect the other end of the cable to a television 3 The option menu of Earphone TV pops out on the LCD Screen 4 Choose TV option and press the Enter button to validate the setting 5 The steps for viewing stored pictures and movies on a TV are exactly the...

Страница 59: ...er 1 Insert the CD ROM into the computer s CD ROM drive The autorun screen will appear 2 Click Install Device Driver Follow the on screen instructions to complete the installation Depending on your operating system you may have to restart your computer after installing the driver Connecting Your Digital Video Camera to a Computer You can transfer pictures movies or voice recordings stored on your ...

Страница 60: ...voice recordings can be found on your computer at My Computer Removable Disk DCIM Under this mode you can read delete move or copy any movie picture voice recording you want Use the bundled Ulead application software to edit the movies or pictures PC Digital Video Camera Mode When in Mass Storage Device Mode press the MODE button to switch to PC Digital Video Camera Mode and the GREEN LED will lig...

Страница 61: ...must include Microphone Sound card Speakers or headphones Network or Internet connection Step1 Installing the PC Digital Video Camera Driver The PC Digital Video Camera driver included on the CD ROM is exclusively for Windows The PC Digital Video Camera function is not supported for Mac platforms 1 Insert the CD ROM that came with the Digital Video Camera into your CD ROM drive The welcome screen ...

Страница 62: ...use Windows NetMeeting for videoconferencing 1 Go to Start Programs Accessories Communications NetMeeting to launch the NetMeeting program 2 Click the Start Video button to view live video 3 Click the Place Call button 4 Type the e mail address or the network address of the computer that you are calling 5 Click Call The person that you are calling must also have Windows NetMeeting running and be w...

Страница 63: ...Reader is a popular program that you need to have installed to read the User s Manual Many computer users will find they already have this software installed on their computer ÖMEPG4 Video Codec Xvid this decode software has to be installed for correctly viewing the movies you record Detailed information can be found in the online help of all the bundled software To install the bundled software 1 ...

Страница 64: ...en will appear on your desktop Viewing Images stored in the Digital Video Camera through Photo Express 4 0 To view images stored in the Digital Video Camera you must switch to Mass Storage Device Mode 1 Select the image you want to open in the workspace from the browse bar on the left hand side 2 Double click the selected picture ...

Страница 65: ...ain screen you must switch to PC Digital Video Camera Mode Press MODE button to Switch to PC Digital Video Camera Mode Under this mode you can capture videos or pictures through Photo Express 4 0 Click the Get Photo button Click the Import button Click the Capture button and then choose your images Click the Insert button and click the Exit button to leave the screen ...

Страница 66: ...English 62 Getting Started With Video Studio 7 0 z Click StartÆ Select ProgramsÆ Video Studio 7 0 z The Video Studio main Screen will appear on your desktop ...

Страница 67: ...through Photo Express 4 0 To view images stored in the Digital Video Camera you must switch to Mass Storage Device Mode 1 Click the folder on the right hand side of the screen 2 Select the image stored in the Digital Video Camera and press the Open button to view ...

Страница 68: ... button to switch to PC Digital Video Camera Mode Under this mode you can view Digital Video Camera video through Video Studio To capture a video picture from the Digital Video Camera Click the Capture item Click the Capture Video button Click the Capture Image button ...

Страница 69: ...ice Record MP3 Player PC Digital Video Camera Mass Storage Device Lens f 8 54mm F3 0 Focus Range Normal 100cm Infinity Portrait 60cm 100cm Macro center 20cm Digital Zoom 8X Shutter Electronical LCD monitor 2 0 Color LTPS LCD Storage Media Built in 16M Memory SD MMC Card Slot Support can be expanded up to 512MB Image Resolution 2976x2232 2048x1536 1024x768 ...

Страница 70: ...at Picture JPEG Movie AVI Voice WAV Image play Single Image Thumbnails Slideshow PC Interface Mini USB 2 0 Port TV out NTSC PAL Selectable Battery NP 60 Rechargeable Li ion Battery Dimension 100 70 30mm Weight 136 g without battery System Requirement Windows 98SE 2000 ME XP Pentium MMX Celeron or AMD Athlon CPU 64MB RAM CD ROM 500MB free HDD space Available USB port 16 bit Color Display ...

Отзывы: