


14
NAT Settings
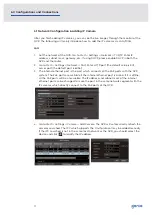
1. The NVR shall be powered on and connected to the network.
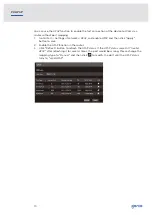
2. Go to Start → Settings → Network → TCP/IP. You can obtain the IP address, subnet mask
and gateway automatically. You can also manually enter them according to the actual
network situation. Please make sure the network segment is the same as that of the
network which is used.
3. Set the preferred or alternative DNS Server. Click “Apply” to save the parameters.
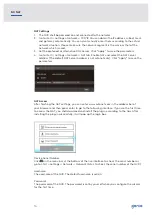
4. Go to Start → Settings → Network → NAT tab. Enable NAT and select the NAT Server
Address (The default NAT Server Address is nat.autonat.com). Click “Apply” to save the
parameters.
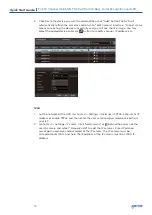
NAT Access
After finishing the NAT settings, you can enter www.autonat.com in the address bar of
your browser and then press enter to go to the following interface. If you are the first time
to access the NAT, you shall download and install the plug-in according to the tips. After
installing the plug-in successfully, it will pop up the login box.
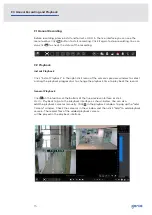
Device Serial Number:
Click on the menu bar at the bottom of the live interface to check the serial number or
go to Start → Settings → Network → Network Status to check the serial number of the NVR).
Username:
The username of the NVR. The default username is admin.
Password:
The password of the NVR. The password is set by yourself when you configure the wizard
for the first time.
8.0 NAT