background image


7.    [0] 

[9]    Digital Number pad   

8.    [CLEAR] 

Clear key 

9.    [ENTER] 

Confirmation Key 

10.    [AUTO] 

Auto horizontal scan   

11.    [WIDE]     Short lens focus     

12.    [TELE]     Long lens focus   

13.    [FAR]     Far focusing     

14.    [NEAR] Close up focusing     


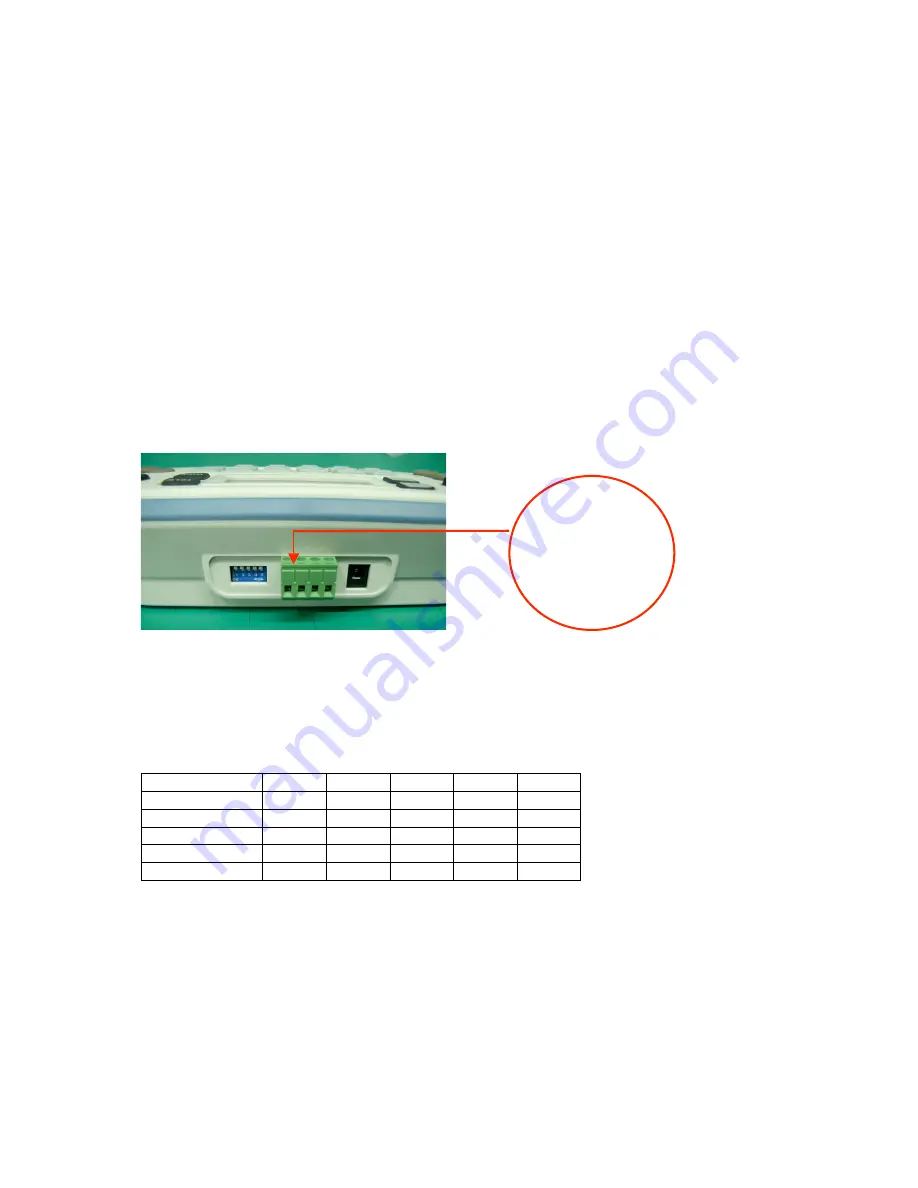
3.2 Front Panel: 


3.2.1 Power input port: DC12V/400mA 
3.2.2 RS485 Com port: This port is used to connect the speed dome ; this KB-1000 offers 2 

pcs of RS485 output 

3.3.3 DIP Switch setting for Protocols: KB-1000 built in 4 different protocols, which can be 

programmed by 5 blue-color DIP switches as below table illustrated: 


S/W 1  S/W 2  S/W 3  S/W 4  S/W 5 

PELCO D-2400  OFF 

OFF 

OFF 

OFF 

OFF 

PELCO P-4800  ON 

OFF 

OFF 

OFF 

OFF 

PELCO P-9600  OFF 

ON 

OFF 

OFF 

OFF 

EYEVIEW 9600  ON 

ON 

OFF 

OFF 

OFF 

DEFAULT 

OFF


OFF


ON 

OFF 

OFF 


IV. Operation of the Keyboard 

Complete  the  connection  of  the  speed  dome  and  the  keyboard.  (Remember  that  failure  to 

connect the speed dome and the keyboard properly may result in an inoperative keyboard.) After 

the connection is completed, you may start to operate the speed dome using the keyboard.   


      RS485 

- + - + 

Содержание KB5451

Страница 1: ...1 KB5451 Mini Keyboard User Manual Ver 1 0 ...

Страница 2: ...or decoders 0 99 2 Controlling each function of the cameras directly 3 Entering the speed dome menu for option setting 4 Operating the built in control panel of the speed dome camera 5 Setting and adjusting preset points and tracks of the dome camera 6 Controlling the dome camera either manually or automatically and changing the camera s default settings by adjusting the menu of a specific camera ...

Страница 3: ...00 built in 4 different protocols which can be programmed by 5 blue color DIP switches as below table illustrated S W 1 S W 2 S W 3 S W 4 S W 5 PELCO D 2400 OFF OFF OFF OFF OFF PELCO P 4800 ON OFF OFF OFF OFF PELCO P 9600 OFF ON OFF OFF OFF EYEVIEW 9600 ON ON OFF OFF OFF DEFAULT OFF OFF ON OFF OFF IV Operation of the Keyboard Complete the connection of the speed dome and the keyboard Remember that...

Страница 4: ...of the speed dome camera you want to control and refer to the Speed Dome Camera Manual for ID address setup You may enter the same address to control the corresponding speed dome camera by following the operation procedure LCD displays CAMERA ID NN NN Indicates the current dome number under operation 4 4 Select to Control the Speed Dome Camera Enter CAM NN ENTER Display CAMERA ID NN NN Users may e...

Страница 5: ...e preset points by following the operation procedure Enter PRESET NNN OFF Display CALL Number NNN NNN Preset points to be deleted No 1 128 as preset points number 4 8 Set up Preset Point Group Do not apply to PELCO Protocol Description This function is designed to scan the preset points in order Each group is allowed to set up 16 preset points for the moving speed and retention time Enter SHOT N O...

Страница 6: ...o end and save your setting 4 9 Start Preset Point Group Scanning Do not apply to PELCO Protocol Enter SHOT N ENTER LCD displays SHOT NO XXX XXX No 1 4 preset points group scanning 4 10 Horizontal Revolution of 2 Preset Points Do not apply to PELCO Protocol Description This function is designed to set the speed dome at horizontal revolution in a small zone Enter Press AUTO LCD displays 1ST NO 000 ...

Страница 7: ...POWER series Enable the speed dome to auto return Preset Point 1 as Home Position at every 5 minutes To activate Enter PREST 85 ENTER To deactivate Enter SET 85 ENTER 4 12 PELCO Extended Command Keyboard Operation Definition N Value No Control Object SET N ENTER PRESET N ENTER 85 Home Position Auto Returning OFF ON 92 START point 93 PAN SCAN SETTING STOP point 97 Preset Tour preset 1 16 point OFF ...

Страница 8: ...8 ...

Отзывы: