background image

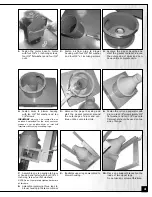
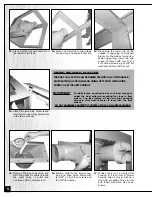
11.

Place another support bracket on
the inside of two legs.

12.

Place one lower leg to the outside
of upper leg and support bracket.

13.

Make sure the lower leg on the
outside of upper leg and support
bracket on the inside of upper leg.
Fasten upper leg, lower leg and
support bracket with four 3/8" x 
1 inch-long screws, eight 3/8" flat
washers and four 3/8" hex nut.

15.

Remove the paper backing and
start the gasket material around
the outer edge of outlet and 
continue until a complete turn.

16.

Position outlet to the blower hou-
sing, and align holes. Fasten with
ten 3/8" x 1 inch-long screws and
ten 3/8" flat washer.

17.

Position the 4 inch x 4 holes inlet
housing to 8 inch inlet of blower
housing. Align holes in inlet hou-
sing with pre-drilled holes in inlet
and fasten with three pan head
screws.

5

14.

Attach the remaining brackets and
lower legs to upper legs assemblies
in the same manner.

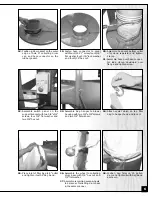
LIFTING THE DUST COLLECTOR

THE DUST COLLECTOR CAN BE RAISED TECHNICALLY OR MANUALLY,

BUT WE STRONGLY RECOMMEND USING LIFT TRUCK WITH GUIDE

ROPES TO SET THE UNIT UPRIGHT.

IMPORTANT:

Carefully loosen mounting hardware at least enough to
adjust the dust collector, mounting four legs to floor 
surface. And then tighten all legs and foot mounting 
hardware after dust collector is level with the floor 
surface.

DO NOT ASSEMBLE CASTERS TO THE FEET AS THEY CAN CREATE HAZARD.

Содержание 10-810

Страница 1: ...mply set the garbage can on the curb with the lid to be emptied 5 micron filter bag as standard accessory 45 gallon 55 gallon U S drums not included Overall height 121 1 4 3080 mm Mobile base for garb...

Страница 2: ...should only be carried out by qualified persons by using original spare parts otherwise this may result in considerable danger to the user Woodworking can be dangerous if safe and proper operating pro...

Страница 3: ...receptacle which will accept the machine s plug 2 ELECTRICAL DISCONNECTION A The disconnection is carried out by hand operated disconnecting device B Be sure to disconnect this machine from power sour...

Страница 4: ...DUST BAG IN POSITION ASSEMBLY DRAWING INSTRUCTIONS Remove the dust collector components from the shipping containers Please check parts list for missing or damaged parts 3 WARNING THE BLOWER HOUSING C...

Страница 5: ...ng three legs to blower housing in the same manner 9 Illustrates upper legs assembled to blower housing 10 Place one support bracket on the inside of two upper legs Do not use any screw at this time 4...

Страница 6: ...ong screws and ten 3 8 flat washer 17 Position the 4 inch x 4 holes inlet housing to 8 inch inlet of blower housing Align holes in inlet hou sing with pre drilled holes in inlet and fasten with three...

Страница 7: ...w 25 Place inlet of filter bag to 8 outlet and tighten it with 8 bag band 26 Assemble the wheel to collecting drum base with 3 8 hex nut and 3 8 flat washer 27 Assemble remaining seven wheels to 2 pie...

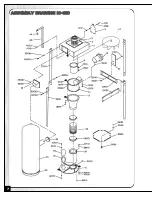
Страница 8: ...A AS SS SE EM MB BL LY Y D DR RA AW WI IN NG G 1 10 0 8 81 10 0 7...

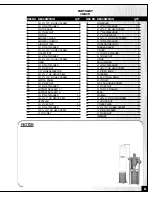
Страница 9: ...5 16 FLAT WASHER 3 8 x 3 4 HD HEX SCREW 8 OUTLET QTY 4 8 1 4 1 1 1 1 4 4 3 9 9 1 18 9 1 9 2 1 2 4 2 2 16 16 4 16 10 10 1 REF N0 32 33 34 35 36 37 38 39 40 41 42 43 44 45 46 47 48 49 50 51 52 53 54 55...

Страница 10: ...ts always give the model number serial number of the machine and part number Also a brief description of each item and quantity desired 10 810 8360 Champ d Eau Montreal Quebec Canada H1P 1Y3 Tel 514 3...

Отзывы: