GeMNeXT EXT-200-LAN Скачать руководство пользователя страница 5

5V/1A 

Supply power for the Receiver 

Reset 

Hold down the key,the model will re-start 

IR-in 

Connect IR Receiver this Port 

HDMI-out 

Connect HDMI sink device to this Port 


5.Connection and operation 

1) Connect the HDMI source (such as DVD, PS3, STB ) to the HDMI IN of Sender.  

2) Connect the IR sender to the Sender IR OUT Port, and Be Directed at HDMI video source’s IR 

receiver. 

3) Connect the HDMI out of Receiver to HDTV display. 

4) Connect the IR receiver to the Receiver IR IN Port. 

5) Use one Cat5e/6 cable up to 120m to connect the Sender and Receiver.  

6) Plug two pieces of 5V power supply into the Sender and Receiver.  

7) Power on the HDTV display and HDMI source.   

 
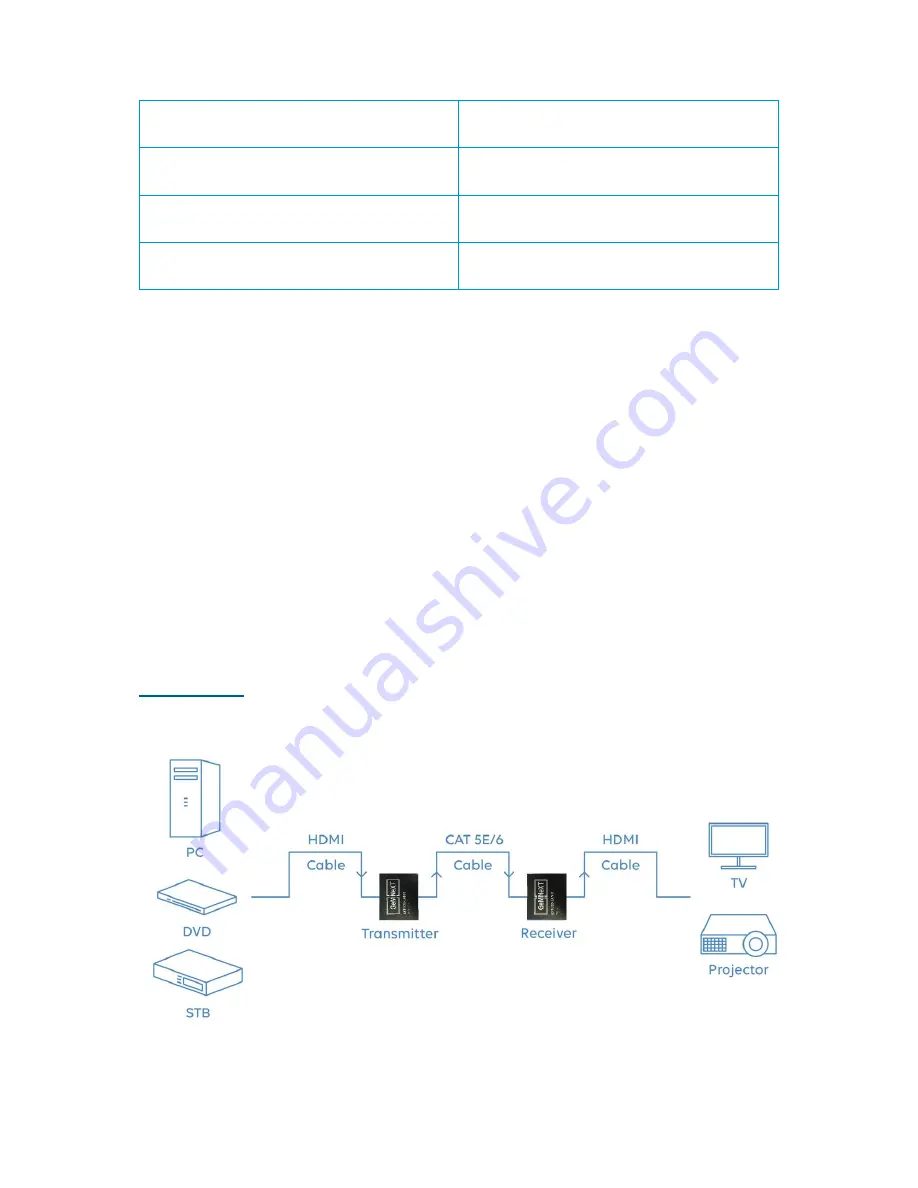
6.Application diagrams


Application 1 

 Point To Point 


Содержание EXT-200-LAN

Страница 1: ...U S E R M A N U A L HDMI Extender up to 200M Distance EXT 200 LAN...

Страница 2: ...ur HD video to multiple displays by using an Ethernet Switch HDTV Resolutions 480p 576p 720p 1080p Audio Sample rate 32kHz 44 1kHz 48kHz IR remote control 38kHz NEC HDMI HDMI 1 3 HDCP HDCP 1 2 Power a...

Страница 3: ...Multiple Tx s can be connected to a Managed Gigabit switch with VLAN IGMP support therefore sending 1080p video signals to Rx connected to the Gigabit switch to show different sources on the HDMI disp...

Страница 4: ...Descriptions HDMI Transmitter 5V 1A Supply power for the Transmitter Reset Hold down the key for 5 seconds IR out Connect IR transmitter this Port HDMI in Connect HDMI sink source to this Port HDMI R...

Страница 5: ...IN of Sender 2 Connect the IR sender to the Sender IR OUT Port and Be Directed at HDMI video source s IR receiver 3 Connect the HDMI out of Receiver to HDTV display 4 Connect the IR receiver to the R...

Страница 6: ...Receiver he Graphical User Interface is displayed Connect the laptop or PC that is connected from the LAN port of the laptop or PC to the RJ45 port of the Transmitter or Receiver It is important to b...

Страница 7: ...Receiver device 6 2 System Config Network config In Network config the device IP settings can be modified to bring all devices in the same range of your desired network When you are using your product...

Страница 8: ...down list or you can match it with the Input resolution 6 4 System Config System update If a new system version is available in order to upgrade potential new or improved functionality this can be do...

Страница 9: ...a default IP address Please note this default address is not the IP address described on the label on the device Transmitters 192 168 1 168 Receivers 192 168 1 160 If you need to bring the unit back t...

Отзывы: