background image

6

ACAM-001

FULL HD ACTION CAMERA WITH WATERPROOF CASE

GEMBIRD EUROPE B.V.   http://www.gembird.eu

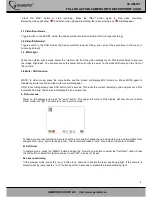
 Press  the  "REC"  button  to  start  recording, Press  the  "REC"  button  again  to  stop  video  recording.
Below the videos will show " " and timer, when stopped recording, the red recording icon “ ” will disappear.

3.1 Video/Sport mode

Toggle switch to the SPORT mode, the device will be recorded until card is full (no loop recording).

3.2 Video/CAR model

Toggle  switch  to  the  CAR  model,  the  device  will  start  loop  recording,  you  can  set  the  cycle  time  in  the  menu  (1

minute by default).

3.3 White light

When the outside light is weak, select the “night mode” from the video settings menu. This feature helps to improve

the image brightness. You can also press the power button shortly to power on the white LED lamps on the front of

the camera.

3.4 Mute / SOS function

MUTE:  In  video  mode,  press  the  mute  button  and  the  screen  will  display  MIC  mute  icon.  Press  MUTE  again  to

disable the mute function and the mute icon will disappear.

SOS: In recording mode press SOS button for 2 seconds. This locks the current recording cycle and prevent it from

automatic deleting. The screen will display the lock screen icon.

4. Picture mode

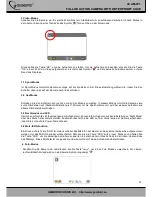
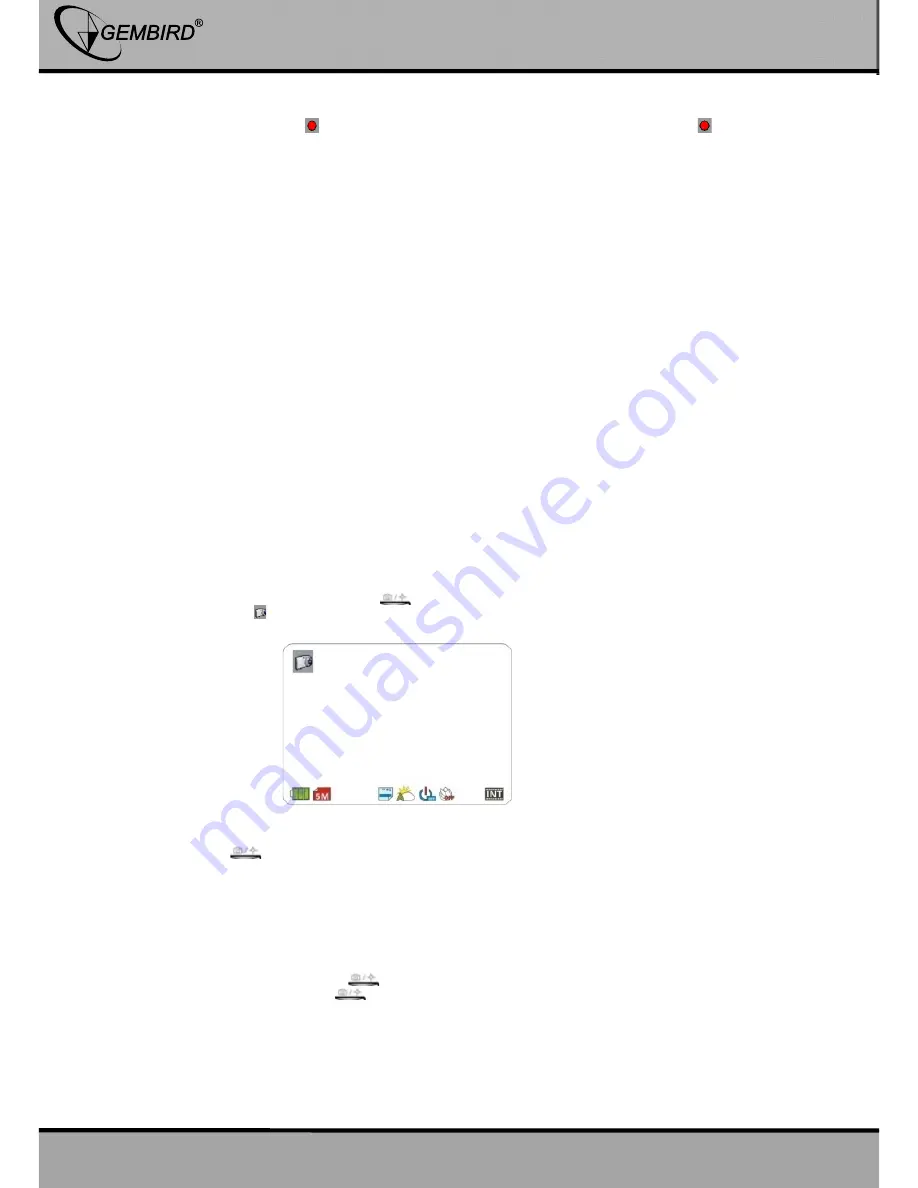
Power on the camera and press the "

" button. The upper left corner of the display will now show a “picture

mode” mode icon " ". The camera is now in picture mode.

To take a picture, just aim the camera lens at the photo subject, press the up and down key to use the digital zoom

and press the “

” button to take a photo. The camera will make a “click” sound when the photo is finished.

4.1 Self-timer

In camera mode , press the “MENU“ button and use the “Down“ arrow button to select the "Self timer" option. Press

the OK button to select this feature and set to set "OFF, 5 secs or 10 secs”.

4.2 Laser positioning

In the preview mode, press the “

” button for 2 seconds to enable the laser positioning light. If the camera is

aimed correctly, just press the “

” button again for 2 seconds to disable the laser positioning light.

Содержание ACAM-001

Страница 1: ...ACAM 001 FULL HD ACTION CAMERA WITH WATERPROOF CASE USER MANUAL BENUTZERHANDBUCH GEBRUIKSAANWIJZING ...

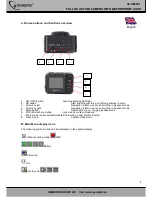
Страница 2: ... en scrolling in playback mode 4 Arrow key right Navigation in Menu zoom en scrolling in playback mode 5 Menu button Opening the menu Toggle playback mode 6 SOS Microphone button Lock videos mute microphone 7 Photo mode Laser pointer Activate Photo mode Laser pointer function 8 Video mode Activate video mode B Main Menu display icons The following symbols icons can be displayed on the camera displ...

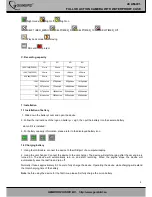
Страница 3: ... TUNGSTEN Resolution 1080P 720P 480 RES_1080P30 Image Flip Setup mode EV show Auto power off LCD Back light TV standard Format Default Language English Russian Frequency 50HZ 60HZ Date Time Version Picture mode DEL_1 DEL_ALL 2048 1536 2592 1944 3200 2400 4000 3000 Zoom out Zoom in Effects EFFECT_COLOR EFFECT_NEGATIVE EFFECT_SEPIA ...

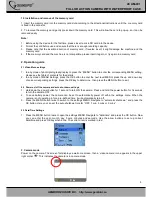
Страница 4: ...pen the device 2 Follow the instructions of the logo on battery sign then put the battery into the camera battery slot until it is installed 3 For battery capacity information please refer to the displayed battery icon 1 2 Charging battery 1 Using the USB cable connect the device to the USB port of a computer Laptop 2 Using the car changer Connect the device to the car charger The device will star...

Страница 5: ...f MENU Settings press the OK button to enter the next level MENU press the up and down key choose corresponding settings press the OK key to determine then press the MENU button to exit 2 2 Power on off the camera and auto shut down settings 1 Hold down the power button for 1 second to turn ON the camera Press and hold the power button for 3 seconds to turn the camera OFF 2 To save battery power t...

Страница 6: ...will display MIC mute icon Press MUTE again to disable the mute function and the mute icon will disappear SOS In recording mode press SOS button for 2 seconds This locks the current recording cycle and prevent it from automatic deleting The screen will display the lock screen icon 4 Picture mode Power on the camera and press the button The upper left corner of the display will now show a picture m...

Страница 7: ...pressing OK a pop up will appear Select x and press OK to cancel and return to the main MENU select and press OK to delete all photo or video files 4 Protect Protect the current file Note will appear on the upper left corner of the protected file Repeat this operation to unprotect the protected files It is impossible to delete the protected files with the camera except by formatting the SD card 5 ...

Страница 8: ...te Sepia Night shoot mode ON OFF Recording Pour screen White balance automatic sunshine cloudy fluorescent lamp tungsten wire Image resolution 12M 8M 5M 3M Special efficiency Color Black and White Sepia Night shoot ON OFF self timer OFF 5 second 10 second Press the camera button and select time automatically takes pictures Camera Take pictures OFF 5 seconds 10 seconds Press the camera button and s...

Страница 9: ...0 3000 Maximum output 12M Recording format TS Resolution 1920 1080 30 fps 1280 720 30 fps 848 480 60 fps Zoom 4 x digital zoom Recording medium Micro SD card Maximum support 32 GB Microphone Built in microphone loudspeaker single track Shutter Electronic shutter Shutter speed 1 2 1 1000 seconds Color balance Automatic sun cloudy fluorescent tungsten filament lamp LED light Switch on off Interfaces...

Страница 10: ...rollen bei Wiedergabe 4 Pfeiltaste runter Navigation im Menu Scrollen bei Wiedergabe 5 Menu Schalter Aufrufen des Menus Wiedergabe 6 SOS Mikrofon Schalter Zum Sperren von Videos Stummschaltung 7 Foto Modus Laser Pointer Umstellung auf Foto Modus Laserpointer Funktion 8 Video Modus Umstellen des Aufnahmemodus B Icons im Hauptmenü Folgende Symbole werden je nach Modus auf dem Display dargestellt Vid...

Страница 11: ...Licht Kunstlicht Auflösung 1080P 720P 480 1080P30 Bilddrehung Einstellungen EV Autom abschalten LCD Beleuchtung TV Standard Format Standard Einst Sprache Englisch Russisch Frequenz 50HZ 60HZ Datum Zeit Version Foto Modus Einzelnd löschen Alle löschen 2048 1536 2592 1944 3200 2400 4000 3000 Reinzoomen Rauszoomen Effekte Farbe Negativ Sepia ...

Страница 12: ...os 9992 Fotos 19984 Fotos 1 Installation 1 1 Einsetzen des Akkus 1 Schieben Sie die Abdeckung auf der rechten Seite der Kamera nach unten um das Akkufach zu öffnen 2 Setzen Sie den Akku nun so ein dass dessen Kontakte auf die innenliegenden Kontakte aufliegen Schließen Sie anschließend die Abdeckung wieder 3 Den Ladestatus des Akkus können Sie in der unteren rechten Bildschirmecke ablesen 1 2 Akku...

Страница 13: ...aktuell befinden erreichen Sie das jeweilige Menü mit einem Druck auf die mit M gekennzeichnete Menü Taste 2 Drücken Sie erneut die Menü Taste um Untermenüs aufzurufen Die Auswahl des entsprechenden Menüs oder einer Einstellung erfolgen mit den beiden Pfeiltasten oberhalb der Kamera und können mit einem Druck auf die Taste OK bestätigt werden Um das Menü wieder zu verlassen drücken Sie bitte erneu...

Страница 14: ...dateien auf Standard Einstellung ist 1 Minute Ist die Speicherkarte voll wird bei weiterer Aufnahme die älteste Filmdatei überschrieben 3 3 Nachtmodus und LED Herrschen schlechte Lichtbedingungen am Aufnahmeort können die Aufnahmen mit den Einstellungen Night Mode über das Menü heller erstellt werden Zusätzlich lässt sich eine LED auf der Vorderseite der Kamera einschalten indem Sie kurz auf die P...

Страница 15: ...n Sie nun durch alle verfügbaren Dateien navigieren und diese mit einem Druck auf die Taste OK öffnen 2 Einzelnes Foto oder Vidoe löschen Im Wiedergabe Modus können Sie Fotos und Videos löschen indem Sie die Menü Taste drücken und den Punkt Delete on wählen Wählen Sie anschließend die zu löschende Datei mit den Pfeiltasten aus und bestätigen Sie den Löschvorgang mit der Taste OK Um den Modus wiede...

Страница 16: ...istung entfällt für Schäden oder Mängel die durch unsachgemäße Handhabung oder durch äußere Einwirkung Sturz Schlag Wasser Staub Verschmutzung oder Bruch herbeigeführt wurden Verschleißteile z B Akkus sind von der Garantie ausgenommen 10 Konformitätserklärung Das Produkt ACAM 001 wurde getestet und stimmt mit den grundlegenden Anforderungen der Richtlinie 2004 108 EG EMV überein Die Konformitätser...

Страница 17: ...E B V http www gembird eu 13 Lieferumfang HD Action Cam ACAM 001 Wasserfestes Gehäuse bis 30m Lenkrad Halterung Kfz Halterung Helm Befestigung Kopf Band Klebepads USB Lade und Datenkabel ohne Abbildung Kfz Ladeadapter ohne Abbildung Wiederaufladbarer Akku ohne Abbildung ...

Страница 18: ...rollen in playbackmodus 12 pijltje rechts Navigatie in Menu zoom en scrollen in playbackmodus 13 Menu knop Menu openen naar playbackmodus schakelen 14 SOS Mikrofoon knop Videos beschermen geluid dempen 15 Fotomodus Laserpointer Fotomodus activeren Laserpointer functie 16 Videomodus Videomodus activeren B Betekenis schermiconen Onderstaande symbolen iconen kunnen te zien zijn op het display van de ...

Страница 19: ... 720P 480 RES_1080P30 Beeld draaien Instellingenmenu Belichtingswaarde Auto uit LCD uitschakelen TV standaard Formatteren Standaardinstellingen Taal Engels Russich etc Frequentie 50HZ 60HZ Datum Tijd Softwareversie Fotomodus Verwijder 1 Verwijer ALLES 2048 1536 2592 1944 3200 2400 4000 3000 Zoom uit Zoom in Effecten EFFECT_KLEUR EFFECT_NEGATIEF EFFECT_SEPHIA ...

Страница 20: ...78 foto s 956 foto s 1912 foto s 8M 367 foto s 739 foto s 1486 foto s 2988 foto s 5M 517 foto s 1040 foto s 2092 foto s 4208 foto s 3M 614 foto s 1235 foto s 2484 foto s 4996 foto s 1 Installatie 1 1 Installatie van de batterij 1 Ontgrendel het batterijklepje en open het 2 Plaats de batterij volgens de aangegeven instructie Sluit het batterijklepje 3 Let op onderstaande iconen op het scherm voor i...

Страница 21: ...aart ongeschikt is probeer deze dan nogmaals in te steken Formatteer indien nodig de kaart m b v de camera Zonodig andere geheugenkaart gebruiken 2 Gebruik van de camera 2 1 Video Menu instellingen 1 Druk op de MENU knop om het instellingenmenu te openen U krijgt altijd het menu te zien dat hoort bij de huidige modus video foto playback van de camera Zie punt 8 van deze handleiding voor overzicht ...

Страница 22: ... opname starten Dat houdt in dat de camera de video opname opdeelt in segmenten die naadloos in elkaar overlopen De tijdsduur van deze segmenten kunt u zelf instellen 1 min Is standaard Zodra de kaart vol is zal de camera het oudste videosegment automatisch overschrijven zodat u continu kunt blijven opnemen 3 4 Verlichting In omstandigheden met beperkt licht kunt u de nachtmodus activeren via het ...

Страница 23: ...activeren Hiermee kunt u de camera eenvoudig op uw onderwerp richten Zodra de camera correct is gericht drukt u weer 2 seconden op de knop om de laserpointer weer uit te schakelen NOTE a In fotomodus kunt u op de knop drukken om naar de videomodus te schakelen b Zowel in de foto als videomodus kunt u door 2 sec op de M te drukken schakelen naar de playbackmodus c Zowel in de foto als videomodus ku...

Страница 24: ...m alle bestanden als een diavoorstelling af te spelen 6 Automatisch aan uitschakelen in videomodus Zet de camera uit en sluit hem aan op de autolader Als u nu de auto start zal de camera automatisch inschakelen en beginnen met opnemen en opladen LET OP Zodra u de motor afzet zal de camera het huidige videobestand opslaan en na 5 sec automatisch uitschakelen 7 Bestandsbeheer en uitvoer beeld 7 1 US...

Страница 25: ... UIT Beter beeld bij weinig licht Video Pour screen Witbalans automatisch zonnig bewolkt TL lamp tungsten wire Resolutie 12M 8M 5M 3M Speciale effecten kleur Zwart Wit Sephia Nachtmodus AAN UIT Foto Zelfontspanner UIT 5 seconden 10 seconden Instelbare afdrukvertraging Maak bv een foto 5 sec Nadat de knop is ingedrukt Één verwijderen Alles verwijderen beschermen Playback Auto afspelen pieptoon Menu...

Страница 26: ...UROPE B V http www gembird eu 9 Overzicht accessoires HD Action Cam ACAM 001 Waterdichte behuizing tot 30m Stuurklem Zuignap Helmbevestiging Hoofdband Zelfklevende pads USB kabel voor data overdracht en opladen geen foto Autlader geen foto Li ion batterij geen foto ...

Страница 27: ...e essential requirements of the laws of member states concerning EMC 2004 108 EC The CE declaration can be found under www gembird eu Dieses Produkt wurde getestet und stimmt mit den grundlegenden Anforderungen der Richtlinie EMC 2004 108 EC überein Die Konformitätserklärung kann auf unserer Webseite www gembird de heruntergeladen werden ...

Страница 28: ...n Richtlijnen m b t afvalverwerking Batterijen en accu s dienen als klein chemisch afval afgeleverd te worden bij toegewezen afvalverzamelpunten zie www afvalgids nl U dient ervoor te zorgen dat de batterijen accu s leeg zijn en dus geen stroom meer kunnen leveren Let op de batterijen accu s dienen onbeschadigd ingeleverd te worden Gooi dit product niet weg in uw vuilnisbak Dit kan zowel het milie...

Страница 29: ...ated on the basis of the current market value of the defective products Die Garantie beträgt 24 Monate ab Verkaufsdatum an den Endverbraucher Das Kaufdatum und der Gerätetyp sind durch eine maschinell erstellte Kaufquittung zu belegen Bitte bewahren Sie Ihren Kaufbeleg daher für die Dauer der Garantie auf da er Voraussetzung für eine eventuelle Reklamation ist Innerhalb der Garantiezeit werden all...

Страница 30: ...pendant toute la durée de la garantie car elle est nécessaire pour toute réclamation Au cours de la période de garantie tous les défauts doivent être remplacé aux frais du fabricant soit par la réparation ou la remplacement de la pièce défectueuse ou l ensemble du produit Les travaux effectués sous garantie ne prolongent pas la période de garantie ni ne commencent pas une nouvelle période de garan...

Отзывы: