4.Operation
Note:
Hold down the UP button or the Down button to select values faster.
Manually Setting the Time:
• Press and hold down the
"SET"
button for 2 seconds until the display begins to flash.
• Set the following information in the order listed:
• Hours
• Minutes
• To select individual values, press
UP
button or the
DOWN
button and confirm each selection by
pressing the
SET
button.
5.Alarm Clock:
5.1 Setting the alarm
• Hold the
ALARM
button for about 3 seconds to set the alarm time. The display begins to flash.
Set the following information in the order listed:
• hours
• Minutes
• To select individual values, press
UP
button or the
DOWN
button and confirm each selection by
pressing the
ALARM
button.
• If you do not make an entry for 20 seconds, setting mode is exited automatically.
5.2 Activating/deactivating the alarm
To turn the alarm ON or OFF, press the
ALARM
button to enter alarm mode, press the
ALARM
button again to ON or OFF the alarm. The “
图标
” symbol should show next to the clock display
when alarm mode is active.
5.3 Stopping the alarm/snooze function
• When the alarm is triggered, the alarm symbol begins to flash and an alarm sounds.
• By pressing any button (except the
SNOOZE/LIGHT
) button to stop the alarm. Otherwise, it
will stop automatically after 2 minutes.
Note:
While the alarm signal is sounding, press the
SNOOZE/LIGHT
button to activate the snooze
function. The alarm will sound after 5 minutes.
6. Temperatue and humidity
6.1 Temperature
• Indoor temperature -9.9°C— +50°C
(
14.2°F—— +122°F
)
, display LL.L when below -9.9°C and
display HH.H when higher than 50°C.
• Outdoor temperature -40°C ~ 60°C (-40°F ~ 140°F), display LL.L when below -40°C and
display HH.H when higher than 60°C.
• Temperature resolution: 0.1°C
• When alarm ringing, temperature test will be stopped.
Note:
Accuracy
• Temperature accuracy:
-40°C ~ -20°C: ± 4°C
-20°C ~ 0°C: ± 2°C
0°C ~ +60°C: ±1°C
6.3 Setting the Temperature Units:
To switch the temperature measurement between Celsius and Fahrenheit, press the
“DOWN”
button which is also the C/F option button. You can switch between Celsius and Fahrenheit at any
time (except when setting other setting options.)
7.BackLight:
Press the
SNZ / LIGHT
button to active the backlight for 5 seconds.
8.Remote sensor transmission:
This thermometer is arranged to communicate with three external sensors. One of these comes
with the unit, the remaining two are optional.
• Power the thermometer as described in
Getting started.
• Set the selector in the outdoor sensor to the desired transmission channel (1, 2 or 3).
Automatic data will be transmitted.
• Press the
UP
button more times to select the channel set on the external sensor. Sequentially
selects the channel 1, channel 2, channel 3 and sequentially display for 3 channels.
Notes:
• Place the weather station away from equipment that generates magnetic fields such as mobile
phones, televisions etc.
• In case of non receipt of the display, signal it is shown the character -. Press and hold the
UP
button to receive RF signal.
• Always make sure the channel chosen on the display unit matches the channel option chosen on
the outdoor sensor.
9.Care and maintenance
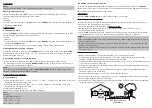
• Display unit and outdoor sensor must be within 150 ft. (50m) of each other.
• To maximize wireless range, place units away from large metallic items, thick walls, metal
surfaces, or other objects that may limit wireless communication.
• To prevent wireless interference, place both units at least 3ft (1 m) away from electronic devices
(TV, computer, microwave, radio, etc.
• To ensure accurate temperature measurement, place units out of direct sunlight and away from
any heat sources or vents.
• Do not clean any part of the product with benzene,thinner or other solvent chemicals. When
necessary, clean it with a soft cloth.
• Never immerse the product in water. This will damage the product.
• Do not subject the product to extreme force, shock, or fluctuations in temperature or humidity.
• Do not tamper with the internal components.
• Do not dispose of this product as unsorted municipal waste. Collection of such waste separately
for special treatment is necessary.
TV
(150 feet maximum)
(50 meters)
(0.9 m)
3
feet
AT
LEAST
APART


