GE WIRELESS THIN-PROFILE Скачать руководство пользователя страница 4

Page 4 

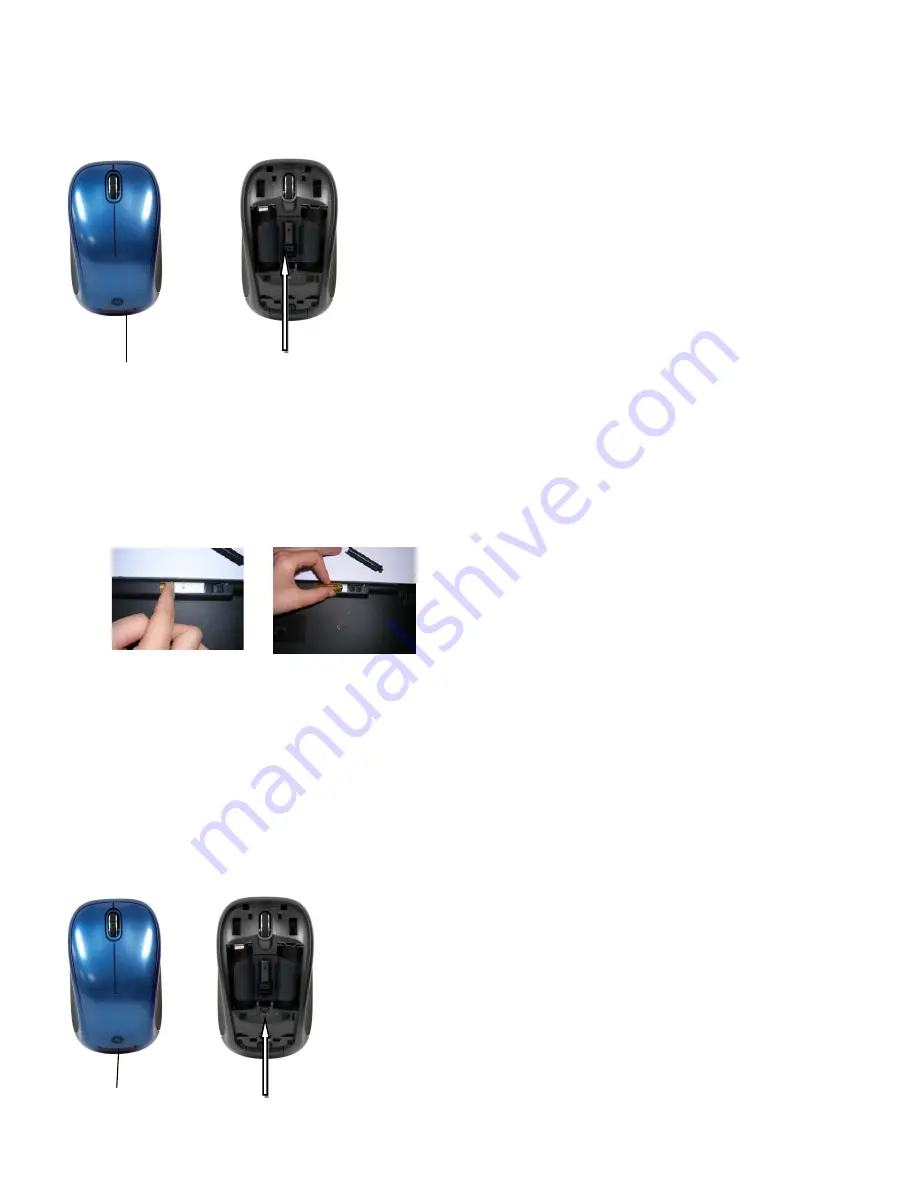
1). Connecting receiver to PC  


How to Remove the Nano Receiver 


1.


Press the tab (as shown) to remove the top of the mouse.  

2.


Remove the Nano Receiver from its location in the center of the mouse. 

3.


Plug the USB receiver into an available USB port of your PC. 


2). Insert the batteries with correct orientation into the battery compartments of both keyboard and mouse 
respectively. 


Installing the batteries in the Mouse 

1.


Turn off the power switch 

2.


Press the tab (as shown) to remove the top of the mouse. 

3.


 Remove the battery restraint by pressing the tab (as shown) that is located below the Nano receiver. 

4.


 Insert the batteries as depicted by the battery compartments. 

5.


Replace the battery restraint and the top of the mouse.  

6.


 Turn on power switch. 


Press to remove 

top of mouse 

Press to remove 

battery restraint 

+


Positive 


-


Negative


+


-


Press to remove 

top of mouse 

Remove the Nano receiver stored in 

the Center between the batteries. 

Содержание WIRELESS THIN-PROFILE

Страница 1: ...WIRELESS THIN PROFILE KEYBOARD AND MOUSE USER S MANUAL www jascoproducts com ...

Страница 2: ...ENTS 1 INTRODUCTION 3 2 PACKAGE CONTENTS 3 3 SYSTEM REQUIREMENT 3 4 INSTALLATION INSTRUCTIONS 3 5 SPECIAL FUNCTION HOT KEYS 6 6 SPECIAL MOUSE FUNCTIONS 7 7 TROUBLESHOOTING 7 8 TWO YEAR LIMITED WARRANTY 7 9 FCC STATEMENT 8 ...

Страница 3: ...lution is designed to maximize your total productivity no matter what operating system you are running For Windows XP or later operation systems NO driver is required you can just plug and play For Mac 10 3 or later operation systems a driver is required 2 Package Contents Wireless Thin Profile Keyboard 2 4 GHz Mini Wireless Mouse Nano Receiver in mouse s battery compartment Two AAA batteries for ...

Страница 4: ...use respectively Installing the batteries in the Mouse 1 Turn off the power switch 2 Press the tab as shown to remove the top of the mouse 3 Remove the battery restraint by pressing the tab as shown that is located below the Nano receiver 4 Insert the batteries as depicted by the battery compartments 5 Replace the battery restraint and the top of the mouse 6 Turn on power switch Press to remove to...

Страница 5: ...uire changing connection ID as there is no ID button on the Nano receiver 2 When this wireless set encounters radio interference either keyboard or mouse will automatically change to a clean channel respectively Manually changing connection ID is not necessary 3 For Mac 10 3 and higher you will have to use the driver provided in order to use the Mac oriented function keys ...

Страница 6: ... Function Hot Keys The Wireless Thin Profile Keyboard will come preset with these function keys and shortcuts In order to toggle between the function key and the Multimedia hotkeys FN needs to be selected or deselected ...

Страница 7: ...imited Warranty TWO YEAR LIMITED WARRANTY Jasco Products Company warrants this product to be free from manufacturing defects for a period of two years from the original date of consumer purchase This warranty is limited to the repair or replacement of this product only and does not extend to consequential or incidental damage to other products that may be used with this unit This warranty is in li...

Страница 8: ...ill not occur in a particular installation If this equipment does cause harmful interference to radio or television reception which can be determined by turning the equipment off and on the user is encouraged to try to correct the interference by one or more of the following measures Reorient or relocate the receiving antenna Increase the separation between the equipment and receiver Connect the e...

Отзывы: