background image

24

49-7000194   Rev. 0

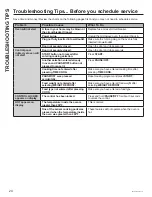
Troubleshooting Tips... Before you schedule service

TROUBLESHOOTING TIPS

Save time and money! Review the charts on the following pages first and you may not need to schedule service.

Problem

Possible Causes

What To Do

Oven will not start

A fuse in your home may be blown or 

the circuit breaker tripped.

Replace fuse or reset circuit breaker.

Power surge.

Unplug the microwave oven, then plug it back in.

Plug not fully inserted into wall outlet.

Make sure the 3-prong plug on the oven is fully 

inserted into wall outlet.

Door not securely closed.

Open the door and close securely.

Control panel 

lighted, yet oven will 

not start

Door not securely closed.

Open the door and close securely.

START button not pressed after 

entering cooking selection.

Press 

START.

Another selection entered already 

in oven and PAUSE/OFF button not 

pressed to cancel it.

Press 

PAUSE/OFF.

Cooking time not entered after 

pressing TIME COOK.

Make sure you have entered cooking time after 

pressing 

TIME COOK

.

PAUSE/OFF  was pressed 

accidentally. 

Reset cooking program and press

 START.

Food weight not entered after 

selecting WEIGHT DEFROST.

Make sure you have entered food weight after 

selecting 

WEIGHT DEFROST.

Food type not entered after pressing 

COOK.

Make sure you have entered a food type.

CONTROL LOCKED 

appears on display

The control has been locked.

Press and hold 

PAUSE/OFF

 for about 3 seconds 

to unlock the control.

HOT appears on 

display

The temperature inside the oven is 

greater than 200°F.

This is normal.

One of the sensor cooking pads was 

pressed when the temperature inside 

the oven was greater than 200°F.

These features will not operate when the oven is 

hot.

Содержание UVM9125

Страница 1: ...sitio de internet GEAppliances com OWNER S MANUAL MICROWAVE OVEN UVM9125 GE is a trademark of the General Electric Company Manufactured under trademark license SAFETY INFORMATION 3 OPERATING INSTRUCTI...

Страница 2: ...s into every GE Appliances product and we think you will too Among other things registration of your appliance ensures that we can deliver important product information and warranty details when you n...

Страница 3: ...er cord or plug if it is not working properly or if it has been damaged or dropped Keep power cord away from heated surfaces Do not let cord hang over edge of table or counter Do not immerse power cor...

Страница 4: ...at least an INTERNAL temperature of 180 F Cooking to these temperatures usually protects against foodborne illness This oven is not approved or tested for marine use CLEANING Keep the oven free from...

Страница 5: ...t not to defeat or tamper with the safety interlocks b Do Not Place any object between the oven front face and the door or allow soil or cleaner residue to accumulate on sealing surfaces c Do Not Oper...

Страница 6: ...mode without the turntable and turntable support seated and in place 5 Removable Turntable Support Do not operate the oven in the microwave mode without the turntable and turntable support seated and...

Страница 7: ...nter POWER LEVEL Power Level 0 to 10 High COOK TIME Amount of cooking time EXPRESS COOK Starts immediately ADD 30 SEC Starts immediately Sensor Convenience Features Press Enter POPCORN Press pad to se...

Страница 8: ...ng down each time the pad is pressed Each touch will add 30 seconds up to 99 minutes and 99 seconds Add 30 sec can also be used like an express 30 seconds button The microwave oven will start immediat...

Страница 9: ...mal when oven is not operating at High power Defrosting Tips Foods frozen in paper or plastic can be defrosted in the package Closed packages should be slit pierced or vented AFTER food has partially...

Страница 10: ...half of time and shield warm areas with foil After second half of time separate pieces with table knife Let stand to complete defrosting Poultry Chicken broiler fryer cut up 21 2 to 3 lbs 14 to 19 mi...

Страница 11: ...e microwave oven are dry before placing food in the oven Beads of moisture turning into steam can mislead the sensor Covered Vented Dry off dishes so they don t mislead the sensor Sensor Cook Allows y...

Страница 12: ...ations in temperature Some areas may be extremely hot It is best to use Cook Time for these foods Bread products Foods that must be reheated covered Foods that need to be stirred or rotated during reh...

Страница 13: ...begin x2 Hot Cereal 1 3 Servings Press START to select Enter amount using keypad Press START to begin x3 Frozen Pizza 6 8 12 oz Press START to select Enter amount using keypad Press START to begin x4...

Страница 14: ...ired food selection 2 See Cooking Guide for SNACK or check the display for the food selections 3 Press START Press Food Note x1 Hot Dogs 1 6 Pieces Press START to select Enter amount using keypad Pres...

Страница 15: ...ering with wax paper allows excess steam to escape Shielding In a regular oven you shield chicken breasts or baked foods to prevent over browning When microwaving you use small strips of foil to shiel...

Страница 16: ...the time Most cooking will be done on High power level 10 which gives you 100 power Power level 10 will cook faster but food may need more frequent stirring rotating or turning over A lower setting wi...

Страница 17: ...he oven from being accidentally started during cleaning or being used by children To lock or unlock the controls press and hold the LOCK CONTROL button for three seconds When the control panel is lock...

Страница 18: ...for 30 minutes or more after the cooktop and microwave controls are turned off Insert Food Reminder A reminder will show on the display if the user tries to start the cooking cycle without placing fo...

Страница 19: ...lay and cycle automatically Press START to confirm when the desired setting is displayed x2 Weight lb kg Press SETTINGS twice x2 and wait until Lb KG appears Press START to confirm x3 Clock Display On...

Страница 20: ...on usage To Install the Charcoal Filter To remove and replace the charcoal filter first disconnect power at the main fuse or circuit breaker or pull the plug Remove the two vent plate screws located a...

Страница 21: ...ld detergent suitable for stainless steel surfaces Use a clean hot damp cloth to remove soap Dry with a dry clean cloth Always scrub lightly in the direction of the grain Helpful Hints An occasional t...

Страница 22: ...nnect electrical power to the oven Remove screws Vent Fan The vent fan has two metal reusable vent filters Models that recirculate air back into the room also use a charcoal filter Reusable Vent Filte...

Страница 23: ...the manufacturer s instructions may cause interference to radio and television reception It has been type tested and found to comply with limits for ISM Equipment pursuant to part 18 of FCC Rules whic...

Страница 24: ...ter entering cooking selection Press START Another selection entered already in oven and PAUSE OFF button not pressed to cancel it Press PAUSE OFF Cooking time not entered after pressing TIME COOK Mak...

Страница 25: ...shes not reported within 48 hrs of delivery EXCLUSION OF IMPLIED WARRANTIES Your sole and exclusive remedy is product repair as provided in this Limited Warranty Any implied warranties including the i...

Страница 26: ...ine and schedule your service at your convenience any day of the year GEAppliances com service or call 800 GE CARES 800 432 2737 during normal business hours Contact Us If you are not satisfied with t...

Отзывы: