


TruVision NVR 40 Quick Start Guide
3
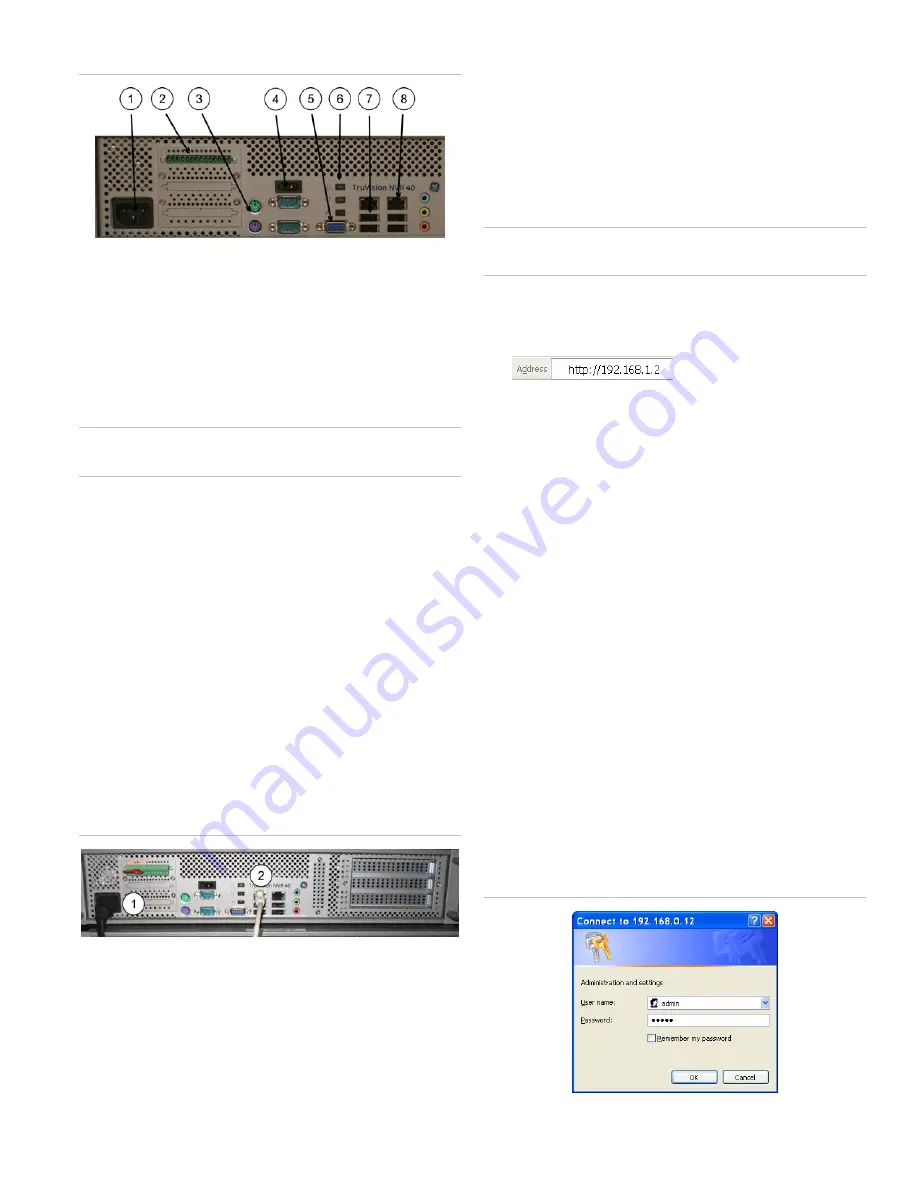
Figure 3: Front panel connectors
1. Power
socket
2.
Interface module
3.
Keyboard and mouse
4. Power
button
5. VGA
6. LEDs
7. USB
ports
8. Ethernet
ports
Turning on the TruVision NVR 40
Caution:
Do not operate the unit until the ambient
temperature is within the specified operating range.
To start the TruVision NVR 40 unit and connect to the
network, follow this procedure:
1. Connect the power cord to the unit. See Figure 4,
item 1.
2. Connect the Ethernet cable. See Figure 4, item 2.
3. Press the power button on the front panel, to turn on
the unit. See Figure 3.
4. The topmost LED on the front panel indicates whether
AC mains power is present; constant green indicates
when the power is on. See Figure 7 on page 4.
5. You are now ready to configure the TruVision NVR 40
unit through a Web server using a host computer. See
Figure 6 on page 4.
Figure 4: NVR 40 basic setup connections
TruVision NVR 40 configuration
The TruVision NVR 40 is designed for configuration and
installation through an Ethernet network. All configuration
and monitoring is done via a Web server.
1. Connect a host computer to the NVR 40 (this can be
done via a direct connection with a PC/notebook or
through an appropriate network.
Caution:
Default IP address is 192.168.1.2. Ensure that your
computer will be able to see this device on the network.
2. Launch your favorite web-browser (for example,
Internet Explorer or Mozilla Firefox) and connect to IP
address 192.168.1.2.
3. Access the device configuration window, by selecting
Administration from the main menu. Enter the following
values in the logon and password dialog box
(see Figure 5):
User name: admin
Password: admin
Note:
You can change this password later in the
“Change administrative password” window. See the
user manual for more details.
4. Select the Network Configuration icon.
5. Select the appropriate network configuration. See
Figure 6 on page 4. If in doubt, please check the
network policy with your IT department.
6. Click the Apply button at the bottom of the window, to
confirm the configuration.
7. Restart the NVR 40 unit by clicking Restart on the Web
server main menu.
8. Verify that you can connect to the Web server using the
new settings.
Your TruVision product is now ready to be used.
Figure 5: Administration logon and password dialog box


