background image

24

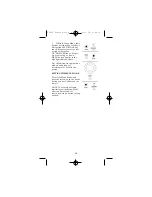
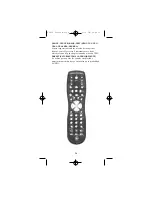
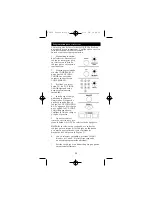
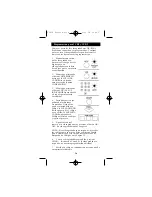
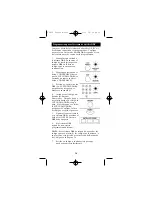
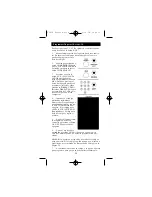
FRONT, CENTER, REAR, TEST (FRONTAL, CEN-
TRAL, TRASERA, PRUEBA)
Ajusta respectivamente los niveles de las bocinas
frontal,  central y trasera. Primeramente se debe 
activar el tono de prueba presionando el botón TEST.
PRESET (ESTABLECIDOS ANTERIORMENTE)

Se utiliza para operar los canales establecidos

anterior mente mientras se encuentra en la modalidad 
AUDIO.

94926 Revised Size  2/25/02  4:14 PM  Page 25

Содержание RM94926

Страница 1: ...Universal Remote Control RM94926 INSTRUCTION MANUAL GLOW CONTROL 94926 Revised Size 2 25 02 4 13 PM Page 1 ...

Страница 2: ...grammed for most GE RCA and ProScan TVs VCRs DBS Systems DVD Players and Audio Video Receivers NOTE For users of GE RCA and ProScan DBS Products older DBS models require that the DISPLAY Button on this remote be used to make program selec tions Use the SELECT Button for making program selections on newer GE RCAand ProScan DBS models Battery Installation Your Universal Remote Control requires 2 AAA...

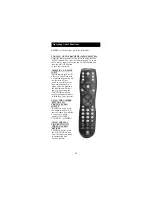
Страница 3: ...allows you to go to the pre vious channel you selected Operates the same as Last Channel Go Back or Recall on your original remote CODE SEARCH Used to program the remote or to search through codes GUIDE Brings up the on screen TV program guide if your TV has that feature DISP Display Button shows the date and the time if your TV or VCR has that feature NAVIGATION BUTTONS SELECT Used to move throug...

Страница 4: ...ime for you to turn off your TV automatically Button Description For Audio Operation Press AUDIO device button to enable the AUDIO MODE Audio functions indicated by pink descriptions LEVEL LEVEL Sets the level of the speakers during test tone mode DSP ON OFF Enables the receiver s Digital Sound Processing Mode DSP MODE When the DSP mode is enabled pressing this button allows the user to toggle thr...

Страница 5: ...ver s vari ous surround sound mode settings FRONT CENTER REAR TEST Adjust the levels of the front center and rear speakers respectively The test tone must be enabled first by pressing the TEST button PRESET Used to operate preset channels while in the AUDIO mode 94926 Revised Size 2 25 02 4 13 PM Page 5 ...

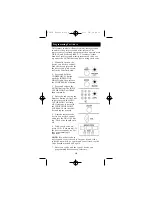
Страница 6: ...it 4 Enter the code using the Number Buttons After your code is entered the INDI CATOR LIGHT will turn off If the code is not valid the INDICATOR LIGHT will blink Check the code list and repeat process 5 Aim the remote at your TV and press the ON OFF button Your TV should turn off NOTE If your TV does not respond try all the codes for your brand If the codes do not work or your brand is not listed...

Страница 7: ...emain lit 4 Enter the code using the Number Buttons After your code is entered the INDICATOR LIGHT will turn off If the code is not valid the INDICATOR LIGHT will blink Check the code list and repeat process 5 Aim the remote at your VCR and press the ON OFF button Your VCR should turn off NOTE If your VCR does not respond try all the codes for your brand If the codes do not work or your brand is n...

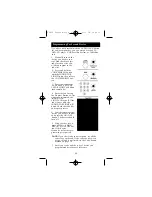
Страница 8: ...T will blink then remain lit 4 Enter the code using the Number Buttons After your code is entered the INDICATOR LIGHT will turn off If the code is not valid the INDICATOR LIGHT will blink Check the code list and repeat process 5 Aim the remote at your DVD system and press the ON OFF but ton Your DVD system should turn off 6 If the DVD System responds no further programming is required NOTE If your...

Страница 9: ...main lit 4 Enter the code using the Number Buttons After your code is entered the INDI CATOR LIGHT will turn off If the code is not valid the INDICATOR LIGHT will blink Check the code list and repeat process 5 Aim the remote at your DBS system and press the ON OFF button Your DBS system should turn off 6 With your DBS System on press CHAN CHAN NELUP If the satellite sys tem responds no further pro...

Страница 10: ...e INDICATOR LIGHT will turn off If the code is not valid the INDICATOR LIGHT will blink Check the code list and repeat process 5 Aim the remote at your CABLE and press the ON OFF button Your CABLE should turn off 6 With your Cable Box on press CHAN CHANNELUP If the Cable Box responds no further programming is required NOTE If your Cable Box does not respond try all the codes for your brand If the ...

Страница 11: ...ress and release the AUDIO button The INDI CATOR LIGHT will blink then remain lit 4 Enter the code using the Number Buttons After your code is entered the INDI CATOR LIGHT will turn off If the code is not valid the INDICATOR LIGHT will blink Check the code list and repeat process 5 Aim the remote at the device you wish to control and press the ON OFF but ton The device should turn off 6 With your ...

Страница 12: ... Enter the code using the Number Buttons After your code is entered the INDICATOR LIGHT will turn off If the code is not valid the INDICATOR LIGHT will blink Check the code list and repeat process 5 Aim the remote at the device you wish to control and press the ON OFF button The device should turn off 6 With your device on press CHAN CHAN NELUP or ON OFF but ton If the device responds no further p...

Страница 13: ...ape Deck may be selected depending on the features of your receiver or mini system Input selection may be made either by pressing the labeled number but ton or by pressing the FUNCTION button to toggle through the inputs available on your system USING THE NUMBER BUTTONS TO CHANGE AUDIO INPUTS To select a device press the number button 1 6 that corresponds with the device you want to operate CD TAP...

Страница 14: ......

Страница 15: ......

Страница 16: ...plies to the highlighted menu items Not all functions in competitive models and brands of televisions may be fully sup ported EXITINGTHEMENUMODE To exit the Menu Mode and clear the screen push the device button you have chosen on the remote NOTE The remote will auto matically exit the Menu Mode after ten 10 seconds of inactivity with no buttons being pushed 15 94926 Revised Size 2 25 02 4 14 PM Pa...

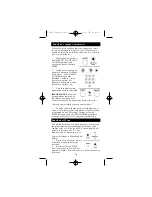
Страница 17: ...mming The INDI CATORLIGHT will blink once then remain lit NOTE For AUX programming when not an audio code press AUX followed by the device button 4 Press and release ON OFF until your device turns off 5 When your device turns off press ENTER the INDICATOR LIGHT will turn off Identifying Codes From Your Universal Remote If you need to find the three digit code for your TV VCR DBS System Cable Box o...

Страница 18: ... REC button twice NOTE For AUX retrieving press AUX button followed by the device button 3 Press and release CODE SEARCH The INDICATOR LIGHTwill turn off 4 Starting with 0 on the keypad press the number buttons in order 0 9 until the INDICATOR LIGHT blinks 5 The number which causes the INDICATOR LIGHT to blink is the first digit of your code 6 Repeat Step 4 until you have retrieved all three numbe...

Страница 19: ...y installed Try using the DISPLAY button to make the selection while in the Program Guide Invalid Code for the device Check the Code list and reprogram the Remote Control Trouble Shooting con t PROBLEM Problems changing channels No response after pressing a key SELECT button not respond ing Flashing Indicator Light NOTE Reprogramming may be required after batter ies are removed 94926 Revised Size ...

Страница 20: ......

Страница 21: ... Este Control Remoto Universal ya se encuentra pro gramado para la mayoría de los televisores videograbadoras sistemas DBS sistemas DVD y receptores de video o audio de las marcas GE RCA y ProScan NOTA Para los usuarios de productos DBS GE RCA o ProScan los modelos antiguos de DBS requieren que el Botón DISPLAY en este control remoto se utilice para hacer selecciones de programas Utilice el Botón ...

Страница 22: ...all revocar de su control remoto original CODE SEARCH BUSQUEDA DE CÓDIGOS Se utiliza para programar el control remoto o para buscar los códigos GUIDE GUÍA Si su televisor tiene esta función muestra en la pan talla la guía para programar el televisor DISP MOSTRAR Si su televisor tiene esta función el botón DISPmues tra la fecha y la hora BOTONES DE NAVEGACIÓN Y SELECT SELEC CIONAR Se utilizan para ...

Страница 23: ......

Страница 24: ......

Страница 25: ...e las bocinas frontal central y trasera Primeramente se debe activar el tono de prueba presionando el botón TEST PRESET ESTABLECIDOS ANTERIORMENTE Se utiliza para operar los canales establecidos anterior mente mientras se encuentra en la modalidad AUDIO 94926 Revised Size 2 25 02 4 14 PM Page 25 ...

Страница 26: ...erá encendida 4 Introduzca el código utilizando los Botones Numerados Después de que haya introducido su código la LUZ INDICADO RA se apagará Si el código no es válido la LUZ INDI CADORAparpadeará Verifique la lista de códigos y repita el proceso 5 Apunte el control remoto a su televisor y pre sione el botón ON OFF Su televisor debe apagarse NOTA Si su televisor no responde use todos los códigos p...

Страница 27: ...á encendida 4 Introduzca el código utilizando los Botones Numerados Después de que haya introducido su código la LUZ INDICADO RAse apagará Si el código no es válido la LUZ INDI CADORAparpadeará Verifique la lista de códigos y repita el proceso 5 Apunte el control remoto a su videograbadora y presione el botón ON OFF Su videograbadora debe apagarse NOTA Si su videograbadora no responde usa todos lo...

Страница 28: ...ORAparpadeará y después permanecerá encendida 4 Introduzca el código utilizando los Botones Numerados Después de que haya introducido su código la LUZ INDI CADORAse apagará Si el código no es válido la LUZ INDICADORA parpadeará Verifique la lista de códigos y repita el proceso 5 Apunte el control remoto a su sistema DVD y presione el botón ON OFF Su sistema DVD debe apagarse 6 Si el sistema DVD re...

Страница 29: ...a LUZ INDICADORA parpadeará y después per manecerá encendida 4 Introduzca el código uti lizando los Botones Numerados Después de que haya introducido su código la LUZ INDICADORAse apa gará Si el código no es válido la LUZ INDICADORA parpadeará Verifique la lista de códigos y repita el proceso 5 Apunte el control remoto a su sistema DBS y presione el botón ON OFF Su sistema DBS debe apagarse 6 Si e...

Страница 30: ...LUZ INDI CADORAse apagará Si el código no es válido la LUZ INDICADORAparpadeará Verifique la lista de códigos y repita el proceso 5 Apunte el control remoto a su Caja del Cable y presione el botón ON OFF Su Caja del Cable debe apagarse 6 Con su Caja de Cable encendida presione CHAN Avance de Canal Si su Caja de Cable responde no necesita progra mación adicional NOTA Si su Caja de Cable no responde...

Страница 31: ... entonces suelte el botón CODE SEARCH 3 Presione y suelte el botón AUDIO La LUZ INDICADORAparpadeará y después permanecerá encendida 4 Introduzca el código utilizando los Botones Numerados Después de que haya introducido su código la LUZ INDICADO RAse apagará Si el código no es válido la LUZ INDICADORA parpadeará Verifique la lista de códigos y repita el proce so 5 Apunte el control remoto al apar...

Страница 32: ... pre sione DVD para un disco compacto 4 Introduzca el código utilizando los Botones Numerados Después de que haya introducido su código la LUZ INDICADORAse apagará Si el código no es válido la LUZ INDICADO RAparpadeará Verifique la lista de códigos y repita el proceso 5 Apunte el control remo to al aparato que desea controlar y presione el botón ON OFF Su aparato debe apagarse 6 Con su Caja de Cab...

Страница 33: ...TUNER TV o VIDEO COMO UTILIZAR ELBOTÓN FUNCTION PARA CAMBIAR LOS APARATOS DE AUDIO Para seleccionar un aparato presione el botón FUNC TION hasta que la entrada que desea operar aparezca en su sistema COMO USAR ELTOCADISCOS COMPACTO O REPRODUCTOR DOBLE DE CASSETTES Utilice los botones PLAY FF REV REC STOP y PAUSE para tocadiscos compactos y reproductores dobles de casetes En algunos casos los boton...

Страница 34: ...ne el botón SURR MODE hasta que encuentre la modalidad deseada 2 Presione DELAY o DELAY para alcanzar el efecto de demora deseado 3 Presione el botón DSPON OFF para encender o apagar el sistema DSP Procesador de Sonido Digital 4 Presione el botón DSP hasta que se alcance el efecto deseado 5 Presione el botón TEST para escuchar los niveles de las bocinas 6 Presione los botones FRONT frontal CENTER ...

Страница 35: ...televisor Como apagar el reloj de apagado automático 1 Cuando se hace cualquiera de las siguientes dos cosas el reloj de apagado automático será cancelado y programado a cero Presione y sostenga el botón SLEEP hasta que la LUZ INDICADORAparpadee o presione el botón ON OFF apagando la televisión Función del Menu La Función del Menu se utiliza para hacer cambios en las programaciones seleccionadas t...

Страница 36: ... selec cionado en el control remoto NOTA El control remoto cancelará la Modalidad del Menu automáticamente después de estar inactivo por diez 10 segundos sin haber presionado ningun botón Programación con B squeda de Códigos 1 Manualmente encienda el aparato que desee pro gramar 2 Mantenga presionado el botón CODE SEARCH hasta que la LUZ INDICADORAse encienda entonces suelte el botón CODE SEARCH 3...

Страница 37: ...la LUZ INDI CADORAse encienda entonces suelte el botón CODE SEARCH 2 Presione y suelte el botón del aparato para el aparato que usted esté pro gramando La LUZ INDI CADORAparpadeará una vez NOTE Para seleccionar el auxiliar presione primero el botón AUX y después el botón del aparato 3 Presione y suelte el botón CODE SEARCH La LUZ INDICADORAse apa gará 4 Comenzando con el numero 0 presione los boto...

Страница 38: ...ódigos en la página 17 Comience nuevamente la Busqueda de Códigos para localizar el código apropiado para obtener una compatibil idad completa Use el código de la video grabadora para su marca Sin embargo algunas uni dades combinadas pueden requerir ambos códigos del televisor y video grabadora parauna operación completa Como una función de seguridad en su control remoto debe presionar el botón RE...

Страница 39: ... permite el exclusión o limitaciones del daños incidental o consiguiente así el limitacíon del arriba no aplicarse Esta limitada darse justicia y talvez tiene otro justi cias que cambia del estado a estado Si la unidad resul ta defectuosa durante el periodo de garantía devolverla prepagada a Jasco Products Company 311 N W 122nd Street Oklahoma City OK 73114 OPERDI SUS C DIGOS Junto con este contro...

Страница 40: ...39 CODE LIST 94926 Revised Size 2 25 02 4 14 PM Page 40 ...

Страница 41: ...40 CODE LIST 94926 Revised Size 2 25 02 4 14 PM Page 41 ...

Страница 42: ...41 CODE LIST 94926 Revised Size 2 25 02 4 14 PM Page 42 ...

Страница 43: ...42 CODE LIST 94926 Revised Size 2 25 02 4 14 PM Page 43 ...

Страница 44: ...43 CODE LIST 94926 Revised Size 2 25 02 4 14 PM Page 44 ...

Отзывы: