background image

Consumer Support

Tr

oubleshooting T

ips

Care and Cleaning

Operating Instructions

Safety Instructions

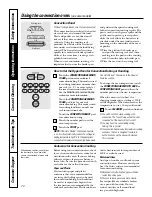
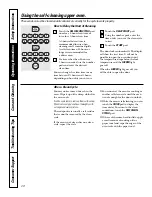
To Set the Clock

The clock must be set to the correct time
of day for the automatic oven timing
functions to work properly. The time of
day cannot be changed during a timed
baking or self-cleaning cycle.

Touch the 

CLOCK

pad.

Touch the number pads.

Touch the 

START

pad.

Make sure the clock is set to the
correct time of day.

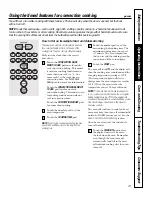
To Set the Kitchen Timer

Touch the 

KITCHEN TIMER 

ON/OFF

pad.

Touch the number pads until the
amount of time you want shows 
in the display. For example, to set 
2 hours and 45 minutes, touch 

2, 4

and 

5

in that order. If you make a

mistake touch the 

KITCHEN TIMER

ON/OFF

pad and begin again.

Touch the 

START

pad.

After touching the

START

pad,

SET

disappears;

this tells you the time is counting down, although

the display does not change until one minute has
passed. Seconds will not be shown in the display
until the last minute is counting down.

When the Kitchen Timer reaches 

:00

,

the control will beep 3 times followed
by one beep every 6 seconds until
the 

KITCHEN TIMER ON/OFF

pad 

is touched.

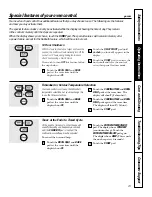
The 6-second tone can be canceled by following
the steps in the Special features of your oven
control section under Tones at the End of a 
Timed Cycle.

The Kitchen Timer is a minute timer only. 

The Kitchen Timer does not control
oven operations. The maximum
setting on the Kitchen Timer is 9 hours
and 59 minutes. 

To Reset the Kitchen Timer

If the display is still showing the time
remaining, you may change it by
touching the 

KITCHEN TIMER ON/OFF

pad,

then touch the number pads until the
time you want appears in the display.

If the remaining time is not in the display
(clock, delay start or cooking time are in
the display), recall the remaining time by
touching the 

KITCHEN TIMER ON/OFF

pad

and then touching the number pads to
enter the new time you want.

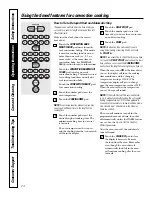
To Cancel the Kitchen Timer

Touch the 

KITCHEN TIMER ON/OFF

pad twice.

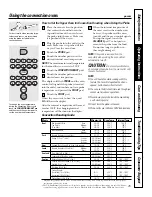
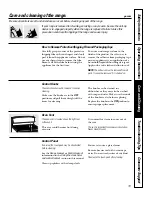
Your control will allow you to lock out the touch
pads so they cannot be activated when pressed.

To lock/unlock the touch pad controls:

Touch the 

RANGE LOCKOUT 

pad,

then touch the 

START

pad.

The surface unit displays (on models 
so equipped) will show 

LC

and the

oven display will show 

Loc On

for

several seconds, then they will go
blank until a cooking pad is touched.

To unlock the control, touch the

RANGE LOCKOUT 

pad, then touch 

the 

START

pad.

If the range control is locked and a
cooking pad is touched, the appropriate
surface display (on models so equipped)
or the oven display will show that the
control is locked.

■ 

The 

RANGE LOCKOUT

mode affects all 

touch pads. No touch pads will work when 
this feature is activated.

Range Lockout 

(on some models)

18

Using the clock, kitchen timer and control lockout.

Содержание Profile JB968

Страница 1: ...rolled Models 10 11 Touch Pad Controlled Models 8 9 Thermostat Adjustment Do It Yourself 19 Timed Baking and Roasting Features 16 Warming Feature 26 Care and Cleaning 33 39 Troubleshooting Tips 40 44 Accessories 50 Consumer Support Consumer Support Back Cover Product Registration 45 46 Warranty 51 ge com JB968 JB988 Owner s Manual 49 80361 11 05 JR Write the model and serial numbers here Model ___...

Страница 2: ...oductive harm and requires businesses to warn customers of potential exposure to such substances The fiberglass insulation in self clean ovens gives off a very small amount of carbon monoxide during the cleaning cycle Exposure can be minimized by venting with an open window or using a ventilation fan or hood When using electrical appliances basic safety precautions should be followed including the...

Страница 3: ... These surfaces may be hot enough to burn even though they are dark in color During and after use do not touch or let clothing or other flammable materials contact the surface units areas nearby the surface units or any interior area of the oven allow sufficient time for cooling first Potentially hot surfaces include the cooktop areas facing the cooktop oven vent opening surfaces near the opening ...

Страница 4: ...heating fat beyond the smoking point Avoid scratching the glass cooktop The cooktop can be scratched with items such as sharp instruments rings or other jewelry and rivets on clothing Large scratches or impacts to glass doors or cooktops can lead to broken or shattered glass Do not operate the radiant surface units if the glass is broken Spillovers or cleaning solution may penetrate a broken cookt...

Страница 5: ...re should be taken not to rub damage or move the gasket Before self cleaning the oven remove the convection roasting rack broiler pan grid and other cookware Shiny silver colored oven racks on some models should be removed from the oven before beginning the self clean cycle Gray porcelain coated oven racks on some models may be cleaned in the oven during the self clean cycle Be sure to wipe up exc...

Страница 6: ...ned off Glow brightly until the unit has cooled below 150 F NOTE A slight odor is normal when a new cooktop is used for the first time It is caused by the heating of new parts and insulating materials and will disappear in a short time NOTE On models with light colored glass cooktops it is normal for the cooking zones to change color when hot or cooling down This is temporary and will disappear as...

Страница 7: ...celain enamel as it may scratch the glass ceramic cooktop Glass ceramic usable but not recommended Poor performance May scratch the surface Stoneware usable but not recommended Poor performance May scratch the surface Check pans for flat bottoms by using a straight edge Pans with rounded curved ridged or warped bottoms are not recommended Home Canning Tips Be sure the canner is centered over the s...

Страница 8: ...ing Burner To use the multi size burner Touch the ON OFF pad for the front right surface unit Use the pad to set the desired power setting Touch the BURNER SIZE pad as needed to select the desired burner size When first selected the 12 size is on Touch again for the 9 and again for the 6 The light next to the BURNER SIZE pad indicates which size surface unit is on To turn the surface unit off touc...

Страница 9: ...Beverages W5 Soups liquid W5 The chart above shows initial suggested settings only The temperature type and amount of food type of pan and the time held will affect the quality of the food CAUTION Do not warm food on a PRECISE WARM surface unit setting for more than 2 hours Do not use plastic wrap to cover food Plastic may melt onto the surface and be very difficult to remove Use only cookware rec...

Страница 10: ...cooking Using the Bridge Burner on some models To use the bridge burner turn the left front control knob to the BRIDGE BURNER settings For full bridge surface unit operation also turn on the left rear surface unit To use only the front surface unit turn the control knob to the FRONT BURNER settings Using the surface units Knob controlled models Tri Ring Surface Element on some models The rear cent...

Страница 11: ...uminum foil Always use pot holders or oven mitts when removing food from the WARMING ZONE as cookware will be hot A HOT surface indicator light will glow when the glass surface is hot and will remain on until the surface is cool enough to touch Lower settings may not heat the glass surface enough to cause the HOT surface indicator light to come on NOTE The WARMING ZONE will not glow red like the c...

Страница 12: ...there has been a power outage SELF CLEAN STD LO Pad Touch to select self cleaning function See the Using the self cleaning oven section OVEN LIGHT ON OFF Pad Touch to turn the oven light on or off DELAY START Pad Use along with COOKING TIME or SELF CLEAN STD LO pads to set the oven to start and stop automatically at a time you set COOKING TIME Pad Touch this pad and then touch the number pads to s...

Страница 13: ... must be reset The time of day will flash in the display when there has been a power outage SELF CLEAN STD LO Pad Touch to select self cleaning function See the Using the self cleaning oven section OVEN LIGHT ON OFF Pad Touch to turn the oven light on or off DELAY START Pad Use along with COOKING TIME or SELF CLEAN STD LO pads to set the oven to start and stop automatically at a time you set COOKI...

Страница 14: ...gel food cake A Bundt or pound cakes B or C Biscuits muffins brownies C or D cookies cupcakes layer cakes pies Casseroles C or D Turkey on offset rack A Before you begin The racks have stops so that when placed correctly on the supports they will stop before coming completely out and will not tilt When placing and removing cookware pull the rack out until it stops On some models the bake heating e...

Страница 15: ...ioning the oven rack one position higher ge com Safety Instructions Operating Instructions Care and Cleaning Troubleshooting Tips Consumer Support Broiling Guide Quantity and Shelf First Side Second Side Food or Thickness Position Time min Time min Comments Ground Beef 1 lb 4 patties E 9 6 Space evenly Up to 8 Well Done 1 2 to 3 4 thick E 11 10 patties take about the same time Beef Steaks Rare 1 t...

Страница 16: ... Touch the BAKE pad Touch the number pads to set the desired oven temperature Touch the COOKING TIME pad NOTE If your recipe requires preheating you may need to add additional time to the length of the cooking time Touch the number pads to set the desired length of cooking time The minimum cooking time you can set is 1 minute The oven temperature that you set and the cooking time that you entered ...

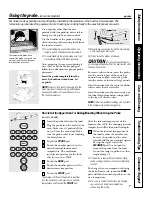
Страница 17: ...obe and plug when inserting and removing them from the food and outlet To avoid damaging your probe do not use tongs to pull on the cable when removing it To avoid breaking the probe make sure food is completely defrosted before inserting After preparing the meat and placing it on a trivet or on the broiler pan grid follow these directions for proper probe placement Insert the probe completely int...

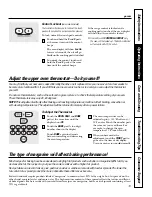
Страница 18: ...itchen Timer is a minute timer only The Kitchen Timer does not control oven operations The maximum setting on the Kitchen Timer is 9 hours and 59 minutes To Reset the Kitchen Timer If the display is still showing the time remaining you may change it by touching the KITCHEN TIMER ON OFF pad then touch the number pads until the time you want appears in the display If the remaining time is not in the...

Страница 19: ...ure The type of margarine will affect baking performance Most recipes for baking have been developed using high fat products such as butter or margarine 80 fat If you decrease the fat the recipe may not give the same results as with a higher fat product Recipe failure can result if cakes pies pastries cookies or candies are made with low fat spreads The lower the fat content of a spread product th...

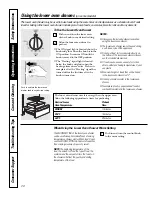
Страница 20: ...of foods that can be baked in the lower oven drawer is 31 2 Do not put liquid or water in the lower oven drawer Never place plastics paper canned foods or combustible material in the lower oven drawer The lower oven drawer may be used to bake foods using the same times and temperatures as a standard oven Foods ideal for baking in the lower oven drawer include pizza frozen foods casseroles biscuits...

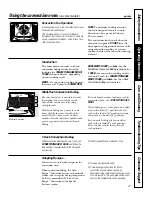
Страница 21: ...ion below 1 RACK for convection cooking on one rack only Touch the CONVECTION BAKE MULTI 1 RACK pad twice See the 1 Rack Convection Baking section below Introduction Convection Fan Operation In a convection oven a fan circulates hot air over under and around the food This circulating hot air is evenly distributed throughout the oven cavity As a result foods are evenly cooked and browned often in l...

Страница 22: ...the walls of the oven Paper and Plastic Heat resistant paper and plastic containers that are recommended for use in regular baking can also be used for convection baking but should not be used at temperatures higher than the temperature recommended by the cookware manufacturer Plastic cookware that is heat resistant to temperatures of 400 F can also be used Metal and Glass Any type of cookware wil...

Страница 23: ...starting at 100 F The temperature display will start to change once the oven temprature reaches 100 F When the oven reaches the temperature you set 3 beeps will sound NOTE If the Auto Recipe Conversion Feature is on it will automatically reduce the set regular baking temperature by 25 F to the appropriate convection temperature in convection bake mode See Auto Recipe Conversion in the Special Feat...

Страница 24: ...s to set the time of day you want the oven to turn on and start cooking Touch the START pad NOTE An attention tone will sound if you are using timed baking or roasting and do not touch the START pad NOTE If you would like to check the times you have set touch the DELAY START pad to check the start time you have set or touch the COOKING TIME pad to check the length of cooking time you have set When...

Страница 25: ...g a self cleaning cycle Do not store the probe in the oven Probe not for use in Broil or Self Clean functions For best results when roasting large turkeys and roasts we recommend using the probe included in the convection oven To change the oven temperature during the Convection Roast cycle touch the CONVECTION ROAST pad and then touch the number pads to set the new desired temperature Convection ...

Страница 26: ...over some of the cooked food items Remove serving spoons etc before placing containers in the oven Do not use plastic containers lids or plastic wrap CAUTION Plastic containers lids or plastic wrap will melt if placed in the oven Melted plastic may not be removable and is not covered under your warranty How to Set the Upper Oven For Proofing on some models Place the covered dough in a dish in the ...

Страница 27: ...n with an open window or using a ventilation fan or hood during the first self clean cycle Remove the convection roasting rack broiler pan broiler grid probe all cookware and any aluminum foil from the oven NOTE If your oven is equipped with shiny silver colored oven racks remove them before you begin the self clean cycle If your oven is equipped with gray porcelain coated oven racks they may be l...

Страница 28: ...edges of the oven racks with the paper towel How to Delay the Start of Cleaning Touch the SELF CLEAN STD LO pad once for a 4 hour clean time or twice for a 3 hour clean time A 3 hour self clean time is recommended for use when cleaning small contained spills A self clean time of 4 hours or longer is recommended for a dirtier oven If a time other than 4 hours or 3 hours is needed use the number pad...

Страница 29: ...Celsius Touch the START pad Tones at the End of a Timed Cycle At the end of a timed cycle 3 short beeps will sound followed by one beep every 6 seconds until the CLEAR OFF pad is touched This continual 6 second beep may be canceled To cancel the 6 second beep Touch the BROIL HI LO and BAKE pads at the same time until the display shows SF Touch the KITCHEN TIMER ON OFF pad The display shows CON BEE...

Страница 30: ...ll show OFF If this is the choice you want touch the START pad NOTE If the clock is in the black out mode you will not be able to use the Delay Start function Tone Volume This feature allows you to adjust the tone volumes to a more acceptable volume There are three possible volume levels Touch the BROIL HI LO and BAKE pads at the same time until the display shows SF Touch the OVEN LIGHT ON OFF pad...

Страница 31: ...ss the START pad the display will show CON and the converted temperature of 325 F To deactivate the feature Press the BAKE and BROIL HI LO pads at the same time until the display shows SF Press the CONVECTION BAKE MULTI 1 RACK pad The display will show CON ON Press the CONVECTION BAKE MULTI 1 RACK pad again The display will show CON OFF Press the START pad To reactivate the feature repeat steps 1 ...

Страница 32: ...ppears in the display Touch the START pad and will appear in the display Touch the COOKING TIME pad Touch the number pads to set the desired length of cooking time between 1 minute and 9 hours and 99 minutes The cooking time that you entered will be displayed Touch the START pad Touch the BAKE pad No signal will be given Using the number pads enter the desired temperature No signal or temperature ...

Страница 33: ... parts It cannot be removed if it is baked on Control Knobs The control knobs may be removed for easier cleaning Make sure the knobs are in the OFF positions and pull them straight off the stems for cleaning The knobs can be cleaned in a dishwasher or they may also be washed with soap and water Make sure the inside of the knobs are dry before replacing Replace the knobs in the OFF position to ensu...

Страница 34: ...ully open the door If the door will not fully open the indentation is not seated correctly in the bottom edge of the slot Push the hinge locks up against the front frame of the oven cavity to the locked position Close the oven door Indentation Bottom edge of slot Hinge arm Cleaning the Oven Door To clean the inside of the door Because the area inside the gasket is cleaned during the self clean cyc...

Страница 35: ...n the upper oven Lower oven drawer has a removable pan for easy cleaning Clean with hot soapy water and a sponge or dish towel Dry with a clean cloth Replace the pan in the lower oven drawer NOTE For models with an electric warming drawer or lower oven drawer before performing any adjustments cleaning or service disconnect the range electrical power supply at the household distribution panel by re...

Страница 36: ...der the oven floor If spillovers residue or ash accumulate on the oven floor wipe up before self cleaning Storage Drawer Removal on some models To remove the drawer Pull the drawer out until it stops Lift the front of the drawer until the stops clear the guides Remove the drawer To replace the drawer Place the drawer rails on the guides Push the drawer back until it stops Lift the front of the dra...

Страница 37: ...coated oven racks they may be cleaned in the oven during the self clean cycle NOTE The shiny silver colored oven racks on some models and the convection roasting rack may be cleaned in the self cleaning oven However the racks will darken in color lose their luster and become hard to slide if cleaned during the self cleaning cycle To make the racks slide more easily apply a small amount of vegetabl...

Страница 38: ...idue has been removed polish the entire surface with CERAMA BRYTE Ceramic Cooktop Cleaner and a paper towel The CERAMA BRYTE Ceramic Cooktop Scraper and all recommended supplies are available through our Parts Center See instructions under To Order Parts section on next page NOTE Do not use a dull or nicked blade Heavy Burned On Residue Use a CERAMA BRYTE Cleaning Pad for Ceramic Cooktops Normal D...

Страница 39: ...e using the CERAMA BRYTE Ceramic Cooktop Cleaner with the CERAMA BRYTE Cleaning Pad for Ceramic Cooktops If pots with a thin overlay of aluminum or copper are allowed to boil dry the overlay may leave black discoloration on the cooktop This should be removed immediately before heating again or the discoloration may be permanent WARNING Carefully check the bottom of pans for roughness that would sc...

Страница 40: ...of cookware are clean salt or sand were between before use and use cookware with smooth bottoms the cookware and the surface of the cooktop Cookware has been slid across the cooktop surface Areas of discoloration Food spillovers not cleaned See the Cleaning the glass cooktop section on the cooktop before next use Hot surface on a model This is normal The surface may appear discolored with a light ...

Страница 41: ...properly and slit as recommended In some areas the power Preheat the broil element for 10 minutes voltage may be low Broil for the longest period of time recommended in the Broiling Guide Oven temperature Oven thermostat See the Adjust the oven thermostat Do it yourself too hot or too cold needs adjustment section Storage drawer Rear drawer support is Reposition the drawer See the Storage Drawer i...

Страница 42: ...tions Excessive smoking Excessive soil Touch the CLEAR OFF pad Open the windows to during a clean cycle rid the room of smoke Wait until the LOCKED light goes off Wipe up the excess soil and reset the clean cycle Oven door will not Oven too hot Allow the oven to cool below locking temperature open after a clean cycle Oven not clean after a Oven controls not properly set See the Using the self clea...

Страница 43: ...wer outage or surge Reset the clock If the oven was in use you must reset clock flashes it by touching the CLEAR OFF pad setting the clock and resetting any cooking function Steam from the vent When using the convection This is normal feature it is normal to see steam coming out of the oven vent As the number of racks or amount of food being cooked increases the amount of visible steam will increa...

Страница 44: ... See the Care and cleaning of the range section Drawer is over loaded or Reduce weight Redistribute drawer contents load is unbalanced Lower oven drawer or A fuse in your home may be Replace the fuse or reset the circuit breaker warming drawer will blown or the circuit breaker not work tripped Controls improperly set See the Electric warming drawer or Lower oven drawer section Excessive condensati...

Страница 45: ...otection or you may request your money back on the remaining value of your contract No questions asked It s that simple Protect your refrigerator dishwasher washer and dryer range TV VCR and much more any brand Plus there s no extra charge for emergency service and low monthly financing is available Even icemaker coverage and food spoilage protection is offered You can rest easy knowing that all y...

Страница 46: ...here Complete and mail your Consumer Product Ownership Registration today Have the peace of mind of knowing we can contact you in the unlikely event of a safety modification After mailing the registration below store this document in a safe place It contains information you will need should you require service Our service number is 800 GE CARES 800 432 2737 Read your Owner s Manual carefully It wi...

Страница 47: ...Notes Safety Instructions Operating Instructions Care and Cleaning Troubleshooting Tips Consumer Support 47 ...

Страница 48: ...Notes 48 Consumer Support Troubleshooting Tips Care and Cleaning Operating Instructions Safety Instructions ...

Страница 49: ...Notes Safety Instructions Operating Instructions Care and Cleaning Troubleshooting Tips Consumer Support 49 ...

Страница 50: ...ring normal business hours Have your model number ready Tired of discolored racks Wishing you had extra heavy duty oven racks NOW AVAILABLE for your range GE s innovative self cleanable porcelain coated oven racks Heavy Duty Durable Able to be cleaned in a self cleaning oven Visit ge com for more information Surface Elements Drip Pans Oven Racks Broiler Pan Oven Elements Light Bulbs Knobs Cleaner ...

Страница 51: ...s to your home to teach you how to use the product Improper installation delivery or maintenance Failure of the product if it is abused misused or used for other than the intended purpose or used commercially Damage to the glass cooktop caused by use of cleaners other than the recommended cleaning creams and pads Damage to the glass cooktop caused by hardened spills of sugary materials or melted p...

Страница 52: ...earn about special discounts that are available while your warranty is still in effect You can purchase it on line anytime or call 800 626 2224 during normal business hours GE Consumer Home Services will still be there after your warranty expires Parts and Accessories ge com Individuals qualified to service their own appliances can have parts or accessories sent directly to their homes VISA Master...

Отзывы: