GE
D
IRECTION
5573152-100, R
EV
. 2
LOGIQ E9 S
ERVICE
M
ANUAL
Chapter 8 Replacement procedures
8 - 185
Section 8-7
Main Console parts replacement
8-7-1
Purpose of this section
This section describes how to replace the replaceable parts in the Main Console
8-7-2
Rear Filter and “handle type“ Bottom Filter replacement / cleaning
8-7-2-1
Manpower
One person, 15 minutes.
8-7-2-2
Tools
No tools are needed to replace the filter.
8-7-2-3
Preparations
When preparing for the replacement, you must perform the following steps:
1.) Power down the system.
2.) Disconnect the mains power cable from the wall outlet.
3.) Remove the Filter Cover.
Follow these links if you need more information:
•
4-2-3 "Power shut down" on page 4-6.
•
8-5-10 "Filter Cover replacement" on page 8-49.
Clean the air filters to ensure that a clogged filter does not cause the system to overheat and reduce
system performance and reliability. It is recommended the filters be cleaned quarterly (once every three
months) or more often in locations where high levels of dust are present.
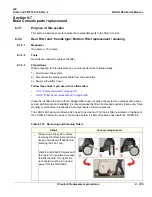
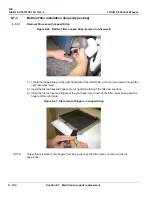
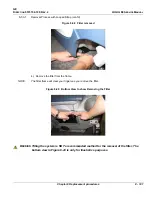
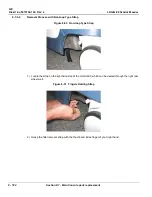
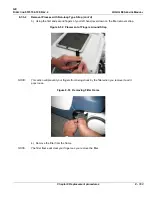
The LOGIQ E9 has two air filters which need to be cleaned. The top air filter is located on the back of
the LOGIQ E9 below the power cord and the bottom air filter is located underneath the LOGIQ E9.
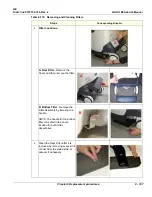
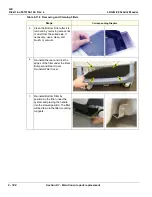
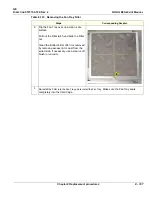
Table 8-118 Removing and Cleaning Filters
Steps
Corresponding Graphic
1.
Power down the system before
removing the filters to prevent any
loose or knocked-off debris from
entering the Fan Tray.
Walk the LOGIQ E9 forward until
the caster is in position to access
the filter handle. The right side,
rear caster must be in-line and
away from the LOGIQ E9.
Содержание LOGIQ E9
Страница 1: ...12 13 18 GEHC_FRNT_CVR FM LOGIQ E9 SERVICE MANUAL VERSION R6 Part Number 5573152 100 Revision Rev 2 ...
Страница 2: ......
Страница 11: ...GE DIRECTION 5573152 100 REV 2 LOGIQ E9 SERVICE MANUAL xi ZH CN KO ...
Страница 140: ...DIRECTION 5573152 100 REV 2 LOGIQ E9 SERVICE MANUAL 4 50 Section 4 8 Site Log This page was intentionally left blank ...
Страница 753: ......
Страница 754: ......


