


GE
D
IRECTION
5573152-100, R
EV
. 2
LOGIQ E9 S
ERVICE
M
ANUAL
Chapter 8 Replacement procedures
8 - 61
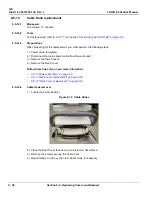
8-5-15
Rear Bumper replacement
8-5-15-1
Manpower
One person, 15 minutes.
8-5-15-2
Tools
8-2-5 "Tools needed for servicing the LOGIQ E9" on page 8-5
8-5-15-3
Preparations
When preparing for the replacement, you must perform the following steps:
1.) Power down the system
2.) Disconnect the mains power cable from the wall outlet.
3.) Disconnect all Probes and External I/O Cabling.
4.) Remove Side Covers.
5.) Remove Rear Cover.
Follow these links if you need more information:
•
4-2-3 "Power shut down" on page 4-6.
•
8-5-3 "Side Covers replacement" on page 8-28.
•
8-5-12 "Rear Cover replacement" on page 8-51.
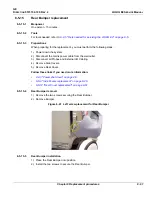
8-5-15-4
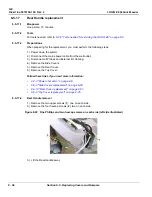
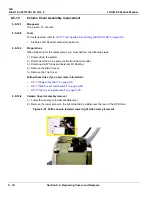
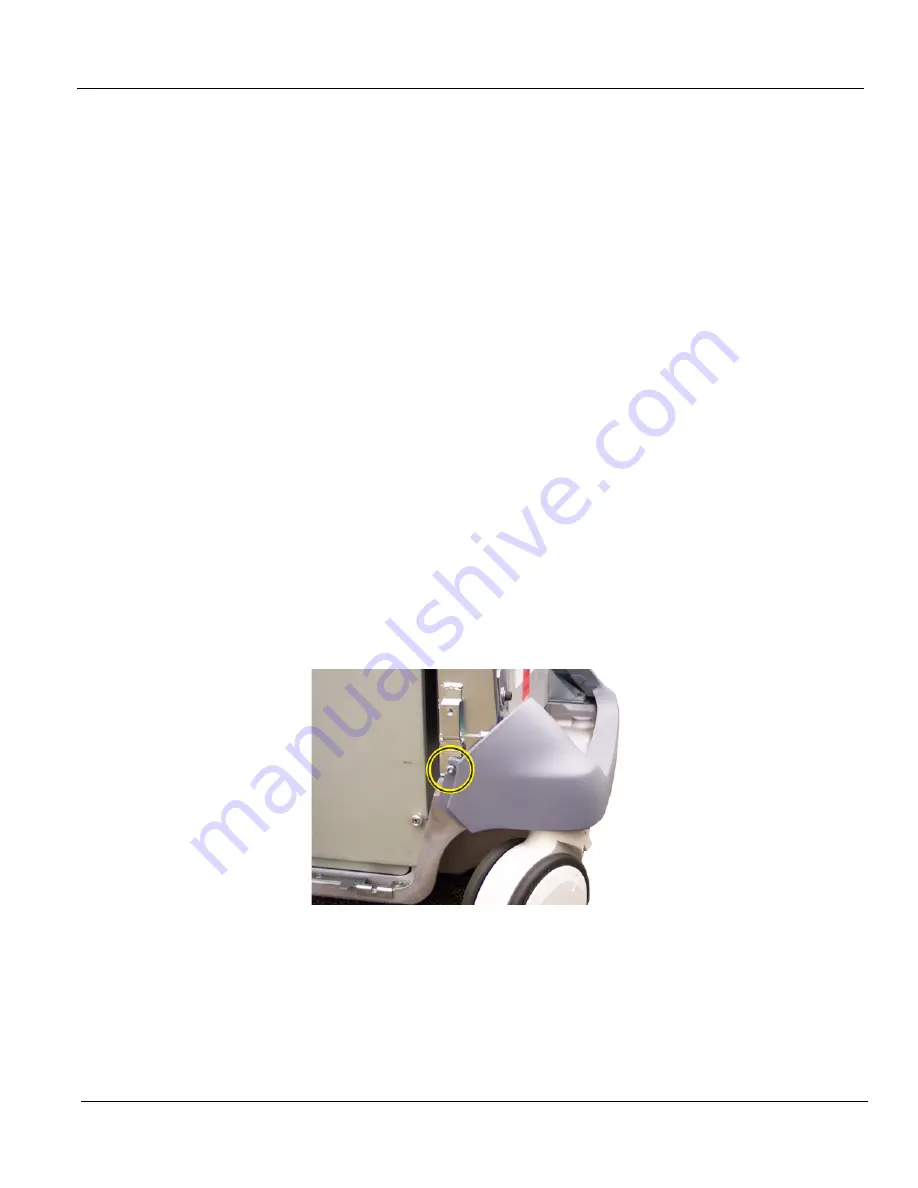
Rear Bumper removal
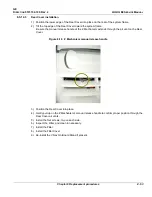
1.) Remove the two screws securing the Rear Bumper.
2.) Remove Bumper.
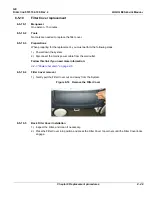
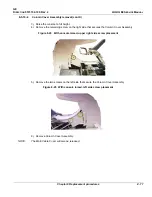
8-5-15-5
Rear Bumper installation
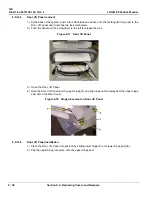
1.) Place the Rear Bumper into position
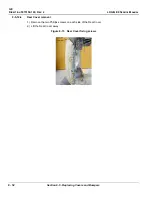
2.) Install the two screws to secure the Rear Bumper.
Figure 8-21 Left screw placement for Rear Bumper
Содержание LOGIQ E9
Страница 1: ...12 13 18 GEHC_FRNT_CVR FM LOGIQ E9 SERVICE MANUAL VERSION R6 Part Number 5573152 100 Revision Rev 2 ...
Страница 2: ......
Страница 11: ...GE DIRECTION 5573152 100 REV 2 LOGIQ E9 SERVICE MANUAL xi ZH CN KO ...
Страница 140: ...DIRECTION 5573152 100 REV 2 LOGIQ E9 SERVICE MANUAL 4 50 Section 4 8 Site Log This page was intentionally left blank ...
Страница 753: ......
Страница 754: ......


