4-44
L30 LINE CURRENT DIFFERENTIAL SYSTEM – INSTRUCTION MANUAL
FRONT PANEL INTERFACE
CHAPTER 4: INTERFACES
4
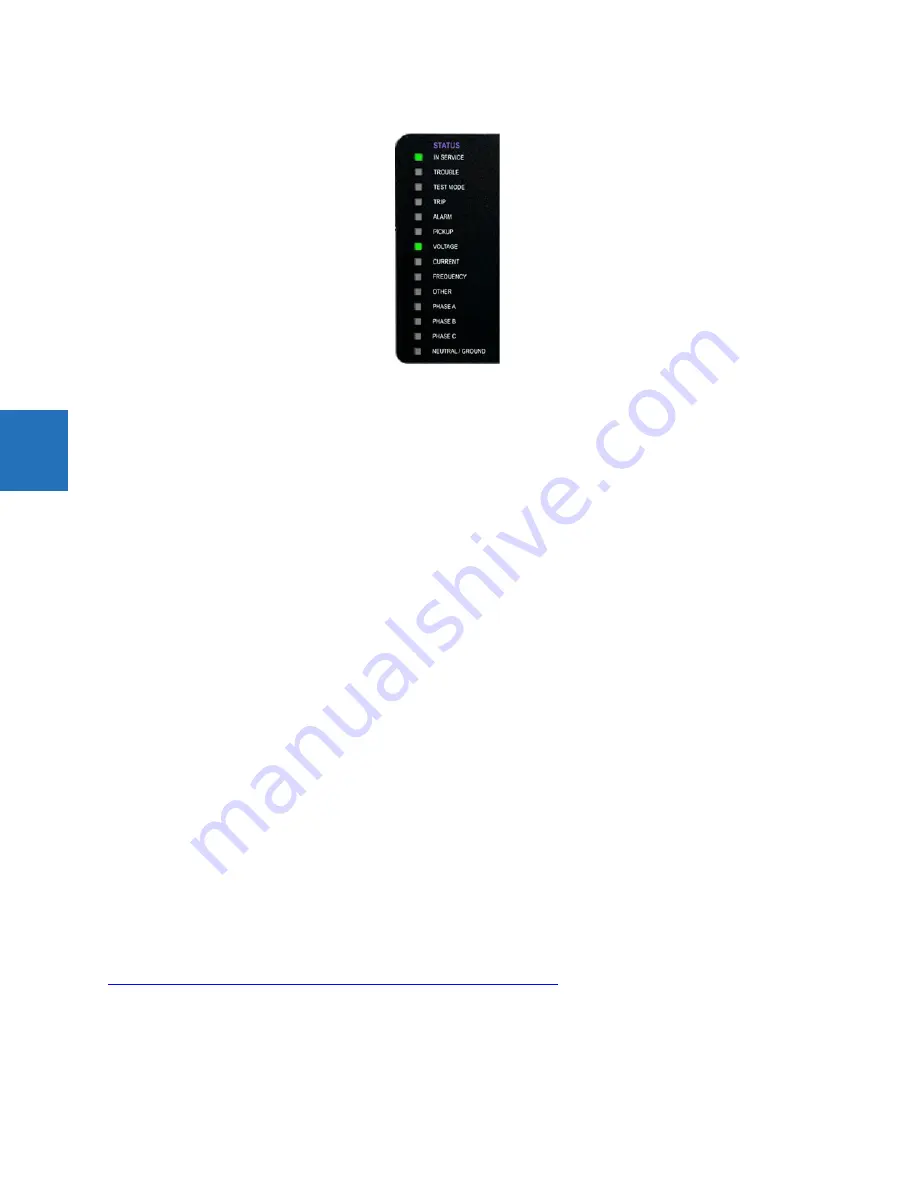
Figure 4-51: Example of LEDs on graphical front panel
User-programmable event-cause indicators
Event-cause LEDs are below the status LEDs. They are turned on or off by protection elements that have their respective
target setting selected as “Enabled” or “Latched.” If set to “Enabled,” then the corresponding event cause LED remains on
as long as the operand associated with the element remains asserted. If set to “Latched” and asserted, then it remains on
until the operand is reset and then a reset command initiated.
All elements that are able to discriminate faulted phases can independently turn on or off the phase A, B, or C LEDs. This
includes phase instantaneous overcurrent, phase undervoltage, and so on. This means that the phase A, B, and C operate
operands for individual protection elements are ORed to turn on or off the phase A, B, or C LEDs.
The LEDs have defaults and can be configured to show instead the status of any FlexLogic operand.
The labelling area has a clear cover behind which custom labels can be mounted. A utility is available to print stick-on
labels, as outlined later in this chapter.
These LEDs are programmed by default as follows:
•
PICKUP — LED 6
— Indicates that an element is picked up, and hence a trip can be imminent
•
VOLTAGE — LED 7
— Indicates voltage was involved
•
CURRENT — LED 8
— Indicates current was involved
•
FREQUENCY — LED 9
— Indicates frequency was involved
•
OTHER — LED 10
— Indicates a composite function was involved
•
PHASE A — LED 11
— Indicates phase A was involved
•
PHASE B — LED 12
— Indicates phase B was involved
•
PHASE C — LED 13
— Indicates phase C was involved
•
NEUTRAL/GROUND — LED 14
— Indicates that neutral or ground was involved
4.2.5 Front panel labelling
4.2.5.1 Enhanced front panel
The following procedure requires these pre-requisites:
•
The UR front panel label cutout sheet (GE part number 1006-0047) has been downloaded from
http://www.gegridsolutions.com/products/support/ur/URLEDenhanced.doc
and printed
•
Small-bladed knife
To create custom LED and pushbuttons labels for the enhanced front panel:
1.
Start the EnerVista UR Setup software.
2.
If not already copied to the Offline Window area, right-click the online device and select the
Add Device to Offline
Содержание L30
Страница 10: ...x L30 LINE CURRENT DIFFERENTIAL SYSTEM INSTRUCTION MANUAL TABLE OF CONTENTS ...
Страница 14: ...1 4 L30 LINE CURRENT DIFFERENTIAL SYSTEM INSTRUCTION MANUAL FOR FURTHER ASSISTANCE CHAPTER 1 INTRODUCTION 1 ...
Страница 126: ...3 68 L30 LINE CURRENT DIFFERENTIAL SYSTEM INSTRUCTION MANUAL CONNECT TO D400 GATEWAY CHAPTER 3 INSTALLATION 3 ...
Страница 214: ...4 88 L30 LINE CURRENT DIFFERENTIAL SYSTEM INSTRUCTION MANUAL FLEXLOGIC DESIGN USING ENGINEER CHAPTER 4 INTERFACES 4 ...
Страница 582: ...7 16 L30 LINE CURRENT DIFFERENTIAL SYSTEM INSTRUCTION MANUAL TARGETS MENU CHAPTER 7 COMMANDS AND TARGETS 7 ...
Страница 598: ...9 6 L30 LINE CURRENT DIFFERENTIAL SYSTEM INSTRUCTION MANUAL TESTING CHAPTER 9 COMMISSIONING 9 ...
Страница 622: ...10 24 L30 LINE CURRENT DIFFERENTIAL SYSTEM INSTRUCTION MANUAL FAULT LOCATOR CHAPTER 10 THEORY OF OPERATION 10 ...
Страница 670: ...A 18 L30 LINE CURRENT DIFFERENTIAL SYSTEM INSTRUCTION MANUAL FLEXANALOG ITEMS APPENDIX A FLEXANALOG OPERANDS A ...
Страница 678: ...C 6 L30 LINE CURRENT DIFFERENTIAL SYSTEM INSTRUCTION MANUAL COMMAND LINE INTERFACE APPENDIX C COMMAND LINE INTERFACE C ...
Страница 682: ...D 4 L30 LINE CURRENT DIFFERENTIAL SYSTEM INSTRUCTION MANUAL REVISION HISTORY APPENDIX D MISCELLANEOUS D ...
Страница 686: ...iv L30 LINE CURRENT DIFFERENTIAL SYSTEM INSTRUCTION MANUAL ABBREVIATIONS ...


