background image

Содержание JTP15

Страница 1: ...13 18 20 22 23 25 26 Special Features of Your Control 8 10 Timed Baking 15 16 Vent 11 Problem Solver 29 30 Thermostat Adjustment Do t Yourse f 17 More questions call GEAnswer Center 800 626 2000 Consumer Services 31 Appliance Registration 2 Important Phone Numbers 31 Model and Serial Number Location 2 Removal of Packaging Tape 2 Warranty Back Cover Care and Cleaning 26 28 Broiler Pan and Grid 26 L...

Страница 2: ...umbers are also on the Consumer Product Ownership Registration Card that came with your oven Before sending in this card please write these numbers here Model Number Serial Number Use these numbers in any correspondence or service calls concerning your oven Save thne and money Before you request service Check the Problem Solver in the back of this guide It lists causes of minor operating problems ...

Страница 3: ...IT BREAKER Do not leave children alone Children should oven Flammable material could be ignited if brought in contact with hot heating elements and may cause severe bums DO NOT STORE OR USE COMBUSTIBLE MATERIALS GASOLINE OR OTHER FLAMMABLE VAPORS AND LIQUIDS IN THE VICINITY OF THIS OR ANY OTHER APPLIANCE Use only dry pot holders Moist _ or daml_ pot holders on hot surfaces may result in burns from...

Страница 4: ...ide Improper installation of aluminum foil may result in a risk of electric shock or fire Oven Self Cleaning Oven Stand away from the oven when opening the oven door The hot air or steam which escapes can cause bums to hands face and or eyes Do not heat unopened food containers Pressure could build up and the container could burst causing an injury Keep the oven vent duct unobstructed Keep the ove...

Страница 5: ...c Oven Light Switch The light comes on automatically when the door is opened Explained Feature Index on page 10 Broil Element 4 20 26 11 Oven Shelf Supports 4 11 13 Shelf positions for cooking are 18 20 22 suggested in the Baking Roasting 23 25 26 and Broiling sections 12 Oven Shelves with Stop Locks _ 4 11 13 18 20 22 23 25 26 13 Lift Off Oven Door 3 4 20 with Broil Stop Position 23 27 Easily rem...

Страница 6: ...9 hours and 59 minutes 9 CLEAR OFF Press to cancel any timed oven operation except the clock and timer 10 HOUR and MIN pads Press to set times up to 9 hours and 59 minutes for example the time of day on the clock the timec the starting and length of cooking time for Timed Bake and the starting and length of cleaning time for Self Clean 11 TEMP pads Press to set the cooking temperature you want to ...

Страница 7: ...es followed by one beep every 6 seconds until KITCHEN TIMER ON OFF is pressed The 6 second tone can be canceled by following the steps in the Special Features of Your Oven Control section under Tones at the End of a Timed Cycle How to Set the Timer HOUR MIN Press KITCHEN TIMER ON OFF Press the HOUR and MIN or pads until the amount of time you want shows in the display If you make a mistake press K...

Страница 8: ...tion The tone can be quickly identified by watching the display messages SPECIAL FEATURES OF YOUR OVEN CONTROL Your new touch pad control has additional features that you may choose to use The following are the features and how you may activate them The special feature modes can only be activated while tile display is showing tile time of day clock They remain in the control s memory until the ste...

Страница 9: ..._r _ shut off and leave the control set in this special features mode 2 Press COOKING TIME The display will show Hid OFF Press COOKING TIME again to activate the feature The display will show Hid ON 3 Press START to activate the cook and hold feature and leave the control set in this special features mode 12 Hour 24 Hour or Clock Black Out Your control is set to use a 12 hour clock If you would pr...

Страница 10: ...se the Fahrenheit temperature selections but you may change this to use the Centigrade selections _ _ l Press BAKE and BROIL HI LO at the same time for 2 seconds until the display shows SF 2 Press BROIL HI LO The display will show F Fahrenheit 3 Press BROIL HI LO again The display will show C Centigrade 4 Press START Changing the Speed of the or Pads As you use the or pads when setting a time or t...

Страница 11: ...m or placing food on them When placing cookware on a shelf pull the shelf out to the bump on the shelf support Place the cookware on the shelf then slide the shelf back into the oven This will eliminate reaching into the hot oven To remove a shelf from the oven pull it toward you tilt the front end upward and pull the shelf out To replace place the shelf on the shelf support with the stop locks cu...

Страница 12: ...or Baking To avoid possible burns place the shelves in the correct position before you turn the oven on 1 Press BAKE TEMP 2 Press the TEMP or pads to set the oven temperature 3 Press START When the oven starts to heat the changing temperature will be in the display The display starts changing once the temperature reaches I00 F 4 Press CLEAR OFF when baking is finished NOTE A cooling tan may automa...

Страница 13: ...ting is not necessary For ovens without a preheat indicator light or tone preheat 10 minutes After the oven is preheated place the food in the oven as quickly as possible to prevent heat from escaping Baking Pans Use the proper baking pan The type of finish on the pan determines the amount of browning that will occur Dark rough or dull pans absorb heat resulting in a browner crisper crust Use this...

Страница 14: ... will cause uneven baking results and poorly shaped products A cake baked in a pan larger than the recipe recommends will usually be crisper thinner and drier than it should be If baked in a pan smaller than recommended it may be undercooked and batter may overflow Check the recipe to make sure the pan size used is the one recommended Aluminum Foil Never entirely cover a shelf with aluminum il Thi...

Страница 15: ...icall3z TEMP HOUR MIN 1 Press BAKE 2 Press the TEMP or pads to set the oven temperature 3 Press COOKING TIME NOTE If your recipe requires preheating you may need to add additional time to the length of the cooking time Press the HOUR and MIN or pads to set the baking time The oven temperature and the cooking time that you entered will be displayed 5 Press START The display shows the oven temperatu...

Страница 16: ... to set the time of day you want HOUR MIN the oven to turn on and start cooking If you would like to check the times you have set press DELAY START to check the start time you have set or press COOKING TIME to check the length of cooking time you have set When the oven turns on at the time of day you have set the display will show the changing temperature starting at 100 F and the cooking time cou...

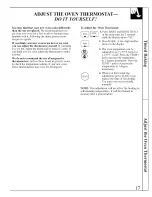
Страница 17: ... in grocery stores to check the temperature setting of your new oven These thermometers may vary 20 40 degrees To Adjust the Oven Thermostat _ _ 1 Press BAKE and BROIL HI LO at the same time for 2 seconds until the display shows SF 2 3 TEMP Press BAKE A two digit number shows in the display The oven temperature can be adjusted up to 35 F hotter or 35 F cooler Press the TEMP pad to increase the tem...

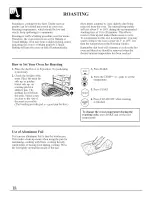
Страница 18: ... Roasting Guide Remember that food will continue to cook in the hot oven and therefore should be removed when the desired internal temperature has been reached How to Set Your Oven for Roasting 1 Place the shelf in A or B position No preheating is necessa_ 7 2 Check the weight of the meat Place the meat tat side up or poultry breast side up on roasting grid in a shallow pan The melting tat will ba...

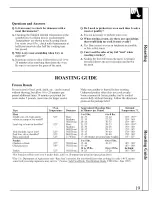
Страница 19: ... under 5 pounds more time for larger roasts Make sure poultry is thawed before roasting Unthawed poultry often does not cook evenly Some commercial frozen poultry can be cooked successfully without thawing Follow the directions given on the package label Type Meat Tender cuts rib high quality sirloin tip rump or top roundt Lamb leg or bone in shouldert Veal shoulder leg or loint Pork loin rib or s...

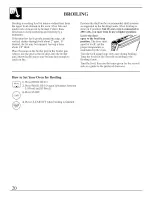
Страница 20: ...tch on fire Position the shelf on the recommended shelf position as suggested in the Broiling Guide Most broiling is done on E position but if your oven is connected to 208 volts you may wish to use a higher position Leave the door open to the broil stop position The door stays open by its yet the proper temperature is maintained in the oven Turn the food using tongs only once during broiling Time...

Страница 21: ...meat drier Juices are protected by the grid and stay cooler thus preventing excessive spatter and smoking Q Should I salt the meat before broiling A No Salt draws out the juices and allows them to evaporate Always salt after cooking Piercing the meat with a fork also allows juices to escape Turn the meat with tongs instead of a fork Q Why are my meats not turning out as brown as they should A In s...

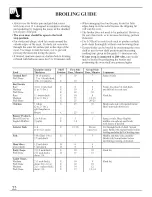
Страница 22: ...oning the oven shelf one position higher Quantity and or Shelf First Side Second Side Food Thickness Position Time Minutes Time Minutes Comments Ground Beef 1 lb 4 patties E 10 7 Space evenly Well Done 1 2 to 3 4 inch thick 4 lbs 16 patties E 10 9 Beef Steaks Rare Medium Well Done Rare Medium Well Done Chicken 3 4 to 1 inch thick 1 to 1V lbs 11 inches thick 2 to 2V lbs E E E E E E C 8 10 12 10 15 ...

Страница 23: ...forming when the oven is heated Buff these areas with a dry cloth Do not clean the gasket Do not use abrasives or oven cleaners Clean the outside front of the oven door with soap and water Also use soap and water to clean under the oven vent grille Make sure the oven light bulb cover is in place Do not rub or clean the door gasket the fiberglass material of the gasket has an extremely low resistan...

Страница 24: ...ART The display will flash and the control will beep if you set the clean cycle and forget to close the oven door How to Set Delay Start of Cleaning Easy Steps 1 Press SELF CLEAN 2 Press the HOUR and MIN or pads to set the clean time 3 Press DELAY START 4 Press the HOUR and MIN or pads to set the start time 5 Press START Delay Start is setting the oven to start the clean cycle automatically at a l...

Страница 25: ...s the next time the oven is automatically cleaned Q What should I do if excessive smoking occurs during cleaning A This is caused by excessive soil Turn the oven off Open the windows to rid the room of smoke Wait until the oven has cooled and the words LOCKED DOOR are off in the display Wipe up the excess soil and reset the clean cycle Q Is the crackling or popping sound I hear during cleaning nor...

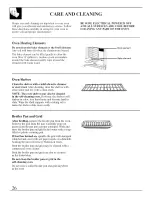
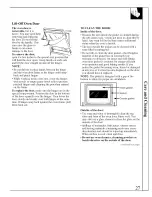
Страница 26: ...nd dry with a clean cloth NOTE The oven shelves may also be cleaned in the self cleaning oven However the shelves will darken in color lose their luster and become hard to slide Wipe the shelf supports with cooking oil to make the shelves slide more easily Broiler Pan and Grid After broiling remove the broiler pan from the oven Remove the grid from the pan Carefully pour out grease from the pan in...

Страница 27: ...the gasket is cleaned during the self clean cycle you do not need to clean this by hand Any soap left on the liner causes additional stains when the oven is heated The area outside the gasket can be cleaned with a soap filled scouring pad Do not rub or clean the door gasket the fiberglass material of the gasket has an extremely low resistance to abrasion An intact and well fitting oven door gasket...

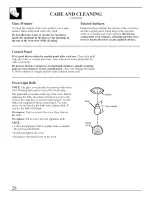
Страница 28: ... Do not use abrasive cleansers strong liquid cleansers plastic scouring pads or oven cleansers on the control panel they will damage the finish A 50 50 solution of vinegar and hot water solution works well Oven Light Bulb NOTE The glass cover should be removed only when cold Wearing latex gloves may offer a better grip The light bulb is located on the top of the oven Before replacing the bulb disc...

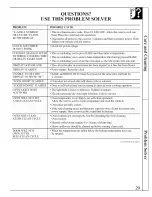
Страница 29: ...the same time and held for DISPLAY TO SHOW SF 2 seconds LOCK DOOR FLASHES Oven door not closed after self clean cycle is selected LOCKED DOOR FLASHES Door is still locked and you are trying to enter an oven cooking operation OVEN LIGHT DOES The light bulb is loose or defective Tighten or replace NOT WORK The pad operating the oven light is broken Call for service OVEN WILL NOT SET Oven temperature...

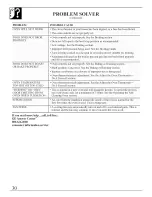
Страница 30: ...as recommended Oven controls not set properly See the Baking or Roasting section Shelf position is incorrect See the Baking or Roasting section Incorrect cookware or cookware of improper size is being used Oven thermostat needs adjustment See the Adjust the Oven Thermostat Do If Yourself section Oven themlostat needs adjustment See the Adjust the Oven Thermostat Do It Yourself section This is norm...

Страница 31: ...0 GE offers flee of charge a brochure to assist in planning a barrier flee kitchen tot persons with limited mobility Consumers wid_ impaired hearing or spee h who have access to a TDD or a corn enfional teletypewriter may tall 800 TDD GE4C 800 833 43Z2 U request intbrmation or serx ice ServiceContracts 800 626 2224 You can have the secure feeling that GE Consumer Service will still be tllere after...

Страница 32: ...e product please contact your dealer or our Consumer Affairs office at the address below or call toll free GE Answer Center 800 626 2000 consumer information service Improper installation If you have an installation problem contact your dealer or installer You are responsible for providing adequate electrical gas exhausting and other connecting facilities as described in the Installation Instructi...

Отзывы: