background image


Care and cleaning of the microwave oven.

Cooktop Light/Night Light 

Replacement

Replace the burned-out bulb with a 

120 volt, 40-watt incandescent bulb 

(WB36X10003), available from your  

GE supplier.

1 To replace the bulb(s), first disconnect 

the power at the main fuse or circuit 

breaker panel or pull the plug.

2 Remove the screw at the left of the 

light cover and lower the cover.

3 Be sure the bulb(s) to be replaced are 

cool before removing. After breaking 

the adhesive seal, remove the bulb by 

gently turning. Replace with the same 

size and type bulb.

4 Replace the screw. Connect electrical 

power to the oven.

Remove Screw.

Oven Light Replacement

1 To replace the oven light, first 

disconnect the power at the main fuse 

or circuit breaker panel or pull  

the plug.

2 To remove the top grille, open the door  

and remove the 3 screws on top of the 

oven that hold the grille into place. Slide 

the grille to the left to remove it.

3 Lift the metal tab on the light cover 

located above the handle.

4 After breaking the adhesive seal, 

remove the bulb by gently turning. 

Replace with the same size and type 

bulb.

5 Replace the light cover.
6 Replace the grille and screws. Connect 

electrical power to the oven.

Screws.

Filter Housing.

Light Cover.

Vent Fan

The vent fan has a metal reusable grease 

filter.  

Models that recirculate air back into the 

room also use a charcoal filter.

Charcoal Filter

(on some models)

Reusable Grease Filter

(on some models)

Reusable Grease Filter

The reusable grease filter traps grease 

released by foods on the cooktop. It 

also prevents flames from foods on the 

cooktop from damaging the inside of  

the microwave. 
For this reason, the filter must ALWAYS 

be in place when the hood is used. The 

grease filter should be cleaned once a 

month, or as needed.

28

Содержание JNM6171DFBB

Страница 1: ...nd Cleaning 27 29 Troubleshooting Tips 30 Things That Are Normal 30 Consumer Support Consumer Support Back Cover Warranty 31 Write the model and serial numbers here Model __________________ Serial ___...

Страница 2: ...in use I PDWHULDOV LQVLGH WKH RYHQ LJQLWH NHHS WKH RYHQ GRRU FORVHG turn the oven off and disconnect the power cord or shut off power at the fuse or circuit breaker panel If the door is opened the fir...

Страница 3: ...ucir el riesgo de incendio en la apertura del horno 1R FRFLQH GHPDVLDGR OD FRPLGD 3UHVWH DWHQFLyQ FXLGDGRVD al electrodom stico cuando se coloca papel pl stico u otro material combustible en el horno...

Страница 4: ...ing Visible bubbling or boiling when the container is removed from the microwave oven is not always present THIS COULD RESULT IN VERY HOT LIQUIDS SUDDENLY BOILING OVER WHEN THE CONTAINER IS DISTURBED...

Страница 5: ...ando se extrae el envase con el l quido del microondas ESTO PODR A RESULTAR EN L QUIDOS MUY CALIENTES DE REPENTE COMENZANDO A HERVIR Y A REBOSARSE CUANDO EL ENVASE ES MOVIDO O SI UNA CUCHARA U OTRO UT...

Страница 6: ...H FRQWDLQHUV should be at least partially uncovered because they form a tight seal When cooking with containers tightly covered with plastic wrap remove covering carefully and direct steam away from h...

Страница 7: ...o causar da os f sicos Adem s los recipientes de pl stico deber an permanecer al menos parcialmente destapados ya que pueden sellarse fuertemente Cuando cocine con recipientes firmemente cubiertos con...

Страница 8: ...acle replaced with a 3 prong grounding receptacle by a qualified electrician before using the appliance ADAPTER PLUGS GROUNDING INSTRUCTIONS This appliance must be grounded In the event of an electric...

Страница 9: ...HFWULFLVWD FDOLILFDGR HO UHHPSOD R GHO WRPDFRUULHQWH GH FDEOHV SRU XQR GH FDEOHV FRQ FRQH LyQ D WLHUUD DQWHV GH usar el electrodom stico ADAPTADORES DE ENCHUFE INSTRUCCIONES DE TOMA DE TIERRA Este ele...

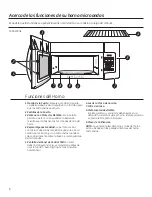
Страница 10: ...4 Shelf some models Lets you microwave several foods at once Food microwaves best when placed GLUHFWO RQ WKH RYHQ RRU RU WXUQWDEOH 5 Touch Control Panel You must set the clock and calendar before usi...

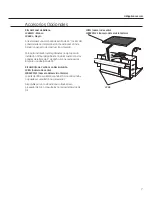
Страница 11: ...earance For installation between cabinets only not for end of cabinet installation Each kit contains two 3 wide filler panels Two kits are needed for a 36 opening Recirculating Charcoal Filter Kit JX8...

Страница 12: ...me Time Features Press Enter Cook Time Amount of cooking time Defrost Weight Time Press twice Amount of defrosting time Express Cook Press number pads 1 6 Starts Immediately Add 30 Sec Starts Immediat...

Страница 13: ...rotating or turning over A lower setting will cook more evenly and need less stirring or rotating of the food 6RPH IRRGV PD KDYH EHWWHU IODYRU WH WXUH RU appearance if one of the lower settings is use...

Страница 14: ...Close the door and press Start Pause to resume cooking Cook Time II Lets you change power levels automatically during cooking Here s how to do it 1 Press Cook Time 2 Enter the first cook time 3 Chang...

Страница 15: ...whole 1 medium head 10 to 17 min In 2 qt casserole place 1 2 cup water frozen 10 oz package 5 to 7 min In 1 qt casserole place 2 tablespoons water Corn frozen kernel 10 oz package 5 to 7 min In 1 qt c...

Страница 16: ...frequent attention than usual A dull thumping noise may be heard during defrosting This is normal when oven is not operating at High power Defrosting Tips RRGV IUR HQ LQ SDSHU RU SODVWLF FDQ EH defros...

Страница 17: ...areas with foil After second half of time separate pieces with table knife Let stand to complete defrosting Poultry Chicken broiler fryer cut up 15 to 19 min Place wrapped chicken in dish Unwrap and t...

Страница 18: ...k way to set 30 seconds of cooking time Express Cook This is a quick way to set cooking time for 1 6 minutes Press one of the Express Cook pads from 1 to 6 for 1 to 6 minutes of cooking at power level...

Страница 19: ...ssing POPCORN press 9 immediately DIWHU WKH RYHQ VWDUWV IRU DQ H WUD VHFRQGV of the cooking time Press 9 again to add another 10 seconds total 30 seconds of additional time To subtract time After pres...

Страница 20: ...2 Meats casseroles pizza Cover with lid or vented plastic wrap 3 Fruits and vegetables Cover with lid or vented plastic wrap 4 Beverages 8 10 ounces Works best with wide mouth mug do not cover 5 Sauc...

Страница 21: ...r food ZHLJKW RU H DPSOH SUHVV SDGV DQG for 1 2 pounds 1 pound 3 ounces 3 Press Start Pause 7LPH HIURVW LV H SODLQHG LQ WKH 7LPH Features section 5HPRYH PHDW IURP SDFNDJH DQG SODFH RQ microwave safe d...

Страница 22: ...e oven will display Food is Ready and beep once a minute until you either open the oven door or press Cancel Off Scroll Speed The scroll speed of the display can be changed Press and hold the AM PM pa...

Страница 23: ...stay lit to remind you that the feature is set You can review the Auto Night Light settings by pressing Auto Night Light To erase your settings and turn off the automatic feature press Auto Night Ligh...

Страница 24: ...KHOI when cooking popcorn R QRW XVH WKH VKHOI with Reheat WARNING ARCING If you see arcing press the Cancel Off button and correct the problem Shelf on some models How to Use the Shelf when Microwavin...

Страница 25: ...1 2 2 Switch places after 1 2 the time To reheat on 3 levels on some models 1 Double the reheating time 2 Switch places twice and give the dishes a 1 2 turn during reheating Place dense foods or those...

Страница 26: ...c wrap or covering with wax paper allows excess steam to escape Shielding In a regular oven you shield chicken breasts or baked foods to prevent over browning When microwaving you use small strips of...

Страница 27: ...art Pause How to Clean the Outside Do not use cleaners containing ammonia or alcohol on the microwave oven Ammonia or alcohol can damage the appearance of the microwave Case Clean the outside of the m...

Страница 28: ...grille open the door and remove the 3 screws on top of the oven that hold the grille into place Slide the grille to the left to remove it 3 Lift the metal tab on the light cover located above the hand...

Страница 29: ...rcoal filter that helps remove smoke and odors The charcoal filter should be replaced when it is noticeably dirty or discolored usually after 6 12 months depending on hood usage See Optional Kits page...

Страница 30: ...e What to Do A fuse in your home 5HSODFH IXVH RU UHVHW FLUFXLW EUHDNHU may be blown or the circuit breaker tripped Power surge 8QSOXJ WKH PLFURZDYH RYHQ WKHQ SOXJ it back in Plug not fully inserted 0D...

Страница 31: ...roper installation delivery or maintenance If you have an installation problem contact your dealer or installer You are responsible for providing adequate electrical exhausting and other connecting fa...

Страница 32: ...call 800 TDD GEAC 800 833 4322 Parts and Accessories GEApplianceparts com Individuals qualified to service their own appliances can have parts or accessories sent directly to their homes VISA MasterCa...

Страница 33: ...ones del Horno 6 14 Otras Funciones 18 22 Niveles de Potencia 9 Funciones del Sensor 16 18 Funciones del Temporizador 10 14 Cuidado y Limpieza 23 25 Consejos para Solucionar Problemas 26 Cosas que son...

Страница 34: ...riesgo de incendio en la apertura del horno 1R FRFLQH GHPDVLDGR OD FRPLGD 3UHVWH DWHQFLyQ FXLGDGRVD al electrodom stico cuando se coloca papel pl stico u otro material combustible en el horno mientras...

Страница 35: ...ndo se extrae el envase con el l quido del microondas ESTO PODR A RESULTAR EN L QUIDOS MUY CALIENTES DE REPENTE COMENZANDO A HERVIR Y A REBOSARSE CUANDO EL ENVASE ES MOVIDO O SI UNA CUCHARA U OTRO UTE...

Страница 36: ...da os f sicos Adem s los recipientes de pl stico deber an permanecer al menos parcialmente destapados ya que pueden sellarse fuertemente Cuando cocine con recipientes firmemente cubiertos con film pl...

Страница 37: ...ectricista calificado el reemplazo del tomacorriente de 2 cables por uno de 3 cables con conexi n a tierra antes de usar el electrodom stico ADAPTADORES DE ENCHUFE INSTRUCCIONES DE TOMA DE TIERRA Este...

Страница 38: ...comidas de una sola vez La comida se cocina mejor con microondas cuando se coloca directamente sobre la base o el plato giratorio del microondas 5 Pantalla del Panel de Control T ctil Usted deber conf...

Страница 39: ...aci n al final del gabinete Cada kit cuenta con dos paneles de relleno de 3 de ancho Son necesarios dos kits para una abertura de 36 Kit del Filtro de Carb n con Recirculaci n JX81J n mero de venta WB...

Страница 40: ...e inmediato Nivel de Potencia Nivel de potencia de 1 a 10 Funciones Convenientes Presionar Presentar Opciones Palomitas de Ma z Comienza de inmediato 3 5 3 0 onzas Bebida Comienza de inmediato 1 a 3 P...

Страница 41: ...er level 10 Nivel de potencia 10 har la cocci n m s r pido pero ser necesario revolver rotar o dar vuelta la comida con mayor frecuencia Una configuraci n inferior har la cocci n m s pareja y se neces...

Страница 42: ...se Iniciar Pausar para reanudar la cocci n Tiempo de Cocci n II Le permite cambiar los niveles de energ a de forma autom tica durante la cocci n As es como funciona 1 Presione Cook Time Tiempo de Cocc...

Страница 43: ...na cazuela de 2 litros coloque 1 2 taza de agua congeladas paquete de 10 onzas 5 a 7 min En una cazuela de 1 litro coloque 2 cucharas soperas de agua Ma z granos congelados paquete de 10 onzas 5 a 7 m...

Страница 44: ...r mayor atenci n a la comida que lo usual Es posible que se escuchen ruidos de golpes secos durante la descongelaci n Esto es normal cuando el horno no est funcionando en el nivel de potencia High Alt...

Страница 45: ...un cuchillo de mesa Espere hasta que se complete la descongelaci n Ave Pollo parilla freidora corte 15 a 19 min Coloque el pollo envuelto en el plato Desenvuelva y d vuelta luego 2 a 3 libras de la p...

Страница 46: ...una forma r pida de configurar el tiempo de cocci n entre 1 y 6 minutos Presione una de las teclas de Express Cook Cocci n Express de 1 a 6 para una cocci n de entre 1 y 6 minutos en power level 10 ni...

Страница 47: ...o de que el horno se inicie para agregar 20 segundos adicionales al tiempo de cocci n autom tica Vuelva a presionar 9 para sumar otros 10 segundos totalizando 30 segundos de tiempo adicional Para rest...

Страница 48: ...una tapa o envoltorio de pl stico ventilado 3 Frutas y verduras Cubra con una tapa o envoltorio de pl stico ventilado 4 Bebidas 8 a 10 onzas Funciona mejor con un taz n de boca ancha no lo cubra 5 Sa...

Страница 49: ...onversi n ingrese el peso de la comida Por ejemplo presione las teclas 1 y 2 para 1 2 libras 1 libra 3 onzas 3 Presione Start Pause Iniciar Pausar Time Defrost Descongelaci n por Tiempo se explica en...

Страница 50: ...microondas presione la tecla Set Clock Configurar Reloj Start Pause 1 2 3 4 5 6 7 8 9 0 Set Clock Clock Display Timer On Off Temporizador de Encendido Apagado Timer On Off Temporizador Encendido Apag...

Страница 51: ...0 minutos o m s luego de que los controles de la cocina o del horno microondas est n apagadosff 19 Surface Light Sound Luz de la Superficie Presione para encender o apagar la luz del horno Algunos mod...

Страница 52: ...el piso del microondas Esto podr a da ar el microondas 8VH VRSRUWHV SDUD ROODV DO sostener el estante ya que podr a estar caliente 1R XVH HO HVWDQWH SDUD cocinar palomitas de ma z 1R XVH HO HVWDQWH F...

Страница 53: ...iempo Para recalentar en 3 niveles en algunos modelos 1 Duplique el tiempo de recalentamiento 2 Cambie las posiciones dos veces y d a los platos medio giro durante el recalentamiento Coloque comidas d...

Страница 54: ...alimentos permite la salida de vapor excesivo Cubrir En un horno normal usted cubre las pechugas de pollo o comidas asadas para evitar que se doren en exceso Al cocinar en el horno microondas deber u...

Страница 55: ...o Limpiar el rea Exterior No use limpiadores que contengan amon acos o alcohol en el horno microondas El amon aco o el alcohol pueden da ar el aspecto del horno microondas Cubierta Superior Limpie el...

Страница 56: ...tornillos en la parte superior del horno que sostienen la rejilla en su posici n Deslice la rejilla hacia la izquierda para retirar la misma 3 Levante la leng eta met lica en la tapa de luz ubicada a...

Страница 57: ...os olores El filtro de carb n deber a ser reemplazado cuando est notoriamente sucio o descolorido normalmente luego de entre 6 y 12 meses dependiendo del uso de la campana Para m s informaci n consult...

Страница 58: ...completamente insertado en el tomacorriente La puerta no est cerrada de forma segura Abra la puerta y cierre la misma de forma segura El piso del horno est caliente incluso cuando el horno no fue usad...

Страница 59: ...es espec ficos y es posible que tenga otros derechos legales que var an entre un estado y otro Para conocer cu les son sus derechos legales consulte a la oficina de asuntos del consumidor local o esta...

Страница 60: ...00 TDD GEAC 800 833 4322 GEAC 800 833 4322 Piezas y Accesorios GEApplianceparts com Individuos calificados para realizar el servicio t cnico de sus propios electrodom sticos podr n solicitar el env o...

Отзывы: