background image

 CONNECTIONS 

(continued)

❑ 

USage 


Power Cord 

 be Disconnected 

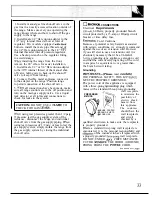
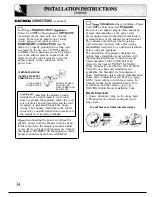
An adapter maybe used only on a 15-amp

circuit. Do not use an adapter on a 20-amp
circuit. 

 local codes permit, a


 may be

made to a properly grounded two-prong wall
receptacle by the use of a 

 adapter,

available at most hardware stores. The larger
slot in the adapter must be aligned with the

larger slot in the wall receptacle to provide
proper polarity in the connection of the
power cord,

TEMPORARY METHOD

(ADAPTER PLUGS NOT
PERMITTED 

IN CANADA)

ALIGN LARGE

PRONGS/SLOTS


ENSURE PROPER
GROUND AND
FIRM CONNECTION
BEFORE USE

 Attaching the adapter ground

terminal to the wall receptacle cover screw

does not ground the appliance unless the cover
screw is metal, and not insulated, and the wall

receptacle is grounded through the house
wiring. The customer should have the circuit
checked by a qualified electrician to make sure
the receptacle is properly grounded.

 disconnecting the power cord from the

adapter, always hold the adapter with one hand.

 this is not done, the adapter ground terminal

is very likely to break with repeated use. Should
this happen, DO 

 USE the appliance until a

proper ground has again been established.

❑ 

 Situations 

where Appliance Power

Cord 

 be Disconnected 

Do not use an adapter plug in these situations

because disconnecting of the power cord
places undue strain on the adapter and leads to
eventual failure of the adapter ground terminal.

The customer should have the two-prong
wall receptacle replaced with a three-prong

 receptacle by a qualified electrician

before using the appliance.

The installation of appliances designed for

mobile home installation must conform with

the Manufactured Home Construction and

Safety Standard, Title 24 

 Part 3280

(formerly the Federal 

 for Mobile

Home Construction and Safety, Title 24, HUD,
Part 280) or, when such standard is not
applicable, the Standard for Manufactured
Home Installations, latest edition (Manufactured
Home Sites, Communities and Set-Ups), 

 latest edition, or with local codes. In

Canada, mobile home installation must be in
accordance with the current 

 Mobile Home Installation Code.

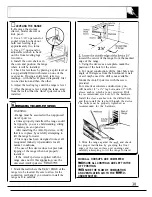
Electric Disconnect

1. Locate disconnect plug on the range back.

2. Pinch sides of connector and pull out of
range back.

You will have one of these disconnect plugs.

 --


34

Содержание JGBS02EM

Страница 1: ...urner Assembly 2 1 22 23 DoorRemoval 25 Lift up Cooktop 24 Oven Bottom 2 3 Oven Vents 2 5 Storage Drawer 27 Problem Solver 45 46 Thermostat Adjustment Do It Yourself 46 More questions call GE Answer C...

Страница 2: ...STRUCTIONS W YOU NED SERVICE To obtain service see the FIRST contact the people who FINALLY if your problem is still Consumer Services page in the serviced your appliance Explain not resolved write ba...

Страница 3: ...recommended in this guide All other servicing shodd be referred to a qutified technician Be sure M packing materi are removed from the r nge before operating it to prevent fire or smoke damage should...

Страница 4: ...high flame settings Boilover causes smoking and greasy spillovers that may catch on fire 4 Adjust top burner flame size so it does not extend beyond the edge of the cookware Excessive flame is hazardo...

Страница 5: ...o not use oven for a storage area Items stored in the oven can ignite Stand away from the range when opening the door of a hot oven The hot air and steam that escapes can cause burns to hands face and...

Страница 6: ...FEATu s OF YOUR RANGE p i e d L i s B S m r Your range is equipped with one of the two types of surface burners shown above 6...

Страница 7: ...ven Shelf Supports Shelf positions for cooking are suggested in the 13 14 Baking Roasting and Broiling sections 14 Air Vent in Oven Door Located at top of Oven Door 4 25 15 Broiler Drawer or Storage D...

Страница 8: ...To light them 1 Be sure surface burner control knobs are in the 0 position 2 Remove the grates and lift the cooktop up see the Lift Up Cooktop section 3 Locate the two pilot ports and light each of t...

Страница 9: ...e Flame will be almost horizontal and will lift slightly away from the burner when the burner is first turned on A blowing or hissing sound may be heard for 30 to 60 seconds This normal sound is due t...

Страница 10: ...ly and cools very slowly Check cookware manufacturer s directions to be sure it can be used on gas ranges Stainless Steel This metal alone has poor heating properties and is usually combined with copp...

Страница 11: ...time Short taps on the UP and hold the UP pad until 6 3 10 appears and then tap DOWN pads will always change the setting by l minute increments The timer can be set for a the UP pad until 3 15 is dis...

Страница 12: ...w range Oven Control Your oven is controlled either by a single OVEN CONTROL knob or by a BA ROIL switch and an OVEN CONTROL knob It will normally take 30 90 seconds before the flame comes on After th...

Страница 13: ...pots and pans on the cooktop may become hot if left too close to the vent Metal items will become very hot if they are left on the cooktop and could cause burns Do not leave any items on the cooktop...

Страница 14: ...sual Your oven has been set correctly at the factory and is more likely to be accurate than the oven which it replaced We do not recommend the use of inexpensive thermometers such as those found in th...

Страница 15: ...shells B or C I Frozen pies I A oncookie sheet I I Casseroles I Bor C I 1 Roasting 1 B orR I Preheating Preheat the oven if the recipe calls for it Preheat means bringing the oven up to the specified...

Страница 16: ...n the recipe for baking since the shiny foil pan reflects heat away recommends will usually be crisper thinner and drier from the pie crust the cookie sheet helps retain it than it should be If baked...

Страница 17: ...ier to carve Internal temperature will rise about 5 to 10 F If you wish to compensate for temperature rise remove the roast from the oven when its internal temperature is 5 to 10 F less than temperatu...

Страница 18: ...rculate and brown the meat ROAST G GU E pe Meat Tender cuts rib high quality sirloir tip rump or top round Lamb leg or bone in shoulder Veal shoulder leg or loin Pork loin rib or shoulder Ham precooke...

Страница 19: ...of food but also increases spattering and the possibility of fats and meat juices igniting 4 Close the oven or broiler door 5 Turn the OVEN CONTROL knob and the BAKE BROIL switch on some models to BRO...

Страница 20: ...25 30 A 30 35 25 30 Bakery Producti Bread Toast or Toaster Pastries 2 to 4 slices 1 pkg 2 1 2 1 Do not turn over c c A 2 3 3 5 13 16 5 1 2 1 Space evenly Place English muffins cut side up and brush w...

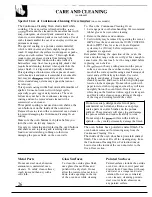
Страница 21: ...burners from range Burners lift out for cleaning Lift up the cooktop and then lift out the surface burners To remove burned on food soak the surface burner in a solution of mild liquid detergent and...

Страница 22: ...mtiels Gra e n j Q h o Sutiace Burner G On models with dual burners the cooktop lifts up for easy access rn all controls OFF before removing burner parts and drip pans if so equipped The burner grates...

Страница 23: ...ooled Then rinse and polish with a dry cloth Be careful when you clean the cooktop because the area over the pilot will be hot on models with standing pilots Cooktop Surface To avoid damaging the porc...

Страница 24: ...bulb with a damp cloth as the bulb will break Control Panel and Knobs It s a good idea to wipe the control panel after each use of the oven Clean with mild soap and water or vinegar and water rinse wi...

Страница 25: ...the door Porcelain Oven Interior on all models except Continuous Cleaning models With proper care the porcelain enamel interior will Cautions about using spray on oven cleaners retain its attractive...

Страница 26: ...by operating the oven at 400 F Close the door and turn the OVEN CONTROL knob to 400 F Time for at least 4 hours Repeated cycles may be necess before improvement in appearance is apparent Remember Dur...

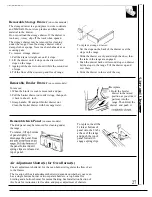
Страница 27: ...le Broiler Drawer on some models To remove To replace 1 When the broiler is cool remove rack and pan 2 Pull the broiler drawer out until it stops then push it back in about 1 inch G 1 Hold the broiler...

Страница 28: ...tion adjustment alteration service or maintenance can cause injury or property damage Refer to this manual For assistance or additiond information consult a qualified installer service agency manufact...

Страница 29: ...tal cabinet The hood must beat least as wide as the appliance and centered over the appliance Clearance between the cooking surface and the ventilation hood surface MU NQWR BE USS 24 INCHES If cabinet...

Страница 30: ...or higher than the floor covering This will allow the range to be moved for cleaning or servicing MODEL AND SERIAL NUMBER LO TION Depending on your range you ll find the model and serial numbers on a...

Страница 31: ...to connect the range to the gas supply line should have an I D of 1 2 and be 5 feet in length for ease of installation In Canada flexible connectors must be single wall metal connectors no longer tha...

Страница 32: ...t max Adapter l a Gas Shut off Valve Rigid Pipe Hookup for Models Equipped with Sealed Burners Q Pressure Regulator o 90 Elbow_ provided t T 90 Elbow Nipple Union Black Iron Pipe Union b Nipple FE i G...

Страница 33: ...test pressures of 1 2 psig or less to test the gas supply system simply isolate the range from the gas supply system by closing the individual shut off valve ELECIRl L CONNECTIONS Electrical Requirem...

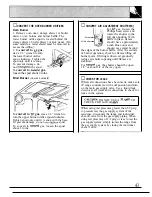
Страница 34: ...apter ground terminal is very likely to break with repeated use Should this happen DO N USE the appliance until a proper ground has again been established Usage Situations where Appliance Power Cord b...

Страница 35: ...he upper tip is normal If you find pilot adjustment is necessary follow instructions at right Adiust the Sutiace Burner Pilots if Necessary 1 Raise the cooktop 3 To adjust use a bladetype screwdriver...

Страница 36: ...module Once the air has been purged from the supply lines burners should light within 4 seconds After burner lights rotate knob out of the LITE position Try each burner in succession until all burners...

Страница 37: ...ottom burner flames are burning properly remove the oven bottom and the burner baffle see below Flames should have approximately 1 blue cones and if range is supplied with natural gas should burn with...

Страница 38: ...mately 1 blue cones and if range is supplied with natural gas should burn with no yellow tipping with most LP gas small yellow tips at the end of outer cones are normal Flames should not lift off burn...

Страница 39: ...his device does not preclude tipping of the range when not properly installed If the Anti Tip device supplied with the range does not fit this application use the universal Anti Tip device WB02X7909 1...

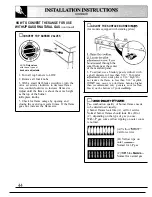
Страница 40: ...e an access cover also For models equipped with dual burners remove the cooktop and locate the pressure regulator at right rear of range n 2 Follow the directions in A or B that match your regulator t...

Страница 41: ...moving spud to prevent the aluminum tube horn twisting 4 Install or lce spuds accordin to one of the d following diagrams see or B for LP gas or natural gas depending on which you are converting to or...

Страница 42: ...VERTING SURFACE BURNERS OH MODELS EQUIPPED WITH DUAL BURNERS See Step 3 if range is equipped with sealed burners 1 Lift cooktop 2 Lift burner assemblies straight up and set aside to gain access to sur...

Страница 43: ...te the shutter to the Screw full open position With Air Shutter baffle in place flames should have approximately l inch blue cones and should not extend beyond the edges of the burner baffle After 30...

Страница 44: ...uipped with standing pilots b accessed through the small hole near the center of the manifold panel 3 To adjust use a blade type screwdriver with a shaft diameter of less than 3 16 Turn pilot adjustme...

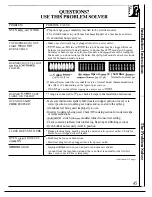
Страница 45: ...ral gas If burner flames look like A cdl for service Normal burner flames should look like B or C depending on the type of gas you use With LP gas some yellow tipping on outer cones is norm If range i...

Страница 46: ...g or moving To check the oven gas shutoff valve raise the cooktop and look for the gas shut off lever either on the front large tube or at the extreme right rear corner Make sure the lever is turned s...

Страница 47: ...g or speech who have Braille controls f r a variety of GE access to a TDD or a conventional teletypewriter may appliances and a brochure to call 800 TDD GEAC 800 833 4322 to request assist in planning...

Страница 48: ...the address below or call toll free GE Answer CenteP 800 626 2000 consumer information service Improper installation If you have an installation problem contact your dealer or installer You are respo...

Отзывы: