

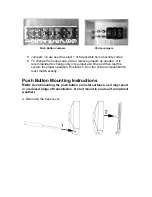
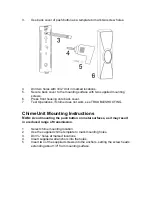

3.
Use back cover of push button as a template to mark two screw holes.
4.
Drill two holes with 3/32” drill in marked locations.
5.
Secure back cover to the mounting surface with two supplied mounting
screws.
6.
Press front housing onto back cover.
7.
Test Operations, if chime does not work, see TROUBLESHOOTING.
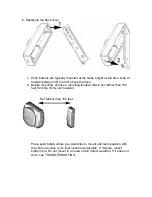
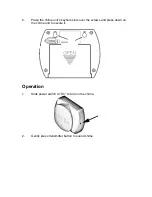
Chime Unit Mounting Instructions
Note:
Avoid mounting the push button on metal surfaces, as it may result
in a reduced range of transmission.
1.
Select chime mounting location.
2.
Use the supplied chime template to mark mounting holes.
3.
Drill ¼” holes at marked locations.
4.
Insert supplied wall anchors into the holes.
5.
Insert two of the supplied screws into the anchors, setting the screw heads
extending about 1/4" from mounting surface.


