background image

re

S r

e

mo

ts

uC

ec

iv

Tr

gn

it

oo

hs

el

bu

o

sp

i

rt

sn

gn

it

ar

ep

O

sn

oit

cu

rt

sn

yt

ef

aS

sn

oit

cu

rt

sn

no

it

all

at

sn

I

sn

oit

cu

About the operation of your freezer.

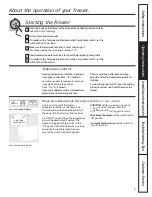
Starting the Freezer

Clean the inside of the freezer with a mild solution of baking soda and water 
(see 

Care and Cleaning

).

Connect cord to power outlet.

On models with a Temperature Monitor or High-Temp Alarm Switch, set the 
switch to the 

OFF

position.

Make sure the temperature control is set at  mid-range,   

4.

Allow freezer to operate for at least four hours before placing food inside.

On models with a Temperature Monitor or High-Temp Alarm Switch, set the 
switch to the 

ON

position.

6

5

4

3

2

1

5

(on some models)

An alarm will sound if the freezer
temperature reaches unsafe levels. The
alarm operates on household electricity. If
the power fails, the alarm will not perform.

An 

ON/OFF

switch allows the temperature

alarm to be deactivated if desired. The
freezer is shipped with the switch in the 

OFF

position. After the freezer has run long

enough to lower the temperature, you 
may set the switch to the 

ON

position.

CAUTION:

Adding more than 3 pounds  

of warm food per cubic foot 

eezer capacity can trigger the alarm.

To activate the alarm,

set the switch to the 

ON

position.

T

o deactivate the alarm,

set the switch to 

OFF

position.

Temperature Control

Freezing temperature selection is made by
setting the control from 

1

to 

7

(coldest).

If you want colder or warmer temperatures,
adjust the control one step at a time.

Allow several hours after each one-step
adjustment for the freezer temperature to
stabilize.

Turning the control to 

OFF

stops the cooling

process but does not shut off power to the
freezer.

ON

OFF

HIGH-TEMP

ALARM SWITCH

Located on fr

ont of fr

eezer.

Located on back of lid.

(For some models, the mid-range setting is “II”).

For some models, temperature selection 
is made by setting the control
from “I” to “III” (coldest). 

Temperature Monitor/High-Temp Alarm Switch

the

(1.5 kg)

of fr

Содержание FUM12

Страница 1: ...627P001 Pub No 49 6952 216572700 CG 11 97 Upright Manual Defrost Models FUM12 FUM14 FUM17 FUM21 Upright No Frost Models FUF14 FUF17 FUF20 Chest Manual Defrost Models FCM5 FCM7 FCM9 FCM15 FCM20 FCM25 O...

Страница 2: ...er Service Product Registration For Customers in the U S 13 Warranty 15 Service Telephone Numbers 16 Product Registration For Customers in Canada 17 FOR YOUR RECORDS Write the model and serial numbers...

Страница 3: ...tly low temperatures in the freezer to freeze recommended quantities of food Caution should be used when removing the door of a freezer Particular caution should be used when removing the lid of a Che...

Страница 4: ...p plug firmly and pull straight out from the outlet Repair or replace immediately all power cords that have become frayed or otherwise damaged Do not use a cord that shows cracks or abrasion damage al...

Страница 5: ...An ON OFF switch allows the temperature alarm to be deactivated if desired The freezer is shipped with the switch in the OFF position After the freezer has run long enough to lower the temperature yo...

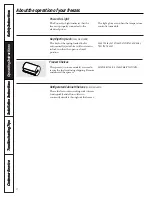
Страница 6: ...ping Remove and discard the spacers Small objects are a choke hazard to children Refrigerated Cabinet Shelves on some models These shelves contain cooling coils to freeze foods quickly and allow cold...

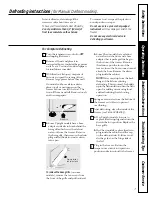
Страница 7: ...ch carry the defrost water out from the freezer Remove the base grille then remove the drain plug and let the defrost water drain into a pan To remove the base grille on some models remove the two scr...

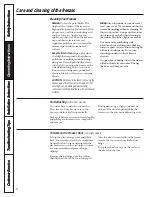
Страница 8: ...Inside Clean the inside of your freezer at least once a year We recommend that the freezer be unplugged before cleaning If this is not practical wring excess moisture out of sponge or cloth when clea...

Страница 9: ...se or room without damage to cabinet or mechanism Preparing to Move Disconnect the power cord plug from the wall outlet Remove foods defrost on Manual Defrost models and clean the freezer Secure all l...

Страница 10: ...r is damp or moist place 2 X 4 s 51 mm X 102 mm under its entire length to assure adequate support Clearances On all models allow 3 76 mm on top back and sides for proper air circulation Adjustable Le...

Страница 11: ...olding door lid open too long Too frequent or too long door lid openings Temperature control See About the operation of your freezer set too cold Inadequate air circulation See Preparing to install th...

Страница 12: ...et too cold Moisture forms on Not unusual during Wipe surface dry outside of cabinet periods of high humidity Interior light does No power at outlet Replace fuse or reset the breaker not work Freezer...

Страница 13: ...tection or you may request your money back on the remaining value of your contract No questions asked It s that simple Protect your refrigerator dishwasher washer and dryer range TV VCR and much more...

Страница 14: ...nt Complete and mail your Consumer Product Ownership Registration today Have the peace of mind of knowing we can contact you in the unlikely event of a safety modification After mailing the registrati...

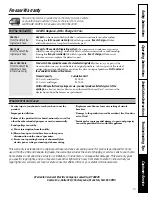
Страница 15: ...lage to a Factory Service Center an authorized Customer Care servicer or the dealer from whom the freezer was purchased Service trips to your home to teach you how to use the product Improper installa...

Страница 16: ...ations Camco Inc Suite 310 1 Factory Lane Moncton N B E1C 9M3 Service Contracts In the U S 800 626 2224 Purchase a GE service contract while your warranty is still in effect and you ll receive a subst...

Отзывы: