background image

7

Consumer Support

Tr

oubleshooting T

ips

Operating Instructions

Safety Instructions

Options

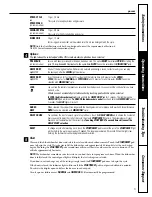
The light above the selected pad will be ON to indicate which 

OPTION 

has been selected.

HOT START

For use with heavily soiled and/or dried-on, baked-on soils. This option 

MUST 

be selected

(on some models)

PRIOR 

to starting the cycle.

This option will improve both wash and dry performance. This

option adds 20 minutes to the cycle time. 

NOTE: 

Cannot be selected with 

RINSE ONLY 

cycle.

HEATED DRY

Shuts off the drying heat option. Dishes air dry naturally and energy is saved. For faster air dry, 

Light OFF

you can prop the door open after the 

CLEAN

light illuminates.

HEATED DRY

Turns the heater on for fast drying. This will extend the total run time by 38 minutes.

Light ON

NOTE: 

Cannot be selected with 

RINSE ONLY 

cycle.

LOCK

You can lock the controls to prevent any selections from being made. Or you can lock the 
controls after you have started a cycle.

Children cannot accidentally start dishwasher by touching pads with this option
selected. 

To LOCK the dishwasher control,

touch and hold the 

HEATED DRY

pad for 3 seconds. The light below the

HEATED DRY

pad will turn on. 

To UNLOCK the dishwasher control,

touch and hold the 

HEATED DRY

pad for 

3 seconds. The 

LOCK

light will turn off.

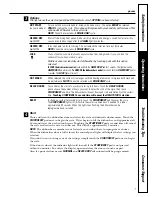
HOT WASH

When selected, the cycle will run longer with the heating element on to improve both wash and 
dry performance. 

NOTE:

Cannot be selected with 

RINSE ONLY 

cycle.

DELAY HOURS

You can delay the start of a wash cycle for up to 8 hours. Touch the 

DELAY HOURS

pad to choose the number of hours you want to delay the start of the cycle; then touch

START/RESET 

one time. The dishwasher will count down and start automatically at the correct

time. 

Touching 

START/RESET

a second time will cancel the

DELAY START

selection

.

RESET

To change a cycle after washing starts, touch the 

START/RESET

pad to cancel the cycle. 

The 

START/RESET 

light will flash while the water is pumped out if needed. This takes

approximately 90 seconds. When the light stops flashing, the dishwasher can be 
reprogrammed and restarted.

Start

Close and latch the dishwasher door and select the cycle and desired enhancements. Touch the

START/RESET

pad once to begin the cycle. Water begins to fill the dishwasher, and approximately

60 seconds later the wash action begins. Touching the 

START/RESET

pad a second time will cancel

the cycle and cause the water to drain out. This will take approximately 2 minutes.

NOTE: 

The dishwasher remembers your last cycle so you don’t have to reprogram each time.

When the dishwasher door is fully closed, the control panel lights will display the last settings you
selected. 

If you don’t want to change any of the settings, simply touch the 

START/RESET 

pad once to begin

the cycle.

If the door is closed, the indicator lights will turn off if the 

START/RESET

pad is not pressed

within two minutes. To activate the display, open and close the door or touch any pad.

Also, if a power failure occurs,

NORMAL 

and 

HEATED DRY 

will automatically be programmed.

3

ge.com

4

Содержание EDW5000 Series

Страница 1: ... JR Safety Instructions 2 3 Operating Instructions Care and Cleaning 12 Control Panel and Settings 4 7 Loading Place Settings 11 Loading the Racks 10 Optional Accessories 11 Using the Dishwasher 8 9 Troubleshooting Tips 13 14 Consumer Support Consumer Support Back Cover Warranty 15 ge com Write the model and serial numbers here Model __________________ Serial __________________ You can find them o...

Страница 2: ...l permanent wiring system or run an equipment grounding conductor with the circuit conductors and connect to the equipment grounding terminal or lead of the appliance Improper connection of the equipment grounding conductor can result in a risk of electric shock Check with a qualified electrician or service representative if you are in doubt whether the appliance is properly grounded Use supply co...

Страница 3: ... dishwashers will cause the dishwasher to fill with suds Locate sharp items so that they are not likely to damage the door seal Load sharp knives with the handles up to reduce the risk of cut type injuries Do not wash plastic items unless marked dishwasher safe or the equivalent For plastic items not so marked check the manufacturer s recommendations Non Dishware Items Do not wash items such as el...

Страница 4: ...play may adjust the remaining time while the sensing light is on The time displayed at the start of each cycle may change from the factory setting as the unit customizes itself to home use During a delay start the display will show hours of time remaining until the cycle starts Cycles The light above the selected pad will be ON to indicate which cycle has been selected This dishwasher is equipped ...

Страница 5: ...CK the dishwasher control touch and hold the HEATED DRY pad for 3 seconds The LOCK light will turn off ADDED When selected the cycle will run longer with the heating element on to improve both wash and dry performance HEAT NOTE Cannot be selected with RINSE ONLY cycle DELAY HOURS You can delay the start of a wash cycle for up to 9 hours Touch the DELAY HOURS pad to choose the number of hours you w...

Страница 6: ...perature in the final rinse to sanitize your dishware The cycle length will vary depending on the temperature of your inlet water NOTE The SANI WASH cycle is monitored for sanitization requirements If the cycle is interrupted during or after the main wash portion or if the incoming water temperature is so low that adequate water heating cannot be achieved the sanitizing conditions may not be met I...

Страница 7: ...ed with RINSE ONLY cycle DELAY HOURS You can delay the start of a wash cycle for up to 8 hours Touch the DELAY HOURS pad to choose the number of hours you want to delay the start of the cycle then touch START RESET one time The dishwasher will count down and start automatically at the correct time Touching START RESET a second time will cancel the DELAY START selection RESET To change a cycle afte...

Страница 8: ... open Turn the dispenser cap to the left and lift it out Add rinse agent until the indicator window looks full Do not overfill Clean up any spilled rinse agent with a damp cloth to prevent foam Replace the dispenser cap Rinse Aid Setting The amount of rinse agent released into the final wash can be adjusted The factory setting is at the midpoint If there are rings of calcium hard water spots on di...

Страница 9: ...y designed for dishwashers will cause the dishwasher to fill with suds During operation these suds will spill out of the dishwasher vents covering the kitchen floor and making the floor wet Because so many detergent containers look alike store the dishwasher detergent in a separate space from all other cleaners Show anyone who may use the dishwasher the correct detergent and where it is stored Whi...

Страница 10: ...hould face the center of the rack If necessary oversized glasses and mugs can be placed in the lower rack to maximize loading flexibility Also be careful not to let a portion of an item such as a pot or dish handle extend through the bottom rack This could block the wash arm and cause poor washing results Fold down tines on some models provide flexibility for extra large and hard to fit items The ...

Страница 11: ...her by adding a custom panel trim kit Wood panel trim kit This accessory contains trim and instructions for you to supply and install a 1 4 thick decorative wood door GPF525B Black GPF525W White GPF525C Bisque Trimless wood panel kit This accessory contains parts and instructions for you to supply and install a 3 4 thick decorative wood door GPF575 Non wood countertop bracket kit This is for insta...

Страница 12: ...r Panel model numbers ending in SS The stainless steel panels can be cleaned with Stainless Steel Magic or a similar product using a clean soft cloth Do not use appliance wax polish bleach or products containing chlorine on Stainless Steel doors You can order Stainless Steel Magic WX10X15 through GE Parts by calling 800 626 2002 CleanSteel Door Panel model numbers ending in CS Use a clean soft lig...

Страница 13: ...permanent To prevent this from happening glassware too much detergent use less detergent if you have soft water Wash glassware in the shortest cycle that will get them clean Water temperature entering This could be etching Lower the water heater temperature the dishwasher exceeds 150 F Suds in the tub Correct detergent Use only automatic dishwasher detergents to avoid sudsing wasn t used Cascade a...

Страница 14: ...with citric acid to remove mineral deposits Citric acid Part number WD35X151 can be ordered through GE Parts See back cover for ordering information Dishwasher won t run Fuse is blown or circuit breaker is Replace fuse or reset circuit breaker Remove any other appliances from tripped the circuit Power is turned off In some installations the power to the dishwasher is provided through a wall switch...

Страница 15: ...home to teach you how to use the product Improper installation delivery or maintenance Failure of the product if it is abused misused or used for other than the intended purpose or used commercially Replacement of house fuses or resetting of circuit breakers Damage to the product caused by accident fire floods or acts of God Incidental or consequential damage caused by possible defects with this a...

Страница 16: ...le your warranty is still in effect You can purchase it on line anytime or call 800 626 2224 during normal business hours GE Consumer Home Services will still be there after your warranty expires Parts and Accessories ge com Individuals qualified to service their own appliances can have parts or accessories sent directly to their homes VISA MasterCard and Discover cards are accepted Order on line ...

Отзывы: