March 2008
2-4
Initial Setup
Entering System Data for
a Channel
Begin the programming of the
SYSTM
submenu in either the
1-
Channel
or
2-Channel
section below.
A 1-Channel Meter
For the 1-Channel Model GS868, the information entered in the
SYSTM
submenu pertains to the global operation of the flowmeter.
1.
At the
User Program
screen, press the
[F2]
function key to
program the
SYSTM
submenu.
2.
Enter a
Site Label
of up to 9 characters and press
[ENT]
. (While
taking measurements, the site label will appear on the locator bar.)
3.
Enter a
Site Message
of up to 21 characters. Press
[ENT]
.
4.
To select the
System Units
, press
[F1]
to display parameters and
measurements in English units, or press
[F2]
to display parameters
and measurements in Metric units.
5.
Use the
[F1]
-
[F4]
keys to select the type of
Pressure Units
desired.
The abbreviations and definitions of all the available pressure units
are shown in Table 2-1 below. The choices shown on the option bar
are determined by the selections made at the previous
SYSTEM UNITS
prompt.
a.
If you have entered gage pressure, or the local atmospheric
pressure (PSIg, BARg or kPag), use the numeric keys to enter
the gage pressure value. Press
[ENT].
6.
At the
Stopwatch Totalizer
prompt, press
[F1]
to totalize all liquid
flow continuously, or
[F2]
to measure totals manually with the
Stopwatch Timer. (With
MNUAL
(
[F2])
, the console key on the
keypad is used to start and stop the totalizer. See the
Programming
Manual
for details.)
The remainder of the
SYSTM
submenu is identical for the 1-Channel
and 2-Channel versions of the Model GS868. Proceed to the
1- and 2-
Channel Meters
section to complete the programming of this
submenu.
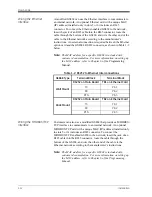
Table 2-1: Available Pressure Units
English
Metric
PSIa = Pounds per square inch absolute
BARa = bar absolute
PSIg = Pounds per square inch gage
BARg = bar gage
kPaa = kiloPascals absolute
kPag - kiloPascals gage
Содержание DigitalFlow GS868
Страница 6: ...Chapter 1...
Страница 28: ...Chapter 2...
Страница 40: ...Chapter 3...
Страница 41: ...Operation Introduction 3 1 Powering Up 3 2 Using the Display 3 3 Taking Measurements 3 5...
Страница 49: ...Chapter 4...
Страница 50: ...Specifications General 4 1 Electrical 4 2 Operational 4 4 Transducer 4 4 Flowcell 4 5...
Страница 56: ...Appendix A...
Страница 57: ...CE Mark Compliance Introduction A 1 Wiring A 1 External Grounding A 1...
Страница 59: ...Appendix B...
Страница 60: ...Data Records Option Cards Installed B 1 Initial Setup Data B 2...
Страница 64: ...Appendix C...
Страница 65: ...Optional Enclosures Introduction C 1 Rack Mount Enclosure C 1 Rack Mount Wiring C 1 Rack Mount Front Panel C 2...
Страница 71: ...Appendix D...
Страница 72: ...Measuring P and L Dimensions Introduction D 1 Measuring P and L D 1...

