background image

Datex-Ohmeda S/5

TM

 Anesthesia and Critical Care Monitors

6

Document no

M1125639-03

3.

ComWheel cover
Check that the ComWheel cover is intact and attached properly.

"

4.

ON/STBY switch
Check that the ON/STBY switch is intact and attached properly. Check that the ON/STBY 
switch changes its state firmly when turning it back and forth. Leave the switch into STBY 
position.

"

5.

Stand-by LED
Reconnect and lock the command bar cable to the B-CPU6 board.
Check that the green stand-by LED is lit up (the Central Unit power cord is connected to 
the mains).

"

3.2.3 Functional inspection

Turn the monitor on and enter the service menu:

Monitor Setup


- Install/Service

 (password 16-4-34) 

- Service 

(password 26-23-8)

6.

Keyboard version
Record the information regarding keyboard software.

"

7.

Alarm LEDs
Select the menu

 KEYBOARD

 with the ComWheel.

Highlight the text 

UPPER LED

. Check that the red alarm LED is turning on and off when 

pressing the ComWheel. Check also the yellow alarm LED by selecting

 LOWER LED

 from 

the menu.

"

8.

Membrane keys
Press the keys one by one. Check that each key generates a sound from the loudspeaker 
and the corresponding text in the menu changes from yellow to red.

"

9.

ComWheel
Turn the ComWheel clockwise and counterclockwise and check that each step generates 
a sound and the corresponding values at the bottom of the menu increase.
Select 

DUMMY PRESS

. Press the ComWheel and check that the press generates a sound 

and the corresponding value in the menu increases.

"

Содержание Datex-Ohmeda S/5

Страница 1: ...a licensed medical practitioner Outside the USA check local laws for any restriction that may apply All specifications subject to change without notice Order code M1162897 1st edition June 25 2009 GE Healthcare Finland Oy Helsinki Finland P O Box 900 FI 00031 GE FINLAND Tel 358 10 39411 Fax 358 9 1463310 www gehealthcare com Copyright 2009 General Electric Company All rights reserved Datex Ohmeda ...

Страница 2: ...he S 5 Critical Care Monitor with L ICU07 and L ICU07A it is intended for use by personnel trained in its proper use It is intended for use on adult and pediatric patients within a hospital or medical facility providing patient care to monitor the state of the brain by data acquisition of EEG signals The Bispectral index BIS a processed EEG variable and one component of the BIS module may be used ...

Страница 3: ...cal Reference Manual Trademarks Datex Ohmeda S 5 D lite D lite Pedi lite Pedi lite D fend D fend Mini D fend OxyTip MemCard ComWheel ComBar EarSat FingerSat FlexSat PatientO2 Patient Spirometry Entropy and Tonometrics are trademarks of GE Healthcare Finland Oy All other product and company names are property of their respective owners A portion of the Entropy software is derived from the RSA Data ...

Страница 4: ......

Страница 5: ...facing Functional check General troubleshooting 1 M1125633 006 Planned Maintenance Instructions 2 Document No Updated Description M1137266 002 Service Menu L ANE07 A L ICU07 A 1 M1125635 005 8 Module Frame F CU8 2 M1125636 005 5 Module Frame F CU5 P 3 M1125637 004 CPU Board B CPU6 4 M1137269 002 UPINET Board B UPI4NET 5 M1137272 002 Displays and Display Controller Boards 6 M1125639 003 Command Bar...

Страница 6: ...Datex Ohmeda S 5 Anesthesia and Critical Care Monitors 2 Document no M1137263 04 ...

Страница 7: ...ule communication 18 2 5 Software loading 19 2 6 Parameter modules 20 3 System installation 21 3 1 Unpacking instructions 21 3 2 Choosing location 21 3 3 Central Unit S 5 8 Module Frame F CU8 22 3 3 1 Connecting to mains 22 3 3 2 Connecting to the Datex Ohmeda Network 22 3 3 3 Inserting the parameter modules 23 3 3 4 E PSM P Mounting Accessories 24 3 3 5 Positioning PC boards 26 3 3 6 Replacing PC...

Страница 8: ...CU8 only 44 3 11 1 Mounting of Extension Frame F EXT4 45 3 11 2 Connection to Central Unit 45 3 11 3 Inserting the parameter modules 45 3 11 4 Troubleshooting 45 4 Interfacing 47 4 1 Interfacing external monitors via Interface Module E INT 47 4 1 1 Connection to external Datex Ohmeda monitors 48 4 1 2 Connection to Critikon Dinamap 1846SX Abbott Oximetrix 3 and Baxter Explorer 49 4 1 3 Connection ...

Страница 9: ...play s 67 5 3 3 Keyboard s 67 5 3 4 5 Module Central Unit F CU5 8 Module Central Unit F CU8 68 5 3 5 Extension Frame F EXT4 68 5 3 6 Compact Airway Module E CXXXXX 68 5 3 7 Single width Airway Module E miniC 69 5 3 8 Multiparameter Hemodynamic Modules 69 5 3 9 Pressure Pressure Temp Modules E P E PT 70 5 3 10 Dual pressure Module E PP 70 5 3 11 Cardiac Output Modules E COP E COPSv 70 5 3 12 Masimo...

Страница 10: ...h cables 29 Figure 13 Two F CU5s connected to one F CPU 29 Figure 14 PC boards 32 Figure 15 Service reset button 33 Figure 16 Display options 34 Figure 17 Address dip switch settings B DISPX 38 Figure 18 Resolution dip switch settings B DISPX 39 Figure 19 Compact Airway Module E XXXX 40 Figure 20 Scavenging through ventilator reservoir 41 Figure 21 Connecting the gas module to the scavenging conne...

Страница 11: ... Cato Julian and Narkomed 2C NAD monitor to the S 5Anesthesia Monitor or S 5Critical Care Monitor 59 Table 8 Coding element connector X4 61 Table 9 Defib IABP sync connector X7 B UPI4NET 02 and on the front of F CPU 61 Table 10 Signal output connector pin assignments 62 Table 11 Patient simulators compatibility with each hemodynamic module 65 Table 12 Adapter cables for hemodynamic patient simulat...

Страница 12: ...Datex Ohmeda S 5 Anesthesia and Critical Care Monitors vi Document no M1137263 04 ...

Страница 13: ...e installation please do not hesitate to contact your authorized distributor Part II contains detailed descriptions of each component of the S 5 AM CCM Monitor such as frame unit parameter modules Remote Controller and Device Interfacing Solution Service check for each product service menus and all the spare parts information for the Monitor is included For information of parameter modules Remote ...

Страница 14: ...n bold italic ECG Setup Menu access is described from top to bottom For example the selection of the Monitor Setup hard key the Screen 1 Setup menu item and the Waveform Fields menu item would be shown as Monitor Setup Screen 1 Setup Waveform Fields Messages Messages alarm messages informative messages displayed on the screen are written inside single quotes Please wait Sections When referring to ...

Страница 15: ...ot include all these components Consult your local representative for the available components Figure 1 Datex Ohmeda S 5 Anesthesia Monitor system 1 12 LCD display D LCC12A 2 15 LCD display D FPD15 3 19 medical grade display 4 F CU5P 5 module frame unit with E PSM P support and measurement modules 5 Patient Side Module E PSM P 6 F CPU central processor unit for F CU5 P and N AC power unit 7 F CU5 ...

Страница 16: ...kaging The contents of the transport package are fragile and must be handled with care Indicates the correct upright position of the transport package The transport package must be kept in a dry environment Indicates the temperature limitations within which the transport package should be stored This package can be recycled ...

Страница 17: ...y To minimize potential effects on the environment and human health it is important that all marked batteries that you remove from the product are properly recycled or disposed For information on how the battery may be safely removed from the device please consult the technical or service manual or equipment instructions Information on the potential effects on the environment and human health of t...

Страница 18: ... additional separating transformer and the original D LCC19 power adapter not from the Central Unit F CU8 On the E PRESTN E PRETN E RESTN E PSM E PSMP E P E PP E PT E COP and E COPSv module indicates the following warning WARNING Protection against cardiac defibrillator discharge is due in part to the accessories for pulse oximetry SpO2 temperature T and invasive pressure P measurement On the E NM...

Страница 19: ...indicates that the alarms are silenced When displayed in the menu or digit fields indicates that the alarm source has been turned off or alarm does not meet the alarm specific activation criteria ESD warning symbol for electrostatic sensitive devices Pins of connectors identified with the ESD warning symbol should not be touched Connections should not be made to these connectors unless ESD precaut...

Страница 20: ...al input Power input Submenu Selecting an alternative marked with this symbol in a menu opens a new menu The monitor is connected to the Datex Ohmeda Network LAN Data Card green and or Menu Card white is inserted Ethernet connector A blinking heart next to the heart rate or pulse rate value indicates the beats detected A lung next to the respiration rate value indicates that respiration rate is ca...

Страница 21: ...Introduction 9 Document no M1137263 04 Gas outlet Do not reuse Use by Indicates the last use day Date of manufacturer Does not contain Latex Do not immerse the sensor in liquids ...

Страница 22: ...for Concentration Limits for Certain Hazardous Substances in Electronic Information Products The number in the symbols is the Environment friendly Use Period EFUP which indicates the period during which the toxic or hazardous substances or elements contained in electronic information products will not leak or mutate under normal conditions so that the use of such electronic information products wi...

Страница 23: ...ion complies with the international standard IEC 60601 1 1 and with the requirements of the local authorities Do not connect any external devices to the system other than those specified When detaching Patient Side modules be careful not to drop them Always support with one hand while pulling out with the other To avoid the risk of electric shock this equipment must only be connected to a supply m...

Страница 24: ...aintenance on the monitor while it is being used on a patient PACEMAKER PATIENTS The impedance respiration measurement may cause rate changes in Minute Ventilation Rate Responsive Pacemakers In this case set the pacemaker rate responsive mode off or turn the monitor impedance respiration measurement off Never install the monitor or the displays so that they are above the patient The monitor must n...

Страница 25: ...hazard damage the equipment or the system result in increased emissions or decreased immunity of the equipment or system or interfere with the measurement Protection against cardiac defibrillator discharge is due in part to the accessories for pulse oximetry SpO2 temperature T and invasive pressure P measurement Single use accessories are not designed to be reused Reuse may cause a risk of contami...

Страница 26: ...mpling system may cause damage to the PVX unit pressure transducers Fuse replacement Replace a fuse only with one of the same type and rating Cleaning and service Do not use hypochlorite acetone phenol or ammonia based cleaners abrasive material or harsh chemicals as they may damage the surfaces of the device Do not use abrasive cleaning compounds instruments brushes or rough surface materials Do ...

Страница 27: ...rovided with the wrist straps for details of proper use ESD precautionary procedure training It is recommended that all potential users receive an explanation of the ESD warning symbol and training in ESD precautionary procedures The minimum contents of an ESD precautionary procedure training should include an introduction to the physics of electrostatic charge the voltage levels that can occur in...

Страница 28: ...Datex Ohmeda S 5 Anesthesia and Critical Care Monitors 16 Document no M1137263 04 ...

Страница 29: ...e Central Unit F CU8 Figure 2 General bus structure of S 5 system The CPU bus is a communication channel used only for internal data transfer It is based on the ISA bus used in IBM PC computers Data is transferred on this 16 bit wide bus using the CPU clock frequency The module bus is used to connect the parameter modules to the Central Unit The bus is based on the industry standard RS 485 which u...

Страница 30: ...cessing When new parameter modules or PC boards are added to the system the processing power is increased As a result the system does not slow down when new features are added 2 4 Module communication The communication master controlling data transfers between the CPU and parameter modules is called UPI processor It sends data to each connected module 100 times a second Modules respond to each dat...

Страница 31: ...ual port RAM with data and the UPI processor distributes it to the parameter modules 2 5 Software loading The program memory on the CPU board is loaded with monitor software at the factory The software is used for running all the functions that are integrated into the PC board For service and upgrade procedures the B CPU6 board is equipped with Ethernet LAN port through which new software can be l...

Страница 32: ... divided into isolated floating and non isolated sections Typically the non isolated section consists of buffers to interface the parameter module to the module bus while the rest of the electronics is located in the isolated section The isolated section includes the microcontroller together with memory components the front end analog electronics amplifiers etc and sensor drivers Module Bus Patien...

Страница 33: ...ng location Consider the following aspects lighting space connections electromagnetic and radio frequency interference see Appendix B ElectroMagnetic Compatibility environment The F CU8 should be placed so that liquid is prevented from entering the casing WARNING The monitor or its components should not be used adjacent to or stacked with other equipment If adjacent or stacked use is necessary the...

Страница 34: ...B CPU6 is installed Use the Monitor Network cable to connect the monitor to the network as follows 1 Make sure that the power to the Central Unit is turned off 2 Connect the RJ 45 network connector to the connector X10 on the CPU board B CPU6 and the Identification Plug to the corresponding connector on the B UPI4NET 3 Connect the other RJ 45 connector to the corresponding connector on the wall bo...

Страница 35: ...ntical functions in the monitor system Take special care not to do this when using the Extension Frame F EXT4 Hemodynamic multiparameter modules E PRESTN E PRETN E RESTN E PSM E PSMP M PRESTN M PRETN M RESTN M ESTPR M ETPR M ESTR M NESTPR M NETPR M NESTR M NE12STPR M NE12TPR M NE12STR Dual Pressure Modules E PP M PP Pressure Modules E P M P Pressure Temp Module E PT M PT Cardiac Output Modules E C...

Страница 36: ...n be attached to an IV pole or to an anesthesia machine rail with a diameter of 10mm 25mm With Interface Module for PSM E INTPSM the Frame Mount or the Pole Mount can be connected to the Datex Ohmeda S 5 F CU8 frame equipped with software license 04 or later The E PSM P module can be attached to the Frame Mount or Pole Mount and used like a Datex Ohmeda S 5 modular module With Module Bus Adapter t...

Страница 37: ...crew of the clamp and tighten properly to a horizontal tube or rail with a diameter of 10 mm 25 mm 1 The correct drilling locations are marked through the marking holes on the enclosed plate 2 Set front and bottom of the plate as shown in the picture 3 The texts MARK BOTTOM and FRONT are carved on the plate to help you locate the correct locations 4 Drill the holes drill diameter 5mm 0 197 in 5 As...

Страница 38: ...splay Controller Board B DISPX secondary screen 2 Display Controller Board B DISPX 3rd screen Keyboard Interface Board B ARK 6 Service reset button 7 Equipotential connector 1 Attach the E PSM P module to the Pole Mount 2 Connect the cable of the Pole Mount for PSM to the F CU8 with the E INTPSM module M1054424 3 Check the module communication of the E PSM P module 1 Attach the E PSM P module to t...

Страница 39: ...en installed so that it can be removed without removing the other PC boards first WARNING The circuit boards contain sensitive integrated circuits that can be damaged by an electrostatic discharge Careful handling of the boards is therefore essential NOTE The B UPI4NET contains components on both sides of the PCB Therefore the installation of B UPI4NET should be handled with extra care Detach the ...

Страница 40: ...ntral unit is divided into three parts the 5 Module Frame F CU5 P the Central Processor Unit F CPU and the universal power unit N AC The 5 Module Frame has two options a frame F CU5P that allows connection to an E PSM P module and a frame F CU5 that cannot be connected to an E PSM P module F CU5 provides places for up to five single width modules or two double width modules plus one slot for one s...

Страница 41: ...e Frame F CPU Central Processor Unit and N AC Power Unit either in one package or separately You can for example attach the Central Processor Unit and Power Unit to the wall or table leg and have the Central Unit at hand There are different interconnecting cable options available F CPU Power Cable 0 4 m 16 inch and 2 7 m 9 ft F CPU Signal Cable 0 3 m 12 inch 3m 10 ft and 10m 33 ft F CU5 P F CPU N ...

Страница 42: ...he Datex Ohmeda Network make sure a Network Board B UPI4NET is installed Use the Monitor Network cable to connect the monitor to the network as follows 1 Make sure that the power to the Central Unit is turned off 2 Connect the RJ 45 network connector to the X10 connector on CPU board B CPU6 and the Identification Plug to the corresponding connector on the B UPI4NET 3 Connect the other RJ 45 connec...

Страница 43: ...dules 1 Ensure that the module is properly orientated i e module release latch facing downward 2 Align the module insertion guide slot with the frame insertion guide 3 Push the module into the frame until it clicks NOTE Do not use two or more parameter modules with identical functions in the monitor system Take special care not to do this when using two F CU5 P module frames Inserting PSM modules ...

Страница 44: ... PRESTN E PRETN E RESTN E PSM E PSMP M PRESTN M PRETN M RESTN M ESTPR M ETPR M ESTR M NESTPR M NETPR M NESTR M NE12STPR M NE12TPR M NE12STR Dual Pressure Modules E PP M PP Pressure Modules E P M P Pressure Temp Module E PT M PT Cardiac Output Modules E COP E COPS M COP and M COPSv NIBP Modules M NIBP and hemodynamic modules w N measurement Airway Modules E CO E COV E COVX E CAiOVX E CAiOV E CAiO E...

Страница 45: ... the frame carefully by pulling it from the X3 connector 25 pin female D connector 3 Remove the new PC board from the protective antistatic packaging Always hold the board by the edges and wear a wrist grounding strap 4 Insert the new PC board into the vacant slot and firmly press the board into position Secure the board two screws 5 Insert all other circuit boards cover plates and EMC plates 6 Re...

Страница 46: ...isplays listed above 3 5 3 3rd display The 3rd display can be installed together with the Display Controller Board B DISPX All S 5 main softwares support the use of the 3rd display NOTE Due to increased power consumption only two LCD displays should take power via the Central Unit simultaneously 3 5 4 Display installation NOTE Please pay attention to any additional instructions that may accompany ...

Страница 47: ...t or to a display arm with appropriate parts Connection to Central Unit 1 Make sure that power to the Central Unit is turned off 2 Remove the connector cover Press fixed lever downward on the back of the display Then slip the cover to the direction of the arrow and remove the cover 3 Connect the AC adapter s DC plug into the displays power input Connect the provided power cord in to the inlet of t...

Страница 48: ... the power off Perform the contrast and brightness adjustments if needed Please refer to the display s User s Manual 3 Color temperature adjustments Perform the color adjustments if needed Please refer to the display s User s Manual 4 Auto Setup Perform Auto Setup to automatically adjust the screen size position phase and clock if needed This adjustment is available only with analog input VGA cabl...

Страница 49: ...ions of the S 5 Anesthesia Monitor and Critical Care Monitor systems Atmospheric pressure lower limit Operating 697 mbar The difference in the operating atmosphere pressure lower limit is only in altitudes over 3000 m 9800 ft Above this altitude use another specified display Mounting When using the display with the desk stand option it must be placed on a flat horizontal surface The 19 medical gra...

Страница 50: ...of the 19 Medical Grade Display refer to the display manufacturer s user guide delivered with the display 3 6 Display controller boards CPU board B CPU6 has an integrated display controller which acts as a controller for the primary display In case only one display is used an optional display controller board is not needed Optional displays must be supported by different separate display controlle...

Страница 51: ...are In other modes the resolution is set accordingly 3 6 3 Resolution selection for primary display The resolution selection for primary display is set through the monitor software setting only 3 7 S 5 Remote Controller K REMCO Connection to Central Unit Connect the Remote Controller cable to the X11 connector on the CPU board B CPU6 Tighten the finger screws bdispx_DipSwitch vsd Bus Connector DVI...

Страница 52: ...8 2 Sample gas exhaust Preventing operation room pollution When N2O or volatile anesthetics are used pollution of the operation room by these gases should be prevented Connect the sample gas outlet of the monitor to the scavenging system or return it to the patient circuit NOTE The sample gas from the E MiniC can only be connected to the scavenging not returned to the patient circuit Connect the s...

Страница 53: ... is at least 2 3 times larger than the exhaust line Scavenging through the anesthesia gas scavenging system Anesthesia machines are equipped with an anesthesia gas scavenging system AGSS and in some machines the sample gas outlet can be connected directly to that For example connect the sample gas outlet to the S 5 Avance Figure 21 Connecting the gas module to the scavenging connector of S 5 Avanc...

Страница 54: ...E If E miniC is being used do not return the sample gas to the patient circuit Figure 22 Sample gas returned to patient circuit in ADU 3 9 Record Keeping Keyboard for Anesthesia K ARKB 3 9 1 Connection to Central Unit 1 Make sure that the power to the Central Unit is turned off 2 Connect the keyboard monitor cable to the X2 connector on the Keyboard Interface Board B ARK and to the connector on th...

Страница 55: ...Barcode Reader N SCAN can be connected to the Record Keeping Keyboard for Anesthesia K ARKB and to the LCD Display or D LCC12A using a Y cable as illustrated in Figure 23 below Figure 23 Barcode Reader connected to LCD Display The ARK Barcode Reader N SCAN can be connected to the Record Keeping Keyboard for Anesthesia K ARKB as illustrated in Figure 24 ...

Страница 56: ...SCAN do not stare into beam The N SCAN is a Class 2 laser product 3 11 S 5 Extension Frame F EXT4 with F CU8 only Figure 25 S 5 Extension Frame F EXT4 The Extension Frame F EXT4 enables the monitor system to be expanded using additional parameter modules The Extension Frame is connected to the Central Unit via the Extension Module E EXT The Extension Module plugs into the Central Unit F CU8 in the...

Страница 57: ...efer to Part II of this Technical Reference Manual Trouble Treatment Nothing functions Unplug the Command Bar or Remote Controller cable Check that the cable is intact then reconnect the cable Unplug the power cord Check that the cord is intact then reconnect the cord Check that the fuses are intact The display does not function Unplug the display power cord and the display cable Check that the co...

Страница 58: ...Datex Ohmeda S 5 Anesthesia and Critical Care Monitors 46 Document no M1137263 04 ...

Страница 59: ...th Ventilators anesthesia machines Heart lung machines Monitors Blood gas analyzers 4 1 Interfacing external monitors via Interface Module E INT It is possible to interface Datex Ohmeda monitors Critikon Dinamap 1846SX Abbott Oximetrix 3 Baxter Explorer and Vigilance Nellcor N 100 N 200 and N 1000 to the S 5 Anesthesia Monitor or to the S 5 Critical Care Monitor via Interface Module E INT The para...

Страница 60: ...apnomac Capnomac II E INT CO2 Pleth Et Fi Airway gases Respiration rate None Capnomac Ultima E INT CO2 Et Fi Airway gases Respiration rate Spirometry SpO2 Pulse rate Pleth amplitude CO2 O2 Anesthesia agent Respiration rate Apnea Occlusion SpO2 Pulse rate Normocap 200 Normocap 200 OXY E INT CO2 Et Fi Airway gases Respiration rate None Oscar Oscar II Oscar OXY E INT CO2 Pleth Et Fi Airway gases Resp...

Страница 61: ...communication port IFM out 4 1 4 Connection to Nellcor N 100 and N 1000 Use the Monitor Nellcor Cable 1 Make sure that the power to both monitors is turned off 2 Connect the 9 pin D connector to the Interface Module E INT Tighten the finger screws NOTE The X3 and X9 connectors cannot be used when interfacing the S 5 Anesthesia Monitor or the S 5 Critical Care Monitor with Nellcor N 100 monitors 3 ...

Страница 62: ...Datex Ohmeda S 5 Anesthesia and Critical Care Monitors 50 Document no M1137263 04 ...

Страница 63: ... Solution DIS is only compatible with the S 5 Anesthesia and S 5 Critical Care Monitor when the monitor has B UPI4NET and S 5 Monitor software rev 01 or later installed Table 6 DIS modules and interfaced devices Device Ventilators N DISEV4 Evita 41 1 Trademark of Dräger Medical AG Co N DISPRIM Primus1 NOTE Not available in the US N DIS7200 7200 Series Ventilator System2 2 Trademark of Nellcor Puri...

Страница 64: ...device and the bus cable to the S 5 Anesthesia Critical Care Monitor s UPI4 or UPI4NET board or to the monitor s DIS connector or to another interfacing module N DISRGM RGM Monitor5 N DISTONO Tonocap5 N DISWHITE Capnomac Capnomac II5 Multicap Normocap CD2 O25 Capnomac Ultima5 Normocap CD 2005 Oscar Oxy Cardiocap 1GS Cardiocap 2GS5 Satlite Satlite Trans Satlite Plus5 1 Trademark of Hospira Inc prev...

Страница 65: ...devices with tested software versions only Always refer to the Installation guide accompanying the DIS module and verify the compatibility before use 4 2 3 Mounting The DIS module can be mounted on the side panel of the external device Also IV pole placement is possible NOTE As the Device Interfacing Solution works only with the device specified in the label of the interfacing module it is recomme...

Страница 66: ...ter cable one module WARNING Make sure that the interfacing module is always used in vertical position to prevent water from entering the module WARNING Make sure that you are connecting the interfacing module to the device specified in the label Always verify the compatibility of the software versions before use 4 2 4 Selecting the external device 1 Turn off the monitor 2 Turn off the external de...

Страница 67: ...erfacing menu Select the desired parameter for example Gases Select the desired source by name for example Aestiva NOTE The name of the device is visible on the list only if the device is correctly connected Detailed information about interfacing module related mountings connections and settings is included in the installation guides that are delivered with the interfacing modules GREEN YELLOW IND...

Страница 68: ...y once a minute or during the system check procedure and appear in the trend pages or in the anesthesia record The transfer of events requires record keeping software 4 3 1 Interconnection Use the ADU AS 3 Monitor Cable 4 3 2 Setting interfacing parameters on the S 5 Anesthesia Delivery Unit 1 Press the Setup key 2 Select Install password 10 3 Select Interfacing and choose S 5 AM 4 Press the Norma...

Страница 69: ...the summarized parameters waveforms or numerics may not be available in all device versions WARNING Always make sure that the combination complies with the international safety standard IEC 60601 1 1 for medical electrical systems and with the requirements of local authorities Events transferred once a minute Ventilator settings Ventilation mode Tidal Volume Minute Volume Resp Rate I E Times inp I...

Страница 70: ... cases please refer to the documentation provided by Dräger 4 4 3 Setting interfacing parameters on the S 5 Anesthesia Monitor or S 5 Critical Care Monitor 1 Press the Monitor Setup key 2 Select Install Service password 16 4 34 3 Select Service password 26 23 8 Parameters More 4 Select Interface and combine a required parameter with the external monitor Two letters al denote alarm integration The ...

Страница 71: ...mum Some of these parameters may not be available in all device versions NOTE The transference of waveforms requires the MEDIBUS real time extension and in Cato monitors waveforms are available only on port 1 Selection Waveforms Numerics States Gases SSS CO2 kPa mmHg CO2 Fi Et kPa O2 Fi Et N2O Fi Et RR CO2 1 min AA Fi Et Tidal Volume insp 1 Minute Volume exp 1 Ppeak mbar Pplat mbar not in Narkomed...

Страница 72: ...printer leakage current to exceed the limit specified for medical equipment A printer must be supplied from an additional transformer providing at least basic isolation isolating or separating transformer 4 5 2 Setting interfacing parameters on the printer NOTE For more information about printer settings please refer to the documentation provided with the printer 4 5 3 Setting interfacing paramete...

Страница 73: ...generated only after returning to the low level The high level ranges from 2 8 to 5 V while the low level ranges from 0 to 0 8 V The delay from the R wave peak to the start of the signal is 35 ms maximum Nurse Call X4 pin 8 The Nurse Call signal is generated by red and yellow alarms When activated the signal is set to the high state and remains at the high state until the alarm situation is over o...

Страница 74: ...thorized GE Healthcare distributor Pressure out B UPI4NET 02 X7 pin 7 Invasive pressure signal From pressure labelled Art Delay max 35ms Gain signal out Pressure in 10 mV mmHg 20 Output range 0 4 V to 3 2 V Noise 50 mVpp max The signal requires input impedance of 100 kΩ 4 7 4 S 5 Pressure Temp Module E PT output signals The signal output connector on the Pressure Temp Module E PT can be used to in...

Страница 75: ...ice password 26 23 8 In case you evaluate the measurement accuracy with a patient simulator add simulator s accuracy specification to the one of the monitor An electrical safety check and a leakage current test are recommended to be performed prior to the monitor installation 5 1 Recommended tools NOTE Use only properly maintained calibrated and traceable measurement equipment for the specified ca...

Страница 76: ...16467 003 E PRESTN w E12 Multi link 12 lead ECG trunk cable 416035 001 E PSM P E PRESTN SpO2 finger probe OXY F UN SpO2 Interconnect Cable OXY ES3 E NSATX Nellcor OxiMax SpO2 interconnect cable Nellcor SpO2 sensor E MASIMO Masimo SpO2 probe Masimo SpO2 sensor Masimo SpO2 interconnect cable E OSAT OxyTip Integrated Finger Sensor OXY F4 N Hemodynamic modules w T Temperature test set 884515 Hemodynam...

Страница 77: ...monitor If the Memory Module E MEM is connected remove any memory cards 1 Check all units visually Check that all parts are intact and that the cables and screws are connected and tightened properly Especially check the following parts Video displays the display power cord is locked to the display F CU5 P F CPU and N AC all the screws and the equipotential tap on the N AC are tightened properly Mo...

Страница 78: ...monitor starts up properly i e a normal start up sound is heard from the loudspeaker the alarm LEDs turn on and off and the monitoring screen appears No error messages should appear on the screen 3 Configure the screen for the parameters that are connected 4 Enter the Service Menu When applicable check from the corresponding Parameters submenu that the Timeouts Bad checksums and Bad c s by mod val...

Страница 79: ...m the screen Tests with the Command Bar Press the Help key Turn the ComWheel in both directions and check that the cursor in the menu moves correspondingly Select Normal Screen and check that the menu disappears from the screen Check the rest of the menu keys by pressing them one by one Tests with the ARK Keyboard Enter the Keyboard service menu Check functioning of the ComWheel Press all keys exc...

Страница 80: ...disappears from the screen 1 Check that the fan is running 2 If the module contains membrane keys on the front panel check the function of each of the membrane keys Compact Airway Modules with the Patient Spirometry option 3 Connect a clean spirometry tube and D lite to the module Connect the sampling line Breathe through the wider side of the D lite Check that the flow waveform moves downwards wh...

Страница 81: ...r off Check that the Asystole message appears on the screen Temperature measurement 2 Check the temperature channels with a patient simulator Check that temperature measurement information is shown on the monitor screen as configured on the simulator Invasive blood pressure measurement 3 Check the function of the front panel membrane keys 4 Check the InvBP channels with a patient simulator Zero th...

Страница 82: ...ator Check that the temperature measurement information is shown on the monitor screen as configured on the simulator 5 3 10 Dual pressure Module E PP 1 Check the function of the front panel Zero P5 and Zero P6 keys 2 Check the InvBP channels with a patient simulator Zero the InvBP channels Then check that the values and waveforms correspond to the simulator settings 5 3 11 Cardiac Output Modules ...

Страница 83: ...S module to the monitor frame Check that Cable off is displayed in the BIS waveform field 2 Connect the DSC to the module Check that the No sensor message appears in the waveform field 3 Check the function of the front panel membrane keys 4 Open the BIS Setup menu BIS BIS Setup and check that Test DSC shows PASS NOTE If the sensor is not connected the Check Sensor key is inoperative 5 3 15 Entropy...

Страница 84: ...ppear in the message field on the screen 5 3 19 Interface Module E INT 1 Make sure that the monitor receives all necessary parameter data from the connected devices Check the screen configuration and the related interfacing settings if necessary Monitor Setup Interfacing 5 3 20 Interface module for PSM E INTPSM 1 Make sure that the monitor receives all necessary parameter data from the connected E...

Страница 85: ...Functional check 73 Document no M1137263 04 5 3 22 General Switch the monitor to standby Perform final cleaning Fill in all necessary documents ...

Страница 86: ...Datex Ohmeda S 5 Anesthesia and Critical Care Monitors 74 Document no M1137263 04 ...

Страница 87: ... the screen Plug in a module On Stby sw itch ON Display connected and pow ered Keyboard connected Monitor starts functioning Monitor starts functioning The pow er supply unit w as shut dow n by instant over voltage in the mains The problem w as caused by loosen pow er cord Yes Module data appears on the screen Another moudle w orks in same place Monitor starts functioning No Yes Faulty module See ...

Страница 88: ...Datex Ohmeda S 5 Anesthesia and Critical Care Monitors 76 Document no M1137263 04 6 1 Software troubleshooting For information on software troubleshooting see Software Download Tool User Instructions ...

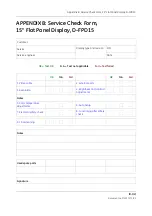
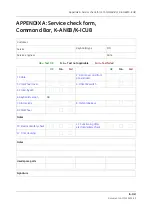
Страница 89: ...Test failed Customer Service Service engineer Date Measuring equipment test gases used Equipment tool gas Manufacturer Model Type Part Number Serial Number ID Calibration Date Monitor Installation F CU5 P B N F CPU B N AC B F CU8 B L K D D Visual Inspection OK N A Fail 1 Check all units visually Functional Inspection OK N A Fail 5 3 1 General 5 3 2 Display s S N 5 3 3 Keyboard s S N ...

Страница 90: ...ometry option For all Compact Airway Modules 5 3 7 Single width Airway Module E miniC S N Notes 5 3 8 Multiparameter Hemodynamic Modules S N ECG and RESP measurements Temperature measurement Invasive blood pressure measurement SpO2 measurement Non invasive blood pressure measurement Notes 5 3 9 Pressure Pressure Temp Modules E P E PT S N Invasive blood pressure measurement Temperature measurement ...

Страница 91: ... Saturation module E MASIMO S N 5 3 13 Nellcor Compatible Saturation module E NSATX S N 5 3 14 BIS Module E BIS S N 5 3 15 Entropy Module E ENTROPY S N 5 3 16 Memory Module E MEM S N 5 3 17 Recorder module S N 5 3 18 Network connection S N 5 3 19 Interface Module E INT S N 5 3 20 Interface module for PSM E INTPSM S N 5 3 21 Device Interfacing Solution N DISxxx S N S N S N S N S N S N S N S N Funct...

Страница 92: ...atex Ohmeda S 5 Anesthesia and Critical Care Monitors A4 4 Document no M1137263 04 5 3 22 General Perform final cleaning Fill in all necessary documents Notes Signature Functional Inspection OK N A Fail ...

Страница 93: ...environment Emissions test Compliance Electromagnetic environment guidance RF emissions CISPR 11 Group 1 The S 5 AM or CCM uses RF energy only for its internal function Therefore its RF emissions are very low and are not likely to cause any interference in the nearby electronic equipment RF emissions CISPR 11 Class A The S 5 AM or CCM is suitable for use in all establishments other than domestic a...

Страница 94: ... lines 1 kV for input output lines Mains power quality should be that of a typical commercial or hospital environment Surge IEC 61000 4 5 1 kV differential mode 2 kV common mode 1 kV differential mode 2 kV common mode Mains power quality should be that of a typical commercial or hospital environment Voltage dips short interruptions and voltage variations on power supply lines IEC 61000 4 11 5 UT 9...

Страница 95: ...on distance calculated from the equation applicable to the frequency of the transmitter Recommended separation distance Conducted RF IEC 61000 4 6 3 Vrms 150 kHz to 80 MHz 3 Vrms 3 Vrms 150 kHz to 80 MHz 1 Vrms 1 Radiated RF IEC 61000 4 3 3 V m 80 MHz to 2 5 GHz 3 V m 3 V m 80 MHz to 2 5 GHz 1 V m 2 where P is the maximum output power rating of the transmitter in watts W according to the transmitt...

Страница 96: ...lines may not apply in all situations Electromagnetic propagation is affected by absorption and reflection from structures objects and people a Field strengths from fixed transmitters such as base stations for radio cellular cordless telephones and land mobile radios amateur radio AM and FM radio broadcast and TV broadcast cannot be predicated theoretically with accuracy To assess the electromagne...

Страница 97: ...CCM can help prevent electromagnetic interference by maintaining a minimum distance between portable and mobile RF communications equipment transmitters and the S 5 AM or CCM as recommended below according to the maximum output power of the communications equipment Rated maximum output power of transmitter W Separation distance according to frequency of transmitter m 150 kHz to 80 MHz 1 80 MHz to ...

Страница 98: ...Datex Ohmeda S 5 Anesthesia and Critical Care Monitors B6 6 Document no M1137263 04 For your notes ...

Страница 99: ...ed medical practitioner Outside the USA check local laws for any restriction that may apply All specifications subject to change without notice Document number M1125633 06 June 18 2009 GE Healthcare Finland Oy Helsinki Finland P O Box 900 FI 00031 GE FINLAND Tel 358 10 39411 Fax 358 9 1463310 www gehealthcare com Copyright 2009 General Electric Company All rights reserved Datex Ohmeda Inc P O Box ...

Страница 100: ......

Страница 101: ...y 11 2 2 3 Keyboard s 11 2 2 4 5 Module Frame F CU5 P 8 Module Frame F CU8 11 2 2 5 Extension Frame F EXT4 12 2 2 6 Compact Airway Module E CXXXXX 12 2 2 7 Single width Airway Module E miniC 13 2 2 8 Multiparameter Hemodynamic Modules 14 2 2 9 EEG Module E EEG and EEG Headbox N EEG 16 2 2 10BIS Module E BIS 16 2 2 11Entropy Module E ENTROPY 17 2 2 12Pressure Pressure Temp Modules E P E PT 18 2 2 1...

Страница 102: ...Datex Ohmeda S 5 Anesthesia and Critical Care Monitors ii Document no M1125633 06 ...

Страница 103: ...ameters Gas Unit As you enter the service menus you need the following passwords Monitor Setup Install Service password 16 4 34 Service password 26 23 8 In case you evaluate the measurement accuracy with a patient simulator add the simulator s accuracy specification to the one of the monitor WARNING Handle the water trap and its contents as you would any body fluid Infectious hazard may be present...

Страница 104: ...with V D lite 733950 All Airway modules Sampling line 6 m 19 7 ft 73306 Hemodynamic modules Hemodynamic modules with N E PSM P NIBP cuff and adult NIBP cuff hose with cuff ID 2753E cuff 2021285 001 hose Pressure manometer Hemodynamic modules with P InvBP transducer Multi Link ECG accessories IEC E PSM P E PRESTN Multi link 3 leadwire set 412682 003 Multi link 5 leadwire set 412681 003 Multi link 5...

Страница 105: ...able 1 Patient simulators compatibility with hemodynamic modules E COP E COPSv C O Catheter cable 16590 E COPSv SvO2 simulator 890121 EEG Module E EEG Earphones EEG simulator 90502 BIS Module E BIS BIS simulator or BIS Sensor simulator 900509 900508 E ENTROPY Simulator for E ENTROPY N ES Entropy sensor cable 8002964 E NMT NMT simulator 871251 NMT ElectroSensor 888416 NMT sensor cable 888415 E MEM ...

Страница 106: ...le M1010832 Medsim Inv BP adapter cable M1010858 Lionheart MPS450 Temperature adapter cable M1010846 Lionheart MPS450 Inv BP adapter cable M1010862 For product s Part Order No 5 Module Frame F CU5 P Fan filter M1016473 Central Processor Unit F CPU Fan filter M1014462 8 Module Frame F CU8 Fan filter 871558 Extension Frame F EXT4 Fan filter 874594 CPU Board B CPU6 every 8 years Battery for SRAM Time...

Страница 107: ...Part Order No Special tube 300 mm Nafion 733382 HEL Special tube 130 mm Nafion M1080137 Ref gas sticker 893110 HEL Ref gas sticker sheet M1130738 Filter 886136 HEL Filter assembly M1028983 Fan filter M1028987 D fend O ring 2 pcs 65312 HEL Ref gas O ring 65340 PM sticker 893108 Part Order No For product s Special tube Nafion 2 pcs 733382 HEL All Airway modules Mini D fend O ring 2 pcs 656565 E mini...

Страница 108: ...Datex Ohmeda S 5 Anesthesia and Critical Care Monitors 6 Document no M1125633 06 ...

Страница 109: ...operly F CU8 the equipotential tap and all the screws are tightened properly Check that modules go in smoothly and lock up properly in all module slots 2 Replace the batteries if necessary The manufacturer recommendations are Replace the lead acid battery in the module frames F CU5 P F CU8 power supply unit every 4 years Replace the SRAM Timekeeper battery on the CPU board every 8 years NOTE The F...

Страница 110: ... Replace the absorber if necessary 4 Connect the Compact Airway Module to a module slot in the module frame with a long gas interface cable the grounding plates of the cable should be removed for the procedure 2 1 4 Single width Airway Module E miniC 1 Detach the module box 2 Check that all cables and tubes are connected properly and that there are no loose objects inside the module 3 Install the ...

Страница 111: ...y i e the alarm LEDs turn on shortly normal start up sound is heard from the loudspeaker and the monitoring screen appears No error messages should appear on the screen 3 Configure the screen for the parameters that are connected Check that all the connected modules are recognized i e the required parameter information is shown on the screen NOTE InvBP waveforms are not shown without a parameter s...

Страница 112: ... Spirometry Loops Scaling Indep Paw Scale 20 Flow Scale 15 or Ventil Spirometry Setup Scaling Indep Paw Scale 20 Flow Scale 15 Others C O C O Setup Scale 1 0 C Injectate Volume 10 ml Measurement Mode SET Others SvO2 Update Hb 115 g l or Wedge C O SVO2 C O View C O Setup Scale 1 0 C Injectate Volume 10 ml Measurement Mode SET Wedge C O SVO2 SvO2 Update HGB 115 g l Others NMT Stimulus Mode TOF Set C...

Страница 113: ...function of the ComWheel Press all keys except Modify and Print Check that each key produces a sound from the loudspeaker or the Message count value in the service menu increases Press the Modify and Print keys and check that the corresponding menus appear on the monitor screen Tests with the Remote Controller Enter the Keyboard service menu Check the function of the Comwheel Press all keys Check ...

Страница 114: ...corresponds with the Compact Airway Module type being used 4 Check that the Time outs Bad checksums and Bad c s by mod values are not increasing faster than by 5 per second 5 Enter the Gases service menu Check that the Ambient value displayed corresponds with the current ambient pressure 20 mmHg 6 Check that the flow measurement offset i e the sample Zero value displayed is within 10 ml min 7 Perf...

Страница 115: ...and check that the message Sample line blocked appears on the monitor screen within 30 seconds 15 Detach the D fend and check that the message Check D fend appears on the monitor screen within 60 seconds 2 2 7 Single width Airway Module E miniC 1 Wait until the message Calibrating gas sensor disappears from the screen then enter the Gas Unit General service menu 2 Check that the Time outs Bad chec...

Страница 116: ...g electrode in the service menu shows OFF within 10 seconds from the disconnection then reconnect the lead Check the rest of the leads using the same method NOTE With NESTPR ESTPR type modules when the ground lead black is disconnected all the electrodes should show OFF With E PRESTN and E PSM when any of the limb leads is disconnected the measurement will automatically change to 3 electrode ECG m...

Страница 117: ... message Probe off is shown when the probe is not connected to a finger 13 Attach the SpO2 probe to your finger Check that a reading of 95 100 and a pleth waveform appear on the screen Non invasive blood pressure measurement 14 Enter the NIBP service menu Check that the Time outs Bad checksums and Bad c s by mod values are not increasing faster than by 5 per second Check that the NIBP board memori...

Страница 118: ... pos and imped neg value on the simulator Go to EEG EP service menu and select Check Electr Check in the headbox view that the impedances in all four channels are 10 kΩ 1 kΩ 4 Select 2 kΩ as imped pos and imped neg value on the simulator Select 10 Hz 200 µV sinewave on the simulator and check that all the four waveforms have the same form Check that the size of the waveforms is 200 µVpp 5 µV Check...

Страница 119: ...0508 is used the values can be out of the given range 6 Enter the Module menu Check that no BIS engine errors appear Perform sensor check by pressing Check Sensor and see that the check is passed During the sensor check the Impedance meas should show CYCLIC During operation the Impedance meas should show COMBINED or OFF depending on the user setting in BIS Setup menu 2 2 11 Entropy Module E ENTROP...

Страница 120: ... temperature test plugs NOTE Make sure that the protection for temperature calibration is set on 2 2 13 Dual pressure Module E PP 1 Enter the PP module service menu Check that the Time outs Bad checksums and Bad c s by mod values are not increasing faster than by 5 per second Check that the Dual Pressure module E PP memories have passed the internal memory test i e RAM ROM and EEPROM all show OK 2...

Страница 121: ... within a half a minute 6 Perform an In Vitro calibration with the SvO2 simulator Check that the calibration date for In Vitro calibration was updated correctly and the SvO2 reading on the screen is 81 2 Cardiac Output measurement 7 Enter the COP module service menu Check the front panel Start C O membrane key 8 Enter the C O menu Others C O Connect a catheter connecting cable to the module connec...

Страница 122: ...ains under 100 2 2 16 Nellcor Compatible Saturation Module E NSATX 1 Enter the N O SAT service menu Check that the Time outs Bad checksums and Bad c s by mod values are not increasing faster than by 5 per second Check that the NSAT module s ROM memory has passed the internal memory test i e ROM shows OK Check that all three error indicators Preamp Error QUART Error and I O Error state NO 2 Check t...

Страница 123: ...en the paper compartment cover Check that the message Recorder Cover open appears on the screen then close the cover 2 Select Record Print and Record Waveforms Select Record Wave and check that the module starts recording the selected waveforms Select Stop Wave to stop recording 3 Check that the quality of the recordings is acceptable 2 2 20 Network connection 1 Check that the Mon Net cable connec...

Страница 124: ... DIS modules 2 2 23 General 1 Storing trend data Check that the monitor is capable of storing the trend information and temporary settings in a short max 15 minutes standby situation with no power cord 2 Service reset Check the Service Reset switch Switch the monitor to standby and press the Service Reset switch for at least five seconds Switch the monitor back on and check that the monitor perfor...

Страница 125: ...Planned maintenance check list 23 Document no M1125633 06 6 Final cleaning Switch the monitor to standby and perform final cleaning Fill in all necessary documents ...

Страница 126: ...Datex Ohmeda S 5 Anesthesia and Critical Care Monitors 24 Document no M1125633 06 ...

Страница 127: ...st failed Customer Service Service engineer Date Measuring equipment test gases used Equipment tool gas Manufacturer Model Type Part Number Serial Number ID Calibration Date Monitor Installation F CU F K D S L E B N E B Visual Inspection OK N A Fail 2 1 1 General 2 1 2 Extension Frame F EXT4 S N 2 1 3 Compact Airway Module E CXX S N 2 1 4 Single width Airway Module E miniC S N 2 1 5 Recorder modul...

Страница 128: ...U5 P 8 Module Frame F CU8 S N 2 2 5 Extension Frame F EXT4 Notes 2 2 6 Compact Airway Module E CXXXXX Anesthesia Agent Patient Spirometry General Notes 2 2 7 Single width Airway Module E miniC Notes 2 2 8 Multiparameter Hemodynamic Modules ECG and RESP measurements Temperature measurement Invasive blood pressure measurement SpO2 measurement Non invasive blood pressure measurement Notes ...

Страница 129: ...surement Modules with temperature measurement Notes 2 2 13 Dual pressure Module E PP Notes 2 2 14 Cardiac Output Modules E COP E COPSv Invasive blood pressure measurement SvO2 measurement Cardiac Output measurement Notes 2 2 15 NeuroMuscular Module E NMT S N 2 2 16 Nellcor Compatible Saturation Module E NSATX S N 2 2 17 Masimo Compatible Saturation Module E MASIMO S N 2 2 18 Memory Module E MEM S ...

Страница 130: ...INT S N 2 2 22 Device Interfacing Solution N DISxxx S N S N S N S N Notes 2 2 23 General 1 Storing trend data 2 Service reset 3 Watchdog for Display Controller on B CPU6 Board 4 Service Log reset 5 Electrical safety check 6 Final cleaning Notes Used spare parts Notes Signature Functional Inspection OK N A Fail ...

Страница 131: ...a licensed medical practitioner Outside the USA check local laws for any restriction that may apply All specifications subject to change without notice Document number M1137266 02 June 18 2009 GE Healthcare Finland Oy Helsinki Finland P O Box 900 FI 00031 GE FINLAND Tel 358 10 39411 Fax 358 9 1463310 www gehealthcare com Copyright 2009 General Electric Company All rights reserved Datex Ohmeda Inc ...

Страница 132: ......

Страница 133: ...on 9 1 5 Power Supply 10 1 5 1 Battery 10 1 6 CPU board 11 2 Display 12 3 Keyboard 13 3 1 Keyboard Log 14 3 2 Keyboard Type 14 4 Parameters 15 4 1 Gas Unit 15 4 1 1 General 16 4 1 2 Gases 17 4 1 3 Spirometry 18 4 2 ECG Module 20 4 2 1 ECG Setup 21 4 3 ESTP Module 22 4 3 1 Calibrations 24 4 4 P PT 25 4 4 1 P PT Calibrations 26 4 5 PP 27 4 5 1 PP Calibrations 28 4 6 COP 29 4 6 1 COP Calibrations 30 ...

Страница 134: ... 50 4 12 4 CO2 Sensor 52 4 12 5 Pneumatics 53 4 12 6 AD 54 4 13 EEG EP 55 4 13 1 EEG EP Setup 57 4 14 BIS 58 4 14 1 BIS Setup 64 4 15 Entropy 65 4 16 DIS Interfacing 67 4 16 1 Interfacing 67 4 16 2 Status Page 68 4 16 3 DIS Interfacing service menu 68 4 16 4 DIS Module specific page 69 4 16 5 DELP service menu 70 5 Set Test 71 5 1 Country Settings 72 6 Service Log 73 6 1 Maintenance 74 6 1 1 Plann...

Страница 135: ... 45 Table 5 Module general error status 45 Table 6 Module pneumatics error status 46 Table 7 Module hardware error status 47 Table 8 Description of system test 51 Table 9 Module general status 59 Table 10 BIS Engine status 59 Table 11 BIS Engine and DSC error messages 60 Table 12 DSC status 63 Table 13 Sensor status 63 Table 14 BE power up status 63 Table 15 HEX to binary conversion A 1 ...

Страница 136: ...Datex Ohmeda S 5 Anesthesia and Critical Care Monitors iv Document no M1137266 02 ...

Страница 137: ...valve Service Log Record Data Maintenance Planned Maint Repair Upgrade Country Settings Network MemCards Display NIBP demo Pulse valve Network Config Ethernet Pneumatics servmenu_struct07_AM vsd Buttons Leds Watchdog General ECG Setup Gases Memory Keyboard Log P PT COP NMT NIBP N OSAT More Spirometry Calibrations Calibrations Calibrations Calibrations NMT setup EEG EP TONO BIS ENTROPY DIS Interfac...

Страница 138: ...ect Install Service password 16 4 34 3 Select Service password 26 23 8 The field on the right in the Service Menu shows software versions and their release dates of different parts of the monitor control numbers of measuring boards and serial numbers of modules if available Scroll Vers enables to scroll the field on the right side More indicates that there are more lines to be viewed Record Vers B...

Страница 139: ...Service Menu 3 Document no M1137266 02 1 Frame The frame menu includes service menus common for the frame ...

Страница 140: ...rsion Program version of the programmable logic device SW date Manufacturing date of the display controller software SW version Version of the display controller software NOTE The display controller software is a part of the monitor software and it is downloaded to the display controller board memory from the CPU board when necessary Resolution This shows the output resolution that is selected thr...

Страница 141: ...the test is Fail the battery for the SRAM timekeeper should be replaced 1 3 1 Network Status The Network Status view shows the general status of the network Location ID Monitor s location given at the setup DRI level Shows the selected level of network communication The network communication is set according to the network software used e g S CNET01 Interfaces The field indicates if there is a con...

Страница 142: ...ssages File Op File operation messages saving and loading of cases Service Maintenance and service Modes User mode data Indics Remote indications sent to monitor RemoteEv Remote events Data server Packets of the data server Arrhythmia Workstation Packets total Total number of packets sent received Bytes total Total number of bytes sent received T o Number or resendings InE Received faulty packets ...

Страница 143: ...physical layer problems An erroneous packet often has both frame and CRC error Transmission errors Transm Number or errors in packet Transmission Internal errors Intern Internal error of the network board Must always be 0 Missed packets Missed Number of received packets lost due to overload Must always be 0 FIFO errors FIFO Internal error of the network board Must always be 0 Overrun errors Overru...

Страница 144: ...pectively Card type indicates whether the card is MENU or DATA card If a duplicated card is inserted type DUPL File system indicates the type of the memory card in use The only supported file system is ATA If a memory card using another file system is used the message UNKNOWN is shown If the card is poorly attached the message LOOSE is shown Card size indicates the total amount of disk space in th...

Страница 145: ...ice indicates the Memory Module operations Modes indicates the User Mode operations Module status indicates the number of sent received data packets that relate to the memory module status Packets total indicates the total amount of data packets that have been sent received since the last monitor start Bytes total indicates the total amount of data bytes that have been sent received since the last...

Страница 146: ...of the last one second the Min column shows the minimum mean value and the Max column the maximum mean value of the voltages and temperature measured during the current power ON The voltages should meet the following ranges 15V 14 20 15 60 15V 14 00 15 50 V 15VD 14 10 15 60 V 5V 4 70 5 40 V Temp C value corresponds with the Central Unit internal temperature measured at the location of the UPI4 NET...

Страница 147: ...U board The menu shows the temperature measured by the Central prosessing board Temp C value corresponds with the Central Unit internal temperature measured at the location of the CPU6 board A D values shows the A D value of temperature measurement ...

Страница 148: ...eda S 5 Anesthesia and Critical Care Monitors 12 Document no M1137266 02 2 Display Geometry views the geometry of the display Colors views the color of the screen Readability views the readability of the screen ...

Страница 149: ...heel When the text is highlighted pressing the ComWheel creates a sound from the loudspeaker and the corresponding number on the service data field increases Service Data Message count counts the number of messages that are sent out to the main CPU board Leds upper and lower indicate the states of the alarm LEDs on the command board Direct action keys texts are indications to the command board mem...

Страница 150: ... length of the log is 1150 events The log is FIFO type Scroll Stat enables to scroll the keyboard events Store Mask A selection for the anaesthesia keyboard s language The selected language determines the outcome of the lower keypad Store Type is for selecting the keyboard COM Command Board ARK Anaesthesia Keyboard AIC Information Center Keyboard NOTE The settings should be checked if the controll...

Страница 151: ...ment no M1137266 02 4 Parameters NOTE Parameter values in Service Data fields are only for reference in this section 4 1 Gas Unit Service menu for airway gas modules communication and airway gas and spirometry measurements ...

Страница 152: ...own Bad c s by mod is a cumulative number that indicates how many communication errors the module has detected The monitor starts counting these items at power up and resets to zero at power off The values may also be reset when a module is attached to the monitor frame and be set to 32769 or continuous counting may be started when the module is removed from the monitor frame The nonzero values do...

Страница 153: ...the value is typically 75 Sample Flow is calculated from differential pressure and adjusted by the module Zero value as measured during initialization when the pump is off Gain sample flow measurement can be calibrated by adjusting the gain Ambient Ambient pressure is measured continuously in E miniC In M miniC it is measured at least once an hour during the first running hour during each zeroing ...

Страница 154: ... separate box for adjusting the value appears During adjustment calibration values are sent to the module When the ComWheel is pressed the values are permanently stored in EEPROM of the module and the box disappears Zero PVX Start zeroing the pressure sensors Effects Aw Pres Zero and Flow Zero value Exp Flow Gain Insp Flow Gain Adjust the Flow sensor gains Valves Switch between MEASUREMENT and ZER...

Страница 155: ...e With calibration pump or spirometry tester the results are always in ATP If breathing is detected EtCO2 1 0 the results are according to the Flow Vol Setup selection Flow shows the flow measurement value TVol Exp TVol Insp MVol Exp and MVol Insp are shown to ease calibration The numbers are the same as on the main display The former pump calibration procedure has been dropped out We claim that c...

Страница 156: ...r takes place Waveform VALUE will be updated in one second interval Timeouts is a cumulative number that indicates how many times the module has not responded to the monitor s inquiry Bad checksums is a cumulative number that indicates how many times communication from the module to the monitor has broken down Bad c s by mod is a cumulative number that indicates how many communication errors the m...

Страница 157: ... catches the slow changes in ST segment The ST filter is more susceptible to baseline wander than the monitor filter 5 lead cable selects five or three electrodes With the 12 lead ECG the selection is automatic Pacemaker selects how to display the pacing pulse of cardiac pacemaker The selections are Show Hide ON R and Sensit Hide the pacing pulse is filtered away from ECG data Show the pacer pulse...

Страница 158: ...tween 17000 and 25000 and for T1 and T2 between 13000 and 14300 Zero indicates the offset compensation value of each parameter in the A D converter Typically the values for P1 and P2 are within 1000 and for T1 and T2 between 150 and 300 Calibrate if zero and or gain value is outside the ranges Cable shows ON when a corresponding cable is connected to the front panel and Probe shows ON when a corre...

Страница 159: ...on shows the chosen module configuration TP ST or STP Timeouts is a cumulative number that indicates how many times the module has not responded to the the monitor s inquiry Bad checksums is a cumulative number that indicates how many times communication from the module to the monitor has broken down Bad c s by mod is a cumulative number that indicates how many communication errors the module has ...

Страница 160: ...te P2 Leave the transducer to room air pressure 2 Press the ComWheel to start zeroing 3 Supply a pressure of 100 mmHg to 300 mmHg to the transducer The recommended pressure is 200 mmHg 4 Set the pressure on the display to match the pressure reading on the manometer and press the ComWheel A tolerance of 1 mmHg is allowed 5 The message Calibrated will appear on the display Protection Protection for ...

Страница 161: ...mHg Button the front panel key function can be confirmed by pressing the key and checking that OFF turns to ON Temp error shows whether the calibration of the temperature was successful or not Protect key shows normally OFF but turns to ON when the button at the bottom of the module is pressed Protect mode is normally ON It turns to OFF when Protect is switched to OFF for the temperature calibrati...

Страница 162: ...and a pressure manometer 1 Connect the pressure transducer with the pressure manometer to the P3 connector Select Calibrate P3 Leave the transducer to room air pressure 2 Press the ComWheel to start zeroing 3 Supply a pressure of 100 mmHg to 300 mmHg to the transducer The recommended pressure is 200 mmHg 4 Set the pressure on the display to match the pressure reading on the manometer and press the...

Страница 163: ...is a cumulative number that indicates how many times the module has not responded to the monitor s inquiry Bad checksums is a cumulative number that indicates how many times communication from the module to the monitor has failed Bad c s by mod is a cumulative number that indicates how many communication errors the module has detected The monitor starts counting these items at power up and resets ...

Страница 164: ...ect Calibrate P5 Calibrate P6 Leave the transducer at room air pressure 2 Push the ComWheel to start zeroing 3 Supply a pressure of 100 mmHg to 300 mmHg to the transducer The recommended pressure is 200 mmHg 4 Set the pressure on the display to match the pressure reading on the manometer and push the ComWheel A tolerance of 1 mmHg is allowed 5 The message Calibrated will appear on the display Cali...

Страница 165: ...dex for intensity shift from previous calibration or Hgb update intensity decreased increased 0 indicates a normal signal 1 indicates an intermediate signal 2 indicates a poor signal and 3 indicates an unacceptable signal Button The front panel Zero P4 and Start C O key functions can be confirmed by pressing the key and checking that the relevant OFF message turns to ON Service menu for Cardiac Ou...

Страница 166: ...ace Also failures in other modules may cause these numbers to rise or be set to 32769 RAM indicates the state of the external RAM memory ROM indicates whether the checksum at the EPROM is in accordance with the software calculated value EEPROM indicates if the values stored in the permanent memory are valid The state is either OK Fail or module not in place or a communication error 4 6 1 COP Calib...

Страница 167: ...es and E PSM P AD0 to AD7 show the values of each eight channels of the A D converter AD7 is not used in PRESTN series modules and E PSM P Timeouts is a cumulative number that indicates how many times the module has not responded to the monitor s inquiry Bad checksums is a cumulative number that indicates how many times communication from the module to the monitor has broken down Bad c s by mod is...

Страница 168: ...ure signals that are measured from the NIBP cuff The measurement result is shown in the adjoining digit field Wave Recording is for selecting the recording option If ON is selected the pressure signals are printed out in real time on the recorder Remove menu widens the displayed waveform area The menu can be closed by selecting the Previous Menu or just by pressing the ComWheel if the Remove menu ...

Страница 169: ...cording to the manometer Verify that both pressure values in the prompt field match the manometer reading If not adjust by turning the ComWheel Active Leak Test Wrap an adult cuff around a rigid cylinder or pipe and connect the cuff to the module Select the active leak test ON The module automatically pumps a pressure of 260 mmHg into the cuff Wait for several seconds until the pressure stabilizes...

Страница 170: ...ted measurement mode Start test is for starting and Stop test is for stopping the Safety Valve test Safety Valve Data For information on general items Pressure Zero Protect handle Calibr prot 15 V power AD0 to AD7 as well as Timeouts etc see service data descriptions in section 4 7 NIBP Module Max press and 2 s after stop show the measured values at Safety Valve test How to check Safety Valve Wrap...

Страница 171: ...l See the pulse valve value and adjust it by turning the ComWheel Then push the ComWheel to confirm the value The Interval 240 mmHg 50 mmHg time should be less than 60 seconds when the valve is 150 and less than 10 when fully opened 255 When fully closed 0 the system should be airtight and the pressure does not drop Depending on an individual the pulse valve may remain closed up to approx value 10...

Страница 172: ...le M NIBP Buttons Leds Data For information on general items Pressure Zero Protect handle Calibr prot 15 V power AD0 to AD7 as well as Timeouts etc see section 4 7 NIBP Module Buttons Checking The front panel keys function is confirmed by pressing and releasing the key and observing that OFF turns to ON at Auto On Off and Start Cancel Set Cycle Time and STAT On Off are only in use with the NIBP mo...

Страница 173: ... This function is not used with E PRESTN and E PSM P modules Open Exh2 Close Exh2 A manual control for the exhaust valve 2 The selection changes to Close Exh2 when the valve is opened Open Zero valve A manual control for the zero valve This function is not in use with E PRESTN and E PSM P modules Set Valve The opening of the pulse valve is adjusted between 0 and 255 0 for fully closed and 255 for ...

Страница 174: ...ing up seconds and keeps on counting as long as the 15 Vdirty is on The time should be 60 to 70 seconds These menu items have only effect on the M NIBP modules They do not effect other NIBP modules Test ADULT is to test watchdog timer in adult mode 120 to 140 seconds Test INFANT is to test watchdog timer in infant mode about 60 to 70 seconds Stop Test is for stopping the test Watchdog Data field F...

Страница 175: ...er Service Data Cable shows the type of cable being used Cable check value shows the bit amount To check the value for each cable see the following chart EMG 100 100 Cable OFF 1950 Piezo 900 1100 Regional block 600 800 Module keys checks the function of the module keys A blue background appears at the back of the text when a key is pressed for more than one second Stimulus mode shows the selected ...

Страница 176: ... to rise or be set to 32769 RAM indicates the state of the RAM memory ROM indicates whether the checksum in the EPROM is in accordance with the software calculated value EEPROM indicates if the values stored in the permanent memory are valid The state is either OK Fail or module not in place or a communication error Start up is for starting the neuromuscular transmission measurement Stop Continue ...

Страница 177: ...en Preamp MP 203 4 and Interface board Timeouts is a cumulative number that indicates how many times the module has not responded to the monitor s inquiry Bad checksums is a cumulative number that indicates how many times communication from the module to the monitor has broken down Bad c s by mod is a cumulative number that indicates how many communication errors the module has detected The monito...

Страница 178: ...Datex Ohmeda S 5 Anesthesia and Critical Care Monitors 42 Document no M1137266 02 4 10 More More indicates that there are more parameter menus to be viewed ...

Страница 179: ...hed rt real time values that are available via the interface Timeouts is a cumulative number that indicates how many times the module has not responded to the monitor s inquiry Bad checksums is a cumulative number that indicates how many times communication from the module to the monitor has failed Bad c s by mod is a cumulative number that indicates how many communication errors the module has de...

Страница 180: ... enter the module pneumatics menu AD A selection to enter the module AD value display Record Data A selection to print out the shown service data to the device defined in the Service Record Data menu TONO Statuses HEX See APPENDIX A How to read HEX numbers General Module general status See Table 2 Module general status for a detailed description of the message Table 2 Module general status bit 0 5...

Страница 181: ...sed bit 1 Button 2 Lab Data pressed bit 2 15 Not used Bit Description What to do bit 0 1 Not used bit 2 Zeroing error Zero gas signal out of limits or pressure or temperature signal varying during measurement CO2 sensor faulty Send the module to the factory for repair bit 3 CO2 measurement error CO2 signal out of limits or pressure or temperature signal varying during measurement CO2 sensor faulty...

Страница 182: ...heck tubing valves for occlusion 8 press sens values differ Pump pressure and catheter pressure readings differ more than 50 mbars Calibrate the pressure sensors 9 pneuma fatal error This error is shown if the pneumatic error occurred is considered fatal Check for other pneumatics errors 10 cath press too low Catheter pressure reading is below reasonable pressure values Make sure that you are not ...

Страница 183: ...module frame 5vdc 5 Volts of the module derived internally from 15vdc 15vdc 15 Volts of the module received from the module frame Pneuma voltage 15 V voltage driving pneumatic elements of the module derived from 15V dirty 15V dirty 15 V voltage received from the module frame bit 0 Lamp error bit 1 2 3 not used bit 4 CPU EEPROM error bit 5 Sensor EEPROM error bit 6 Internal AD converter error bit 7...

Страница 184: ...eding gas Press the ComWheel and continue feeding gas until the text Adjust appears on the display 4 Check that the displayed values match the values on the calibration gas container Adjust with the ComWheel if necessary 5 If airway gases are monitored it is recommended to calibrate the airway gases at the same time Start Stop Cycling is for starting or stopping the measurement Display with PgCO2 ...

Страница 185: ... mbar on this page Pump Press pressure measured from the pumping unit Cath Press pressure measured from the catheter line User Cal Press pressure that the user sets during the calibration sequence according to the pressure that is applied to the catheter port The set value should be close to 100 mmHg User Amb Press pressure that the user sets during the calibration sequence according to the curren...

Страница 186: ...the device defined in the Service Record Data menu TONO Cathpres pressure measured from the catheter line mbar Ambpres ambient pressure in the room mbar Pumppres pressure measured from the pumping unit mbar System test results detailed information of the test results of different system parts The meaning of the messages OK the part successfully passed the test FAIL the part failed in the test N A ...

Страница 187: ... tightness of the pump unit is tested Check pump unit for leaks Cath conn leak test The air tightness of the zeroing unit and catheter connector is tested Make sure that the catheter connector is properly closed during the test Check the zeroing unit and the catheter connector for leaks Block test Air is aspirated through the zeroing valve If pressure at the pump pressure sensor drops too much the...

Страница 188: ...actor that is set in calibration Lamp on current sensor lamp current when lit Lamp off current sensor lamp current when off Block temp sensor temperature C in degrees centigrade Detector offset CO2 detector offset voltage Lamp status displays whether the sensor lamp is on or off CO2 AD signal from CO2 sensor thermopile AD counts CO2 signal thermopile signal maximum minimum when the lamp is blinkin...

Страница 189: ...a Power displays whether electricity has been connected to the pneumatics system or not Zero valve displays whether the zero valve is on or off Pump valve displays whether the pump valve is on or off Gas removed count displays how many times gas is removed from the catheter during a measurement cycle Pneumatic errors detailed information of the performance of different pneumatics system parts The ...

Страница 190: ...emperature signal cath press pressure measured from the catheter line pump press pressure measured from the pumping unit INTERNAL ADC VDD 5 V digital units driving voltage received from the module frame 5V 5 Volts of the module derived internally from 15vdc 15V 15 Volts of the module received from the module frame pneuma voltage 15 V voltage driving pneumatic elements of the module derived from 15...

Страница 191: ...he evoked potential measurement is active in the module Sending EP shows 1 if the module has acquired 100 200 new epochs and is sending them to the monitor Par Error shows 1 if the evoked potential parameters active in the module are conflicting with each other Reserved 1 is reserved for future use Reserved 2 is reserved for future use HB Mod Timeouts is a cumulative number that indicates how many...

Страница 192: ...us of all channels 0 means that there are no artefacts on the signal and 1 means that there are artefacts Noise shows 1 if the activity of FEMG is too high for clean EEG signal and that EEG is not probably reliable EMG AD shows the latest AD conversion result of FEMG signal without any filtering or scaling Leadset AD shows the latest AD conversion result of lead set signal without any scaling Bipo...

Страница 193: ...ngs in this menu Imp Cycle Impedance measurement repetition time Select Montage Selection of headbox s electrode configuration EEG Channels Number of active channels in EEG measurement Montage Type Selection of bipolar Bip referenced Ref montage Cycle EP measurement repetition time Stim Frequency EP measurement s stimulation frequency Stim Intensity Intensity of EP stimulus ...

Страница 194: ...o the interface board Mod Mon Timeouts is a cumulative number that indicates how many times the module interface board has not responded to the monitor s inquiry Mod Mon Bad Checksum is a cumulative number that indicates how many times there has been an error in the message from the module interface board to the monitor Mon Mod Bad Checksum is a cumulative number that indicates how many times ther...

Страница 195: ...ailure bit 13 RAM failure bit 14 Test mode bit 15 Init mode bit 0 Check Sensor key pressed bit 1 BIS key pressed bit 2 Inpedance check mode cyclic bit 3 Impedance check mode combined bit 4 Impedance check mode ground bit 5 Impedance check off bit 6 Measurement on bit 7 EEG measurement on bit 8 Impedance check on DSC channel 1 passed bit 9 Impedance check on DSC channel 2 passed bit 10 BIS Engine p...

Страница 196: ...er of channels for EEG data Misc errors Illegal EEG data type Illegal EEG data rate Illegal EEG filter coefficients No updates from Host Communication related errors Bad CRC TI_SELFTEST_CODE EEPROM CRC checks Bad CRC TI_RUN_CODE Bad CRC FPGA_CONFIG Bad CRC REV_INFO Illegal serial number Serial number check DSC failed to power up DSC related errors Serious DSC overcurrent error DSC receiver data ov...

Страница 197: ...ed interrupt received UART modem interrupt No status nibble received DSC related errors DSC not connected DSC disconnected after test failure Illegal DSC ID DSC power regulation fault DSC interface fault DSC did not respond to command Illegal PIC ID DSC overcurrent DSC overrun EEPROM Bad packet length Software update related errors EEPROM Bad checksum EEPROM Bad code length EEPROM Illegal packet s...

Страница 198: ...Engine power up test PASS FAIL DSC selftest ch1 indicates the DSC selftest status for channel 1 PASS FAIL DSC selftest ch2 indicates the DSC selftest status for channel 2 PASS FAIL Measured parameters indicated BIS indicates BIS index range 0 1000 corresponds to 0 100 SQI indicates signal quality index range 0 1000 corresponds to 0 100 EMG indicates EMG activity level range 0 10000 corresponds to ...

Страница 199: ...out test bit 7 Unblocked timeout test bit 8 DSC not connected test bit 9 Not used test bit 10 Not used test bits 11 15 Not used bit 0 Quick selftest pass bit 1 Quick selftest gain bit 2 Quick selftest noise bit 3 Quick selftest fail bit 4 Quick selftest valid bit 5 Sensor valid bit 6 Sensor invalid bit 7 Sensor too many uses bit 8 Sensor expired bit 9 Sensor validity unknown bits 10 15 Not used bi...

Страница 200: ... BIS Setup Automatic Check A selection to define whether the automatic sensor check is used ON OFF Test DSC indicates the status of the DSC self test PASS FAIL Filters A selection to define if filters are used ON disturbances are filtered from the raw EEG signal OFF raw EEG signal is shown ...

Страница 201: ...iods Artefact shows Off if there is no high frequency noise present On if the module detects noise Diathermy shows On if the module is detecting diathermy i e electrocautery AD clipped shows On if the signal is getting clipped at the A D converter Alg ver Mon shows the monitor algorithm version number Alg ver Mod shows the module algorithm version number Alg ver used shows the currently used algor...

Страница 202: ...able is connected to the module or not Sensor indicates whether the Entropy sensor is connected to the cable or not Sensor S N module reads the manufacturing serial number from the sensor chip Sensor Lot module reads the manufacturing lot number from the sensor chip Lead 1 2 3 shows the lead on off status of all sensor electrodes Imped 1 2 3 shows the respective impedance value of each sensor elec...

Страница 203: ...To select the parameter data source Press the Monitor Setup and select Interfacing Select the desired measurement parameter for example Gases Select the desired source by name for example Aest NOTE The name of the device is visible on the list only if the device is correctly connected to the module ...

Страница 204: ...IS modules are connected to the DIS bus simultaneously Interfaces The menu displays a list of all connected DIS modules and the statuses of the corresponding external devices If the bus voltage is too low you cannot add more devices DIS module bus voltage low Do not add more devices or reduce cable length message appears Access via Monitor setup Install Service Service The menu displays submenus f...

Страница 205: ...t field Indicates the status of the external device bus voltage DIS bus voltage measured by UPI4 NET board The value should normally be within 6 8 V tout DIS module timeouts seen by the monitor The value should not increase more than by 5 per second cse DIS module checksum errors seen by the monitor The value should not increase more than by 5 per second rx The number of data packets from the exte...

Страница 206: ... the Art waveform variation for the SPV calculation Arrhytmh is the number of detected artefact cycles in SPV calculation Inv is the count of invalid e g resp rate too high breath cycles Beats Br is the average of Art pulses detected during one breath for the SPV calculation 1 min ct is the detected respiration rate for SPV calculation Cycle count is the count of breaths used in SPV calculation Br...

Страница 207: ...tchdog circuitry is working properly The monitor will restart after 1 5 seconds from the start of the test In malfunction 20 s is displayed and the test will be interrupted In this case the fault is in the watchdog circuitry of the power unit WD by Overload test ensures the functionality of a feature where the software controls the monitor but detects an overload situation in the main CPU The test...

Страница 208: ...he software language National Reqs Select the software features which include national requirements Power Frequency Set the power frequency 50 Hz 60 Hz This setting is used to filter out possible power frequency interference from the parameter measurements Time format Set the time format of the real time clock 24 h 12 h ...

Страница 209: ...ight side of the menu Event History is for selecting the event history view onto the right side of the menu Alarm History is for selecting the alarm history view onto the right side of the menu Scroll Last Er Ev is for scrolling the error event alarm information on the right side of the menu Scroll Counters is for scrolling the error event alarm counters on the right side of the menu Record Data i...

Страница 210: ...set at the factory and it shows the manufacturing date and time User cannot reset this date and time since last 1 year PM shows the running hours since the last 1 year PM storing Last events The section shows the last maintenance events and the time of their occurrence Event counters The section contains counters for each different maintenance events The time of occurrence of the last event is sho...

Страница 211: ...he maintenance history log The different repairs that can be saved are Display Power Supply Recorder Frame e g board in the frame Parameters e g a board in the parameter module or Other a miscellaneous repair not specified by previous options The upgrade menu gives the user a possibility to store the upgrades in the maintenance history log ...

Страница 212: ... dog timeout indicates an erroneous restart controlled by the main CPU board and caused by the display controller board The restart is listed as a fast cold start UPI watch dog timeout indicates an erroneous restart controlled by the main CPU board and caused by the UPI or UPINET board The restart is listed as a fast cold start Last events The section shows the last events and the time of their oc...

Страница 213: ...e section shows the last events and the time of their occurrence Alarm counters The section contains counters for each different detected event The time of occurrence of the last event is shown beside each counter Last log reset The date and time of the last alarm log reset ...

Страница 214: ...ny service menu The setting goes into the permanent memory of the monitor The options where to print are To Printer To Recorder and To Memory Card The To Printer and To Memory Card options are not in use When any of the front panel keys of the recorder module E REC is pressed the output is the recorder module despite of the setting of Record Data menu ...

Страница 215: ...e download menu is for downloading monitor software via the network port The SWDL tool is intended to be used by GE Healthcare service organization and authorized distributors only For more information on the SWDL tool see Software Download Tool User Instructions ...

Страница 216: ...Datex Ohmeda S 5 Anesthesia and Critical Care Monitors 80 Document no M1137266 02 ...

Страница 217: ...1111 Then we write the four binaries that correspond to 3 0011 after the first four We now have 11110011 And so on Eventually we have a string of 16 binary numbers so called bits HEX number F3A1 corresponds to a binary code of 1111 0011 1010 0001 Spaces are added here for legibility and to visualize the fact that every group of four bits corresponds to one HEX character The bits in a binary number...

Страница 218: ...Datex Ohmeda S 5 Anesthesia and Critical Care Monitors A 2 2 Document no M1137266 02 For your notes ...

Страница 219: ...titioner Outside the USA check local laws for any restriction that may apply All specifications subject to change without notice Document number M1125635 05 June 24 2009 GE Healthcare Finland Oy Helsinki Finland P O Box 900 FI 00031 GE FINLAND Tel 358 10 39411 Fax 358 9 1463310 www gehealthcare com Copyright 2007 2009 General Electric Company All rights reserved Datex Ohmeda Inc P O Box 7550 Madis...

Страница 220: ......

Страница 221: ... Internal connectors 11 3 Service procedures 12 3 1 General service information 12 3 2 Service check 12 3 2 1 Recommended tools 12 3 2 2 Recommended parts 12 3 2 3 Visual inspection 13 3 2 4 General inspection 15 3 3 Disassembly and reassembly 19 3 3 1 Before disassembly 19 3 3 2 Tools needed 19 3 3 3 To remove and disassemble the Power Supply Unit 19 3 3 4 To remove the CPU mother board and the m...

Страница 222: ...e 3 Power supply unit block diagram F CU8 rev 12 4 Figure 4 Mains part and battery inlet switch block diagram F CU8 rev 12 5 Figure 5 Power supply board block diagram F CU8 rev 12 6 Figure 6 Power logic board block diagram F CU8 rev 12 7 Figure 7 F CU8 connectors 9 Figure 8 Monitor troubleshooting flowchart 29 Figure 9 Central Unit troubleshooting flowchart 30 Figure 10 Digital section troubleshoo...

Страница 223: ...y unit CPU mother board Module mother board Information for the maintenance and service of CPU Board in CPU Board B CPU6 slot UPINET Board in UPINET Board B UPI4NET slot Optional Display Controller Board B DISPX in Displays and Display Controllers slot The service menu is described in a separate Service Menu slot and the spare part lists in the AM CCM Spare Parts slot Figure 1 8 Module Frame F CU8...

Страница 224: ...50 60 Hz Allowed voltage fluctuations 100 V 10 110 V 10 to 120 V 10 220 V 10 to 240 V 10 Maximum power consumption F CU8 Rev 12 160 VA Safety class Class I Grounding Hospital grade Interruptibility Data memory and alarm settings are saved during power failures up to 15 minutes 1 1 2 Environmental requirements Operating temperature 10 35 C 50 95 F Storage temperature 10 50 C 14 122 F Relative humid...

Страница 225: ...UPI4NET are installed into the 8 Module Frame at the factory The frame has two sections The front part is for the modules Between the front and rear parts there is a module mother board and a CPU mother board The module mother board connects modules to the system and the CPU mother board connects boards together Figure 2 Basic structure of S 5 Monitor an example of possible configuration Parameter...

Страница 226: ... converter 5 V converter RESET POWERFAIL WD 32 Vd 15 Vd 15 Va 5 V FAN Loud speaker 6 V battery T 10 A ON STBY switch on Command Board AUDIOin 32 V ON STBY BATCHRG STOP 5 Vint GND CPU INTERFACE 15 V converter 32 Vd switch 2AF Power ON STBY control batchrg etc 32 Vd AUDIO AMP 15 Vd Mains transformer RESET CPU Service reset button Rectifiers power factor correction 5 Vcpu SILENCE ALARM Dip Switch on ...

Страница 227: ...00 mA 7 5 W 15 V converter 15 V converter is a Buck type chopper power supply that generates 15 V from 32 V The output of the power supply is divided into two 15 Va for analog voltage and 15 Vd for less sensitive components 5 V converter 5 V converter is a Buck type chopper power supply that generates 5 1 V from 32 V The load capacity is 8 A 40 W 5 V 15 V 32 V and 5 Vcpu checking Those voltages ar...

Страница 228: ...io alarm is powered from the lead acid battery 32 VD switch This short circuit protected circuit connects the dirty 32 Vd voltage Figure 5 Power supply board block diagram F CU8 rev 12 Battery switch connector 2 control Power Logic Board F1 F2 32 Vd 5 1 V 5 Vcpu 15 V ON STBY Audio Out Fan Mains Transformer connectors Battery switch connector 1 power 15 Vd 32 V 32 V 32 V X1 X4 X6 X4 X7 X5 6 X3E 2 4...

Страница 229: ...e protection 32 V Automatic power off when U 25 V Automatic start up after voltage back to normal 3 High current protection all secondary outputs Output restrained until cause is eliminated 4 High temperature protection Automatic power off at 58 C approx and automatic start up at 54 C approx Possible caused by fan failure fan filter is not clean or power supply unit is overloaded The measurement i...

Страница 230: ...ations in battery backup mode during a loss of mains power In this situation the monitor uses the anesthesia machine batteries NOTE This External Battery 24 Vdc connector must only be connected to the monitor battery backup supply in GE anesthesia delivery systems Do not use this connector for any other purpose AC output for display supply has been removed from the unit to get space for the input ...

Страница 231: ... STBY line is connected only to a B CPU6 board connector from where it goes directly to Keyboard and ON STBY switch The CPU mother board is connected to module mother board by 25 pin D connector 2 1 3 Module mother board This board connects the modules and the main frame together electrically Module bus structure is the same in all S 5 monitors There are connectors for 4 double width or 8 single w...

Страница 232: ... 2 External Battery 24Vdc connector Battery backup F CU8 rev 12 Mains connector Pin Signal L PE N Live Protective earth Neutral Connector 11W1 Pin I O Signal A1 1 2 3 4 5 6 7 8 9 10 Shield O I I I I I O GND GND NC STBY ON 24 Vdc 24 Vdc 24 Vdc 24 Vdc 24 Vdc 32 Vdc for factory use only GND Cable shield GND metal case 6 10 4 5 3 2 1 7 8 9 A1 ...

Страница 233: ... a c e 2 15 VD GND 32 VD 4 15 VD GND 32 VD 6 5 V GND GND 8 5 V 5 V GND 10 RESET_CPU 5 V_CPU GND 12 POWER_FAIL REFRESH_WD AUDIO_IN 14 ON STBY RESET AL_OR_BAT 16 SERVRST ALARMENA N C 18 GND GND GND 20 TEST1 N C TEST2 N C N C 22 TEST4 N C TEST5 N C TEST6 N C 24 TEST7 N C N C N C 26 GND GND GND 28 BAT_ON N C TEST8 N C N C 30 N C GND N C 32 15 V GND 15 V ...

Страница 234: ...ervice may void warranty of the unit 3 2 Service check These instructions include complete procedures for a service check The service check is mandatory after any service repair However the service check procedures can also be used for determining possible failures The procedures should be performed in ascending order The instructions include a check form APPENDIX A which may be used when performi...

Страница 235: ...ectors are clean and intact Check also that the screws that connect the module mother board to the frame are tightened properly 4 Module motherboard position Check that the E REC fits in smoothly and locks up properly in all possible slots in the Central Unit Leave the E REC disconnected CAUTION Ensure that the module is properly orientated i e module release latch facing downward before insertion...

Страница 236: ...f the PC boards are clean and intact 12 Block screws for cables Check that all block screws for cables are in place and tightened properly Check also that their threads are intact 13 Grounding plates Check that the grounding plates under the PC board rear panels are attached properly and are not bent 14 Optional display controller board B DISPX jumpers DIP switches If available disconnect the disp...

Страница 237: ...mains power cord and turn the monitor on 16 Fan Check that the fan is running 17 Starting Check that the monitor starts up properly i e the alarm LEDs on the Command Bar turn blank the start up sound is heard from the loudspeaker and the normal monitoring screen appears No error messages should appear on the screen 18 Module communication Check that the connected modules are recognized i e the nee...

Страница 238: ...t the alarm volume changes correspondingly The alarm sound should be clear and audible with all the settings 21 Monitor software Enter the service menu Monitor Setup Install Service password 16 4 34 Service password 26 23 8 Take down the information regarding monitor software 22 Content of service log Select SERVICE LOG from the menu Record the Service log onto the E REC by selecting RECORD DATA C...

Страница 239: ...tandby Turn the monitor to standby and disconnect the power cord Wait for two minutes then reconnect the power cord and turn the monitor back on The monitor should perform a Warm start which means the trend information and temporary settings should still be available If the monitor performed a Cold start instead the battery fuse or the battery needs to be replaced NOTE The B CPU6 requires 2 Amps b...

Страница 240: ... Care Monitors 18 Document no M1125635 05 29 Functioning after electrical safety check Check that the Central Unit functions normally after the performed electrical safety check 30 Final cleaning Clean the Central Unit with suitable detergent ...

Страница 241: ... front of the frame Disconnect all external cables connected to the monitor 3 3 2 Tools needed 3 3 3 To remove and disassemble the Power Supply Unit Notice that the PCBs can only be removed in certain order NOTE The B UPI4NET contains components on both sides of the PCB Therefore the installation of B UPI4NET should be handled with extra care NOTE When reassembling do not fasten the screws until y...

Страница 242: ...e cross recess screw M6x30 with its support plate from the bottom of the frame housing 3 Remove the two uppermost screws from the back panel of the Power Supply Unit 4 Pull the Power Supply Unit out of the frame housing NOTE Be careful not to damage the speaker located at the bottom of the unit ...

Страница 243: ...me housing 2 Remove the four screws from the top cover and disconnect the two cables from the Power Supply Board 3 Lift the cover off To remove the Power Supply Board 1 Remove the top cover of the Power Supply Unit 2 Disconnect the two cables from the Power Supply Board 3 Remove the three screws from the bottom of the unit Cables ...

Страница 244: ...M1125635 05 4 Disconnect the three cables from the board NOTE Notice the positions of the cables while reassembling To remove the fan and the loudspeaker 1 Remove the Power Supply Board 2 Remove the four screws from the rear plate of the Power Supply Unit 3 Remove the fan ...

Страница 245: ... loudspeaker in place and lift the loudspeaker off To remove the transformer 1 Remove the top cover of the Power Supply Unit 2 Disconnect the two cables from the Power Supply Board 3 Remove the screw that goes through the transformer and disconnect the two cables from the power supply socket ...

Страница 246: ...e the lead acid battery for 5Vcpu The sealed lead acid battery in the Power supply unit can be used for 3 5 years If the trends are not stored in the memory for 15 minutes after the power is turned off and the power cord is disconnected the fault is probably in the battery or in the battery fuse 1 Remove the top cover of the Power Supply Unit 2 Remove the screw attached to the metal battery holder...

Страница 247: ...least 24 hours before it reaches full capacity 3 3 4 To remove the CPU mother board and the module mother board To remove the Power Logic Board 1 Remove the top cover of the Power Supply Unit 2 Remove the lead acid battery 3 Detach the board by removing the four screws To remove the CPU mother board 1 Remove the Power Supply Unit 2 Remove the four screws holding the CPU mother board to the metal c...

Страница 248: ...rom the front side of the module mother board and one screw from the bottom of the frame housing 3 Pull the metal chassis out of the frame housing 4 Detach the module mother board by removing the four screws Reassemble the device in reverse order NOTE While reassembling make sure the module connectors are located exactly in the middle of the openings of the frame housing ...

Страница 249: ...properly To replace the primary fuses 1 Use a flat blade screwdriver to pull out the fuse holder located beneath the power supply socket 2 Replace the fuses When reconnecting the fuse holder check that it locks up properly To replace the secondary fuse 1 Remove the rear panel of the power supply unit by removing the four screws 2 Remove the fuse holder by releasing the lock with a flat blade screw...

Страница 250: ...635 05 3 4 Adjustments and calibrations It is not necessary to do calibrations or adjustments to the F CU8 To replace the 5Vcpu battery fuse 1 Remove the Power Supply Unit from the frame housing 2 Replace the 5Vcpu battery located on the Power board Reassemble in reverse order ...

Страница 251: ...ower cord Remove all modules and turn power on NO NO The power supply unit was shut down by instant over voltage in the mains YES NOTE In case of short power off and automatic start up see section Power logic board Protections to find the possible reason YES Keyboard trouble See part II for trobleshooting NO Clock etc appear on the screen NO NO Plug in a module Module data appear on the screen Pic...

Страница 252: ... Unit work Connect mains power cord and turn power on by shorting pins 13 GND and 20 ON STBY at Gas interface board connector Remove Power supply unit and turn it on by shorting pins a14 ON STBY and a18 GND See chapter 2 4 1 connector X3 CPU mother board or Gas interface board faulty Check continuities of ground and ON STBY line through to Command board Power supply board unit faulty Replace it Di...

Страница 253: ... board Digital section faulty OK A beep is heard when monitor is turned on Insert one of the removed boards Turn the monitor on OK Replace faulty board Remove CPU or optional display controller Replace CPU board Is tone same as at OK start but longer Is tone lower and longer than at OK start Replace UPI board Yes No No No No Yes Yes Yes Yes Is tone same as at OK start Try with another display OK Y...

Страница 254: ... STD93 Service Manual 882 580 Software Cartridge S STD94 S ARK94 Service Manual 885 930 Software Cartridge S STD95 S ARK95 Service Manual 885 930 Software Cartridge S STD96 S ARK96 Service Manual 885 931 Service Menu descriptions related to software of level 97 98 Technical Reference Manual Slot 895 704 Service Menu descriptions related to software of level 99 02 Technical Reference Manual Slot 80...

Страница 255: ...l 1 Bronze taps 2 Pads and screws 3 Module motherboard connectors 4 Module motherboard position 5 Fan filter 6 Primary fuses 7 Power inlet connectors 8 Service reset switch 9 Equipotential tap and rear panel screws 10 PC board screws 11 PC board connectors 12 Block screws for cables 13 Grounding plates 14 Optional display controller board B DISPX jumpers DIP switches Notes 15 Communication lines R...

Страница 256: ...sound 21 Monitor software L 22 Content of service log 23 Voltages 15 V 14 20 15 60 V 15 V 14 00 15 50 V 15 VD 14 10 15 60 V 5 V 4 70 5 40 V OK N A Fail OK N A Fail 24 Watchdog circuitry 25 Trend retaining 26 Service reset button 27 Recovering from power loss Notes 28 Electrical safety check 29 Functioning after electrical safety check 30 Final cleaning Notes Used spare parts Signature ...

Страница 257: ...der of a licensed medical practitioner Outside the USA check local laws for any restriction that may apply All specifications subject to change without notice Document number M1125636 05 June 24 2009 GE Healthcare Finland Oy Helsinki Finland P O Box 900 FI 00031 GE FINLAND Tel 358 10 39411 Fax 358 9 1463310 www gehealthcare com Copyright 2007 2009 General Electric Company All rights reserved Datex...

Страница 258: ......

Страница 259: ... P 9 2 4 1 DC Power board 9 2 5 External connectors and signals 11 2 5 1 5 Module Frame F CU5 P 11 2 5 2 Power Unit N AC and Central Unit F CPU 14 3 Service procedures 18 3 1 General service information 18 3 2 Service check 18 3 2 1 Recommended tools 18 3 2 2 Recommended parts 18 3 2 3 Visual inspection 19 3 2 4 General inspection 21 3 3 5 Module Frame disassembly and reassembly 26 3 3 1 Before di...

Страница 260: ...Figure 6 Central Processor Unit F CPU 6 Figure 7 Block diagram of the DC Power unit of F CPU 7 Figure 8 5 Module Frame F CU5P back and front view 9 Figure 9 Block diagram of the DC Power board of the F CU5 P 9 Figure 10 Modulebus Flex board 10 Figure 11 Interconnection Flex board 10 Figure 12 External connections F CU5 P 11 Figure 13 External connections N AC and F CPU 14 Figure 14 Monitor trouble...

Страница 261: ...nector F CU5 P 11 Table 3 Module connector out X1 X5 F CU5 P 12 Table 4 Connector for Central Processor Unit F CPU in F CU5 P 13 Table 5 DC 32V output connector N AC 15 Table 6 Main power X3 N AC 15 Table 7 DC 32V input connector F CPU 16 Table 8 Connectors to 5 Module Frame F CU5 P 2 pcs in F CPU 17 Table 9 DIS connector F CPU 17 ...

Страница 262: ...Datex Ohmeda S 5 Anesthesia and Critical Care Monitors iv Document no M1125636 05 ...

Страница 263: ...al Processor Unit F CU5 Power Unit Information for the maintenance and service of CPU Board in CPU Board B CPU6 slot UPINET Board in UPINET Board B UPI4NET slot Optional Display Controller Board B DISPX in Displays and Display Controllers slot The service menu is described in a separate Service Menu slot and the spare part lists in the AM CCM Spare Parts slot Figure 1 Parts of the 5 Module Frame F...

Страница 264: ...3 1 kg 6 8 lbs F CU5 Power Unit N AC Dimensions D x W x H 238 x 66 x 78 5 mm 9 4 x 2 6 x 3 1 in Weight 1 1 kg 2 4 lbs 1 1 1 Electrical requirements Rated voltages and frequencies 100 240 V 50 60 Hz Allowed voltage fluctuations 100 V 10 to 240 V 10 Maximum power consumption 150 VA Safety class Class I Grounding Hospital grade Interruptibility Data memory and alarm settings are saved during power fa...

Страница 265: ...AC The units are connected together with appropriate cables F CPU Power Cable 0 4m 16 inch or 2 7m 9ft F CPU Signal Cable 0 3m 12inch 3m 10ft or 10m 33ft NOTE You can connect two F CU5 P 5 Module Frames to one F CPU If you do so you cannot at the same time use a display that uses B DISPX as power supply for example 12 LCD display Figure 2 5 Module Frame F CU5P w modules To operate S 5 Anesthesia M...

Страница 266: ... be connected to standard mains supply to deliver DC power for the switched mode power supplies of the 5 Module Frame F CU5 P and the Central Processor Unit F CPU The operating voltage level is of 24 35V rated voltage 32V Figure 4 F CU5 Power Unit N AC Parameter module Parameter module Parameter module Parameter module CPU Mother Board Module Mother Board Display Optional display controller board ...

Страница 267: ...wer of the power unit nominal 100W maximum 120W The efficiency of the power unit is 0 8 with maximum output power There is over temperature protection in the power unit at 50 C and the recovery occurs at 45 C F CPU Power Cable The F CU5 Power Unit is connected to the Central Processor Unit F CPU with the F CPU Power Cable 0 4m 16 inch or 2 7m 9ft Cooling fan The F CU5 Power Supply N AC cannot be r...

Страница 268: ...nnects the boards together It also contains an internal battery for restoring the patient data for 15 min after shut down Figure 6 Central Processor Unit F CPU 2 3 1 DC Power board The DC power board of the F CPU converts the 32Vdc to voltages needed by the CPU display controller and upinet boards and the battery The created voltages are 15V 15V 5V and 5Vcpu Also the 32Vdc is routed to the Central...

Страница 269: ...ff RESET signal is also generated for other digital boards Audio amplifier Audio signal from the CPU is amplified and filtered for the loudspeaker Amplification gain is about 5 dB Protections The following protections generate an automatic power off situation without any message in advance 1 High voltage protection 32 V 15 V 5 V 5 Vcpu Requires manual start up Power cord must be disconnected short...

Страница 270: ... components Fan The fan is switched on automatically when 32 Vd is generated Loudspeaker The loudspeaker is controlled by the audio amplifier on the DC Power board Battery 6 V 1 2 Ah sealed lead acid battery is used to supply power to the CPU board after the power is turned off and the power cord is disconnected The maximum discharge current of the battery is 1A Charging voltage of the battery is ...

Страница 271: ...w 2 4 1 DC Power board The DC Power board is located at the back of the F CU5 P frame The DC Power board converts the 32Vdc that is fed through the F CPU DC Power board to voltages needed by the frame electronics and the parameter modules The created voltages are 15Vd 15V 15V and 5V Also 32V is routed through Figure 9 Block diagram of the DC Power board of the F CU5 P Output 18 32V 15Vd 15Va 5V 15...

Страница 272: ...igure 10 Modulebus Flex board The connector for E PSM P is located on the modulebus flexboard in F CU5P Figure 11 Interconnection Flex board There are connectors on the interconnection board to connect the modulebus flexboard the CPU board the module mother board and the F CPU external connector ...

Страница 273: ... 2 Synchronisation connector 3 Module connector 4 Connector for Central Processor Unit F CPU Table 1 Module connector for E PSM F CU5P Table 2 Synchronization connector F CU5 P 5 pin female connector Pin Signal 1 2 3 4 5 GND Vmod 13 8 16 V Data Data Shield Mini DIN7 connector Pin Signal 1 2 3 5 6 7 8 Defib_sync_out Reserved Analog GND Digital GND GND Pressure_out Direct_ECG_out 1 3 2 4 ...

Страница 274: ... is maximally 35 ms Pressure out pin 7 P1 from hemodynamic module The Invasive pressure output signal is 1 V 100 mmHg originally ranging from 0 to 320 mmHg and with a delay of approximately 25 ms The signal requires an input impedance of 100 k Direct ECG pin 8 Delay max 15 ms Gain ECG out ECG in 1 V 1 mV Pacer 5 V and 2 ms pulse Table 3 Module connector out X1 X5 F CU5 P 25 pin male D connector Pi...

Страница 275: ...ESET_RS485 Module reset RESET_RS485 Module reset DIR_ECG DEF_SYNC 32V power output ECG_PWM TXDC TXD_to_MEM RXDC RXD_from_MEM RTSC RTS_to_MEM CTSC CTS_from_MEM DATA_RS485 Module data DATA_RS485 Module data IBP1 32Vd power output 32Vd power output ENABLE Enable power GND short pin TXDB TXD_to_REC RXDB RXD_from_REC RTSB RTS_to_REC CTSB CTS_from_REC Cable shield GND A1 20 19 18 17 16 15 14 13 12 11 1 ...

Страница 276: ... AC 11 Network connector B CPU6 12 Display connector B CPU6 13 Connector for Command Bar Remote Controller anesthesia record keeping solution keyboard and 12 LCD display D LCC12 14 Service reset button 15 Connector for secondary Command Bar Remote Controller anesthesia record keeping solution keyboard and 12 LCD display D LCC12 Optional Display Controller B DISPX 16 Display connector for secondary...

Страница 277: ... cable are 11W1xxx male and 11W1xxx female Pin numberings are the same as in 32V output connector in Table 5 and Table 7 Connector 11W1xxx female Pin Signal A1 1 2 3 4 5 6 7 8 9 10 Shield GND GND ENABLE Enable power GND short pin in cable NC 32V 32V 32V 32V 32V NC GND Cable shield GND metal case Mains connector Pin Signal L PE N Live Protected earth Neutral A1 9 8 7 1 2 3 5 4 10 6 ...

Страница 278: ... 05 Central Processor Unit F CPU Table 7 DC 32V input connector F CPU Connector 11W1xxx Pin Signal A1 1 2 3 4 5 6 7 8 9 10 Shield GND GND ENABLE Enable power GND short pin in cable STBY ON 32V 32V 32V 32V 32V EXT_BAT_CHARGE GND Cable shield GND metal case 6 10 4 5 3 2 1 7 8 9 A1 ...

Страница 279: ...CG DEF_SYNC 32V power output ECG_PWM TXDC TXD_to_MEM RXDC RXD_from_MEM RTSC RTS_to_MEM CTSC CTS_from_MEM DATA_RS485 Module data DATA_RS485 Module data IBP1 32Vd power output 32Vd power output ENABLE Enable power GND short pin TXDB TXD_to_REC RXDB RXD_from_REC RTSB RTS_to_REC CTSB CTS_from_REC Cable shield GND 10 pin female connector Pin Signal 1 2 3 4 5 6 7 8 Shield Data Data 15Vd GND 8V_DIS GND D...

Страница 280: ...d service may void warranty of the unit 3 2 Service check These instructions include complete procedures for a service check The service check is mandatory after any service repair However the service check procedures can also be used for determining possible failures The procedures should be performed in ascending order The instructions include a check form APPENDIX A which may be used when perfo...

Страница 281: ... its normal position Check that the module motherboard connectors are clean and intact Check also that the screws that connect the module mother board to the frame are tightened properly 4 PSM connector With F CU5P model check that the PSM connector is clean and intact 5 Module motherboard position Check that the E REC fits in smoothly and locks up properly in all possible slots in the Central Uni...

Страница 282: ...filter Clean or replace the fan filter 12 Service reset button Check that the service reset button is intact Press the button for at least five seconds PC boards 13 PC board screws Check that all the rear side PC boards are secured to the Central Processor Unit with screws 14 PC board connectors Check that the connectors on the rear panels of the PC boards are clean and intact 15 Block screws for ...

Страница 283: ...connector Check that the power inlet connector is clean and intact 21 Equipotential tap and rear panel screws Check that the equipotential tap and all the rear panel screws are tightened properly 3 2 4 General inspection 22 Communication lines After any service repair for the Module mother board measure resistance from the following Module mother board s connector pins against the ground Check tha...

Страница 284: ... parameter information is missing check the screen configuration from the MONITOR SETUP menu NOTE InvBP waveforms are not shown without a patient simulator 26 Real time clock Check that the clock on the screen shows correct time Adjust the time if necessary Monitor Setup Time And Date NOTE If the clock shows time 0 00 continuously at successive start ups the SRAM TIMEKEEPER chip on the CPU board o...

Страница 285: ...out The output signal s ratio to the actual InvBP signal should be around 1V 100mmHg 30 Monitor software Enter the service menu Monitor Setup Install Service password 16 4 34 Service password 26 23 8 Take down the information regarding monitor software 31 Content of service log Select SERVICE LOG from the menu Record the Service log onto the E REC by selecting RECORD DATA Check the content of reco...

Страница 286: ...the monitor to standby and disconnect the power cord Wait for two minutes then reconnect the power cord and turn the monitor back on The monitor should perform a Warm start which means the trend information and temporary settings should still be available If the monitor performed a Cold start instead the battery needs to be replaced The information regarding the start up is saved also in the Servi...

Страница 287: ... 25 Document no M1125636 05 38 Functioning after electrical safety check Check that the Central Unit functions normally after the performed electrical safety check 39 Final cleaning Clean the Central Unit with suitable detergent ...

Страница 288: ...ling PC boards Electrostatic discharge may damage components on the board Disconnect the main power cord If the monitor is connected to the Datex Ohmeda Network disconnect the Mon Net cable 3 3 2 Tools needed 3 3 3 To disassemble the 5 Module Frame F CU5 P screwdriver TORX T10 T20 flat blade screwdriver antistatic wristband monkey wrench size 5 5 1 Remove all the cables from the F CU5 P 2 Remove t...

Страница 289: ...me 4 Remove the cover of the frame To remove the PSM Connection Unit 1 Remove the two screws T10 to disconnect the PSM connector from the DFI board 2 Remove the screw T20 holding the PSM Connection Unit 3 Remove the four screws T10 and disconnect the Sync connector to detach the PSM Connection Unit from the DFI board ...

Страница 290: ...the PSM Connection Unit 2 Remove the six screws T10 and the hexagon spacer size 5 5 to remove the EMC cover 3 Detach the connector connecting the power board and module mother board together 4 Disconnect the fan cable from the power board 5 Now you can access the following field replaceable parts Frame unit fan EMC cover Connection flex board ...

Страница 291: ...efive screws T10 To remove the module mother board 1 Remove the EMC cover from the frame It is not necessary to remove the F CU5 P frame power board 2 Face the frame module side towards you 3 Remove the four screws T10 holding the board and its supporting plate 4 Remove the four screws T10 to detach the mother board from the supporting plate ...

Страница 292: ...removing any PC board or the Power supply unit from the rear of the Central Processing Unit F CPU 2 Remove the following boards from the back of the F CPU B UPI4NET Pull it slightly out and disconnect the cable red connector from the board B DISPX optional B CPU6 F CPU power board Plates covering possible empty slots Remove the six screws from the bottom of the F CPU You can now detach the F CPU u...

Страница 293: ...ker from its place NOTE When reassembling the loudspeaker place it carefully to the mounting slots To detach the DIS Connector Unit 1 Remove the screw T10 holding the DIS Unit 2 Detach the DIS Unit cable from the CPU mother board 3 Lift the DIS unit to remove it To remove the F CPU bottom cover 1 Remove the battery and the loudspeaker cables 2 Detach the DIS Connector Unit 3 Remove the six screws ...

Страница 294: ... together are properly connected and secured To remove the CPU mother board 1 Remove the F CPU bottom cover 2 Detach the four screws holding the back plate to the EMC cover 3 Remove the four screws to detach the CPU mother board from the back plate To reassemble and replace the fan unit 1 Turn the Power Unit upside down 2 Remove the four TORX screws T10 to remove the bottom plate 3 Detach the fan ...

Страница 295: ...cted Display connected and powered No No Connect and check OK Yes No OK Disconnect and reconnect the power cord OK Connect power cord and interconnecting cables No Yes Yes The power supply unit was shut down by instant over voltage in the mains Yes No The problem was caused by loosen cable s Yes The problem was caused by loosen power cord Yes Mains voltage in correct operating range The problem is...

Страница 296: ...hooting No No Faulty F CU5 P Module Frame No Yes Start up texts appear on screen Continues from previous page Switch the monitor Stby switch ON Is the F CPU fan running Problem in F CPU power board Connect an other board and schwitch the monitor ON No Yes Does the CPU board contain SW No Download appropriate monitor SW No Yes Yes Is the F CU5 P fan running Replace the F CU5 P power board Check con...

Страница 297: ...board Digital section faulty OK A beep is heard when monitor is turned on Insert one of the removed boards Turn the monitor on OK Replace faulty board Remove CPU or optional display controller Replace CPU board Is tone same as at OK start but longer Is tone lower and longer than at OK start Replace UPI board Yes No No No No Yes Yes Yes Yes Is tone same as at OK start Try with another display OK Ye...

Страница 298: ...ical Care Monitors 36 Document no M1125636 05 5 Earlier revisions This manual supports only the current revisions F CPU 02 and F CU5 P 01 Information about earlier revisions can be found in M1021563 There are no earlier revisions of N AC ...

Страница 299: ...motherboard connectors 4 PSM connector 5 Module motherboard position 6 Fan filter Central Processor Unit F CPU 7 Plastic frame 8 Brass plugs 9 DIS connector 10 Rubber pads and screws on the bottom 11 Fan filter 12 Service reset button Notes PC boards 13 PC board screws 14 PC board connectors 15 Block screws for cables 16 Grounding plates 17 Optional display controller board B DISPX jumpers DIP swi...

Страница 300: ...rting 25 Module communication 26 Real time clock 27 Loudspeaker sound 28 ECG out 29 Pressure out 30 Monitor software L 31 Content of service log 32 Voltages 15 V 14 20 15 60 V 15 V 14 00 15 50 V 15 VD 14 10 15 60 V 5 V 4 70 5 40 V 33 Watchdog circuitry 34 Trend retaining 35 Service reset button 36 Recovering from power loss 37 Electrical safety check 38 Functioning after electrical safety check 39...

Страница 301: ...ed medical practitioner Outside the USA check local laws for any restriction that may apply All specifications subject to change without notice Document number M1125637 04 June 24 2009 GE Healthcare Finland Oy Helsinki Finland P O Box 900 FI 00031 GE FINLAND Tel 358 10 39411 Fax 358 9 1463310 www gehealthcare com Copyright 2009 General Electric Company All rights reserved Datex Ohmeda Inc P O Box ...

Страница 302: ......

Страница 303: ...cense 6 2 4 Connectors and signals 7 2 4 1 DVI I connector 7 2 4 2 Keyboard connector 8 2 4 3 Ethernet Network Interface 9 3 Service procedures 10 3 1 General service information 10 3 2 Service check 10 3 2 1 Recommended tools 10 3 2 2 Functional inspection 11 3 3 Disassembly and reassembly 15 3 3 1 Downloading replacing software on CPU Board B CPU6 15 3 3 2 Performing Factory Reset 15 3 4 Adjustm...

Страница 304: ...and Critical Care Monitors ii Document no M1125637 04 Table of figures Figure 1 B CPU6 1 Figure 2 CPU board block diagram B CPU6 4 Figure 3 Monitor troubleshooting flowchart 18 Figure 4 Digital section troubleshooting flowchart 19 ...

Страница 305: ... This section provides information for the maintenance and service of the following products B CPU6 Software licenses L ANE07 A L ICU07 A The service menu is described in a separate Service Menu slot and the spare part lists in the AM CCM Spare Parts slot Figure 1 B CPU6 ...

Страница 306: ...approved data transformer Coding element interface 1 2 Integrated Display Controller Output data VGA resolution Resolution 640 480 pixels Frame frequency 60 Hz Scan frequency 31 6 kHz Dot frequency 25 MHz Sync polarity H negative V negative level TTL Sync pulse SVGA resolution Resolution 800 600 pixels Frame frequency 60 Hz Scan frequency 37 9 kHz Dot frequency 40 MHz Sync polarity H positive V po...

Страница 307: ...olution Resolution 1280 1024 pixels Frame frequency 60 13 Hz Scan frequency 64 1 kHz Dot frequency 108 4 MHz Sync polarity H positive V positive level TTL Sync pulse Horizontal Vertical Front porch 0 205 µs 0 017 ms Sync pulse 1 216 µs 0 05 ms Back porch 2 24 µs 0 469 ms Sweep time 16 61 µs 13 33 ms Horizontal Vertical Front porch 0 45 µs 0 0158 ms Sync pulse 1 032 µs 0 0466 ms Back porch 2 28 µs ...

Страница 308: ...ted display controller Integrated Ethernet Controller Figure 2 CPU board block diagram B CPU6 Memory capacity B CPU6 SDRAM 32 MB program flash memory 32 MB 32 kB static RAM with real time clock 4 channel UART AS BUS connector 96 pin Serial CPU6_blck_dgrm vsd X2 DVI I X11 Combar connector X10 RJ 45 Ethernet controller SDRAM Display controller AUDIO Analog amplifier File FLASH Code FLASH NV SDRAM RT...

Страница 309: ...s the refreshing the monitor will be reset in order to prevent false information to be displayed on the screen If the UPI4NET board stops the refreshment the board will be reset internally 2 1 3 SRAM M48T37V The SRAM with a real time clock is backed up by a lithium battery CAUTION The IC contains a lithium battery Discard the battery according to local regulations 2 1 4 Integrated Ethernet Control...

Страница 310: ... software upgrades The upgrade software can be downloaded onto a monitor that is equipped with the B CPU6 The service software has been developed to replace the original monitor software in case of a B CPU6 failure There is service software available for each S 5 monitor software version The functionality of the service software is equal to the functionality of the corresponding original S 5 monit...

Страница 311: ...al data to display 10 TX1 11 1 3_SHIELD Shield for data pairs 1 3 12 TX3 Differential data to display 13 TX3 14 5V_OUT 5V supply to display 15 GND 16 HP_DET HotPlug detection 17 TXD0 Differential data to display 18 TXD0 19 0 5_SHIELD Shield for data pairs 0 5 20 TX5 Differential data to display 21 TX5 22 CLK_SHIELD Shield for CLK pair 23 CLK Differential CLK to display 24 CLK C1 ANA_RED Red Green ...

Страница 312: ...rd X11 Pin Signal Description 1 CRT_RED Analog video out 2 CRT_GREEN 3 CRT_BLUE 4 MON_ID2 Monitor ID input 5 MON_ID1 Monitor ID input 6 GND 7 MON_ID0 Monitor ID input 8 HSYNC2 9 VSYNC2 10 GND 11 GND 12 GND 13 GND 14 GND 15 5VRE 16 ON_STBY 17 GND 18 GND 19 SERD_RXD_RS232 20 SERD_TXD_RS232 21 BRIGHTNESS 22 CONTRAST 23 NC 24 NC 25 32V 26 32V 1 9 10 18 19 26 ...

Страница 313: ...1125637 04 2 4 3 Ethernet Network Interface Network connector X10 RJ45 connector Pin Signal Description 1 2 3 4 5 6 7 8 Tx Tx Rx NC NC Rx NC NC Differential transmit data Differential transmit data Differential receive data Differential receive data ...

Страница 314: ...instructions include complete procedures for a service check The service check is mandatory after any service repair However the service check procedures can also be used for determining possible failures The procedures should be performed in ascending order The instructions include a check form APPENDIX A which may be used when performing the procedures The symbol in the instructions indicates th...

Страница 315: ...unctional inspection 5 Fan Install the display together with the Command Bar parameter module and the E REC Connect the power cord and turn the monitor on Check that the fan is running 6 Starting Check that the monitor starts up properly i e the alarm LEDs on the Command Bar turn blank the start up sound is heard from the loudspeaker and the normal monitoring screen appears No error messages shoul...

Страница 316: ...nstall Service password 16 4 34 Service password 26 23 8 Take down the information regarding the monitor software 11 Content of service log Select Service Log from the menu Record the Service Log onto the E REC by selecting Record Log Check the content of recording for possible problems then empty the Service Log by selecting Reset Log from the menu 12 CPU watchdog circuitry Test the Central Unit ...

Страница 317: ...connector and the Identification plug are clean and intact then connect the Mon Net cable to the CPU board and the Identification plug to the UPI4NET board Check that the monitor connects to the Datex Ohmeda Network i e the network symbol appears under the clock on the upper right hand corner of the screen A message regarding the connected Datex Ohmeda Central should appear in the message field of...

Страница 318: ...on Disconnect the Mon Net cable from the Network cable extension Check that the message Network down appears in the message field within 30 seconds Reconnect the Mon Net cable and check that the monitor connects to the network again General 20 Electrical safety check Perform an electrical safety check and a leakage current test 21 Functioning after electrical safety test Check that the CPU Board f...

Страница 319: ...ngineer SWDL is a service tool that enables the installation of monitor service software from personal computer into legacy Datex Ohmeda patient monitor It replaces the use of traditional service and upgrade software licenses in most situations 3 3 2 Performing Factory Reset NOTE The Factory Reset is necessary after downloading of monitor software and after replacing the CPU board or SRAM Timekeep...

Страница 320: ...CPU6 board The B CPU6 board is defective The board cannot be used See network service page for details Identification plug on B UPI4NET board There is no identification plug attached to the monitor The identification plug is defective or uninitialized The plug cannot be used Check network connectors message shows on the monitor screen Monitor Network cable Cable not connected properly to the wall ...

Страница 321: ... There are too many unprinted documents waiting in the print queue Check the printer as it is not operating properly Printer is off line Printer cable is loose printer is out of paper there is a paper jam or the printer is simply switched to off line state Record keeper menus are blank There are no menus for the record keeper Run Network Setup to verify the current set up Symptom at the monitor en...

Страница 322: ...e place Monitor not functioning Faulty module Faulty Central Unit Go to Part II for troubleshooting Power cord connected trbl_monitor vsd ON STBY switch ON Keyboard connected Display connected No No Connect and check OK No OK Disconnect and reconnect the power cord OK Connect the power cord No Yes Yes The power supply unit was shut down by instant over voltage in the mains NOTE In case of short po...

Страница 323: ... Yes Yes Is tone same as at OK start Try with another display OK Yes Yes No No Replace display Turn the monitor on cpu5_digital_sect_trbl vsd Remove all modules and boards except CPU UPI4NET and optional display controller board Digital section faulty OK A beep is heard when monitor is turned on Insert one of the removed boards Turn the monitor on OK Replace faulty board Replace CPU or optional di...

Страница 324: ...M Error is due to memory malfunction Restart the monitor If the problem persists replace the SRAM Timekeeper battery Remember to perform factory reset after the replacement 4 3 2 RAM Error The RAM memory is located on the CPU board The RAM Error message is displayed due to memory malfunction Replace the CPU board Remember to perform factory reset after the replacement ...

Страница 325: ...rts earlier revisions except Item Manual and document number Service Menu descriptions related to software of level 97 98 Technical Reference Manual 896624 manual slot 895704 B CPU2 B CPU3 Technical Reference Manual 896624 manual slot 895704 B CPU4 B CPU5 Technical Reference Manual M1021563 manual slot M1027812 ...

Страница 326: ...Datex Ohmeda S 5 Anesthesia and Critical Care Monitors 22 Document no M1125637 04 ...

Страница 327: ...easuring equipment test gases used Equipment tool gas Manufacturer Model Type Part Number Serial Number ID Calibration Date CPU board OK N A Fail OK N A Fail 1 Device plates 2 Grounding plates 3 SRAM Timekeeper battery 4 PC board screws 5 Fan 6 Starting 7 Module communication 8 Real time clock 9 Loudspeaker sound 10 Monitor software 11 Content of service log 12 CPU watchdog circuitry 13 Recovering...

Страница 328: ...ail OK N A Fail 14 Connecting to network 15 Ethernet address 16 In Out data counters 17 Data error counters 18 Hardware error counters 19 Recognition of disconnection Notes General OK N A Fail OK N A Fail 20 Electrical safety check 21 Functioning after electrical safety test Notes Notes Used spare parts Signature ...

Страница 329: ...ractitioner Outside the USA check local laws for any restriction that may apply All specifications subject to change without notice Document number M1137269 02 March 11 2009 GE Healthcare Finland Oy Helsinki Finland P O Box 900 FI 00031 GE FINLAND Tel 358 10 39411 Fax 358 9 1463310 www gehealthcare com Copyright 2009 General Electric Company All rights reserved Datex Ohmeda Inc P O Box 7550 Madiso...

Страница 330: ......

Страница 331: ...nectors and signals 4 2 2 1 Network coding element interface 4 2 2 2 RS232 Serial data interface 5 2 2 3 DIS interface RS422 5 2 2 4 Synchronization interface 5 2 2 5 Printer interface 6 2 2 6 Connection to the S 5 bus 7 3 Service procedures 8 3 1 Service check 8 3 1 1 Recommended tools 8 3 1 2 Visual inspection 8 3 1 3 Functional inspection 9 4 Troubleshooting 11 4 1 Troubleshooting 11 5 Earlier ...

Страница 332: ...Datex Ohmeda S 5 Anesthesia and Critical Care Monitors ii Document no M1137269 02 ...

Страница 333: ...will be blocked The UPI4NET board provides interfaces for example for a computer parallel printer and Device Interfacing Solution DIS In addition the board has two digital output signals and two analog output signals for other interfaces The use of UPI4NET board requires S 5 Anesthesia or Critical Care main software The service menu is described in a separate Service Menu slot and the spare part l...

Страница 334: ...ication Supports RS422 500 kbps Device Interfacing Solution DIS bus communication Printer port LPT RS232 level communication driven by B CPU6 Analog signals Direct ECG Pressure Out Digital signals Defibrillation Synchronization Nurse Call 1 3 NET Ethernet NOTE When used together with the B CPU6 board the Ethernet portion is handled by the CPU board Meets IEEE802 3 specifications 10BASE T Hospital ...

Страница 335: ...her board The following signals pass on between the UPI section and CPU mother board data bus address bus reset read and write signals and other related signals Processor The processor in the UPI section is an H8S 2655 which functions at 16 MHz frequency RS232 serial bus interfaces RS232 serial bus is connected to the connector X8 That serial channel is driven by the CPU board Only the RS232 buffe...

Страница 336: ...f B CPU4 or B CPU5 and B UPI4NET 00 or 01 are used see the previous version of the Technical Reference Manual M1021563 2 2 Connectors and signals 2 2 1 Network coding element interface Coding element connector X4 Nurse Call X4 pin 8 The Nurse Call signal is generated by yellow and red alarms When activated the signal is set to the high state and remains at the high state until the alarm situation ...

Страница 337: ...e signal is in state 1 After 10 ms the signal is reset to state 0 New Defibrillation Sync is not generated before the indication is deactivated The delay from the R wave peak to the start of the signal is maximally 35 ms 9 pin male D connector Pin Signal 1 2 3 4 5 6 7 8 9 GND RxD TxD NC GND N C RTS CTS N C 10 pin female connector Pin Signal 1 2 3 4 5 6 7 8 DIS_out DIS_out 15V_DIS GND 8V_DIS GND DI...

Страница 338: ...ly 25 ms The signal requires an input impedance of 100 k Direct ECG pin 8 Delay max 15 ms Gain ECG out ECG in 1 V 1 mV Pacer 5 V and 2 ms pulse 2 2 5 Printer interface Standard printer connector X3 25 pin female D connector Pin Signal 1 2 3 4 5 6 7 8 9 10 11 12 13 14 15 16 17 18 19 20 21 22 23 24 25 Data_clk Data0 Data1 Data2 Data3 Data4 Data5 Data6 Data7 N C Printer busy Paper end N C N C Error N...

Страница 339: ...232 9 SA12 SA13 RXDD_RS232 10 SA14 SA15 Direct_ECG_PWM 11 SA16 SA17 BIT1IN 12 SA18 SA19 TXDC 13 SA20 SA21 RXDC 14 SA22 SA23 RTSC 15 SMEMR SMEMW CTSC 16 IOR IOW TXDB 17 CLK RESET RXDB 18 IOCHRDY IRQ10 RTSB 19 N C_1 IRQ11 CTSB 20 N C_2 IRQ12 TXDA 21 SBHE IRQ15 RXDA 22 SD0 SD1 RTSA 23 SD2 SD3 CTSA 24 SD4 SD5 LOUDSPEAKER 25 SD6 SD7 5 V 26 SD8 SD9 5 V 27 SD10 SD11 5 V 28 SD12 SD13 5 V 29 SD14 SD15 ON S...

Страница 340: ...ns include a check form APPENDIX A which may be used when performing the procedures The symbol in the instructions indicates that the check form contains space to record the results of the particular procedure 3 1 1 Recommended tools 3 1 2 Visual inspection Make sure the monitor is switched to standby Press the service reset switch at the back of the power supply unit for at least five seconds Dis...

Страница 341: ...fully together with the other detached PC boards Connect the Identification plug to the UPI4NET board Do not connect any cables to the board at this point Switch the monitor on Make sure that the Hemodynamic parameter module is installed Connect a patient simulator to the module 5 Parameter data and waveforms Check that the parameter data and waveforms are displayed 6 Voltage and temperature Enter...

Страница 342: ...ected to the network Switch the monitor to standby Disconnect the Identification plug from the UPI4NET board Switch the monitor back on and check that the message Check network connectors appears in the message field Reconnect the Identification plug and check that the monitor connects to the network General 9 Electrical safety check Perform an electrical safety check and a leakage current test 10...

Страница 343: ...ntroller board OK A beep is heard when monitor is turned on Insert one of the removed boards Turn the monitor on OK Replace faulty board Replace CPU or Display controller Replace CPU board Is tone same as at OK start but longer Is tone lower and longer than at OK start Replace UPI board Yes No No No No Yes Yes Yes Yes Is tone same as at OK start Try with another display OK Yes Yes No No Replace di...

Страница 344: ...nitors 12 Document no M1137269 02 5 Earlier revisions See information related to the earlier revisions of UPI board in the main manual 896624 and slot 895704 1 See information related to B UPI4NET rev 00 01 in the Technical Reference Manual M1021563 ...

Страница 345: ...g equipment test gases used Equipment tool gas Manufacturer Model Type Part Number Serial Number ID Calibration Date General OK N A Fail OK N A Fail 1 UPI4NET board connectors 2 PC board components and IC attachment 3 Screws 4 Grounding plates Notes Upi functions 5 Parameter data and waveforms 6 Voltage and temperature 15 V 14 20 15 60 V 15 V 14 00 15 50 V 15 VD 14 10 15 60 V 5 V 4 70 5 40 V 7 Wat...

Страница 346: ... Care Monitors A 2 2 Document no M1137269 02 NET function OK N A Fail 8 Recognition of ID plug Notes General OK N A Fail OK N A Fail 9 Electrical safety check 10 Functioning after electrical safety test Notes Notes Used spare parts Signature ...

Страница 347: ...ractitioner Outside the USA check local laws for any restriction that may apply All specifications subject to change without notice Document number M1137272 02 March 13 2009 GE Healthcare Finland Oy Helsinki Finland P O Box 900 FI 00031 GE FINLAND Tel 358 10 39411 Fax 358 9 1463310 www gehealthcare com Copyright 2009 General Electric Company All rights reserved Datex Ohmeda Inc P O Box 7550 Madiso...

Страница 348: ......

Страница 349: ...tion 14 3 1 1 LCD Display D LCC12A 14 3 1 2 15 Flat Panel Display D FPD15 14 3 1 3 19 Medical Grade Display 14 3 2 Service check 14 3 2 1 LCD Display D LCC12A 15 3 2 2 15 Flat Panel Display D FPD15 17 3 2 3 19 medical grade display 19 3 3 Disassembly and reassembly 21 3 3 1 LCD Display D LCC12A 21 3 3 2 15 Flat Panel Display D FPD15 22 3 3 3 19 Medical Grade Display 22 4 Troubleshooting 23 4 1 LCD...

Страница 350: ...Datex Ohmeda S 5 Anesthesia and Critical Care Monitors ii Document no M1137272 02 ...

Страница 351: ...ntroller Boards S 5TM Display Controller Board B DISPX 01 The service menu is described in a separate Service Menu slot and the spare part lists in the AM CCM Spare Parts slot B DISPX 01 is compatible with the following displays D LCC12A 01 D FPD15 00 and 19 medical grade display NOTE B DISPX 01 requires monitor software L ANE05 L ANE05A revision 01 and later or L ICU05 and L ICU05A revision 01 an...

Страница 352: ... F Storage temperature 10 60 C 14 140 F Relative humidity 10 93 non condensing 1 2 15 Flat Panel Display D FPD15 00 Display size 15 in diagonal Display type Active Matrix Color TFT LCD Display Resolution XGA 1024 x 768 Dimensions Outline Desk stand and keypad holder included W D H 375 x 247 4 x 371 mm 14 7 x 9 7 x 14 6 in Weight 8 6 kg 18 9 lbs Electrical requirements Rated voltage range 100 250 V...

Страница 353: ...0 VA Environmental Requirements Operating temperature 5 35 C 41 95 F Storage temperature 20 60 C 4 140 F Atmospheric pressure operating 697 1060 hPa 697 1060 mbar storage 187 1060 hPa 187 1060 mbar Relative humidity Operating 10 90 Non operating 10 90 1 4 Display Controller Board B DISPX 01 Video output B DISPX analog RGB and DVI 0 0V 0 7V 0 7Vpp 75 ohm Output data VGA resolution Resolution 640 48...

Страница 354: ...ency 60 13 Hz Scan frequency 64 1 kHz Dot frequency 108 4 MHz Sync polarity H positive V positive level TTL Sync pulse Horizontal Vertical Front porch 1 µs 0 027 ms Sync pulse 3 2 µs 0 105 ms Back porch 2 2 µs 0 612 ms Sweep time 26 39 µs 16 67 ms Horizontal Vertical Front porch 0 205 µs 0 017 ms Sync pulse 1 216 µs 0 05 ms Back porch 2 24 µs 0 469 ms Sweep time 16 61 µs 13 33 ms Horizontal Vertic...

Страница 355: ...ected to the Display controller board B DISPX or B CPU6 in the monitor frame with the LCD display interface cable The Display controller board B DISPX or B CPU6 sends video signals in both analog and digital form through its DVI connector Communication between the Display controller board and the keyboard is in RS232 serial format NOTE D LCC12A D FPD15 and 19 medical grade display require B DISPX ...

Страница 356: ... long More information about the 15 Flat Panel Display D FPD15 can be found in the display s User s Manual that is delivered with each display 2 1 3 19 medical grade display The 19 medical grade display is intended to be used with Datex Ohmeda S 5 Anesthesia and Critical Care Monitors The 19 medical grade display is provided with a desk stand as default with the GCX adaptor included Standard VESA ...

Страница 357: ...e included with the display Pin No I O Signal Notes 1 O RED_VIDEO Analog RGB to CRT 2 O GREEN_VIDEO 3 O BLUE_VIDEO 4 I MON2ID0 5 I MON2ID1 6 P GND 7 I MON2ID0 8 O HSYNC2 9 O VSYNC2 10 G GND 11 G GND 12 G GND 13 G GND 14 G GND 15 P 5V 5V to ComBar 16 I ON_STBY ON StandBy signal from ComBar 17 G GND 18 G GND 19 I RXDD Serial data to from ComBar 20 O TXDD 21 O BRIGHTNESS 22 O CONTRAST 23 O NC 24 O NC...

Страница 358: ...h the CPU bus to the B DISPX board if needed Figure 1 Display Controller Board B DISPX layout NOTE B DISPX 01 requires monitor software L ANE05 L ANE05A revision 01 and later if available or L ICU05 and L ICU05A revision 01 and later if available DVI AS Bus ComBar Processor 3 3V 2 5V Power Display controller DVI buffer PCI Bus SDRAM Interface Flash GP Bus Test conn Reset Test conn Ana Piano switch...

Страница 359: ...ftware in the Flash memory is of an older version than the corresponding part in the monitor software or if the Flash memory is empty the display controller software is written from the main CPU to the display controller Flash memory during start up Display controller The actual image to be displayed is formed in the Display controller memory according to the data sent by the main CPU The display ...

Страница 360: ...itical Care Monitors 10 Document no M1137272 02 Figure 2 B DISPX block diagram AS Bus 5V 3 3V 2 5V bdispx_blockdiag vsd PCI Bus GP Bus Flash SDRAM DVI Processor DVI FPGA Test connectors Ana DAC ComBar Test connectors Display controller ...

Страница 361: ...e generated if master reset goes low System reset must stay active 1100ms after supply voltages have reached valid levels DVI interface Differential RGB data and clock links must operate according to DVI standard 5V 5 100mA voltage must be provided to DVI connector through current limitation circuitry DVI AS Bus WDOG RST 2 5V 3 3V 5V RST WD_REF ComBar LCC10 RST RS232 to ComBar On Standby 32V bdisp...

Страница 362: ... 3_SHIELD G GND Shield for data pairs 1 3 12 TX3 O TMDS DIF Differential data to display 13 TX3 O TMDS DIF 14 5V_OUT PO 5V 5V supply to display 15 GND G GND 16 HP_DET I 5V HotPlug detection 17 TXD0 O TMDS DIF Differential data to display 18 TXD0 O TMDS DIF 19 0 5_SHIELD G GND Shield for data pairs 0 5 20 TX5 O TMDS DIF Differential data to display 21 TX5 O TMDS DIF 22 CLK_SHIELD G GND Shield for C...

Страница 363: ...l up 4 7k 8 HSYNC2 O CMOS 9 VSYNC2 O CMOS 10 GND G GND 11 GND G GND 12 GND G GND 13 GND G GND 14 GND G GND 15 5V P 5V 5V to ComBar 16 ON_STBY I 5V ON StandBy signal from pass through 17 GND G GND 18 GND G GND 19 RXDD I RS232 STD Serial data to from ComBar pass through 20 TXDD O RS232 STD 21 BRIGHTNESS O ANA 22 CONTRAST O ANA 23 2 5V_SENSE O 2 5V 2 5V sense for unit tester 24 3 3V_SENSE O 3 3V 3 3V...

Страница 364: ...5 Flat Panel Display D FPD15 Maintenance is limited to the basic adjustments through the display s Control dial The display should be returned to GE Healthcare for repair 3 1 3 19 Medical Grade Display Maintenance is limited to the basic adjustments through the display s Control dial The display should be returned to GE Healthcare for repair 3 2 Service check These instructions include complete pr...

Страница 365: ...also that the cable itself is intact Detach the rear cover by removing the eight screws from the corners 2 Check internal parts all screws are tightened properly all cables are connected properly all IC s that are on sockets are attached properly there are no loose objects inside the display Reattach the rear cover 3 Check external parts the outer cover is intact the display screen is intact the b...

Страница 366: ...larm LED is turning on and off on the LCD display when pressing the ComWheel Check also the yellow alarm LED by selecting LOWER LED from the menu 7 Membrane keys Check the LCD display membrane keys Press the keys on the LCD display front panel one by one Check that each key generates a sound from the loudspeaker and the corresponding text in the menu changes from yellow to red 8 Check the ComWheel...

Страница 367: ...operly connected and locked both to the monitor board and to the display with the locking screws Check that the power cord is intact and properly in place 2 External parts Check external parts the outer cover is intact the display screen is intact the desk stand is intact and tightened properly the keypad holder is intact and tightened properly Functional inspection Turn on the monitor and press t...

Страница 368: ... the display s User s Manual 5 Color temperature adjustments Perform the color adjustments if needed Please refer to the display s User s Manual 6 Auto Setup Perform Auto Setup to automatically adjust the screen size position phase and clock if needed NOTE This adjustment is available only with analog input VGA cable This function is not available for digital input DVI NOTE Position adjustments cl...

Страница 369: ... parts the outer cover is intact the display screen is intact the block screws for the cable are in place and are tightened properly if installed the block screw threads are intact if installed Functional inspection 3 Power cord Connect and lock the LCD interface cable to the LCD display and to the board in the monitor Check that the display power cord is intact and properly in place Turn on the m...

Страница 370: ...if needed Please refer to the display s User s Manual 7 Auto Setup Perform Auto Setup to automatically adjust the screen size position phase and clock if needed NOTE This adjustment is available only with analog input VGA cable This function is not available for digital input DVI NOTE Position adjustments clock and phase can be adjusted also manually Please refer to the display s User s Manual Exi...

Страница 371: ...play from the mount and disconnect the LCD interface cable at the display side 2 Place the display carefully on a clean surface with the display screen side down 3 Open the eight screws holding the display rear cover and detach the rear cover 4 Open the two screws on the video cable connector and disconnect the video cable from the LCD Controller Board Place the rear cover with the video cable asi...

Страница 372: ...tach the rear cover 4 Open the two screws on the video cable connector and disconnect the video cable from the LCD Controller Board Place the rear cover with the video cable aside 5 Disconnect all other cables carefully from the LCD Controller Board 6 Open the 15 screws holding the LCD Controller Board in the LCD Display Unit Detach the LCD Controller Board carefully from the LCD Display Unit conn...

Страница 373: ...creen continuously Jumpers in Display controller board not positioned correctly Check the jumpers See Installation section in Part I for details Only small portion of CRT screen is displayed on LCD display in zoomed up form LCD Display defined as High Resolution Display Change the resolution setting through the installation menus in monitor software Unstable image 5 V unstable Loose cable Jumpers ...

Страница 374: ... or clock adjustments in the OSD menu Problem Cause Treatment No image on screen and no backlight No power or loose interface cable Check LCD ON STBY switch position and interface cable No image on screen backlight on Cables may be loose Display controller board or LCD Interface board failure Check the items Replace the Display controller board or change the display if necessary Vertical stripes o...

Страница 375: ...ith display controller board Replace the board Try an other type of display or display controller board Part of the screen has wrong colors Triac board failure Replace triac board see Part II 8 Module Frame F CU8 Power supply Picture disfigured Outer magnetic field Turn the monitor off wait 10 minutes and turn the monitor on again in order to demagnetize the screen The picture is unclear The pictu...

Страница 376: ...plays In their case please refer to the following manuals for more service information LCD Display D LCC10 revision 01 Service Manual p n 882580 LCD Display D LCC10 revision 02 Service Manual p n 885930 LCD Display D LCC10 revision 03 04 Technical Reference Manual 8005672 and 8005796 Displays and Display Contollers slot 8005675 This manual fully supports 12 LCD Display D LCC12 Flat Panel Display D...

Страница 377: ...ed Customer Service Display type and revision S N Service engineer Date OK N A Fail OK N A Fail 1 Interface cable 2 Check internal parts 3 Check external parts 4 Check the picture Notes 5 Keyboard software 6 Check the alarm LEDs 7 Membrane keys 8 Check the ComWheel Notes 9 Electrical safety check 10 Functioning after safety check 11 Final cleaning Notes Used spare parts Signature ...

Страница 378: ...Datex Ohmeda S 5 Anesthesia and Critical Care Monitors A 2 2 Document no M1137272 02 For your notes ...

Страница 379: ...st not applicable Fail Test failed Customer Service Display type and revision S N Service engineer Date OK N A Fail OK N A Fail 1 Video cable 2 External parts 3 Resolution 4 Brightness and contrast adjustments Notes 5 Color temperature adjustments 6 Auto Setup 7 Electrical safety check 8 Functioning after safety check 9 Final cleaning Notes Used spare parts Signature ...

Страница 380: ...Datex Ohmeda S 5 Anesthesia and Critical Care Monitors B 2 2 Document no M1137272 02 For your notes ...

Страница 381: ...st failed Customer Service Display type and revision S N Service engineer Date OK N A Fail OK N A Fail 1 Interface cable 2 Check external parts 3 Power cord 4 LCD display picture Notes 5 Brightness and contrast adjustments 6 Color temperature adjustments 7 Auto Setup Notes 8 Electrical safety check 9 Functioning after safety check 10 Final cleaning Notes Used spare parts Signature ...

Страница 382: ...Datex Ohmeda S 5 Anesthesia and Critical Care Monitors C 2 2 Document no M1137272 02 For your notes ...

Страница 383: ...ractitioner Outside the USA check local laws for any restriction that may apply All specifications subject to change without notice Document number M1125639 03 March 11 2009 GE Healthcare Finland Oy Helsinki Finland P O Box 900 FI 00031 GE FINLAND Tel 358 10 39411 Fax 358 9 1463310 www gehealthcare com Copyright 2009 General Electric Company All rights reserved Datex Ohmeda Inc P O Box 7550 Madiso...

Страница 384: ......

Страница 385: ... 2 External communication 3 2 1 3 ComWheel 3 2 1 4 LEDs 4 2 1 5 Connectors and signals 4 3 Service procedures 5 3 1 General service information 5 3 2 Service check 5 3 2 1 Recommended tools 5 3 2 2 Visual inspection 5 3 2 3 Functional inspection 6 3 3 Disassembly and reassembly 8 3 3 1 Command Bar K ANEB K ICUB 8 4 Troubleshooting 9 4 1 K ANEB K ICUB 9 5 Earlier revisions 10 Appendix A Service che...

Страница 386: ...Datex Ohmeda S 5TM Anesthesia and Critical Care Monitors ii Document no M1125639 03 ...

Страница 387: ... 03 Introduction This section provides information about the maintenance and service of the following products Command Bars K ANEB K ICUB The service menu is described in a separate Service Menu slot and the spare part lists in the AM CCM Spare Parts slot ...

Страница 388: ...l Care Monitors 2 Document no M1125639 03 1 Specifications 1 1 Command Bar K ANEB K ICUB Dimensions W D H 282 26 54 mm 11 x 1 x 2 in Weight incl cable 0 4 kg 0 9 lbs Input voltage 5 V Power consumption 350 mW max Communication protocol RS 232 ...

Страница 389: ...on with the host processor takes place in RS232 serial communication channels which are available in both the CPU bus and the module bus Two signals TXD and RXD are in use No handshaking is used The 26 pin subminiature D connector of the Command Bar is connected to a B CPU6 Serial communication speed rate is 19 2 kbps 2 1 3 ComWheel The ComWheel on the front panel is used for menu selection Comman...

Страница 390: ... Bars connected to the system the system is ON STBY LED not lit when at least one of the switches is positioned ON 2 1 5 Connectors and signals Table 1 26 pin D connector on K ANEB K ICUB Pin No I O Signal 1 2 3 4 5 6 7 8 9 10 11 12 13 14 15 16 17 18 19 20 21 22 23 24 25 26 I I O O I Not connected Not connected Not connected Not connected Not connected GND Not connected Not connected Not connected...

Страница 391: ...ir However the service check procedures can also be used for determining possible failures The procedures should be performed in ascending order The instructions include a check form APPENDIX A which may be used when performing the procedures The symbol in the instructions indicates that the check form contains space to record the results of the particular procedure 3 2 1 Recommended tools 3 2 2 V...

Страница 392: ...p Install Service password 16 4 34 Service password 26 23 8 6 Keyboard version Record the information regarding keyboard software 7 Alarm LEDs Select the menu KEYBOARD with the ComWheel Highlight the text UPPER LED Check that the red alarm LED is turning on and off when pressing the ComWheel Check also the yellow alarm LED by selecting LOWER LED from the menu 8 Membrane keys Press the keys one by ...

Страница 393: ...ty check Perform an electrical safety check and a leakage current test 11 Functioning after electrical safety check Check that the Command Bar functions normally after the performed electrical safety check 12 Final cleaning Clean the Command Bar Fill in all necessary documents ...

Страница 394: ...Central Unit 2 Remove the Command Bar from the display unit 3 Unscrew the three screws holding the front cover of the Command Bar to the rear cover Carefully remove the rear cover 4 Disconnect the Command Bar cable the wire set from the ON STBY switch the wire set from the ComWheel K ANEB K ICUB and the flat cable from the membrane keyboard K ANEB K ICUB 5 Detach the Command Bar PCB by pressing th...

Страница 395: ...g Keyboard cable loose or broken D 26 connector pin failure Switch leads broken Switch connector loose Switch faulty Check the items Replace them if necessary ComWheel not working ComWheel leads broken or connector loose ComWheel faulty Check the items Replace the ComWheel if necessary Membrane key not working Switch cable loose or broken Keyboard cable loose or broken D 26 connector pin failure R...

Страница 396: ... 5 Earlier revisions For more service information on the command boards K ANE and K ICU please refer to Technical Reference Manual M1021563 Command Board revision 01 Service Manual p n 880850 Command Board revision 02 Service Manual p n 885930 This manual supports all later revisions ...

Страница 397: ...il Test failed Customer Service Keyboard type S N Service engineer Date OK N A Fail OK N A Fail 1 Cable 2 Front cover and front panel sticker 3 ComWheel cover 4 ON STBY switch 5 Stand by LED 6 Keyboard version KB 7 Alarm LEDs 8 Membrane keys 9 ComWheel Notes 10 Electrical safety check 11 Functioning after electrical safety check 12 Final cleaning Notes Used spare parts Signature ...

Страница 398: ...Datex Ohmeda S 5TM Anesthesia and Critical Care Monitors A 2 2 Document no M1125639 03 For your notes ...

Страница 399: ...d medical practitioner Outside the USA check local laws for any restriction that may apply All specifications subject to change without notice Document number M1125641 03 March 13 2009 GE Healthcare Finland Oy Helsinki Finland P O Box 900 FI 00031 GE FINLAND Tel 358 10 39411 Fax 358 9 1463310 www gehealthcare com Copyright 2009 General Electric Company All rights reserved Datex Ohmeda Inc P O Box ...

Страница 400: ......

Страница 401: ...ls 5 2 1 1 Module bus connector 5 2 1 2 Other connectors 6 3 Service procedures 7 3 1 Service check 7 3 1 1 Recommended tools 7 3 1 2 Visual inspection 7 3 1 3 Functional inspection 9 3 2 Disassembly and reassembly 11 3 2 1 Changing the fuse 11 4 Troubleshooting 12 4 1 Troubleshooting chart 12 5 Earlier revisions 13 Appendix A Service check form Extension Frame F EXT4 Extension Module E EXT A 1 ...

Страница 402: ...Datex Ohmeda S 5 Anesthesia and Critical Care Monitor ii Document no M1125641 03 ...

Страница 403: ... in the F CU8 frame NOTES Do not use F EXT with F CU5 F CU5P Only one F EXT4 can be connected to the monitor at a time The following modules cannot be used in the F EXT4 Recorder Module E REC Memory Module E MEM Interface Module E INT Compact Airway Modules E Cxxxxx Do not use identical modules simultaneously in the extension frame and in the host monitor When the extension frame is used with the ...

Страница 404: ...1 1 General specifications Frame size W D H 160 205 137 mm 6 3 x 8 x 5 4 in with module 160 228 137 mm 6 3 x 8 9 x 5 4 in Frame weight 1 3 kg 2 8 lbs Power consumption 35 W max at input voltage of 32 V with PRESTN module inserted and NIBP pump working Module size W D H 37 180 112 mm 1 5 7 1 4 4 in ...

Страница 405: ... from it necessary operational voltages for the inserted modules The received 32 V is passed through fuse F1 and filtered and led to power supply components There is overvoltage and undervoltage protection for input voltage the input voltage is set so that it can vary between 18 5 V and 36 0 V OVERVOLTAGE AND UNDERVOLTAGE PROTECTION SOFT START REMOTE ON OFF CONTROL 32 V 15 V SWITCHING POWER SUPPLY...

Страница 406: ...time to get charged This enables the extension frame to be connected to the monitor frame during operation There is also overvoltage protection for outgoing supply voltages The overvoltage limits are 5 95 V 5 V and 17 50 V 15 Vd Signal routes There are two connectors which are used for data communications RS485 for supply voltages 32 V 15 Vd 15 Va and 5 V for grounds connections GNDD GND SHIELD be...

Страница 407: ...n the Extension Module Module bus connector X1 Pin No I O Signal 1 I RESET_RS485 2 I 15 VDC 3 I 15 VDIRTY 4 I 15 VDC 5 I O DATA_RS485 6 I O DATA_RS485 7 Ground Shield 8 I RESET_RS485 9 I CTSB 10 O RTSB 11 I RXDB 12 O TXDB 13 Ground Shield 14 I 32 VDIRTY 15 I GroundDIRTY 16 I CTSC 17 O RTSC 18 I RXDC 19 O TXDC 20 ON STANDBY 21 BIT0IN 22 RXDD_RS232 23 TXDD_RS232 24 I 5 VDC 25 I 5 VDC 13 1 14 25 ...

Страница 408: ...ther connectors Table 2 Extension Frame rear panel connector X1 Connector X1 Pin No I O Signal A I RESET_RS485 B I O DATA_RS485 C I O DATA_RS485 D I RESET_RS485 E O Direct ECG F N C G I 32 VDC H I Gnd and Shield for data transmission J N C K N C L I 32 VDC M I GndD dirty for power supply ...

Страница 409: ...ver the service check procedures can also be used for determining possible failures The procedures should be performed in ascending order The instructions include a check form APPENDIX A which may be used when performing the procedures The symbol in the instructions indicates that the check form contains space to record the results of the particular procedure 3 1 1 Recommended tools 3 1 2 Visual i...

Страница 410: ...Check that the plastic frame is intact 4 Mounting plate Check that the extension frame mount is tightened properly to the plastic frame 5 Fastening screw Check that the large fastening screw at the back of the mount is intact 6 Pads Check that all four rubber pads are in place on the bottom 7 Fan filter If the extension frame contains a fan Rev 02 clean or replace the fan filter 8 Cable connector ...

Страница 411: ...0 kΩ If not replace the module motherboard 12 E EXT installation Connect and lock the extension module cable to the extension frame rear panel connector Make sure that the monitor is switched to STBY and then install the extension module into the monitor Check that the module goes in smoothly and locks up properly 13 Voltages Connect the gas interface cable the grounding plates of the cable should...

Страница 412: ...thing happens make sure the screen configuration is appropriate Change the module position in the extension frame and check that the module is still recognized 16 Restarting 1 Detach the extension module E EXT from the monitor then install it again Check that the module in the extension frame is still recognized 17 Restarting 2 Disconnect the monitor s power cord shortly during the monitor is on C...

Страница 413: ...le the Extension Frame F EXT4 in the following way See the exploded view of the frame 1 Remove the four screws from the front of the frame Detach the PC board s block 2 Remove the four screws from module motherboard with which it is attached to the rear frame 3 Carefully lift the module mother board and the power supply board attached to it and detach the two connectors under the power supply boar...

Страница 414: ...Incoming voltage too high or too low Check the Central Unit output voltage Replace the F EXT4 power supply board if necessary F EXT4 does not work PC board s faulty Check the fuse on the power supply board Check the PC boards and their connections Replace the power supply board Fuse on power supply board is blown repeatedly Short circuit in output voltages Replace the fuse Remove modules and turn ...

Страница 415: ...Extension Module E EXT 13 Document no M1125641 03 5 Earlier revisions F EXT4 Rev 01 see also service manual p n 889535 M EXT Rev 00 see also service manual p n 889535 M EXT Rev 02 see also Technical Reference Manual Slot 8001007 ...

Страница 416: ...Datex Ohmeda S 5 Anesthesia and Critical Care Monitor 14 Document no M1125641 03 ...

Страница 417: ... N A Fail 1 Internal parts 2 External parts Notes 3 Plastic frame 4 Mounting plate 5 Fastening screw 6 Pads 7 Fan filter 8 Cable connector 9 Module motherboard connectors 10 Module motherboard position Notes 11 Communication lines Reset RS485 pin 1 10 kW Data RS485 pin 5 10 kW Data RS485 pin 6 10 kW Reset RS485 pin 8 10 kW 12 E EXT installation 13 Voltages 15 V pin 2 14 50 15 50 V 15 VD pin 3 14 5...

Страница 418: ...ent no M1125641 03 OK N A Fail OK N A Fail 14 Fan 15 Module communication 16 Restarting 1 17 Restarting 2 18 Test measurement with module Notes 19 Electrical safety check 20 Functioning after electrical safety check 21 Final cleaning Notes Used spare parts Signature ...

Страница 419: ...ioner Outside the USA check local laws for any restriction that may apply All specifications subject to change without notice Document number M1137274 01 October 20 2008 GE Healthcare Finland Oy Helsinki Finland P O Box 900 FI 00031 GE FINLAND Tel 358 10 39411 Fax 358 9 1463310 www gehealthcare com Copyright 2008 General Electric Company All rights reserved Datex Ohmeda Inc P O Box 7550 Madison WI...

Страница 420: ......

Страница 421: ...ssor Unit for F CU5 F CPU 02 9 3 3 F CU5 Power Unit N AC 12 4 8 Module Frame F CU8 13 4 1 8 Module Frame F CU8 12 13 5 Displays 17 5 1 LCD Display D LCC12A 17 5 1 1 LCD Display D LCC12A rev 01 17 5 1 2 Front panel stickers for D LCC12A rev 01 18 5 2 15 Flat Panel Display D FPD15 18 5 3 19 Medical Grade Display 19 6 Extension frame 20 6 1 Extension Frame F EXT4 rev 03 20 6 2 Extension Module E EXT ...

Страница 422: ...Datex Ohmeda S 5 Anesthesia and Critical Care Monitors ii Document no M1137274 01 ...

Страница 423: ...innish M1120133 S 5 Anesthesia Service Software License w Extended Arrhythmia Analysis L ANE07AS 00 French M1120134 S 5 Anesthesia Service Software License w Extended Arrhythmia Analysis L ANE07AS 00 Italian M1120135 S 5 Anesthesia Service Software License w Extended Arrhythmia Analysis L ANE07AS 00 Japanese M1120136 S 5 Anesthesia Service Software License w Extended Arrhythmia Analysis L ANE07AS ...

Страница 424: ...125 S 5 Anesthesia Service Software License L ANE07S 00 Czech M1120127 S 5 Anesthesia Service Software License L ANE07S 00 Chinese M1120128 S 5 Critical Care Service Software License L ICU07S 00 for B CPU6 S 5 Critical Care Service Software License L ICU07S 00 Danish M1119893 S 5 Critical Care Service Software License L ICU07S 00 German M1119894 S 5 Critical Care Service Software License L ICU07S ...

Страница 425: ...5 Critical Care Service Software License w Extended Arrhythmia Analysis L ICU07AS 00 Italian M1119879 S 5 Critical Care Service Software License w Extended Arrhythmia Analysis L ICU07AS 00 Dutch M1119880 S 5 Critical Care Service Software License w Extended Arrhythmia Analysis L ICU07AS 00 Norwegian M1119882 S 5 Critical Care Service Software License w Extended Arrhythmia Analysis L ICU07AS 00 Pol...

Страница 426: ...ard B DISPX 01 Description Order no Note CPU Board B CPU6 M1140016 requires L ANE07 A L ICU07 A software Battery for SRAM Timekeeper 197230 HEL Screw 617110 HEL Description Order no Note Block screw for cables 546096 HEL UPINET board B UPI4NET 02 M1117341 requires L ANE06 A L ICU06 A or later Description Order no Note Video cable DVI D male DVI D male 3m M1005294 Video cable adapter DVI I male VGA...

Страница 427: ...Spare parts 5 Document no M1137274 01 3 5 Module Frame F CU5 3 1 5 Module Frame Unit F CU5 P 01 ...

Страница 428: ...Datex Ohmeda S 5 Anesthesia and Critical Care Monitors 6 Document no M1137274 01 ...

Страница 429: ...00 3 torx head pan head steel zinc coated M1024620 7 Module frame Back Hatch F CU5 M1012014 8 Power Board Air Filter F CU5 P M1016473 9 Scotchmate SJ 3526 D16 M1016475 10 MF DF Hook F CU5 P M1014449 11 Foot Bumpon SJ 5632 F CU5 P M1016471 12 NMF Module frame Bottom M1012006 13 Module frame Module Base F CU5 M1012011 14 Module frame EMC Casing 2 F CU5 P M1018747 15 NMF MF Connection Flex board M102...

Страница 430: ...t no M1137274 01 25 SCREW M3x8mm WN1452 torx head pan head steel zinc coated M1024618 26 NMF MF ECG sync connector flex board M1022268 27 Module frame PSM Option Cover F CU5 M1014433 28 NMF MF EMBC shielding flex board M1028023 Item Description Order no Replaced by ...

Страница 431: ...Spare parts 9 Document no M1137274 01 3 2 Central Processor Unit for F CU5 F CPU 02 ...

Страница 432: ...9 6 SCREW thread forming M3x8mm WN1452 torx head pan head steel zinc coated M1024618 7 Speaker Shield F CPU M1012029 8 Bottom Cover F CPU M1012018 9 SCREW machine M4x40mm DIN965 torx head flat countersunk head steel zinc coated M1024626 10 RUBBER FOOT 12 7mm X 3 5mm ROUND 65141 11 Dis Connector Unit F CPU M1028506 12 BATTERY 6V 1 2Ah rechargeable 17006 HEL 13 Battery Spacer F CPU M1014458 14 Fan F...

Страница 433: ...machine M3x6mm DIN965 torx head flat countersunk head steel zinc coated M1024613 20 EMC Casing Frame F CPU M1012024 21 Snap in card guide Nylon 6 6 M1020381 22 UPI DIS NMF Cable M1020572 23 NMF CPU motherboard M1014605 24 EMC Casing Front Plate F CPU M1014431 Item Description Order no ...

Страница 434: ... 5 Anesthesia and Critical Care Monitors 12 Document no M1137274 01 3 3 F CU5 Power Unit N AC Item Description Order no 1 S 5 FCU5 Power Unit N AC N AC 00 2 N AC Fan Unit Spare Part M1028505 3 Fan Plate Set M1033982 ...

Страница 435: ...cing order number for a spare part that is not available anymore 4 1 8 Module Frame F CU8 12 Figure 1 Exploded view of the Central Unit F CU8 12 Item Description Order no Replaced by 1 Bronze tap for display screen tray 879476 2 CPU mother board AM CCM 891585 3 Module mother board AM CCM 882954 HEL 4 Metal box F CU8 882501 5 Power supply unit for F CU8 220 240V M1028721 5 Power supply unit for F C...

Страница 436: ... for PC boards 879257 13 Connector plate blank narrow 885389 13 Connector plate blank wide 885394 14 Shake proof washer m3 2 63611 HEL 15 Cross cylinder head screw M3x8 61722 16 Service Reset Switch AM CCM 52090 17 Cross recess screw M6x30 61673 18 Support plate for 61673 879502 36 Grounding plate blank narrow 885398 36 Grounding plate blank wide 885404 Item Description Order no Replaced by ...

Страница 437: ...bbon cable Pwr supply Pwr logic 882520 22 Loudspeaker AM CCM 882509 HEL 23 Fuse Miniature 2AF 51063 24 Power board F CU8 rev 10 M1010681 25 Fuse T10A 5x20mm 250V 51137 26 Body F CU8 rev 10 Power Unit M1028737 27 Appliance socket w filter 4A 540140 28 Fuse T2 5A 5X20mm for Power Unit 220 240 511181 28 Fuse 5A 5x20mm 125V UL CSA for 100V 110 120V 511382 29 Shutter plate M1015167 30 Body of shutter M...

Страница 438: ...1137274 01 31 Lead acid battery 6V 1 2Ah 17006 HEL 32 Power logic board AM CCM 882508 33 Battery Switch Board M1004931 34 Mains transformer 230V M1007982 34 Mains transformer 115V M1014489 34 Mains transformer 100 105V 160 VA M1014491 Item Description Order no Replaced by ...

Страница 439: ...021700 3 Keyboard M1021697 4 Front cover D LCC12A M1021703 5 ON STBY switch M1021694 6 Backlight for LCD display M1012542 M1014385 7 LCD display M1012542 8 Inverter for LCD display M1012542 M1013813 9 Rear cover D LCC12A M1021705 10 Screw PT K30x10 628728 11 ComWheel cover 898794 12 ARK connector with cable M1021696 13 ComWheel M1021691 14 LCD interface cable 10m D LCC12A rev 01 M1035180 14 LCD in...

Страница 440: ...T 8504283 M1006117 Front Panel Sticker JA M1004974 Front Panel Sticker NL 8504281 M1006116 Front Panel Sticker NO 8504287 M1006118 Front Panel Sticker PL M1004975 Front Panel Sticker PT 8504284 M1006119 Front Panel Sticker SV 8504286 M1006113 Front Panel Sticker Blank vertical 8504276 M1017805 Item Description Order no 15 inch Flat Panel Display D FPD15 Spare Part M1138310 S Video Cable DVI D male...

Страница 441: ...e display M1063774 S Video Cable DVI D male DVI D male 3m 9 8 ft M1005294 VGA VGA Cable 3 m 9 8 ft VGA male VGA male 8001593 HEL VGA VGA extension cable 10 m 32 8 ft 892095 HEL DVI VGA adapter cable 0 6 m 1 8 ft M1005320 Video Cable extension adapter DVI I male VGA male 10m 32 8 ft M1005324 Y cable for display and keyboard 0 2 m 0 6 ft 889314 HEL Power Adapter for M1138310 and M1063774 Displays 20...

Страница 442: ...51118 3 Power supply board F EXT4 892378 4 Module mother board F EXT4 rev 01 02 884839 5 Frame housing F EXT4 rev 03 898317 5 Frame with rubber pads rev 02 893113 898317 6 Internal connector cable F EXT4 884838 7 Cross cylinder head screw M3x6 61721 HEL 8 Bushing 640455 HEL 9 Cross cylinder head screw M3x12 61736 11 Fan F EXT4 893141 12 Fan cover F EXT4 892680 13 Dust filter 53 mm 874594 14 Protec...

Страница 443: ...T Table 1 Extension Module E EXT spare parts Item Description Order no Replaced by 1 SCREW M3x8mm DIN965 torx head flat countersunk head steel zinc coated 606024 2 Module Casing Single M1021035 3 Torsion Spring M1020935 4 Latch M1021039 5 Front Cover E EXT M1025710 ...

Страница 444: ...Datex Ohmeda S 5 Anesthesia and Critical Care Monitors 22 Document no M1137274 01 ...

Страница 445: ...by 1 ComWheel S 5 898794 2 Membrane keypad K ANEB 898255 3 Front cover K ANEB 897980 4 EMC plate K ANEB 8000225 5 Mounting h 7 5mm D 8mm d 4 3mm PA 640453 HEL 6 Switch Cover 8001436 7 ON STBY switch K ANEB Switch Cover included 8001395 HEL 8 Command board PC board 898007 9 Opto encoder rotary switch 16 positions push button metal shaft 4inch ribbon cable and connector 113291 10 Gable plate K ANEB ...

Страница 446: ...er NL K ANEB S 5 898086 14 Front Panel sticker NO K ANEB S 5 898092 14 Front Panel sticker PT K ANEB S 5 898089 14 Front Panel sticker SV K ANEB S 5 898091 Item Description Order no Replaced by 1 ComWheel S 5 898794 2 Membrane keypad K ANEB 898255 3 Front cover K ANEB 897980 4 EMC plate K ANEB 8000225 5 Mounting h 7 5mm D 8mm d 4 3mm PA 640453 HEL 6 Switch Cover 8001436 7 ON STBY switch K ANEB Swi...

Страница 447: ... Panel sticker FI K ICUB S 5 898102 14 Front Panel sticker FR K ICUB S 5 898097 14 Front Panel sticker IT K ICUB S 5 898100 14 Front Panel sticker JA K ICUB S 5 898106 14 Front Panel sticker NL K ICUB S 5 898098 14 Front Panel sticker NO K ICUB S 5 898104 14 Front Panel sticker PT K ICUB S 5 898101 14 Front Panel sticker SV K ICUB S 5 898103 Item Description Order no Replaced by ...

Страница 448: ...Datex Ohmeda S 5 Anesthesia and Critical Care Monitors 26 Document no M1137274 01 ...

Страница 449: ...ge for oversættelse Forsøg ikke at servicere udstyret medmindre denne servicemanual har været konsulteret og er forstået Manglende overholdelse af denne advarsel kan medføre skade på grund af elektrisk mekanisk eller anden fare for teknikeren operatøren eller patienten WARNUNG DE Diese Serviceanleitung ist nur in englischer Sprache verfügbar Falls der Kundendienst eine andere Sprache benötigt muss...

Страница 450: ... električnim udarom te mehaničkim ili nekih drugih opasnostima FIGYELMEZTETÉS HU Ez a szerviz kézikönyv kizárólag angol nyelven érhető el Ha a vevő szerviz ellátója angoltól eltérő nyelvre tart igényt akkor a vevő felelőssége a fordítás elkészíttetése Ne próbálja elkezdeni használni a berendezést amíg a szerviz kézikönyvben leírtakat nem értelmezték és értették meg Ezen figyelmeztetés figyelmen kí...

Страница 451: ...e vertaling ervan Probeer de apparatuur niet te onderhouden voordat deze service manual geraadpleegd en begrepen is Indien deze waarschuwing niet wordt opgevolgd zou het onderhoudspersoneel de gebruiker of een patiënt gewond kunnen raken als gevolg van een elektrische schok mechanische of andere gevaren ADVARSEL NO Denne servicehåndboken finnes bare på engelsk Hvis kundens serviceleverandør trenge...

Страница 452: ...úšajte sa o obsluhu zariadenia skôr ako si neprečítate návod na obsluhu a neporozumiete mu Zanedbanie tohto varovania môže vyústiť do zranenia poskytovateľa služieb obsluhujúcej osoby alebo pacienta elektrickým prúdom mechanickým alebo iným nebezpečenstvom OPOZORILO SL Ta servisni priročnik je na voljo samo v angleškem jeziku Če ponudnik storitve stranke potrebuje prirocnik v drugem jeziku mora st...

Страница 453: ...інших причин невірного обслуговування обладнання CẢNH BÁO VI Tài Liệu Hướng Dẫn Sửa Chữa chỉ có bản tiếng Anh Nếu các đơn vị cung cấp dịch vụ cho khách hàng yêu cầu một ngôn ngữ nào khác tiếng Anh thì khách hàng sẽ có trách nhiệm cung cấp các dịch vụ dịch thuật Không được sửa chữa thiết bị trừ khi đã tham khảo và hiểu Tài liệu Hướng dẫn Sửa chữa Không tuân thủ những cảnh báo này có thể dẫn đến các...

Отзывы: