background image

Содержание Appliances Quickset III

Страница 1: ...Oven Door 25 Lift Up Cooktop 29 Light 26 Oven Heating Elements 25 Racks 25 Standard Clean Oven Interior 24 Vent 24 Troubleshooting Tips 30 33 Accessories 34 Consumer Support Consumer Support Back Cover Warranty 35 Quickset III and Quickset IV Models For a Spanish version of this manual visit our Website at GEAppliances com Para consultar una version en espa_ol de este manual de instrucciones visit...

Страница 2: ...anti tip bracket is securely attached to the floor or wall and slide the range back so the rear leveling leg is under the anti tip bracket If the range is pulled from the wall for any reason always repeat this procedure to verify the range is properly secured by the anti tip bracket Never completely remove the leveling legs or the range will not be secured to the anti tip device properly For Drop ...

Страница 3: ...t touch or let clothing or other flammable materials contact the surface units areas nearby the surface units or any interior area of the oven allow sufficient time for cooling first Other surfaces of the appliance may become hot enough to cause burns Potentially hot surfaces include the cooktop areas facing the cooktop oven vent opening surfaces near the opening and crevices around the oven door ...

Страница 4: ...ite resulting in fire that may spread to surrounding cabinets Use a deep fat thermometer whenever possible to monitor oil temperature To avoid oil spillover and fire use a minimum amount of oil when shallow pan frying and avaid caaking frazen foads with excessive amounts of ice Useproper pan size select cookware having flat bottoms large enough to cover the surface heating element The use of under...

Страница 5: ...TOP SAFETYINSTRUCTIONS Do not immerse or soak the removable surface units Do not put them in a dishwasher Do not self clean the surface units in an oven Doing so may cause them to fail presenting a burn or fire hazard To avoid the possibility of a burn or electric shock always be certain that the controls for all surface units are at the OFFposition and all coils are cool before attempting to lift...

Страница 6: ...not to rub damage or move the gasket Do not use oven cleaners No commercial oven cleaner or oven liner protective coating of any kind should be used in or around any part of the oven A WARNING i WARIVllNG DRAWER LOWER OVEN DRAWER SAFETY INSTRUCTIONS Somemodels _ The purpose of the warming drawer is to hold hot cooked foods at serving temperature Bacteria will grow in food while it is below 140 F D...

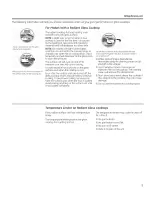
Страница 7: ...sh cooking How to Set Pushthe knob in and turn in either direction to the setting you want A surface ON indicator light will glow when any surface unit is on For gloss cooktop surfaces A HOTCOOKTOPindicator light will come on when the unit is hot to the touch stay on even after the unit is turned off stay on until the unit is cooled to approximately 150 F iill iilk ii ii Rear Melt setting on some ...

Страница 8: ...est setting for breads and pastries Usea medium setting for vegetables sauces stews cream soups butter and chocolate Use the highest setting for soups liquid and hot beverages Theseinitial suggested settings are for reference only The temperature type and amount of food type of pan and the time held will affect the quality of the food Always use pot holders or oven mitts when removing food from th...

Страница 9: ... even when the cooktop is cool Evenafter the surface units are turned off the glasscooktop retains enough heat to continue cooking To avoid overcooking remove pans from the surface units when the food is cooked Avoid placing anything on the surface unit until it has cooled completely Do not slide cookware across the cooktop because it can scratch the glass the glassis scratch resistant not scratch...

Страница 10: ...glass The enamel can melt and bond to the ceramic cooktop Glass ceramic not recommended Poor performance Will scratch the surface Stoneware not recommended Poor performance May scratch the surface Cast Iron not recommended unless designed specifically for glass cooktops Poor conductivity and slow to absorb heat Will scratch the cooktop surface Pans with rounded curved ridged or warped bottoms are ...

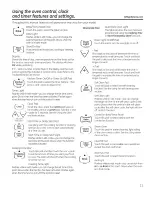
Страница 11: ...until the control is reset Set Clock Hold 3 Sec O Sta rt_ _ Time_ _ o CDelayq L2to U Cooking Time k TimeJ Clock Pad To set the clock pressthe CLOCKpad twice or for models without a CLOCKpad hold the and pads for 3 seconds Seethe Using the clock and timer section d ovocti I Bake I Start Time or Delay Start Pad _Temp Recel_ Usealong with the cooking function or cleaning function to set the oven to s...

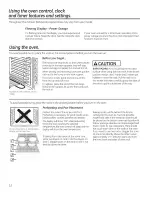
Страница 12: ...ion Always use 2 hands and 2 mitten pot holders to move the rack Pullthe rack out a few inches and then carefully grasp the sides of the rack to pull it out the rest of the way Toavoid possibleburns place Do not place foods or baking stone direct on the oven floor the racks in the desired position before you turn on the oven Preheating and Pan Placement Preheat the oven if the recipe calls for it ...

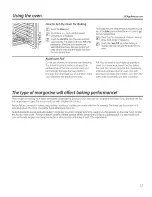
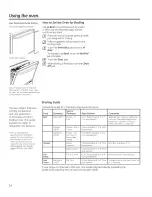
Страница 13: ...ranty Foil may be used to catch spillsby placing a sheet on a lower rack several inches below the food Do not use more foil than necessary and never entirely cover an oven rack with aluminum foil Keepfoil at least i 1 2 from the oven walls to prevent poor heat circulation The type of margarine will affect baking performance Most recipes for baking have been developed using high fat products such a...

Страница 14: ...oning organisms may survive Source Safe Food Book Your Kitchen Guide USDA Rev June 2985 Broiling Guide Preheat the broiler for 2 minutes to improve performance Type or Food Doneness Thickness Rack Position Comments Beef Rare 140 F Steaks 1 E or F foodshould be 1 to 5 Steakslessthan thickare difficult to thick from broil element cook rare Theycookthrough before browning To prevent curling of meat s...

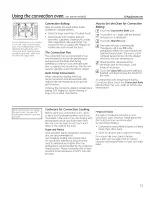
Страница 15: ...eating When the oven reaches the selected temperature the oven control will beep several times and the display will show the oven temperature Check food for doneness at the m_n_mumtime on the recipe Cook longer if necessary Touch the Clear Off pad when baking is finished and then remove the food from the oven To change the oven temperature during Convection Bake touch the Convection Bake pad and t...

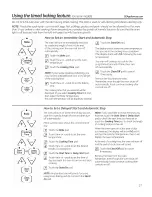
Страница 16: ...ay on Touch the Timer pad again until the display shows OFF Clock display off r3 Touch the Start On pad to leave the control set in this mode NOTE If the clock cannot be recalled or it will not stay permanently displayed the EnergySaver Hode feature is on To turn the feature off see the Energy Saver Hode section o jrKitchen l_imer_ On Off Start _ LOn J Thetimer s a minutetimer only The Clear Off p...

Страница 17: ... then turn off automatically Touch the Clear Off pad to cancel if necessary Remove the food from the oven Remember even though the oven shuts off automatically foods continue cooking after controls are off Temp Recall Cookin_ __TimeJ _ Start_ or jf Delay _ _ Timej j _ Sta t f Start_ k nJ FC eor LoffJ How to Set a Delayed Start and Automatic Stop The oven will turn on at the time of day you set coo...

Страница 18: ... shouldyou forget and leavethe oven on the control will automatically turn off the oven after 12hours during bakingfunctions or after 3 hoursduring a broilfunction Ifyou wish to turn OFF this feature follow the steps below I f Touch the Bake and BroilHi Lo pads at the same time untilthe display shows SF Touchthe Clock pad or for models with no Clock pad touch the Cooking Time pad The display will ...

Страница 19: ...cttimeof dayand the ovenisoff _ TouchandholdboththeBakeandBroilHi Lopads at thesametime untilthedisplay shows SF Tapthe Clockpad orCookingTimepad for models with noClockpad until SAbappearsinthe display How to Set Sabbath Feature for Timed Baking Immediate Start and Automatic Stop _The preset starting temperature wittautomatically be set to 550 Tap the or pads to increase or decreasethetemperature...

Страница 20: ... filledor plasticscouringpads or cleansers such as SoftScrub _ Rinsewell with cleanwater and dry Do not clean the gasket The fiberglass material of the oven door gasket cannot withstand abrasion It is essential for the gasket to remain intact If you notice it becoming worn or frayed replace it Makesure the oven light bulb cover is in place and the oven light is off IMPORTANT Thehealth of somebirds...

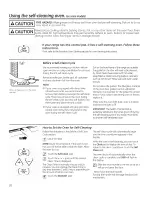
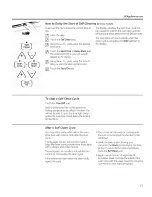
Страница 21: ...he oven has cooled below the locking temperature to unlatch the door You will not be able to open the door right away unlessthe oven has cooled below the locking temperature After a Self Clean Cycle You may notice some white ash in the oven Wipe it up with a damp cloth offer the oven cools If white spots remain remove them with a soap filled steel wool pad and rinse thoroughly with a vinegar and w...

Страница 22: ...latch If the oven is too hot you will not be able to slide the latch Allow the oven to cool Pressthe Steam Clean pad then press Start On A 30 minute cycle will begin to count down on the display D ra When the Steam Clean cycle iscomplete the oven control will beep Pressthe Clear Offpad and open the door The oven bottom and remaining water will still be very warm at the end of the cycle This is nor...

Страница 23: ...thto cleanor rinse Forcleaning usemildsoapandwater ora 50 50 solutionof vinegarandwater Forrinsing useclean water Polishdry witha softcloth Donot useabrasivecleansers strongliquidcleaners plasticscouringpadsor ovencleanersonthe control panel they will damagethe finish Painted Surfaces Paintedsurfacesincludethe sidesofthe rangeand the door top of controlpanelandthe drawerfront Cleanthesewithsoapand...

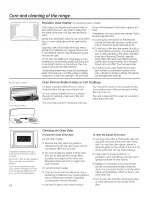
Страница 24: ...ace unit On coil cooktop models the oven isvented through an opening under one of the rear surface units It is normal for steam to come out of the vent and moisture may collect underneath it when the oven is in use The vent is important for proper air circulation Never block this vent This area could become hot during oven use 1 Thegasket isdesigned with a gap at the bottom to allow for proper air...

Страница 25: ...to lock Close the ovendoor Oven Racks Alloven racks may be cleaned by hand with an abrasive cleaner or steel wool After cleaning rinse the racks with clean water and dry with a clean cloth Gray porcelain coated oven racks may remain inthe oven during the self cleaning cycle without being damaged The shiny silver colored oven racks may remain in the oven during the self cleaning cycle but they will...

Страница 26: ...erchange Besure the replacement bulb is rated 120 volts or 130volts NOT12 volts Using gloves or a dry cloth remove the bulb from its packaging Do not touch the bulb with bare fingers Oilfrom skin will damage the bulb and shorten its life r_ Pushthe bulb straight into the receptacle all the way gloves or cloth Placethe tabs of the glass cover into the grooves of the socket Turn the glass cover cloc...

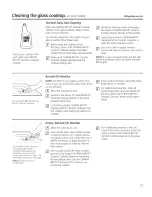
Страница 27: ...e may occur if you use scrub pads other than those recommended r_ Allow the cooktop to cool Spread a few drops of CERAiVlA BRYTE Ceramic Cooktop Cleaner on the entire burned residue area Using the included CERAMABRYTE Cleaning Padfor Ceramic Cooktops rub the residue area applying pressure as needed If any residue remains repeat the steps listed above as needed For additional protection after all r...

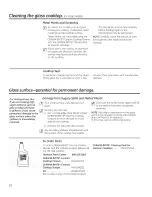
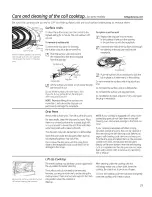
Страница 28: ...r fudge and have a spillover it can cause permanent damage to the glass surface unless the spillover is immediately removed Damage from Sugary Spills and Melted Plastic r_ Turn off all surface units Remove hot pans r2 Wearing an oven mitt a Use a single edge razor blade scraper CERAIVlA BRYTE Ceramic Cooktop Scraper to move the spill to a cool area on the cooktop r4 Don t use the surface units aga...

Страница 29: ...y repair the plug inreceptacle Drip Pans Remove the surfaceunits Thenliftout the drippans Forbestresults cleanthe drippansby hand Place themina coveredcontainer ora plasticbag with cupammoniato loosenthe soil Rinse with clean waterandpolishwith acleansoftcloth Thedrippansmayalsobecleanedina dishwasher Cleanthe areaunderthe drippansoften Built up soil especially grease maycatchfire Donot coverthe d...

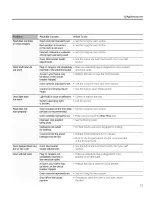
Страница 30: ...ion Food spillovers not cleaned See the Cleaning the glass cooktop section on the radiant glass before next use cooktop Hot surface on a model This is normal The surface may appear discolored with a light colored glass when it is hot This is temporary and will disappear cooktop as the glass cools Plastic melted to Hot cooktop come into See the Glass surface potential for permanent damage the radia...

Страница 31: ...itch operating light Call for service is broken Food does not Door not open to the broil stop Seethe Usingthe oven section broil properly position as recommended Oven controls improperly set Hake sure you touch the Broil Hi Lo pad Improper rack position See the Broiling Guide being used Cookware not suited For best results use a pan designed for broiling for broiling In some areas the power Prehea...

Страница 32: ... flushes HOT Allow the oven to cool to room temperature and steam clean reset the controls Oven controls improperly set See the Using steam clean section Oven door is not closed or in Make sure you close the door For models with a latch make the locked position sure you move the door latch handle all the way to the right Crac klm9 u_ This is the sound of the This is normal popping sound metal heat...

Страница 33: ...y showing in the display Saver Mode section Unable to get the Oven control pads were The Bake and Broil Hi Lo pads must be touched display to show SF not pressed properly at the same time and held for 3 seconds Clock flashes Power outage or surge Reset the clock Ifthe oven was in use you must reset power outage it by touching the Clear Off pad setting the clock and resetting any cooking function B...

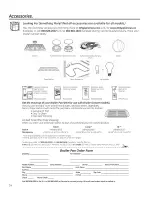
Страница 34: ...an below catches the excessfats and oils Genuine GE Part EasyTo Clean One Year Warranty Limited Time Offe Free Shipping When you order your broiler pan within 30 days of purchasing your GEcooking product Small Large Part WB48X10055 WB48X10056 Dimensions 8 5 4 W x 1 1 4 Hx 15 1 2 D 12 5 4 W x 1 1 4 Hx 15 1 4 D The large standard broil pan does not fit in 20 24 ranges TheXL pan does not fit in 24 wa...

Страница 35: ...consequential damage caused by possible defects with this appliance Damage caused after delivery Product not accessible to provide required service I XCLUSION OF IMPLIED WARRANTIES Your sole and exclusive remedy is product repair as provided in this Limited Warranty Any implied warranties including the implied warranties of merchantability or fitness for a particular purpose are limited to one yea...

Страница 36: ...in effect You can purchase it on line anytime or call 800 626 2224during normal business hours GEConsumer Home Serviceswill still be there after your warranty expires Parts and Accessories GEAppliances com Individuals qualified to service their own appliances can have parts or accessories sent directly to their homes VISA iVlasterCardand Discovercards are accepted Order on line today 24 hours ever...

Отзывы: