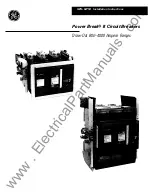
Содержание AM-13.8-750-5

Страница 1: ...MAGNE BLAST CIRCUIT BREAKER I TYPE AM 13 8 750 5 1200 2000 AMPERE W ML 13 MECHANISM INTRODUCTION 3 RECEIVING HANDLING AND STORAGE 3 INSTALLATION 4 DESCRIPTION OF OPERATION 4 ADJUSTMENTS 10 GENERAL MAINTENANCE 15 it RENEWAL PARTS 28 GENERAL ELECTRIC Courtesy of NationalSwitchgear com ...

Страница 2: ... I Courtesy of NationalSwitchgear com ...

Страница 3: ... as this combination has a very corrosive effect on many parts 3 Unfinished surfaces of rollers latches etc of the operating mechanismshouldbe coated with grease to prevent rusting If the breaker is stored for any lengthof time it should be inspected periodically to see that rusting has not started and to insure good mechan ical condition Should the breaker be stored under unfavorable atmospheric ...

Страница 4: ...ation should be wiped clean Insert the spring blocking device 6 and manually discharge the springs against the pins by pushing the manual release button 3 The springs are now blocked and slow closingof the breaker contacts can be accomplished by again turning the driving eccen tric with a 5 8 ratchet wrench 6 If the breaker has been stored for a long period of time it is recommended that the insul...

Страница 5: ... 2 8040932 Left Side View ML 13 Operating Mechanism 2 3 Secondary Coupler Interlock Switches Auxiliary Switch Latch Checking Switch Switch Cam Closing Roller Power Switches Closing Latch Closing Springs Motor 1 2 4 3 4 5 5 6 6 7 8 9 10 Figure 3 8038805 Spring Discharge Linkage 1 Link Adjusting Bolt Trip Latch Crank Discharge Crank Adjusting Clevis Spring Release Crank 2 3 4 5 6 5 I Courtesy of Nat...

Страница 6: ...mote location or mechanically by the manual close and trip levers on the breaker All secondary connectionsfrom the breaker tothe metal clad unit are made through the coupler 1 Figure 2 A spring release interlock Figure 3 is provided to discharge both the closing and opening springs when the breaker is withdrawn from or inserted into the metal clad unit A positive interlock 3 Figure 4 and interlock...

Страница 7: ...any Fusetrons as follows Cont Volt Fuse Size Cat No 48v d c llOv d c 125v d c 115v a c 220v d c 250v d c 230v a c 10A FRN 10 FRN 4 FRN 4 FRN 4 FRN 2 5 FRN 2 5 FRN 2 5 4A 4A 4A 2 5A 2 5A 2 5A Spring Charging The mechanism has a high speed gear motor 10 Figure 5 that compresses a set of closing springs through the action of an eccentric ratchet and pawl assembly The rotary action of the motor is con...

Страница 8: ...closing springs 9 Figure 2 The energy in the springs is used to rotate a cam 8 Figure 7 and close the breaker through the operating mechanism linkage During the closing operation the mech anism is trip free at all times The breaker is held closed by the closing prop 5 moving into position under the prop pin 4 During the i The breaker can be opened either electrically by energizing the trip coil 3 ...

Страница 9: ...oil circuit is energized while the breaker is closing the trip armature willforce the trip latch 17 Figure 7 away from the trip roller 19 causing the mechanism linkage to collapse and the breaker to re open The closing cam 8 will complete its closing stroke and the springs will re charge as in a normal closing operation The arc chute has a series of interleaving ceramic fins Figure 19 As the arc i...

Страница 10: ...VENT ACCIDENTAL CLOSING OR TRIPPING Refer to Figure 9 when the breaker is closed the stationary primary contacts 1 should rise from 1 4 to 5 l6 Before checking this dimen sion be sure the mechanism is re set so that the prop pin 4 Figure 7 is resting on the prop To obtain the proper contact adjustment open the breaker and referring to Figure 10 loosen the check nut 4 and turn the adjusting nut 3 S...

Страница 11: ...re 11 A locking screwlocated behind the trip arm screw mustfirst be loosened Retighten locking screw after making adjustment WHEN WORKING ON THE MECHANISM IN THE CLOSED POSITION KEEP FINGERS CLEAR OF THE LINKAGE AS ACCIDENTAL TRIPPING CAN CAUSE SEVERE INJURY Closing Latch Wipe Refer to Figure 6 The wipe between the closing latch 8 and roller 6 should be 3 16 to 1 4 If re setting is required loosen...

Страница 12: ...until the driving pawl has advanced the ratchet tooth to its maximum travel Now check the clearance between the ratchet tooth and the latching pawl The clearance should be approximately equal for both the driving and latching pawls and notless than 015 in either case AUXILIARY DEVICES Latch Checking Switch Refer to Figure 13 Charge the closing springs sufficiently to reset the mechanism linkage Ro...

Страница 13: ...r bolt 1 to the bottom of the breaker lifting rail 3 should be 11 7 32 to 11 11 32 To change this adjustment add or remove washers 2 Auxiliary Fuses On breakers with either a C F or J suffix a set of protecting fuses is mounted on the front of the breaker These fuses are the primary protective devices for the closing control circuit on those breakers that are used in metal clad units designed for ...

Страница 14: ...h and the mechanism adjustments are checked as described the operating voltages should be checked at the closing coil trip coil and motor terminals Control Power for electrical operation of the breaker may be from either an alternating or direct current source The operating ranges for the closing and tripping voltages as given on the breaker nameplate are as follows Closing Range Nominal Voltage T...

Страница 15: ...Y MAINTENANCE WORK IS PER FORMED MAKE CERTAIN THAT ALL CONTROL CIRCUITS ARE DE ENERGIZED AND THAT THE BREAKER IS REMOVED FROM THE METAL CLAD UNIT DO NOT WORK ON THE BREAKER OR MECHANISM WHILE IN THE CLOSED POSI TION UNLESS THE PROP AND TRIP LATCH HAVE BEEN SECURELY WIRED OR BLOCKED TO PREVENT ACCIDENTAL TRIPPING DO NOT WORK ON THE BREAKER OR MECHANISMWHILE THE SPRINGS ARE CHARGED UNLESS THEY ARE S...

Страница 16: ...Figure 19 without touching Breaker Contacts By removing the box barriers the movable and stationary primary contacts and the movable arcing contacts can be inspected The stationary arcing contacts can be inspected only after removing the interrupter If the contacts are burned or pitted they can be made smooth with a fine file After completing inspection of the contacts check the contact adjustment...

Страница 17: ...throughout its entirestroke Check the mechanism adjustments as specified under ADJUSTMENTS tightness of connections and damaged insulation Bushings and Insulation Check the control wiring for I I The surface of the bushings should be kept clean and unmarred toprevent moisture absorption If the insulation surface should become damaged it should be sanded and cleaned and should be refinished with ei...

Страница 18: ...h to remove the solid particles the bearings can be satisfactorily cleaned Do not handle the bearings with bare hands as deposits from the skin onto the bearings are inductive to corrosion If the bearings are touched the contamination can be removed by washing in alcohol After the bearings have been thoroughly cleaned spin them in clean new light machine oil until the cleaner or solvent is entirel...

Страница 19: ...ct support should be in spected for possible need of replace ment Remove the box barriers 2 Wipe all insulating parts clean of smoke deposit and dust with a clean dry cloth including the bushings and the inside of the box barriers The buffer blocks and their 3 All flat parts in the throat area of the interrupters should be thoroughly cleaned by using sandpaper This cleaning should be performed any...

Страница 20: ...cts The blow out coils should be carefully examined and if the insulation has been cracked shrunk or eroded from arc action and heat so that the turns of the coils are not fully insulated from each other the coils should be re placed checked for tightness The arc runners should be inspected and replaced when the arc resistant coating on the runner surface has been penetrated as a result of arc ero...

Страница 21: ...mechanism should be serviced as described for every 2 000 operations and properly adjusted before being put back into service Remove the assembly bolts 2 6 9 11 15 17 and 19 Figure 18 Remove the side brace 7 and upper brace 3 the upper pole pieces 5 the lower pole pieces 8 and the rear muffler assembly 4 To remove the upper supports 12 and upper interrupter support 14 remove the assembly bolts 1 a...

Страница 22: ...the fins at the rear of the arc chute sides measured at least 1 in from the back end of the arc chute See Figure 21 should be 1 16 maximum Check to insure that electrical connections to the blow out coils are tight When reassembling the arc runner as semblies check that the spacers 6 13 Figure 19 are correctly installed Before bolting the upper supports in place make certain that the upper arc run...

Страница 23: ... on the sta tionary arcing contact and that it does not rub on either side of the throat barrier 9 NOTE Whenever it isfound necessary to replace arcing contacts onany pole of a breaker it is recommended that 3 1 I I ti Vy wmmwBmmmm y m mm 0 I MlS I i alHs ig m 1 m S j j 2 i la r r V 4 I I a 1 5 LM mm 7 m pK _ 111 il 8 1 9 mmm ii 1 MQ n Still 12 11 13 g m 14 PI 15 I B fe rn mi Imm W3m Si j I Figure...

Страница 24: ... Figure 24A rease 9 then 7 so first insert 3 Turn nut 2 in clockwise direction to compress contact spring Figure Hold spring firmly in yoke 24B on spring compressor to prevent spring from slipping out of the compressor 4 Place washer not shown on guide on top of spring place top of guide into hole in spring retainer 4 and the round end of spring guide in cutout in primary finger Figure 24C 5 Hold ...

Страница 25: ... 8034468 Figure 24C 8034469 Figure 24 Method of Installing Primary Contact Springs Using a Spring Compressor 1 Spring Guide Compressor Nut Spring Compressor Spring Retainer Assembly Bolts 6 Spring 7 Contact Support 8 Stop Plate 9 Stationary Primary Finger 2 3 4 5 25 JL Courtesy of NationalSwitchgear com ...

Страница 26: ...terrupter mount ing bracket 3 removing two bolts 4 6 3 Reassemble in the reverse order The interrupter mounting bracket 3 is not symmetrical and must be assembled cor rectly to orient the interrupter properly on the breaker The longest projection of the bracket should be toward the lower end of the bushing 7 4 Remove the two mounting screws of the center switch Remove the two mounting screws of th...

Страница 27: ...n using the manual charging wrench Check the location of the cam follower 15 Figure 7 on the cam 8 If necessary move the cam to correct the alignment Complete the closing operation and check the location of the prop pin 4 on the prop 5 It should be approxi mately centered 6 1 Remove cotter pins at both ends of closing latch shaft 9 Figure 6 2 Remove spring and paddle 12 3 Remove set screws from la...

Страница 28: ... the springs with the manual charging wrench and apply the spring blocking device as described in INSTAL LATION i 2 Discharge springsbypushing manual close RENEWAL PARTS V j ORDERING INSTRUCTIONS It is recommended that sufficient renewalparts be carried in stock to enable the prompt replace ment of any worn broken or damaged parts A stock of such parts minimize service interruptions caused by brea...

Страница 29: ...DC 006174582G001 006174582G015 006174582G002 006174582G013 006174582G032 006275070G001 006275070G002 6 15 1 Closing Coil 110 125 V DC 220 V DC 250 V DC 115 V AC 60 Hz 230 V AC 60 Hz 48 V DC 006174582G001 006174582G015 006174582G002 006174582G010 006174582G014 006275070G002 6 7 Switch Normally Open Switch Normally Closed Auxiliary Switch Type SB 12 Closing Latch Spring Prop Spring Lower Driving Paw...

Страница 30: ...d Assembly Flexible Connector Left Long Flexible Connector Right Long Flexible Connector Left Short Flexible Connector Right Short Throat Barrier Assembly Arcing Contact Assembly Primary Contact Finger Spring Primary Contact Finger Spring Primary Contact Finger Primary Contact Finger Movable Primary Contact Movable Primary Contact Movable Primary Contact Movable Arcing Contact Tube Piston Assembly...

Страница 31: ... MOTOR 52 AUX SW TC REST z 52 X 52Y REQUIRED FOR 220 ft 250V dc OPERATION ONLY 1 H A CONTACTS FURNISHED AS REQUIRED 52 l SM LS N Y Y i 1 1 0108B5599 OR Y REF NO FIG NO DESCRIPTION 52 5 1 AUXILIARY SWITCH AUX SW 52X 6 15 CLOSING COIL 52Y 6 17 CONTROL RELAY 52 5 3 TRIP COIL TC 52 2 2 INTERLOCK SWITCHES 15 52 CL MS 13 6 CLOSING LATCH MONITORING SWITCH 52 6 7 POWER SWITCHES SM LS 52 6 1 LATCH CHECKING...

Страница 32: ... 5 r I in ii i m rii GENERAL ELECTRIC COMPANY SWITCHGEAR BUSINESS DEPARTMENT PHILADELPHIA PA 19142 if lii i ll M ELECTRIC GENERAL Sr i I ij I 1 1 I 3 I I I 2 82 2 72 I Courtesy of NationalSwitchgear com ...

Отзывы: