background image

19

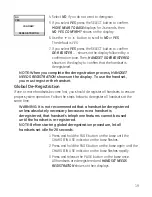
4.  Select 

NO

, if you do not want to deregister.

5.  If you select 

YES

, press the SELECT button to confirm.  

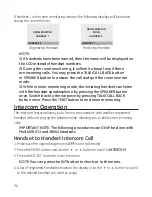
MOVE NEAR TO BASE

 displays for  seconds, then


NO  YES  CONFIRM?


shows on the display.

6.  Use the 

6

 or 

button to scroll to 

NO

 or 

YES

.  

The default is 

YES

7.  If you select 

YES

, press the SELECT button to confirm. 

DE-REGISTER . . .

 shows on the display followed by a 

confirmation tone. Then, 

HANDSET X DEREGISTERED


shows on the display to confirm that the handset is 
deregistered.

NOTE: When you complete the deregistration process, 

HANDSET 

NEEDS REGISTRATION

 shows on the display. To use the handset, 

you must register the handset.

Global De-Registration

If one or more handsets become lost, you should de-register all handsets to ensure 
proper system operation. Follow the steps below to deregister all handsets at the 
same time.

WARNING: It is not recommended that a handset be deregistered 

unless absolutely necessary because once a handset is 

deregistered, that handset’s telephone features cannot be used 

until the handset is re-registered.
NOTE: Before starting global deregistration procedure, let all 

handsets set idle for 20 seconds.

1. Press and hold the PAGE button on the base until the 

CHARGE/IN USE indicator on the base flashes.

. Press and hold the PAGE button on the base again until the 

CHARGE/IN USE indicator on the base flashes rapidly.

. Press and release the PAGE  button on the base once. 

All handsets are deregistered and 

HANDSET NEEDS 

REGISTRATION

 shows on their displays.

CONFIRM?

DEREGISTRATION

YES

NO

DEREGISTRATION

Содержание 28041EE2

Страница 1: ...Model 28041 5 8GHz Color Handset Speakerphone Answering System User s Guide ...

Страница 2: ...icularly important in rural areas CAUTION Users should not attempt to make such connections themselves but should contact the appropriate electric inspection authority or electrician as appropriate NOTES This equipment may not be used on coin service provided by the telephone company Interference Information This equipment generates and uses radio frequency energy which may interfere with resident...

Страница 3: ...n determining the number of devices you may connect to your telephone line and still have all of these devices ring when your telephone number is called In most but not all areas the sum of the RENs of all devices connected to one line should not exceed 5 To be certain of the number of devices you may connect to your line as determined by the REN you should contact your local telephone company REN...

Страница 4: ...gistration 18 Global De Registration 19 Default Setting 20 Display Setting 20 Wallpaper 20 Color Scheme 21 Set Contrast 21 Sound Setting 21 Ringer Volume 22 Ringer Tone 22 Key Tone 22 Answering System Operation 23 Message Counter 23 Mailbox Indicator 24 Leaving a Message 24 Screening Calls from the Base 24 Memory Full 24 Messages Playback 25 Leaving a Memo 26 Answering System Remote Access 26 Remo...

Страница 5: ...er Tones 47 Record with Included Audio Cable or an Optional Headset 48 Record with the Handset Microphone 49 Choosing the Recorded Sound Clip as Ringer Tone 49 Assigning the Recorded Sound Clip to Phone Book Record 49 Belt Clip and Optional Headset 50 Connecting the Belt Clip 50 Connecting an Optional Headset to the Handset 50 Changing the Battery 50 Battery Safety Precautions 51 Display Messages ...

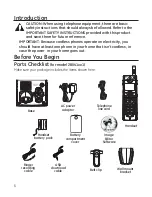
Страница 6: ...e cordless phones operate on electricity you should have at least one phone in your home that isn t cordless in case the power in your home goes out Before You Begin Parts Checklist for model 28041xx1 Make sure your package includes the items shown here Base Handset Belt clip Telephone line cord AC power adaptor Handset battery pack Battery compartment cover Wall mount bracket Ringer recording cab...

Страница 7: ... your phone line INSTALLATION NOTE Some cordless telephones operate at frequencies that may cause or receive interference with nearby TVs microwave ovens and VCRs To minimize or prevent such interference the base of the cordless telephone should not be placed near or on top of a TV microwave ovens or VCR If such interference continues move the cordless telephone farther away from these appliances ...

Страница 8: ...perature Avoid other cordless telephones or personal computers Never install telephone wiring during a lightning storm Never install telephone jacks in wet locations unless the jack is specifically designed for wet locations Never touch non insulated telephone wires or terminals unless the telephone line has been disconnected at the network interface Use caution when installing or modifying teleph...

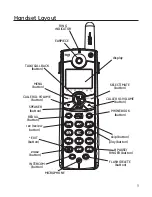
Страница 9: ...PAUSE RINGER button INTERCOM button erase button FLASH DELETE button PHONEBOOK button REDIAL button EXIT button play button rev review button TALK CALL BACK button CALLER ID VOLUME button EARPIECE CALLER ID VOLUME button SELECT MUTE button RING INDICATOR MICROPHONE ...

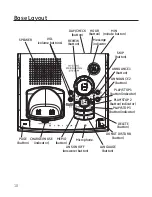
Страница 10: ... button REVIEW button PLAY STOP 1 button indicator SKIP button DO NOT DISTURB button MEMO button VOL volume buttons PLAY STOP 3 button indicator PLAY STOP 2 button indicator Message indicator PAGE button DAY CHECK button HOUR button MIN minute button LANGUAGE button Microphone SPEAKER Base Layout ...

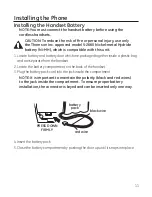
Страница 11: ...ackaged together inside a plastic bag and are separate from the handset 2 Locate the battery compartment on the back of the handset 3 Plug the battery pack cord into the jack inside the compartment NOTE It is important to maintain the polarity black and red wires to the jack inside the compartment To ensure proper battery installation the connector is keyed and can be inserted only one way 4 Inser...

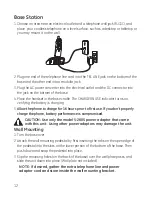
Страница 12: ...ith this unit Using other power adaptors may damage the unit Wall Mounting 1 Turn the base over 2 Attach the wall mounting pedestal by first inserting the tabs on the open edge of the pedestal into the slots on the lower portion of the bottom of the base Then push down and snap the pedestal into place 3 Slip the mounting holes on the back of the base over the wall plate posts and slide the unit do...

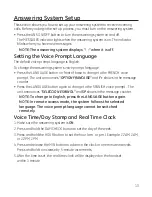
Страница 13: ...nounces OPTION FRANCAISE and Fr shows in the message counter Press the LANGUAGE button again to change to the SPANISH voice prompt The unit announces SELECCION ESPANOL and SP shows in the message counter NOTE To change to English press the LANGUAGE button again NOTE In remote access mode the system follows the selected language The voice prompt language cannot be switched remotely Voice Time Day S...

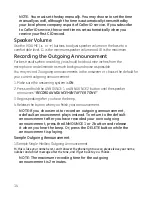
Страница 14: ...r your current outgoing announcement 1 Make sure the answering system is ON 2 Press and hold the ANNOUNCE 1 or ANNOUNCE 2 button until the speaker announces RECORD ANNOUNCEMENT AFTER TONE 3 Begin speaking after you hear the beep 4 Release the button when you finish your announcement NOTE If you choose not to record an outgoing announcement a default announcement plays instead To return to the defa...

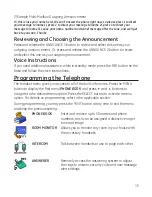
Страница 15: ...REV button on the base and follow the voice instructions Programming the Telephone The handset menu gives you access to all of the built in features Press the MENU button to display the first menu PHONE BOOK and press 6 and 5 buttons to navigate to the desired menu option Press the SELECT button to activate a menu option For details on programming refer to the applicable section During programming...

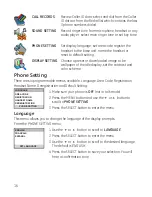
Страница 16: ... menus available Language Area Code Registration Handset Name Deregistration and Default Setting 1 Make sure your phone is OFF not in talk mode 2 Press the MENU button and use the 6 or 5 button to scroll to PHONE SETTING 3 Press the SELECT button to enter the menu Language This menu allows you to change the language of the display prompts From the PHONE SETTING menu 1 Use the 6 or 5 button to scro...

Страница 17: ...DE shows on the display Registration Your handset is pre registered and ready to use It is not recommended that handset be registered again unless absolutely necessary From the PHONE SETTING menu 1 Use the 6 or 5 button to scroll to REGISTRATION 2 Press the SELECT button to enter the menu 3 Use the 6 or 5 button to scroll to NO or YES The default is NO 4 If you select YES press the SELECT button t...
Страница 18: ...the letter M press the 4 key 3 times for the letter I Press the 8 key for the letter T press the 4 key twice for the letter H 4 Press the SELECT button to save your selection You will hear a confirmation tone NOTE If you make a mistake use the FLASH DELETE button to backspace and delete one character at a time Deregistration Deregistration cancels registration During the deregistration process kee...

Страница 19: ...sets become lost you should de register all handsets to ensure proper system operation Follow the steps below to deregister all handsets at the same time WARNING It is not recommended that a handset be deregistered unless absolutely necessary because once a handset is deregistered that handset s telephone features cannot be used until the handset is re registered NOTE Before starting global deregi...

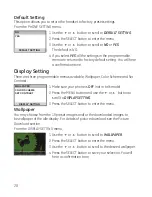
Страница 20: ... 1 Make sure your phone is OFF not in talk mode 2 Press the MENU button and use the 6 or 5 button to scroll to DISPLAY SETTING 3 Press the SELECT button to enter the menu Wallpaper You may choose from the 10 preset images and or the downloaded images to be wallpaper of the idle display For details of picture download see the Picture Download section From the DISPLAY SETTING menu 1 Use the 6 or 5 b...

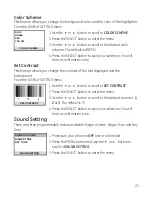
Страница 21: ... the background From the DISPLAY SETTING menu 1 Use the 6 or 5 button to scroll to SET CONTRAST 2 Press the SELECT button to enter the menu 3 Use the 6 or 5 button to scroll to the desired contrast 1 2 or 3 The default is 2 4 Press the SELECT button to save your selection You will hear a confirmation tone Sound Setting There are three programmable menus available Ringer Volume Ringer Tone and Key ...

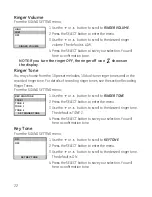
Страница 22: ...ee the section Recording Ringer Tones From the SOUND SETTING menu 1 Use the 6 or 5 button to scroll to RINGER TONE 2 Press the SELECT button to enter the menu 3 Use the 6 or 5 button to scroll to the desired ringer tone The default is TONE 1 4 Press the SELECT button to save your selection You will hear a confirmation tone Key Tone From the SOUND SETTING menu 1 Use the 6 or 5 button to scroll to K...

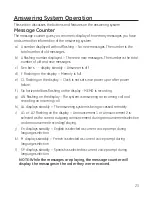
Страница 23: ...r failure f Six horizontal bars flashing on the display MEMO is recording g AN flashing on the display The system is answering an incoming call and recording an incoming call h LA displays steadily The answering system is being accessed remotely i A1 or A2 flashing on the display Announcement 1 or Announcement 2 is selected as the current outgoing announcement during announcement selection and ann...

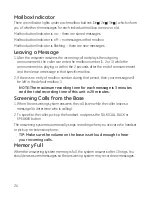
Страница 24: ...ailbox 2 If there is no entry of mailbox number during that period then your message will be left in the default mailbox 1 NOTE The maximum recording time for each message is 3 minutes and the total recording time of this unit is 20 minutes Screening Calls from the Base 1 When the answering system answers the call listen while the caller leaves a message to determine who is calling 2 To speak to t...

Страница 25: ...xt message Press the DELETE button to erase the current message Erasing Messages You may erase messages in several ways To erase a message while it is playing 1 Press and release the respective mailbox button 1 4 g or 2 4 g or 3 4 g 2 Press the REV 3 and SKIP 4 buttons to select and play the message you want to erase 3 Press the DELETE button the current message is erased and the next message play...

Страница 26: ... hold the mailbox button 1 4 g or 2 4 g or 3 4 g You must hold the button until you finish recording the memo 3 Begin speaking after it announces RECORD MESSAGE 4 Release the mailbox button when finished Answering System Remote Access You may access the answering system with the cordless handset or from any tone dial compatible telephone IMPORTANT NOTE The following procedures can ONLY be done wit...

Страница 27: ...security code 5 Press the SELECT button to save your selection You will hear a confirmation tone NOTE If you make a mistake key in the digits again or press the FLASH DELTE button to erase all and re enter Ring to Answer This feature lets you select the number of times you want the phone to ring before the answering system answers the call 1 Press the MENU button and use 6 or 5 button to scroll to...

Страница 28: ...When the answering system picks up 1 Press the SELECT button to access the answering system 2 Listen as the caller leaves a message 3 Press the TALK CALL BACK or SPEAKER buttons to speak to the person or press the SELECT button to stop screening the call Remote Access from Another Location You can access your answering system from any touch tone phone by entering your 3 digit security code during ...

Страница 29: ...an record new messages NOTE The unit also answers after the 10th ring if it is turned off To access the answering system enter your 3 digit security code after you hear the beep Telephone Operation CHARGE IN USE Indicator on the Base The CHARGE IN USE indicator is lit when the phone is in use or a handset is charging in the base charge cradle It flashes when you receive a call Visual Ring Indicato...

Страница 30: ...sing the 6 or 5 button There are four volume levels to choose from When the maximum or minimum volume level is reached the phone beeps twice VOL 1 is minimum and VOL 4 is maximum Call Timer After you press TALK CALL BACK or SPEAKER button on the handset the built in call timer shows in the display and begins counting the length of time of the call Auto Standby Placing the cordless handset in the c...

Страница 31: ...led 1 Press the REDIAL button first then use the 6 or 5 button to select the desired redial number 2 Press the TALK CALL BACK or SPEAKER button the number dials automatically OR If you get a busy signal and want to keep dialing the number press the REDIAL button to quickly redial the number Exit Press the EXIT button to exit a menu function and return to the standby screen Page The page feature he...

Страница 32: ... the 6 or 5 button to scroll to the desired handset you want to page Or scroll to 5 GLOBAL PAGE to page all handsets 5 Press the SELECT button 6 The receiving handset is paged and emits a tone 7 To cancel the page press the EXIT INT or TALK CALL BACK button on the originating handset OR Press the INT button on the receiving handset to enter intercom mode Mute To have a private off line conversatio...

Страница 33: ... in each handset display 3 To cancel press the DO NOT DISTURB button again NOTE You can press the DO NOT DISTURB button and activate the function immediately even when there is incoming call ringing in or during call screening after the call is taken by the answerer Room Monitor This is only applicable when 2 or more handsets are registered to the same base unit IMPORTANT NOTE The following proced...

Страница 34: ...eature allows you to have a conversation with another registered handset without tying up the telephone line allowing you to still receive incoming calls IMPORTANT NOTE The following procedures can ONLY be done with Model 28011 and 28041 handsets Handset to Handset Intercom Call 1 Make sure the originating phone is OFF not in talk mode 2 Press the MENU button and use the 6 or 5 button to scroll to...

Страница 35: ...all during an intercom call the intercom call is immediately terminated and both handsets ring Either handset user may press the TALK CALL BACK or SPEAKER button to answer the call Using Intercom with External Telephone Calls During a telephone call you may use the intercom paging function to page another handset and have an off line private two way intercom conversation You may also have a three ...

Страница 36: ...n external call press the INT button to enter the intercom menu 2 List of registered handsets shows on the display Use the 6 or 5 button to scroll to the desired handset you want to intercom with 3 Press the SELECT button to page LINE ON HOLD shows on the display 4 The receiving handset is paged and emits a paging tone 5 Press the INT button on the receiving handset to answer the intercom call 6 D...

Страница 37: ... are on the phone you must subscribe to Call Waiting Caller ID Service This unit receives and displays information transmitted by your local phone company This information can include the phone number date and time or the name phone number date and time Call Waiting Caller ID Provided you subscribe to Call Waiting Caller ID service from your phone company if you receive an incoming call and you ar...

Страница 38: ... the stored information at any time Calls received since your last review show as NEW CALL XX on the top line of the display Reviewing CID Records As calls are received and stored the display is updated to let you know how many calls have been received To scroll CID records 1 Make sure the phone is OFF not in talk mode 2 Press the 6 button to review the newest CID record 3 Press the 5 button to re...

Страница 39: ...digit area code 7 digit telephone number Ten digits 3 digit area code 317 888 8888 7 digit telephone number Seven digits 7 digit telephone number 888 8888 Storing CID Records into Phone Book You may also store CID information in the Phone Book NOTE It is important that you format CID records correctly for dialing out BEFORE storing in the Phone Book as you cannot reformat CID records stored in mem...

Страница 40: ...e 6 or 5 button to scroll to DELETE 5 Press the SELECT button to show DELETE CALL ID 6 Press the SELECT button again to confirm the deletion The display shows DELETED NOTE Press the EXIT button to return to the standby mode or if no action is taken it will exit automatically after one minute Deleting All CID Records 1 Make sure the phone is OFF not in TALK mode 2 Use the 6 or 5 button to display a...

Страница 41: ...cture will show on the display You may choose from 10 different polyphonic melodies 10 different ring tones and 5 recorded ring tones 1 Make sure your phone is OFF not in talk mode 2 Press the MENU button and use the 6 or 5 button to scroll to PHONE BOOK 3 Press the SELECT button to enter the phone book NOTE You may press the PHONEBOOK button to shortcut to the phone book too 4 Use the 6 or 5 butt...

Страница 42: ...o save the record You will hear a confirmation tone and the display shows the whole record for 2 seconds 14 To enter another name and number return to step 4 and repeat the process Storing the Last Number Dialed Store a dialed number when reviewing it 1 Make sure the phone is OFF not in talk mode 2 Press the REDIAL button on the handset to access the DIALED menu 3 Use the 6 or 5 button to scroll t...

Страница 43: ...the dialing sequence You can press the PAUSE button to insert a P pause when you enter the telephone number when adding a phone book entry Reviewing Phone Book Records 1 Make sure your phone is OFF not in talk mode 2 Press the MENU button and use the 6 or 5 button to scroll to PHONE BOOK 3 Press the SELECT button to enter the phone book NOTE You may press the PHONEBOOK button to shortcut to the ph...

Страница 44: ...the 6 or 5 button or the number keys to scroll to the desired record 2 Press the SELECT button to view the details of the record 3 Press the SELECT button again to show the option menu The display shows EDIT and DELETE 4 Use the 6 or 5 button to scroll to DELETE 5 Press the SELECT button and the display shows the details of the record again with DELETE 6 Press the SELECT button to delete the recor...

Страница 45: ... Authorization Code and a frequently called long distance number in the phone book and simply repeat step 2 through 4 in Dial a phone book record while in talk mode to dial them one by one Picture Download You can download an image of your own up to a total of 15 images in addition to the preset 10 wallpapers One Time Software Installation 1 Insert the enclosed GE 28041 Image Manager CD into your ...

Страница 46: ... sure that the software can communicate with the handset 2 A window pops up that states Connection has been made to the Handset Press OK to continue download 3 Handset displays DOWNLOADING during download and then USB CONNECTED appears in the display After completed download another pop up window states Download finished successfully Press OK to close window Choosing the Downloaded Image as Wallpa...

Страница 47: ... of a song rather than a portion from the middle to produce an audibly pleasing custom ringer 1 Make sure your phone is OFF not in talk mode 2 Press the MENU button and use the 6 or 5 button to scroll to SOUND SETTING 3 Press the SELECT button to enter the menu 4 Use the 6 or 5 button to scroll to RINGER TONE 5 Press the SELECT button to show the options 6 Use the 6 or 5 button to scroll to REC RI...

Страница 48: ...6 or 5 button to scroll to the AUDIO_CABLE or HEADSET 2 Press the SELECT button to enter 3 Verify the cable headset is connected to your handset then press the SELECT button again to start the count down display The handset will start recording and the second number will decrease automatically 4 The recording will stop when the display counts down to 0 seconds Or you may press the SELECT button an...

Страница 49: ... SELECT button any time to stop When the recording stops the display will show 2 options REPLAY and RE RECORD Follow the steps under section Record with Included Audio Cable or an Optional Headset to replay the recorded ringer tone or re record the ringer tone IMPORTANT NOTE When you want to use the handset microphone to record ringer tones DO NOT insert the Audio cable or the optional headset int...

Страница 50: ...lls using the headset 4 To return to normal operation unplug the headset from the jack Changing the Battery CAUTION To reduce the risk of fire or personal injury use only the Thomson Inc approved model 5 2660 Nickel metal Hydride battery Ni MH which is compatible with this unit 1 Make sure the telephone is OFF not in TALK mode before you replace the battery 2 Remove the battery compartment door 3 ...

Страница 51: ...CHARGING Indicates the handset need to charge for a period of time before it can resume normal function DELETE ALL Prompt asking if you want to erase all Caller ID records DELETE CALL ID Prompt asking if you want to erase the Caller ID record that is shown on the display DELETE Prompt asking if you want to erase one of the 50 records stored in the phone s memory END OF LIST Indicates that there is...

Страница 52: ...wed NEW CALL XX XX represents the number of new CID records not reviewed NO CALLS Indicates there are no CID records in memory NO DATA No Caller ID information was received OUT OF RANGE May indicate handset is too far away from the base or that the power has been interrupted Move closer and check connections PAGING or Someone pressed the PAGE button on the base or INT PAGING FROM button on the han...

Страница 53: ...ll F blinking Answering system memory is full Six bars blinking The system is recording a memo A1 or A2 blinking The system is recording an announcement LA Line Access External line remote answering system Handset Sound Signals Signal Meaning A long warbling tone with ringer on Signals an incoming call Three short beeps Page signal One long beep Confirmation tone for the completion of a function O...

Страница 54: ...e charge indicator on the base should be lit when the handset rests in the cradle If not the battery may need to be charged Place handset in charge cradle for at least 20 seconds to reset the unit Handset does not ring Make sure the handset ringer switch is turned ON this can be done through the handset setup menu Ringer Volume The handset may be out of range Move closer to the base You may have e...

Страница 55: ...ery and charge for 16 hours Handset displays SEARCHING or OUT OF RANGE and cannot link up with the base when the TALK CALL BACK button is pressed Handset may be out of range of the base Move closer to the base Make sure the power adaptor is properly installed Disconnect the handset battery and plug it in again Place the handset on the cradle for at least 2 to 3 minutes Disconnect the power adaptor...

Страница 56: ...er ID information during the silent period after the first ring This message indicates the presence of noise on the line No Caller ID In order to receive Caller ID information you must subscribe to the standard name number Caller ID service from your local telephone company Battery Solutions If you experience any of the following problems even after fully recharging the battery you may need to rep...

Страница 57: ...th other electronic devices Baby monitor is using the same frequency Handset battery is low General Product Care To keep your unit working and looking good follow these guidelines Avoid dropping the handset as well as other rough treatment to the phone Clean the phone with a soft cloth Never use a strong cleaning agent or abrasive powder because this will damage the finish Retain the original pack...

Страница 58: ...riginal carton or equivalent Mail prepaid with proof of purchase and insured to ATLINKS Communications Canada Inc c o Thomson multimedia Ltd 6200 Edwards Boulevard Mississauga Ontario Canada L5T 2V7 The provisions of this written warranty are in addition to and not a modification of or subtraction from the statutory warranties and other rights and remedies contained in any applicable legislation a...

Страница 59: ...CHASE DATE ___________________________________________ NAME OF STORE ______________________________________________ To order call the nearest distributor for your area Ontario 905 624 8516 Manitoba 204 783 2088 British Columbia 604 438 8001 Quebec 514 352 9071 A shipping and handling fee will be charged upon ordering It is required by law to collect appropriate sales tax for each individual state ...

Страница 60: ...46 Choosing the Recorded Sound Clip as Ringer Tone 49 CID Error Codes 38 Color Scheme 21 Connecting an Optional Headset to the Handset 50 Connecting the Belt Clip 50 D Default Setting 20 Deleting a CID Record 40 Deleting a Phone Book Record 44 Deleting All CID Records 40 Deregistration 18 Dialing a CID Number 38 Dialing a Phone Book Record 44 Digital Security System 7 Display Messages 51 Display S...

Страница 61: ... 14 Registration 17 Remote Access from Cordless Handset 26 Remote Access Security Code 27 REN Number 3 Reviewing Choosing the Announcement 15 Reviewing CID Records 38 Reviewing Phone Book Records 43 Ring to Answer 27 Ringer Tone 22 Ringer Volume 22 Ringer Volume Shortcut 32 Room Monitor 33 S Screening Calls from the Base 24 Screening Calls from the Handset 28 Service 58 Set Contrast 21 Setting the...

Страница 62: ...62 Model 28041 00008006 Rev 0 CAN E F 06 25 Printed in China ATLINKS Communications Canada Inc 2006 ATLINKS Communications Canada Inc Trademark s Registered Marque s déposée s ...

Страница 63: ...Modèle 28041 Système Téléphonique sans fil de Couleur 5 8 GHz avec Haut Parleur et Répondeur Guide d Utilisation ...

Страница 64: ... compagnie de téléphone Renseignements sur L interférence Cet appareil produit et utilise l énergie radiofréquence qui peut gêner la réception radio et télévision résidentielle s il n est pas installé ou utilisé conformément aux instructions contenues dans ce guide Une protection raisonnable est assurée contre une telle interférence mais rien ne garantit qu un appareil donné ne produira pas d inte...

Страница 65: ...nstallé et utilisé en maintenant une distance minimale de 20 centimètres entre le radiateur et votre corps Cet émetteur ne doit pas être placé ou utilisé avec une autre antenne ou un autre émetteur Pour l utilisation sur soi ce téléphone a été mis à l essai et est conforme aux lignes directrices en matière d exposition RF de la FCC lorsque utilisé avec la pince ceinture fournie avec ce produit L u...

Страница 66: ...ional 17 Enregistrement 17 Nom du Combiné 18 Desenregistrement 18 Desenregistrement Global 19 Reglage par Defaut 20 Reglage Affichage 20 Papier Peint 20 Nuance Couleur 21 Programme Contrast 21 Reglage Sonnerie 21 Volume de la Sonnerie 22 Tonalité de la Sonnerie 22 Tonalité du Clavier 22 Programmation du Répondeur 23 Compteur de Message 23 Indicateurs des boîtes vocales 24 Pour laisser un message 2...

Страница 67: ...ence de Composition D un Numero Memorise 43 Révision des Dossier du Répertoire Téléphonique43 Modification d un Dossier du Répertoire Téléphonique 44 Suppression d un Dossier du Répertoire Téléphonique 44 Composition d un Dossier du Répertoire Téléphonique 44 Composition en Chaine a Partir de la Memoire 45 Téléchargement d Image 45 Installation du Logiciel 45 Édition d une Image 45 Transfert d ima...

Страница 68: ...ans cordon fonctionnent à l électricité vous devriez disposer d au moins un téléphone avec cordon dans la maison en cas de panne de courant Avant de Commencer Liste de Pièces pour le modèle 28041xx1 Assurez vous que la boîte contient les articles suivants Câble d enregistrement de sonnerie Câble USB pour téléchargement Logiciel d édition d images Piédestal de bâti de mur Combiné Base Cordon téléph...

Страница 69: ...es d autres téléphones sans cordon NOTE SUR L INSTALLATION Certains téléphones sans fil fonctionnent à des fréquences qui peuvent causer ou subir de l interférence de téléviseurs fours à micro ondes et magnétoscopes situés à proximité Pour réduire ou éviter cette interférence la base de votre téléphone sans fil ne devrait pas être placée près ou sur un téléviseur un four à micro ondes ou un magnét...

Страница 70: ...vitez les autres téléphones sans cordon et les ordinateurs personnels Ne jamais installer les câbles téléphoniques pendant un orage électrique Ne jamais installer de prises téléphoniques dans des endroits humides à moins qu elles soient spécialement conçue pour endroits humides Ne jamais toucher les fils ou bornes téléphoniques non isolés à moins que la ligne téléphonique ait été débranchée de l i...

Страница 71: ...n quitter INTERCOM botón intercomunicación FLASH DELETE bouton flash suppresion TALK CALL BACK bouton parler rappeler CALLER ID VOLUME bouton ID appelan volume CALLER ID VOLUME bouton ID appelan volume afficheur SPEAKER bouton haut parleur erase bouton effacer rev bouton réviser REDIAL bouton recomposition skip bouton évitement play bouton écoute PAUSE RINGER bouton pause sonnerie ...

Страница 72: ...OUNCE 1 bouton annonce 1 ANNOUNCE 2 bouton annonce 2 DELETE bouton effacer PLAY STOP 1 bouton indicateur de écoute arrêt MEMO bouton MIN bouton minute LANGUAGE bouton Microphone PAGE bouton buscar CHARGE IN USE indicateur de chargement utilisation DO NOT DISTURB bouton ne pas déranger SKIP bouton évitement PLAY STOP 2 bouton indicateur de écoute arrêt PLAY STOP 3 bouton indicateur de écoute arrêt ...

Страница 73: ... compartiment de la pile qui sont emballés ensemble dans un sac de plastique séparément du combiné 2 Repérez le compartiment de la pile à l arrière du combiné 3 Raccordez le connecteur de la pile dans la prise située à l intérieur du compartiment REMARQUE Pour assurer une installation correcte de la pile le connecteur est claveté et ne peut être inséré que dans une seule position fil noir fil roug...

Страница 74: ...e se charger pendant 16 heures avant l utilisation initiale Si vous ne chargez pas correctement le téléphone le rendement de la pile sera compromis ATTENTION Utilisez seulement l adapteur modèle de la puissance 5 2605 qui accompagne l appareil L utilisation d autres adapteurs de puissance peut endommager l unité Montage au Mur 1 Retournez la base 2 Fixez le socle de montage au mur en insérant d ab...

Страница 75: ...essages Appuyez sur le bouton LANGUAGE encore pour l Espagno L appareil annonce SELECCION ESPANOL et le message SP s affiche sur le compteur de messages REMARQUE Pour revenir à Anglais appuyez de nouveau sur le bouton LANGUAGE REMARQUE En mode d accès à distance l appareil fonctionne selon la langue sélectionnée La langue du message d accueil ne peut pas être modifiée à distance Annonce Vocale Dat...

Страница 76: ...le répondeur ou sélectionner le message par défaut 1 Assurez vous que le répondeur est à ACTIVÉ 2 Appuyez et gardez enfoncé le bouton ANNOUNCE 1 ou ANNOUNCE 2 jusqu à ce que l appareil émette le message ENREGISTREZ LE MESSAGE D ACCEUIL APRES LA TONALITE 3 Commencez à parler après le bip 4 Relâchez le bouton quand vous avez terminé le message d accueil REMARQUE Si vous décidez de ne pas enregistrer...

Страница 77: ...tions vocales Programmation du Telephone Le système utilise un menu qui vous donne accès à toutes ses fonctionnalités Appuyez sur le bouton MENU pour sélectionner le premier menu REPERTOIRE NUM et appuyez sur les touches 6 ou 5 pour aller à l option désirée Appuyez sur le bouton SELECT pour accéder une option du menu Pour plus de détails sur la programmation consultez la section appropriée Pendant...

Страница 78: ...leurs Paramètres du Combiné Six menus programmables sont disponibles Langue Code Régional Enregistrement Nom du Combiné Desenregistrement et Reglage par Defaut 1 Assurez vous que le téléphone est DÉSACTIVÉ pas en mode conversation 2 Appuyez sur le bouton MENU et utilisez le bouton 6 ou 5 pour sélectionner REPERTOIRE NUM 3 Appuyez sur le bouton SELECT pour ouvrir ce menu Langue Ce menu permet de mo...

Страница 79: ...uand le message REGLER IND REGI est affiché Enregistrement Vous combiné s sont préenregistrés et prêts à être utilisés On ne recommande pas d enregistrer de nouveau le combiné à moins que ce ne soit absolument nécessaire Du Menu REGL TELEPHONE 1 Appuyez sur le bouton 6 ou 5 pour afficher INDIC REGIONAL 2 Appuyez sur le bouton SELECT pour ouvrir ce menu 3 Utilisez le bouton 6 ou 5 our atteindre NON...

Страница 80: ...trois fois sur la touche 4 pour la lettre I sur la touche 8 pour la lettre T et deux fois sur la touche 4 pour la lettre H 4 Appuyez sur le bouton SELECT pour enregistrer votre sélection Vous entendrez une tonalité de confirmation REMARQUE Si vous faites une erreur appuyez sur le bouton FLASH DELETE pour reculer en effaçant un caractère à la fois Desenregistrement Le désenregistrement annule l enr...

Страница 81: ...devez désenregistrer tous les combinés pour assurer le bon fonctionnement du système Suivez les étapes ci dessous pour désenregistrer les deux combinés en même temps AVERTISSEMENT Il n est pas recommandé de désenregistrer un combiné à moins que cela ne soit absolument nécessaire parce qu un combiné est désenregistré que les fonctions du combiné sont inutilisables tant que le combiné n a pas été ré...

Страница 82: ...VÉ pas en mode conversation 2 Appuyez sur le bouton MENU et utilisez le bouton 6 ou 5 pour sélectionner REPERTOIRE NUM 3 Appuyez sur le bouton SELECT pour ouvrir ce menu Papier Peint Ce menu permet de sélectionner entre dix images en mémoire et ou de télécharger des images d arrière plan pour l écran en mode d attente Pour des détails sur le téléchargement d images consultez la section Téléchargem...

Страница 83: ...u REGL AFFICHAGE 1 Appuyez sur le bouton 6 ou 5 pour afficher PROGR CONTRAST 2 Appuyez sur le bouton SELECT pour ouvrir ce menu 3 Utilisez le bouton 6 ou 5 pour faire défiler au contraste 1 2 ou 3 Le paramètre par défaut est 4 Appuyez sur le bouton SELECT pour enregistrer votre sélection Vous entendrez une tonalité de confirmation Reglage Sonnerie Trois menus programmables sont disponibles Volume ...

Страница 84: ...registrement de tonalités de sonnerie Du Menu REGLAGE SON 1 Appuyez sur le bouton 6 ou 5 pour afficher TIMBRE SONNERI 2 Appuyez sur le bouton SELECT pour ouvrir ce menu 3 Utilisez le bouton 6 ou 5 pour faire défiler à la tonalité désirée de sonnerie Le paramètre par défaut est TONALITE 1 4 Appuyez sur le bouton SELECT pour enregistrer votre sélection Vous entendrez une tonalité de confirmation Ton...

Страница 85: ...une panne électrique f Six barres horizontales en clignotant Enregistrement MÉMO g AN en clignotant L appareil répond à un appel et enregistre un message h Affichages de LA solidement L appareil répond à un appel et enregistre un message i A1 ou A2 en clignotant Le message d accueil 1 ou 2 est sélectionné comme message Affichages de d accueil en cours et pour l enregistrement et la lecture des mes...

Страница 86: ... message d accueil ou dans les 2 secondes suivant la fin du message et laisser un message dans la boîte vocale spécifiée 2 Si l appelant ne spécifie pas de boîte vocale le message sera déposé dans la boîte vocale par défaut 1 Filtrage des Appels à Partir de la Base 1 Lorsque le répondeur prend l appel écoutez pendant que l appelant laisse un message pour savoir qui appelle 2 Pour répondre vous mêm...

Страница 87: ...message précédent Appuyez sur le bouton SKIP 4pour passer au message suivant Appuyez sur le bouton DELETE pour effacer le message en cours Écoute des Messages Vous pouvez effacer un message selon une des méthodes suivantes Pour effacer un message pendant que vous l écoutez 1 Appuyez et relâchez le bouton indicateur 1 4 g ou 2 4 g ou 3 4 g correspondant à la boîte vocale 2 Appuyez sur le bouton REV...

Страница 88: ... STOP 1 2 ou 3 Vous devez garder le bouton enfoncé jusqu à la fin de l enregistrement du mémo 3 Commencez à parler après que l appareil annonce ENREGISTREZ LE MESSAGE 4 Relâchez le bouton de la boîte vocale quand vous avez terminé Accès à Distance du Répondeur Vous pouvez accéder au répondeur avec le combiné sans fil ou à partir d un téléphone compatible avec la composition par tonalité REMARQUE I...

Страница 89: ...une tonalité de confirmation REMARQUE Si vous faites une erreur la clef dans les chiffres encore ou appuient sur le bouton FLASH DELTE effacer tous et resaisir Sélection de Sonnerie Cette caractéristique vous permet de choisir le nombre de fois que l appareil sonnera avant que le répondeur prenne l appel 1 Appuyez sur le bouton MENU et utilisez le bouton 6 ou 5 pour sélectionner REPONDEUR 2 Appuye...

Страница 90: ...Partir du Combiné Utilisez le combiné pour filtrer les appels même si vous ne pouvez entendre le répondeur Quand le répondeur répond 1 Appuyez sur le bouton SELECT pour accéder au répondeur 2 Écoutez l appelant laisser un message 3 Appuyer sur le bouton TALK CALL BACK ou SPEAKER pour entrer en conversation avec la personne ou sur le bouton SELECT pour mettre fin au filtrage de l appel Accès à Dist...

Страница 91: ...che Effacez quelques messages pour que le répondeur puisse enregistrer les nouveaux messages REMARQUE L appareil répond aussi après 10 sonneries s il est éteint Pour accéder au répondeur entrez votre code de sécurité à 3 chiffres Fonctionnement du Telephone Indicateur de Chargement Utilisation L indicateur CHARGE IN USE est allumé quand le téléphone est en service ou un combiné charge dans le berc...

Страница 92: ... bouton 6 ou 5 Vous pouvez choisir parmi quatre niveaux d écoute Le téléphone émet deux bips quand l intensité maximale ou minimale est atteinte VOL 1 est l intensité minimale VOL 4 l intensité maximale Minuterie D appel Après que vous avez appuyé sur le bouton TALK CALL BACK du combiné la minuterie d appel intégrée apparaît dans l afficheur et commence le décompte de la durée de l appel en minute...

Страница 93: ...REDIAL et utilisez le bouton 6 ou 5 pour sélectionner le numéro à recomposer 4 Appuyez sur le bouton TALK CALL BACK ou SPEAKER Le numéro sera composé automatiquement Si vous obtenez un signal d occupation et souhaitez continuer de composer le numéro appuyez sur le bouton REDIAL pour rapidement recomposer le numéro Quitter Appuyez sur le bouton EXIT pour quitter une fonction de menu et retourner à ...

Страница 94: ... à l écran Utilisez le bouton 6 ou 5 pour aller au combiné que vous voulez rechercher Ou allez à 5 GLOBAL PAGE pour rechercher tous les combinés 5 Appuyez sur le bouton SELECT 6 Le combiné récepteur est recherché et émet une tonalité 7 Pour annuler la recherche appuyez sur le bouton EXIT INT ou TALK CALL BACK sur le combiné d écoute ou Appuyez sur le bouton INT du combiné récepteur pour passer en ...

Страница 95: ...fichera 3 Pour annuler appuyez de nouveau sur le bouton DO NOT DISTURB REMARQUE Vous pouvez appuyer sur le bouton DO NOT DISTURB et activer cette fonction immédiatement même si un appel externe a déclenché la sonnerie ou pendant le filtrage des appels une fois qu un appel a été pris par le répondeur Écoute à distance Cela ne peut fonctionner que s il y a deux ou plus combinés enregistrés sur la mê...

Страница 96: ...une fois sur le bouton TALK CALL BACK Fonctionnement de L interphone La fonction d interphone permet de converser avec une personne à un autre combiné sans occuper la ligne téléphonique vous permettre de recevoir toujours des appels d arrivée REMARQUE IMPORTANTE Les procédures suivantes ne peuvent s effectuer qu avec les combinés 28011 et 28041 Interphone entre deux combinés 1 Assurez vous que le ...

Страница 97: ...nier est immédiatement interrompu et les deux combinés sonnent L un ou l autre interlocuteur peut appuyer sur le bouton TALK CALLBACK pour répondre à l appel Utilisation de L interphone Avec les Appels Exterieurs Pendant un appel téléphonique vous pouvez utiliser la fonction interphone recherche pour rechercher un autre combiné et converser à l interphone en privé et hors ligne deux sens Vous pouv...

Страница 98: ... pour aller au menu de l interphone 2 La liste des combinés enregistrés sera affichée à l écran Utilisez le bouton 6 ou 5 pour aller au combiné que vous voulez rejoindre par interphone 3 Appuyez sur le bouton SELECT pour lancer la recherche Le message LIGNE EN GARDE s affiche à l écran 4 Le combiné recherché est rejoint et émet une tonalité de recherche 5 Appuyez sur le bouton INT sur le combiné q...

Страница 99: ...ous devez être abonné au service d afficheur d appel en attente Cet appareil reçoit et affiche l information transmise par la compagnie de téléphone Cette information peut comprendre le numéro de téléphone la date et l heure ou le nom le numéro de téléphone la date et l heure NEW FEB Heure Date Nombre d appels Nom de l appelant Numéro de téléphone de l appelant Afficheur D appel en Attente Dans la...

Страница 100: ...ulter l information mémorisée en tout temps Les appels reçus depuis la dernière écoute s afficheront comme NEW XX en haut de l écran Consultation des Dossiers D appelants À mesure que les appels sont reçus et mémorisés l afficheur est mis à jour pour vous indiquer le nombre d appels reçus Pour faire défiler les dossiers d appelants 1 Assurez vous que le téléphone est DÉSACTIVÉ pas en mode TALK 2 A...

Страница 101: ...ndicatif à 3 chiffres 317 888 8888 numéro de téléphone à 7 chiffres Sept chiffres numéro de téléphone à 7 chiffres 888 8888 Mémorisation des dossiers d identification des appelants dans le répertoire Vous pouvez aussi mémoriser les données d identification des appelants dans le répertoire REMARQUE Il est important de formater correctement les dossiers d identification de l appelant AVANT de les mé...

Страница 102: ...le bouton6 ou 5 pour afficher EFFACER 5 Appuyez sur DELETEl L afficheur indique EFF AFFICHEUR 6 Appuyez à nouveau sur le bouton SELECT pour confirmer la suppression L écran affiche le message EFFACE REMARQUE Appuyez sur la touche EXIT pour retourner en mode attente ou s il n y a aucune action pendant une minute vous reviendrez à l état précédent Suppression de Tous les Dossiers D appelants 1 Assur...

Страница 103: ...ntre dix mélodies polyphoniques dix tonalités de sonnerie et cinq tonalités de sonnerie enregistrées 1 Assurez vous que le téléphone est DÉSACTIVÉ pas en mode TALK 2 Appuyez sur le bouton MENU et utilisez le bouton 6 ou 5 pour sélectionner REPERTOIRE NUM 3 Appuyez sur le bouton SELECT pour ouvrir le répertoire téléphonique REMARQUE Vous pouvez aussi appuyer sur le bouton PHONE BOOK pour aller dire...

Страница 104: ...r indique DEFAULT NO PICTURE ID Utilisez le bouton 6 ou 5 pour aller à l image désirée 13 Appuyez sur le bouton SELECT pour enregistrer le dossier Vous entendrez une tonalité de confirmation et l écran affichera le dossier en entier pendant deux secondes 14 Pour entrer un autre nom et un autre numéro retournez à l étape 4 et répétez l opération Enregistrement du dernier numéro composé Mémorisation...

Страница 105: ...e ou pour attendre une tonalité d accès à un ordinateur Chaque pause compte comme un chiffre dans la séquence de composition Vous pouvez appuyer sur le bouton PAUSE pour insérer une P pause lorsque vous saisissez le numéro dans le répertoire Révision des Dossier du Répertoire Téléphonique 2 Appuyez sur le bouton MENU et utilisez le bouton6 ou 5 pour sélectionner PHONE BOOK 3 Appuyez sur le bouton ...

Страница 106: ...ossier désiré 2 Appuyez sur le bouton SELECT pour afficher les renseignements du dossier 3 Appuyez à nouveau sur le bouton SELECT pour aller au menu des options L afficheur indique MODIFIER et EFFACER 4 Appuyez sur le bouton 6 ou 5 pour afficher EFFACER 5 Appuyez sur le bouton SELECT et l écran affiche les renseignements du dossier et EFFACER 6 Appuyez sur le bouton SELECT pour supprimer le dossie...

Страница 107: ...répertoire en mode de conversation pour les composer une à une Téléchargement d Image Vous pouvez transférer 15 images qui s ajouteront aux dix papiers peints en mémoire Installation du Logiciel 1 Chargez le logiciel de Gestion d image GE 28041 dans l ordinateur 2 Suivez les instructions pour procéder à l installation automatique 3 Lorsque l installation est terminée vous verrez l icône du Gestion...

Страница 108: ...fiche Download finished successfully Appuyez sur OK pour fermer la fenêtre Sélection de l Image Transférée comme Papier Peint Consultez la section Telephone Setup Display Setting Wallpaper Attachement de l Image Transférée à un Dossier du Répertoire Téléphonique Consultez la section Répertoire Ajout de Dossiers dans le Répertoire et Répertoire Révision des Dossier du Répertoire Téléphonique REMARQ...

Страница 109: ... pas en mode conversation 2 Appuyez sur le bouton MENU puis utilisez les boutons 6 ou 5 pour sélectionner REGLAGE SON 3 Appuyez sur le bouton SELECT pour ouvrir ce menu 4 Utilisez le bouton 6 ou 5 pour aller à TIMBRE SONNERI 5 Appuyez le bouton SELECT pour afficher les options 6 Utilisez le bouton 6 ou 5 pour aller à REC RING TONE 7 Appuyez sur le bouton SELECT pour afficher les trois manières d e...

Страница 110: ...SET 2 Appuyez sur le bouton SELECT pour ouvrir ce menu 3 Vérifiez si le câble ou le casque est branché au combiné et appuyez à nouveau sur le bouton SELECT pour démarrer l affichage du compte à rebours Le combiné commencera à enregistrer et le deuxième chiffre diminuera automatiquement 4 L enregistrement cessera lorsque le compte à rebours atteindra 0 seconde Vous pouvez appuyer sur le bouton SELE...

Страница 111: ...t moment pour arrêter l enregistrement À l arrêt de l enregistrement l écran affichera deux options REPLAY et RE RECORD Suivez les étapes sous Enregistrement avec le câble audio ou avec un casque en option pour écouter la tonalité enregistrée ou pour reprendre l enregistrement REMARQUE IMPORTANTE Si vous prévoyez utiliser le microphone du combiné pour enregistrer une tonalité n insérez PAS le câbl...

Страница 112: ...ou faire un appel si vous utilisez le casque 4 Pour retourner au fonctionnement normal débranchez le casque de la prise Remplacement de la Pile ATTENTION Pour réduire le risque d incendie ou de blessures utilisez seulement la batterie approuvé par Thomson Inc d hydrure de Nickel métal Ni MH du model 5 2660 qui est compatible avec cette unité 1 Assurez vous que le téléphone est DÉSACTIVÉ pas en mod...

Страница 113: ...ue le combiné doit facturer une période avant qu il puisse reprendre la fonction normale EFFACER TOUT Demande si vous souhaitez effacer tous les dossiers d appelants EFFACER DOSSIER Demande si vous souhaitez effacer le dossier d appelant affiché EFFACER Demande si vous souhaitez effacer l un des 50 dossiers émorisés dans la mémoire du téléphone FIN DE LISTE Indique qu il n y a plus d information d...

Страница 114: ...présente le nombre de nouveaux dossiers d appelant non consultés PAS D APPEL Indique que la mémoire ne contient aucun dossier d appelant AUCUNE DONNEE Indique qu aucune information d appelant n a été reçue HORS PORTEE Le combiné est trop éloigné de la base Rapprochez vous de la base RECHERCHE ou Quelqu un a appuyé sur le bouton PAGE sur la base ou INT sur RECHERCHE DE BASE le combiné ENREGISTRER I...

Страница 115: ...eur est pleine Six barres clignotantes Le système enregistre une note A1 au A2 clignotant Le système enregistre un message d accueil LA accès à la ligne Répondeur à distance à ligne extérieure Signaux Sonores du Combiné Signal Signification Un long ronflement sonnerie en marche Vous recevez un appel Trois courts bips Signal de recherche Un long bip Tonalité de confirmation pour l accomplissement d...

Страница 116: ...t l indicateur de chargement de la base doit être allumé quand le combiné repose sur le socle Si pas lle bloc pile peut devoir être chargée Placez le combiné dans le socle de chargement pendant au moins 20 secondes pour rétablir l appareil Le combiné ne sonne pas Assurez vous que l interrupteur de sonnerie du combiné est activé Sinon il faut peut être charger la pile Rapprochez vous de la base Vou...

Страница 117: ...e du combiné Attendez 30 secondes et rebranchez l alimentation dans la base et la prise murale Rebranchez la pile et chargez la pendant 16 heures Le combiné affiche RECHERCHE ou HORS DE PORTEE et ne peut communiquer avec la base lorsque le bouton TALK CALL BACK est activé Le combiné est peut être trop éloigné de la base Rapprochez vous de la base Assurez vous que l adaptateur est bien installé Déb...

Страница 118: ...ant le silence qui suit la première sonnerie Ce message indique la présence de bruit sur la ligne Aucun afficheur Vous devez être abonné au service d afficheur de nom numéro offert par la compagnie de téléphone pour recevoir l information d appelant Solutions Pile Si vous éprouvez l un ou l autre des problèmes suivants même après avoir rechargé complètement la pile vous devrez peut être remplacer ...

Страница 119: ...niques Un écouteur de surveillance de bébé utilise la même fréquence Pile de combiné faible Soins et Entretien Voici quelques conseils simples pour préserver le bon fonctionnement et l apparence de ce téléphon Éviter de placer le téléphone près d un appareil de chauffage ou d un appareil produisant du bruit électrique ex moteurs lampes fluorescentes etc Ne pas exposer le téléphone directement au s...

Страница 120: ...Canada Inc c o Thomson multimédia Ltd 6200 Edwards Boulevard Mississauga Ontario Canada L5T 2V7 Les dispositions de cette garantie s ajoutent sans les modifier ni les restreindre aux garanties légales et autres droits ou recours prévus par toute législation applicable pour autant que ces dispositions tendront à rejeter exclure ou limiter toute garantie légale ou tout autre droit et recours elles s...

Страница 121: ...n seront ajoutés au montant de la commande Nous sommes tenus par la loi de percevoir la taxe de vente appropriée pour chaque province dans laquelle la marchandise est expédiée Les articles sont assujettis à la disponibilité des stocks Information pour Accessoires DESCRIPTION No PIÈCE Adaptateur de courant c a 5 2596 Pince ceinture 5 2703 Casque d écoute 5 2425 black Pile de remplacement pour combi...

Страница 122: ...ute des Messages 25 Écran D attente 29 Édition d une Image 45 Effacer les Messages 25 Énonce sur L exposition au Rayonnement RF de la FCC 3 Enregistrement 17 Enregistrement avec le Câble Audio ou avec un Casque en Option 48 Enregistrement avec le microphone du combiné 49 Enregistrement de vos Propres Tonalités 47 Enregistrement des tonalités de sonnerie 47 Enregistrement du dernier numéro composé ...

Страница 123: ...32 Recomposition du Dernier Numero 31 Reglage Affichage 20 Reglage par Defaut 20 Reglage Sonnerie 21 Remplacement de la Pile 50 Renseignements Importants 2 Renseignements sur L interférence 2 Répertoire 41 Reproducción de Mensajes 25 Révision des Dossier du Répertoire Téléphonique 43 Révision et sélection du message d accueil 15 S Sélection d un cClip eEnregistré comme Tonalité de Sonnerie 49 Séle...

Страница 124: ...Modèle 28041 00008006 Rév 0 CAN E F 06 25 Imprimé en Chine ATLINKS Communications Canada Inc 2006 ATLINKS Communications Canada Inc Trademark s Registered Marque s déposée s ...

Отзывы: