background image

26

Changing the Security Code

The default security code for accessing the answering system from another 

location is 

1 2 3

. You must use the handset to change the security code. 

With the phone 

OFF

 (not in TALK mode), follow these steps:

1.  Press the transfer/answerer button to display 

ANSWERER REMOTE

.

2. Press the *exit button.
3. Enter the new 3-digit security code.
4. Press the *exit button again. The handset announces the new code, 

pauses, beeps, and then announces the menu options again.

Belt Clip and Optional Headset

Attaching the Belt Clip

1.  Insert the sides of the belt clip into the slots 

on each side of the handset.

2.  Snap the belt clip into place.

Connecting an Optional Headset 
to the Handset

The handset can be used with an optional headset for hands free operation.

1.  Connect the headset to the headset jack 

on the side of the handset The handset 

receiver and microphone are disabled 

when the headset is connected.

2. Adjust the headset to rest comfortably on 

top of your head and over your ear. Move 

the microphone to approximately two to 

three inches from your mouth.

3. Press the talk/callback button to answer a 

call or make calls using  

the headset.

4. To return to normal operation, unplug the headset from the jack.

-

+

2

abc

5

jkl

8

tuv

0

oper

3

def

6

mno

9

wxyz

#

paus

e

1

4

ghi

7

pqrs

*

exit

memory

mute

prog

chan

red

ial

fo

rm

at

flash

del

cancel

CID -VOL

talk

call back

Headset jack

Headset plug

Slot for 

belt clip

Slot for 

belt clip

Содержание 25860

Страница 1: ...We bring good things to life 5 8 GHz Dual Cordless Handset Call Waiting Caller IDTelephone Answering System User s Guide 25860 ...

Страница 2: ... and therefore you may not be able to use your own telephone equipment if you are on a party line Check with your local telephone company Notice must be given to the telephone company upon permanent disconnection of your telephone from your line If your home has specially wired alarm equipment connected to the telephone line ensure the installation of this product does not disable your alarm equip...

Страница 3: ...na for radio or television that is receiving the interference Reorient or relocate and increase the separation between the telecommunications equipment and receiving antenna Connect the telecommunications equipment into an outlet on a circuit different from that to which the receiving antenna is connected If these measures do not eliminate the interference please consult your dealer or an experien...

Страница 4: ...ALLER ID 18 RECEIVING AND STORING CID INFORMATION 18 REVIEWING CID RECORDS 19 DELETING A CID RECORD 19 DELETING ALL CID RECORDS 19 STORING CID RECORDS IN MEMORY 19 STORING A REDIAL NUMBER 20 DIALING A CID NUMBER 20 CHANGING THE NUMBER FORMAT 21 MEMORY 21 STORING A NAME AND NUMBER IN MEMORY 21 CHANGING A STORED NUMBER 22 DIALING A STORED NUMBER 22 CHAIN DIALING FROM MEMORY 23 INSERTING A PAUSE IN T...

Страница 5: ...ord up to 40 Caller ID messages sequentially Know who called while you are on the other line or when you were away Screen unwanted calls eliminate harassment from annoying calls or to get prepared before answering a call IMPORTANT In order to use all of the Caller ID features of this telephone you must subscribe to two separate services available from your local telephone company the standard Name...

Страница 6: ...CR If such interference continues move the cordless telephone farther away from these appliances Certain other communications devices may also use the 5 8GHz 900MHz frequency for communication and if not properly set these devices may interfere with each other and or your new telephone If you are concerned with interference please refer to the owner s manual for these devices on how to properly se...

Страница 7: ...nounce button display talk callback button Caller ID vol caller ID volume button del chan delete channel button redial button exit button pause button flash prog flash program button transfer answerer button memory button format mute button headphone jack review button play stop button erase button skip button Caller ID vol caller ID volume button charge indicator Handset and Base Layout ringer swit...

Страница 8: ...street and electrical noise such motors microwave ovens and fluorescent lighting Avoid heat sources such as heating air ducts heating appliances radiators and direct sunlight Avoid areas of excessive moisture or extremely low temperature Avoid dusty locations Avoid other cordless telephones or personal computers Installing the Phone Your base and handset charge cradle should be placed on a level su...

Страница 9: ... 5 Set the ringer switch on the handset to ON and place the handset in the cradle on the base The charge indicator on the base turns on to indicate the handset battery is charging NOTE Handsets may be placed into cradles in either a forward or backward position and still make contact for charging 6 Allow handsets to charge for 16 hours prior to first use If you don t properly charge the handset bat...

Страница 10: ...the 2nd handset has been charged for 16 hours on the extra charger place it on the main base station for 20 seconds it will then automatically register NOTE PLEASE REGISTER will show on the display if the handsets have not been registered Once the handsets have completed regisration successfully HANDSET 1 and HANDSET 2 will show on the handset s display NOTE In case of a power failure of more than...

Страница 11: ...setting Speaker Volume Use the volume buttons to adjust speaker volume on the base to a comfortable level L1 is the minimum speaker volume and L8 is the maximum Recording the Outgoing Announcement The maximum time of recording an outgoing announcement is about 2 minutes For best results when recording you should be about nine inches from the microphone and eliminate as much background noise as pos...

Страница 12: ...ering System Operation This section discusses the buttons and features on the answering system Messages Indicator The messages indicator shows you how many new messages you have received and the indicator blinks when new messages are received The ans on off button must be on in order for the messages indicator to work NOTE The answering system displays when it is turned off Screening Calls from th...

Страница 13: ...gs You should erase some messages so the answering system may record new messages Erasing Messages You may erase messages three ways one message at a time from the base all messages from the base or one message at a time from the handset or a phone in another location 1 To erase one message at a time from the base Press play stop The message plays Press and release the erase button 2 To erase all ...

Страница 14: ... FRA 3 ESP shows in the display 2 Use the CID VOL or buttons on the handset or the handset touch tone pad to select 1 2 or 3 3 Press the flash prog button again NOTE Press the exit button once to keep the previous setting and return to the standby screen Local Area Code 1 Press the flash prog button until AREA CODE shows in the display The default is 2 Use the handset touch tone pad to enter the ar...

Страница 15: ...sh prog button again You will hear a confirmation tone NOTE The default settings are ENGLISH AREA CODE and RINGER TONE 1 NOTE Press the exit button once to keep the previous setting and return to the standby screen Telephone Operation Making a Call 1 Pick up the handset and press the talk callback button 2 When you hear a dial tone dial a telephone number 3 When finished press the talk callback butt...

Страница 16: ... ON inTALK mode the talk callback button lights up when the handset is taken off hook The charge in use indicator on the base is lit During an incoming call the in use indicator on the base and the handset talk callback button flash on and off When the handset is taken off hook talk end callback button illuminates and remains on until handset is put on hook Redial 1 Press the talk callback button o...

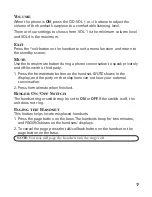
Страница 17: ...a third party 1 Press the format mute button on the handset MUTE shows in the display and the party on the telephone can not hear your external conversation 2 Press format mute when finished Ringer On Off Switch The handset ringer switch may be set to ON or OFF If the switch is off the unit does not ring Paging the Handset This feature helps locate misplaced handsets 1 Press the page button on the ...

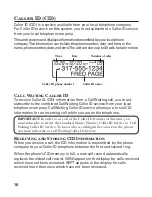
Страница 18: ...to see CID information for an incoming call while you are on the telephone IMPORTANT In order to use all of the Caller ID features of this unit you must subscribe to either the standard Name Number Caller ID Service or Call Waiting Caller ID Service To know who is calling while you are on the phone you must subscribe to Call Waiting Caller ID Service Receiving and Storing CID Information When you ...

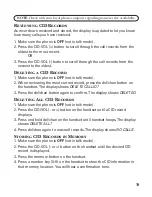
Страница 19: ...del chan button on the handset The display shows DELETE CALL ID 3 Press the del chan button again to confirm The display shows DELETED Deleting All CID Records 1 Make sure the phone is OFF not in talk mode 2 Press the CID VOL or button on the handset until a CID record displays 3 Press and hold del chan on the handset until handset beeps The display shows DELETE ALL 4 Press del chan again to erase ...

Страница 20: ...ring A Name and Number in Memory and then press memory again ENTERTEL NUMBR displays 6 Press redial on the handset to display the redial number and name 7 Press memory again to confirm NOTE If the redial number has more than 24 digits the redial number cannot be stored in memory To replace an old redial number stored in a memory location with a new redial number 1 Repeat steps 1 through 5 then pres...

Страница 21: ...to ten 24 digit numbers in memory for quick dialing This memory feature is in addition to the 40 Caller ID records that can be stored in memory Storing a Name and Number in Memory 1 Press the memory button on the handset 2 Press the desired memory location button 0 through 9 keys If the memory location is occupied the memory location and stored name and number appear on the screen If the memory lo...

Страница 22: ...mber In Memory procedure to change a stored number and replace the old phone number with a new phone number When REPLACE MEMO shows in the display you must press the memory button on the handset to confirm replacement Dialing a Stored Number 1 Make sure the phone is ON by pressing the talk callback button on the handset 2 Press the memory button on the handset 3 Press the number key 0 9 for the des...

Страница 23: ...ress memory and then 9 TIP Wait for the access tones before pressing the memory button or your call might not go through Inserting a Pause in the Dialing Sequence Press the pause button on the handset to insert a delay in the dialing sequence of a stored telephone number A pause is needed to wait for a dial tone for example after you dial 9 for an outside line or to wait for a computer access tone...

Страница 24: ...e base buttons see Answering System Setup The button functions are located on the handset below each number key For example to play messages Pressthetransfer answererbutton ThedisplayshowsANSWERERREMOTE Press 2 play stop When you are finished listening to your messages press the transfer answerer button again Answering System Indicator The answering system is active when the indicator on the base i...

Страница 25: ...ur 3 digit security code after you hear the outgoing announcement The unit will hang up after 3 failed attempts to input correct security code 1 Dial the telephone number to which the answering system is connected to 2 Enter the security code after you hear the tone 3 Follow the voice menu to use the answering system s remote functions The remote feature lets you perform the following functions To...

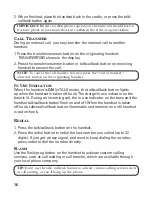
Страница 26: ...t 2 Snap the belt clip into place Connecting an Optional Headset to the Handset The handset can be used with an optional headset for hands free operation 1 Connect the headset to the headset jack on the side of the handsetThe handset receiver and microphone are disabled when the headset is connected 2 Adjust the headset to rest comfortably on top of your head and over your ear Move the microphone ...
Страница 27: ...pack the battery s long term performance is compromised NOTE If the battery is not properly installed in the handset or if the battery pack is not properly connected to the jack inside the battery compartment NO BATTERY shows in the display when the handset is placed in the base cradle Battery Safety Precautions Do not burn disassemble mutilate or puncture Like other batteries of this type toxic m...

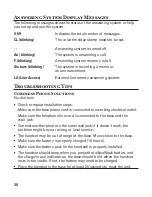
Страница 28: ...telephone number in one of the 10 memory locations ENTER NAME Prompt telling you to enter the name for one of the 10 memory locations DELETE ALL Prompt asking if you want to erase all Caller ID records DELETE CALL ID Prompt asking if you want to erase a Caller ID record DELETED Prompt confirming the Caller ID record is erased END OF LIST Indicates that there is no additional information in Caller I...

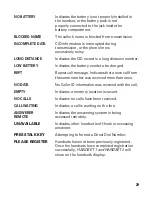
Страница 29: ...ll message Indicates that a new call from the same number was received more than once NO DATA No Caller ID information was received with the call EMPTY Indicates a memory location is vacant NO CALLS Indicates no calls have been received CALLWAITING Indicates a call is waiting on the line ANSWERER Indicates the answering system is being REMOTE accessed remotely UNAVAILABLE Indicates other handset i...

Страница 30: ...epeat installation steps Make sure the base power cord is connected to a working electrical outlet Make sure the telephone line cord is connected to the base and the wall jack Connect another phone to the same wall jack if it doesn t work the problem might be your wiring or local service The handset may be out of range of the base Move closer to the base Make sure the battery is properly charged 1...

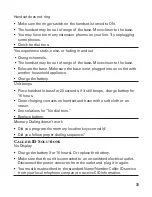
Страница 31: ...attery Unit beeps Place handset in base for 20 seconds if it still beeps charge battery for 16 hours Clean charging contacts on handset and base with a soft cloth or an eraser See solutions for No dial tone Replace battery Memory Dialing doesn t work Did you program the memory location keys correctly Did you follow proper dialing sequence Caller ID Solutions No Display Charge the battery for 16 ho...

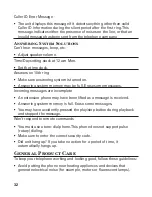
Страница 32: ... Erase some messages Incoming messages are incomplete An extension phone may have been lifted as a message is received Answering system memory is full Erase some messages You may have accidently pressed the play stop button during playback and stopped the message Won t respond to remote commands You must use a tone dial phone This phone does not support pulse rotary dialing Make sure to enter the ...

Страница 33: ... and base with a soft cloth Causes of Poor Reception Aluminum siding Foil backing on insulation Heating ducts and other metal construction that can shield radio signals You re too close to appliances such as microwaves stoves computers etc Atmospheric conditions such as strong storms Base is installed in the basement or lower floor of the house Base is plugged into AC outlet with other electronic d...

Страница 34: ...void the user s authority to operate this product For instructions on how to obtain service refer to the warranty included in this guide or call customer service at 1 800 448 0329 Or refer inquiries to ATLINKS USA Inc Manager Consumer Relations P O Box 1976 Indianapolis IN 46206 Attach your sales receipt to the booklet for future reference or jot down the date this product was purchased or receive...

Страница 35: ...pon ordering We are required by law to collect appropriate sales tax for each individual state country and locality to which the merchandise is being sent Items are subject to availability Prices are subject to change without notice DESCRIPTION MODEL NO AC power supply converter 5 2512 Headset 5 2425 Replacement Handset Battery 5 2548 Belt Clip translucent gray 5 2622 ...

Страница 36: ...res 24 Answering a Call 15 Answering System Display Messages 30 Answering System Indicator 24 Answering System Operation 12 Answering System Setup 10 Answering System Solutions 32 Attaching the Belt Clip 26 B Battery Safety Precautions 27 BeforeYou Begin 6 Belt Clip and Optional Headset 26 C Caller ID CID 18 Caller ID Solutions 31 CallTransfer 16 Call Waiting Caller ID 18 Causes of Poor Reception ...

Страница 37: ... and Deleting Stored Numbers 23 Reviewing CID Records 19 Reviewing the Announcement 12 Ringer On Off Switch 17 Ringer Select Switch 12 RingerTone 14 S Screening Calls from the Base 12 Screening Calls from the Handset 24 Service 34 Speaker Volume 11 Storing a Name and Number in Memory 21 Storing a Redial Number 20 Storing CID Records in Memory 19 T Telephone Jack Requirements 6 Telephone Operation ...

Страница 38: ...tments Batteries Damage from misuse or neglect Products which have been modified or incorporated into other products Products purchased or serviced outside the USA Acts of nature such as but not limited to lightning damage Product Registration Please complete and mail the Product Registration Card packed with your unit It will make it easier to contact you should it ever be necessary The return of ...

Страница 39: ...Creamos cosas buenas para la vida Guía del Usuario Sistema deTeléfono Contestadora Auricular Inalámbrico Dual 5 8 GHz con Llamada en Espera e Identificador de Llamada 25860 ...

Страница 40: ...TAS No se puede usar este equipo con un teléfono de previo pago proveído por la compañía telefónica Las líneas compartidas son sujetas a las tarifas del estado y por eso es posible que Ud no pueda usar su propio equipo telefónico si Ud estuviera compartiendo la misma línea telefónica con otros abonados Se debe notificar la compañía telefónica cuando se desconecte permanentemente su teléfono de la l...

Страница 41: ...la recepción de la radio o de la televisión lo cual puede ser determinado apagando y prendiendo el equipo le animamos a Ud de tratar de corregir la interferencia por medio de una o más de las sugerencias siguientes Cambie la posición o la ubicación de la antena quiere decir la antena de la radio o de la televisión que está recibiendo la interferencia Cambie la posición o cambie la ubicación y aume...

Страница 42: ...NO 9 MONTAJE SOBRE PARED 11 REGISTRO 11 PROGRAMACIÓN DEL SISTEMA CONTESTADOR 11 SELLO DE HORA FECHA 12 VOLUMEN DEL ALTAVOZ 12 PARA GRABAR EL ANUNCIO SALIENTE 12 PARA REVISAR EL ANUNCIO 12 SELECTOR DELTIMBRE 13 OPERACIÓN DEL SISTEMA CONTESTADOR 13 INDICADOR DE MENSAJES 13 PARA FILTRAR LLAMADAS DESDE LA BASE 13 REPRODUCCIÓN DE MENSAJES 13 MEMORIA LLENA 14 PARA BORRAR MENSAJES 14 PARA DEJAR UN RECADO...

Страница 43: ...AL SISTEMA CONTESTADOR DESDE OTRA LOCALIZACIÓN 26 PARA CAMBIAR EL CÓDIGO DE SEGURIDAD 26 PARA CONECTAR EL GANCHO DEL CINTURÓN Y AUDÍFONOS OPCIONALES 27 PARA SUJETAR EL GANCHO DEL CINTURÓN 27 PARA CONECTAR LOS AUDÍFONOS OPCIONALES EN EL AURICULAR 27 PARA CAMBIAR LA BATERÍA 27 PRECAUCIONES DE SEGURIDAD PARA LA BATERÍA 28 SEÑALES SONORAS DEL AURICULAR 28 INDICADORES DE MENSAJES DEL IDENTIFICADOR DE L...

Страница 44: ...ada entrante Grabar hasta 40 mensajes del Identificador de Llamadas en secuencia Saber quién llamó mientras usted estaba en la otra línea o mientras estaba fuera Filtrar llamadas no deseadas eliminar llamadas molestas o prepararse para contestar una llamada IMPORTANTE Para poder utilizar todas las funciones del Identificador de Llamadas de este teléfono usted debe estar suscrito a dos servicios sepa...

Страница 45: ...alámbrico más lejos de estos aparatos Ciertos otros dispositivos de comunicaciones pueden usar también la frecuencia 5 8GHz 900MHz para comunicación y si no están adecuadamente instalados estos dispositivos pueden interferir uno con otro y o con su nuevo teléfono Si usted tiene problemas con interferencia por favor consulte el manual del propietario para estos aparatos sobre cómo instalar apropiad...

Страница 46: ...r anuncio display pantalla talk callback botón para hablar devolver el llamado Caller ID vol botón del identificador volumen del chan botón eliminar canal redial botón para volver a marcar exit botón para salir pause botón para pausa flash prog botón para servicios especiales programar transfer answerer botón transferir contestadora memory botón para memoria format mute botón formato silenciar revie...

Страница 47: ...ctricos que se calientan radiadores y luz de sol directa Evite áreas con humedad excesiva o temperaturas demasiado bajas Evite áreas con mucho polvo Evite colocar cerca de otros teléfonos o computadoras personales Instalación del Teléfono Su base y la base de carga del auricular deben ser colocados sobre una superficie nivelada tal como un escritorio o la parte superior de una mesa o usted puede mo...

Страница 48: ...or de la base se ilumina para indicar que la batería se está cargando NOTA Los auriculares pueden ser colocados en las bases ya sea en posición hacia adelante o hacia atrás y todavía hacer contacto para cargar 6 Permita que los auriculares carguen por 16 horas antes del primer uso Si usted no carga adecuadamente el teléfono el funcionamiento de la batería podría deteriorarse NOTA Si la batería no ...

Страница 49: ...l 2o Teléfono haya cargado por 16 horas en el cargador extra colóquelo 20 segundos en la estación de la base principal entonces se registrará automáticamente NOTA PLEASE REGISTER se mostrará en la pantalla si los teléfonos no han sido registrados Una vez que los teléfonos hayan sido registrados exitosamente HANDSET 1 y HANDSET 2 auricular 1 o 2 se mostrará en la pantalla del teléfono NOTA En caso ...

Страница 50: ...l máximo es L8 Para Grabar el Anuncio Saliente El tiempo máximo de grabación de un mensaje de salida es de aproximadamente 2 minutos Para mejores resultados cuando grabe su anuncio personal usted debe estar a aproximadamente 9 pulgadas del micrófono y debe tratar de eliminar tanto ruido de fondo como le sea posible 1 Asegúrese que el sistema contestador esté encendido ON 2 Oprima y sostenga el bot...

Страница 51: ...ón de encendido on para que funcione el indicador de mensajes NOTA La pantalla del sistema contestador muestra cuando está apagado Para Filtrar Llamadas desde la Base 1 Espere a que la persona que llama empiece a dejar un recado para saber quién llama 2 Para hablar con la persona que llama levante el auricular y oprima el botón talk callback El sistema contestador deja de grabar automáticamente en...

Страница 52: ...n mensaje a la vez desde un auricular en otra localización 1 Para borrar un mensaje a la vez desde la base Oprima el botón play stop El mensaje se reproduce Oprima y suelte el botón para borrar 2 Para borrar todos los mensajes revisados desde la base Oprima y sostenga el botón para borrar hasta que el aparato emita un tono 3 Para borrar un mensaje desde el auricular Oprima el botón del contestador...

Страница 53: ...indicación de clave de área CODIGO AREA aparezca en la pantalla La programación de fábrica es 2 Utilice el teclado numérico del auricular para inscribir la clave de área 3 Oprima nuevamente el botón de programa flash prog NOTA Oprima el botón de salida exit una vez para mantener a la programación previa y volver a la pantalla de alerta NOTA Para recuperar la programación original a oprima y suelte ...

Страница 54: ... Para Hacer una Llamada 1 Levante el auricular y oprima el botón talk callback 2 Cuando escuche el tono de marcar marque el número telefónico 3 Cuando haya terminado oprima nuevamente el botón talk callback para colgar O 1 Marque primero el número telefónico y después oprima el botón talk callback 2 Cuando haya terminado oprima nuevamente el botón talk callback para colgar NOTA Si usted comete un ...

Страница 55: ...rán Cuando el auricular es descolgado el botón talk end callback se ilumina y permanece así hasta que el auricular es colgado nuevamente Para Volver a Marcar 1 Oprima el botón talk callback en el auricular 2 Oprima el botón redial para volver a marcar el último número que usted marcó hasta 32 dígitos Si usted recibe la señal de ocupado y quiere seguir marcando el número oprima el botón para volver...

Страница 56: ...agado El selector del timbre puede estar encendido ON o apagado OFF Si el selector está apagado OFF el aparato no timbra Para Encontrar el Auricular Esta modalidad ayuda a localizar los auriculares extraviados 1 Presione el botón page en la base Los auriculares emitirán un bip durante dos minutos y PAGING se mostrará en las pantallas de los auriculares 2 Para cancelar la búsqueda presione el botón...

Страница 57: ...enarArchivosdelIdentificadordeLlamadas Cuando usted recibe una llamada la información es transmitida desde su compañía telefónica a su teléfono con Identificador de Llamadas entre el primer y el segundo timbre Cuando la memoria del Identificador de Llamadas está llena una llamada nueva automáticamente reemplaza a la llamada más vieja en la memoria La indicación de llamada nueva NEW aparece en la pan...

Страница 58: ...das 3 Oprima el botón de memoria en el auricular 4 Oprima una tecla numérica 0 9 en el auricular para almacenar la información del Identificador de Llamadas en esa localización de memoria Usted escuchará un tono de confirmación NOTA Si la ubicación de memoria está ocupada REPLACE MEMO se visualiza y usted debe confirmar el reemplazo presionando el botón memory Si usted no quiere reemplazar el número ...

Страница 59: ...fono esté desactivado OFF no en modalidad para hablar TALK 2 Utilice el botón del Identificador de Llamadas CID VOL o en el auricular para mostrar el archivo deseado del Identificador de Llamadas 3 Presione el botón memory para confirmar el reemplazo NOTA SiUd noquierereemplazarelnúmeroenlaubicaciónde memoria presioneelbotón exit Para Cambiar el Formato del Número El botón de formato format mute le p...

Страница 60: ...ara inscribir Bill Smith oprima la tecla del 2 dos veces para la letra B Oprima la tecla del 4 tres veces para la letra I Oprima la tecla del 5 tres veces para la L Después de un segundo oprima la tecla del 5 tres veces para la segunda L y oprima la tecla del 1 para inscribir un espacio entre las letras L y S Oprima la tecla del 7 cuatro veces para la letra S Oprima la tecla del 6 una vez para la ...

Страница 61: ...ca automáticamente IMPORTANTE Si usted hace llamadas de prueba a números de emergencia almacenados en la memoria permanezca en la línea y explique brevemente la razón de su llamada al operador También es una buena idea hacer estas llamada en las horas menos ocupadas como temprano por la mañana o tarde por la noche Marcado en Cadena desde la Memoria Utilice esta función para hacer llamadas que requ...

Страница 62: ...cado ParaRevisaryBorrarNúmerosAlmacenadosenlaMemoria 1 Asegúrese que el teléfono esté apagado OFF no en modalidad para hablar TALK 2 Utilice el botón de memoria en el auricular 3 Utilice los botones del Identificador CID VOL o para llegar a la localización de memoria deseada o utilice el teclado del auricular para inscribir el número de la localización de memoria deseada 4 Si usted quiere borrar la...

Страница 63: ...e está iluminado Para Filtrar Llamadas desde el Auricular Utilice el auricular para filtrar llamadas incluso cuando usted no pueda escuchar el sistema contestador Cuando el sistema contestador contesta 1 Oprima el botón transfer answerer para tener acceso al sistema contestador 2 Escuche a la persona que llama dejar un mensaje 3 Oprima el botón talk callback para hablar con la persona que llama u o...

Страница 64: ...borrar mensajes 0 durante su reproducción Para saltar el mensaje 3 Para activar desactivar contestador 4 Para revisar las opciones del menú 7 SUGERENCIA Usted puede saltarse el anuncio saliente oprimiendo cualquier tecla numérica del teclado mientras el anuncio se reproduce Después inscriba el código de seguridad para tener acceso al sistema contestador Para Cambiar el Código de Seguridad El códig...

Страница 65: ...otón para talk callback para contestar una llamada o para hacer llamadas utilizando los audífonos 4 Para volver a la operación normal desconecte los audífonos del enchufe Para Cambiar la Batería CUIDADO Para reducir el riesgo de lastimaduras personales utilice únicamente la batería 5 2548 que es compatible con este aparato 1 Asegúrese que el teléfono esté desactivado OFF no en modalidad para habla...

Страница 66: ...icamente la batería indicada en la Guía del Usuario Mantenga las baterías fuera del alcance de los niños Quite las baterías si va a guardar el aparato durante más de 30 días Señales Sonoras del Auricular Señal Significado Un tono de gorgeo largo con el timbre activado Señala una llamada entrante Tres tonos cortos varias veces Señal del Localizador Un tono corto cada 7 segundos Advertencia de baja b...

Страница 67: ... llamada entrante viene de un área en donde el CALLER NUMBER servicio de Identificador de Llamadas Caller ID no NOM NUM está disponible o la información no fue enviada DESCONOCIDO PAGING Alguien ha oprimido el botón localizador en la base LOCALIZANDO BLOCKED CALL El número de la persona haciendo la llamada ha sido LLAMADA PRIVADA bloqueado y no se transmitirá NO BATTERY Indica que la batería no est...

Страница 68: ...tro auricular está descolgado o NO DISPONIBLE accesando la contestadora PRESSTALK KEY Intentando formatear un Número de Marcación Directa OPR BOTONTALK PLEASE REGISTER Los auriculares no han sido registrados previamente REGISTRAR POR FAVOR Una vez que los auriculares hayan terminado el proceso de registro exitosamente HANDSET 1 y HANDSET 2 se visualizarán en la pantalla del auricular Indicadores d...

Страница 69: ...a batería en el auricular esté instalado adecuadamente El auricular debe emitir un tono cuando usted oprime el botón talk callback y el indicador de carga en uso en la base se debe iluminar mientras el auricular descansa sobre la base Si no se ilumina la batería puede necesitar ser recargada Coloque el auricular sobre la base durante por lo menos 20 segundos para volver a programar el aparato El a...

Страница 70: ...esconecte el cable de corriente de la base y vuelva a conectarlo Usted necesita estar suscrito al servicio de Identificador de Llamadas a través de su compañía local para poder recibir la información del Identificador Mensaje de Error del Identificador de Llamadas El aparato muestra este mensaje si detecta cualquier cosa que no sea una señal válida del Identificador de Llamadas durante el periodo de s...

Страница 71: ...do bien y con buena apariencia observe las siguientes pautas Evite poner el teléfono cerca de calentadores calefactores de ambiente y dispositivos que generen interferencia eléctrica ejemplo motores o lámparas fluorescentes No lo exponga a la luz solar directa o a la humedad No deje caer la extensión móvil y no maltrate el teléfono Limpie el teléfono con un trapo suave Nunca use un agente de limpie...

Страница 72: ...a sido resuelto Este producto puede únicamente ser reparado por el fabricante o sus agentes de reparación autorizados Cualquier cambio o modificación no aprobados expresamente por ATLINKS USA Inc podría ser motivo de anulación de la autoridad del usuario para operar este producto Para recibir instrucciones sobre cómo obtener servicios de mantenimiento por favor consulte la garantía incluida en esta...

Страница 73: ...dor de Mensajes 13 Indicador de Uso 17 Información de Interferencias 3 Información sobre la Aprobación de Equipo 2 Instalación 9 Instalación delTeléfono 9 Introducción 6 L Lista de Partes 7 M Marcado en Cadena desde la Memoria 23 Memoria 22 Memoria Llena 25 Menús Programables 15 Montaje sobre Pared 11 O Operación del Sistema Contestador 13 Operación delTeléfono 16 P Para Volver a Marcar 17 Para Al...

Страница 74: ... Revisar el Anuncio 12 Para Revisar y Borrar Números Almacenados en la Memoria 24 Para Salir 18 Para Sujetar el Gancho del Cinturón 27 ParaTener Acceso al Sistema Contestador desde Otra Localización 26 Precauciones de Seguridad para la Batería 28 Programaciones de Fábrica 16 Programación del Sistema Contestador 11 Programación delTeléfono 15 R Registro 11 Reproducción de Mensajes 13 Requerimientos...

Страница 75: ...ÁLOGO PRECIO Para ordenar tenga lista su tarjeta Visa Mastercard o Discover y llame al 1 800 338 0376 Se aplicará un cargo por envío al ordenar La ley nos requiere que cobremos el impuesto sobre la venta apropiado para cada estado condado y área individuales a las cuales se envíe la mercancía Los artículos están sujetos a disponibilidad Los precios están sujetos a cambios sin previo aviso ...

Страница 76: ... sin limitarse a ellos daños por relámpagos Registro del Producto Por favor llene y envíe por correo la Tarjeta de Registro del Producto que se embarcó con su producto Hará más fácil que hagamos contacto con usted si fuera necesario No se requiere la devolución de la tarjeta para tener la cobertura de la garantía Limitaciones sobre la Garantía LA GARANTÍA ESPECIFICADA ANTERIORMENTE ES LA ÚNICA GAR...

Отзывы: