GE 168952 Скачать руководство пользователя страница 3

NOTE:

Never turn on the fryer with an

empty Oil Reservoir. Always use your
fryer on a flat, heat resistant surface.
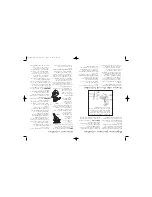
1. Attach magnetic

end of Break-away
cord assembly
directly to the fryer
socket (See figure
1). 

This should be done

prior to plugging the 
cord into the wall outlet.

The magnetic end
of the cord is
designed to only go on one way.  Be
sure the side stating "THIS SIDE
UP" is facing up.

2. Remove lid.
3. Remove Frying

Basket, pull Basket
Handle up until it
clicks into the
horizontal position
(Fig. 2).

4. Make sure the Oil

Reservoir is seated
in place with the
Basket Hook on
the side opposite
the Control Panel
Assembly. The Oil Reservoir is also
marked indicating which side is the
“Heater Side”. Pour cooking oil into
Oil Reservoir until it reaches
between “MIN” and “MAX” marks
inside reservoir. DO NOT OVER
OR UNDER FILL.

5. Smear a little oil on the inside of

the Viewing Window. This prevents
condensation, which impedes the
view.

6. Place lid onto the unit.
7. Make sure that fryer is off and

insert plug into 120 volts AC outlet.
To turn fryer on, press ON/OFF
button once.  The power indicator

will come on. Turn Temperature
Control Knob to desired
temperature. The Ready Light will
come on when the set temperature
is reached.

8. After oil has been preheated,

remove lid and place Frying Basket
onto Basket Hook inside Oil
Reservoir. 

CAUTION:

Keep the Folding Handle in

the locked position.
9. Place food inside Frying Basket (Do

not stack food). Place lid back onto
the unit. Lower Frying Basket into
Oil Reservoir.

CAUTION:

Always replace lid before

immersing food in oil. Do not immerse
or drain food with lid removed.
For cooking times, see fry chart on
page 7 or use the recommended  times
in your recipe.
10. After time is up, lift Frying Basket

and hang basket onto Basket Hook
in Oil Reservoir. To remove excess
grease and retain crispness, let food
drain in Frying Basket at least 10-20
seconds. Open lid, then lift Frying
Basket by handle and pour contents
onto plate covered with paper
towels before serving.

11. When finished cooking, shut down

fryer by pushing the ON/OFF
button to the OFF position.

WARNING: DO NOT USE BREAK-AWAY POWER
CORD SYSTEM TO DISCONNECT THE FRYER.
ALWAYS DISCONNECT PLUG FROM WALL
OUTLET FIRST TO DISCONNECT FRYER.  Use only
Model# DP16 magnetic cord set with this product.
The use of any other magnetic cord set may cause
fire, electric shock, or injury.
CAUTION:

The Break-away power cord is

only for accidental disconnection and
not to be removed during normal
operation.  If the cord becomes

Figure 1

Figure 2

How to Use Your Deep Fryer

5

Preparing Your Fryer for Use

• Fill the unit to the maximum or

minimum capacity lines only.

• Do not over fill the basket. To

achieve quality results deep frying
food needs to be surrounded by oil.
Too much food causes the oil
temperature to drop, resulting in
“soggy” food.

• Be sure that all ice crystals are

removed from the food and food is
completely dry. Excessive water and
ice can cause the oil to splatter
and/or overflow.

• Coated foods (bread crumbs,batters,

etc.) are best for deep frying. The
coating acts as a protective layer
keeping food moist on the inside
and crisp on the outside.

• Fry foods at the correct temperature

for best results. This will prevent
burning and give you even colored,
crispy food. 

Before fryer is used for the first time;
remove all packaging materials
including plastic bag covering Fryer
Basket and notice inside.
Make sure fryer is unplugged. Wash
the Frying Basket and Removable Oil
Reservoir in hot soapy water. Gently

wipe the Cool-Zone Heating Element
with a damp cloth. Dry all parts
thoroughly. Your fryer is now ready to
use.
CAUTION:

Do not immerse fryer,

cord, plugs or Control Panel Assembly
in water.

Tips for Deep Frying

4

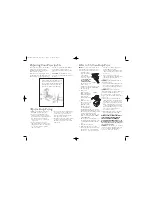
The Cool-Zone Heating Element can
not be switched on unless you insert
the (1) Control Panel Assembly to the
locating slots of the (2) Connecting 
Plate on the Stainless Steel Exterior.

GE168952.03.NA.OMI_428_0950  1/24/03  11:00 AM  Page 4

Содержание 168952

Страница 1: ...t service call customer service at 877 207 0923 168952 UPC 681131689526 Item Stock Number 168952 UPC 681131689526 Restaurant Style Stainless Steel Deep Fryer g GE168952 03 NA OMI_428_0950 1 24 03 11 00 AM Page 1 ...

Страница 2: ...blade is wider than the other To reduce the risk of electric shock this plug will fit in a polarized outlet only one way If the plug does not fit fully in the outlet reverse the plug If it still does not fit contact a qualified electrician Do not attempt to modify the plug in any way Congratulations on the purchase of your New GE Deep Fryer This Deep Fryer is equipped with a Break away Power Cord ...

Страница 3: ...t 10 20 seconds Open lid then lift Frying Basket by handle and pour contents onto plate covered with paper towels before serving 11 When finished cooking shut down fryer by pushing the ON OFF button to the OFF position WARNING DO NOT USE BREAK AWAY POWER CORD SYSTEM TO DISCONNECT THE FRYER ALWAYS DISCONNECT PLUG FROM WALL OUTLET FIRST TO DISCONNECT FRYER Use only Model DP16 magnetic cord set with ...

Страница 4: ...ads or alcohol 4 Remove Frying Basket Wash the Frying Basket in the dishwasher or with hot soapy water Rinse and towel dry carefully 5 Lift Control Panel Assembly up from backside of fryer CAUTION Be sure you have allowed enough time after using for Control Panel Assembly to cool down completely Carefully lift Oil Reservoir out by holding the rim of the bowl Oil can be stored in the Oil Reservoir ...

Страница 5: ...isp Unpleasant smell Control Panel Assembly not seated Not turned on Not plugged in Outlet not energized Reset Button tripped Oil Reservoir over filled Too much water in food Food batches too large Food batches too large Oil temperature too low Using wrong type of oil Oil not fresh Reinstall Control Panel Assembly Push Main Switch ON Insert plug into outlet Check fuses or circuit breaker Push Manu...

Страница 6: ...lk then add to dry ingredients stirring until mixture is moist Drop batter by teaspoonfuls into deep hot oil basket should already be lowered frying only a few at a time Turn hush puppies once and cook until golden brown Remove and drain on paper towels Quick doughnuts refrigerated can of biscuits 1 2 cup sugar 2 tablespoons ground cinnamon Preheat oil to 375 F Take each biscuit and flatten slight...

Страница 7: ...presentar un reclamo de la garantía Guarde su comprobante de compra Empaquete el artefacto correctamente Recomendamos usar la caja original y los materiales de empaque Devuelva el producto a la tienda WAL MART más cercana o llame al Departamento de Servicio al Cliente al 1 877 207 0923 Qué no cubre la garantía Uso comercial Desperfectos por mal uso abuso o negligencia Productos que hayan sido modi...

Страница 8: ...os rollos de pollo en una capa en la canasta de freír Bájela y cocine 5 minutos o hasta que estén dorados Para comprobar si están cocidos saque un rollo de pollo del aceite Cuando el tenedor se puede introducir con facilidad el pollo está cocido Frituras de papa 1 3 4 tazas de harina de maíz 1 2 cucharilla de sal de ajo 1 2 taza de harina 1 2 taza de cebolla picada 3 4 cucharilla de levadura 1 taz...

Страница 9: ...mente se vierte Su viscosidad cambia debido a los cambios ocurridos a la estructura molecular del aceite Cuando aparece humo en la superficie del aceite antes de que la temperatura llegue a 375 grados Fahrenheit el aceite ya no freirá eficazmente Cuando vaya a freír alimentos con un sabor y o aroma fuerte por ejemplo pescado use el aceite solamente una vez También use el aceite solamente una vez c...

Страница 10: ...ente después de freír para que el conjunto de panel de mandos se enfríe completamente Saque cuidadosamente el recipiente de aceite tomándolo de su orilla Puede guardar el aceite en el depósito cubriéndolo con la tapa de plástico de almacenamiento Vea la sección Consejos sobre el uso y almacenamiento del aceite en la página 8 6 La canastilla la tapa principal sin Cómo limpiar su freidora los filtro...

Страница 11: ...rdón al tomacorriente en la pared El extremo magnético del cordón está diseñado para enchufarse en un solo sentido Asegúrese que el lado indicando THIS SIDE UP esté vuelto hacia arriba 2 Quite la tapa 3 Retire la canastilla freidora tire del asa de la canastilla hasta escuchar un clic indicando que está en posición horizontal figura 2 4 Asegúrese que el depósito de aceite esté bien asentado en su ...

Страница 12: ... enchufe polarizado una clavija es más ancha que la otra Como una característica de seguridad para reducir el riesgo de electrochoque este enchufe encajará en un tomacorriente polarizado solamente de una manera Si no entra totalmente en el tomacorriente de vuelta el enchufe Si tampoco entra comuníquese con un electricista competente No intente modificar de manera alguna este enchufe Felicitaciones...

Страница 13: ...epartamento de atención al cliente al 877 207 0923 168952 UPC 681131689526 Número de inventario de la unidad 168952 UPC 681131689526 Freidora de acero inoxidable Estilo restaurante g GE168952 03 NA OMI_428_0950 1 24 03 11 00 AM Page 24 ...

Отзывы: