


RX Series User Manual
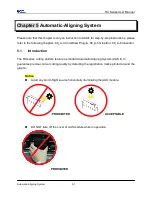
Automatic-Aligning System
5-3
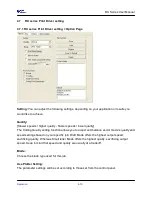
Margin: The distance between marks and images
Range: 0mm~50mm
Optimized Setting: 5mm
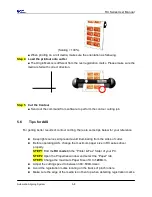
The cutter can not detect the marks while:
Cutter carriage is not located near the outside area of first mark before
detecting (See the picture in page 5-7 for auto-detecting area of first mark.)
Medium thickness is more than 0.8mm
Transparent medium is used
Non-monochrome drawing. The marks can’t be read if is printed on colored
medium
Dirty or creased medium surface
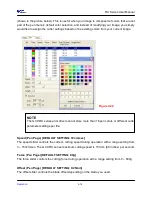
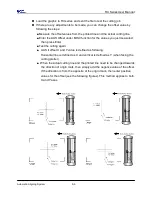
5.2.3 AAS II on RX series
There are three types of AAS II mark patterns: 4-Point Positioning, Segmental Positioning, and
Multiple Copies. Note that before print out your designs by inkjet printers, the registration marks
have to be created on your graphic designs by cutting software like GreatCut, SignPal or GCC
CorelDraw plug-in. Hand-made marks or drawings won’t be reorganized by GCC cutting
plotters. For more details about registration mark setting in cutting software, please refer to
‘Appendix A-3 : CorelDraw Plug-In Instruction”, ‘Appendix A-4 : SignPal 8.5 Instruction’, and
‘Appendix A-5 : GreatCut Instruction.
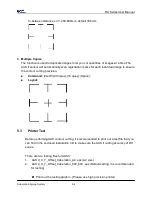
1.
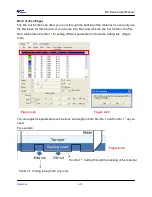
4-Point Positioning
This is the basic mark pattern that AAS II will auto detect four registration marks and contour
cut images inside those marks.
Command: Esc.D1;(XDist);(YDist):
Layout: 4 L-shaped marks at the 4 corners around the design
2.
Segmental Positioning
In addition to 4 original points, the intermediate registration marks are added on both X axis
and Y axis to help contour cut accurately, especially for cutting large images.
Command: Esc.D2;(XDist);(YDist);(XStep);(YStep):
Layout:
In-between distance on X: 200~600mm, default 300mm
Содержание RX Series
Страница 1: ...V 7 2014 Mar RX Series User Manual http www GCCworld com ...
Страница 33: ...RX Series User Manual Installation 2 20 3 Select Driver page ...
Страница 48: ...RX Series User Manual The Control Panel 3 3 3 2 Menu in On line Mode ...
Страница 49: ...RX Series User Manual The Control Panel 3 4 3 3 Menu in Off line Mode ...
Страница 50: ...RX Series User Manual The Control Panel 3 5 ...
Страница 51: ...RX Series User Manual The Control Panel 3 6 ...
Страница 115: ...RX Series User Manual SignPal 10 5 Instruction A 4 8 ...
Страница 118: ...RX Series User Manual SignPal 10 5 Instruction A 4 11 ...
Страница 125: ...RX Series User Manual SignPal 10 5 Instruction A 4 18 ...
Страница 138: ...Jaguar IV User Manual GreatCut Instruction A 5 Step 5 Click output and the object will be sent to GCC Cutting Plotter ...
Страница 151: ...Jaguar IV User Manual GreatCut Instruction A 5 Step 5 Click output and the object will be sent to GCC Cutting Plotter ...
Страница 155: ...Jaguar IV User Manual GreatCut Instruction A 5 Click Multi Copy in GreatCut2 under File ...
Страница 162: ...RX Series User Manual Illustrator Plug In A 6 8 Hit Edit Artboards 9 Click on Presets Fit Artboard to Artwork bounds ...