background image

Vacuum

 40

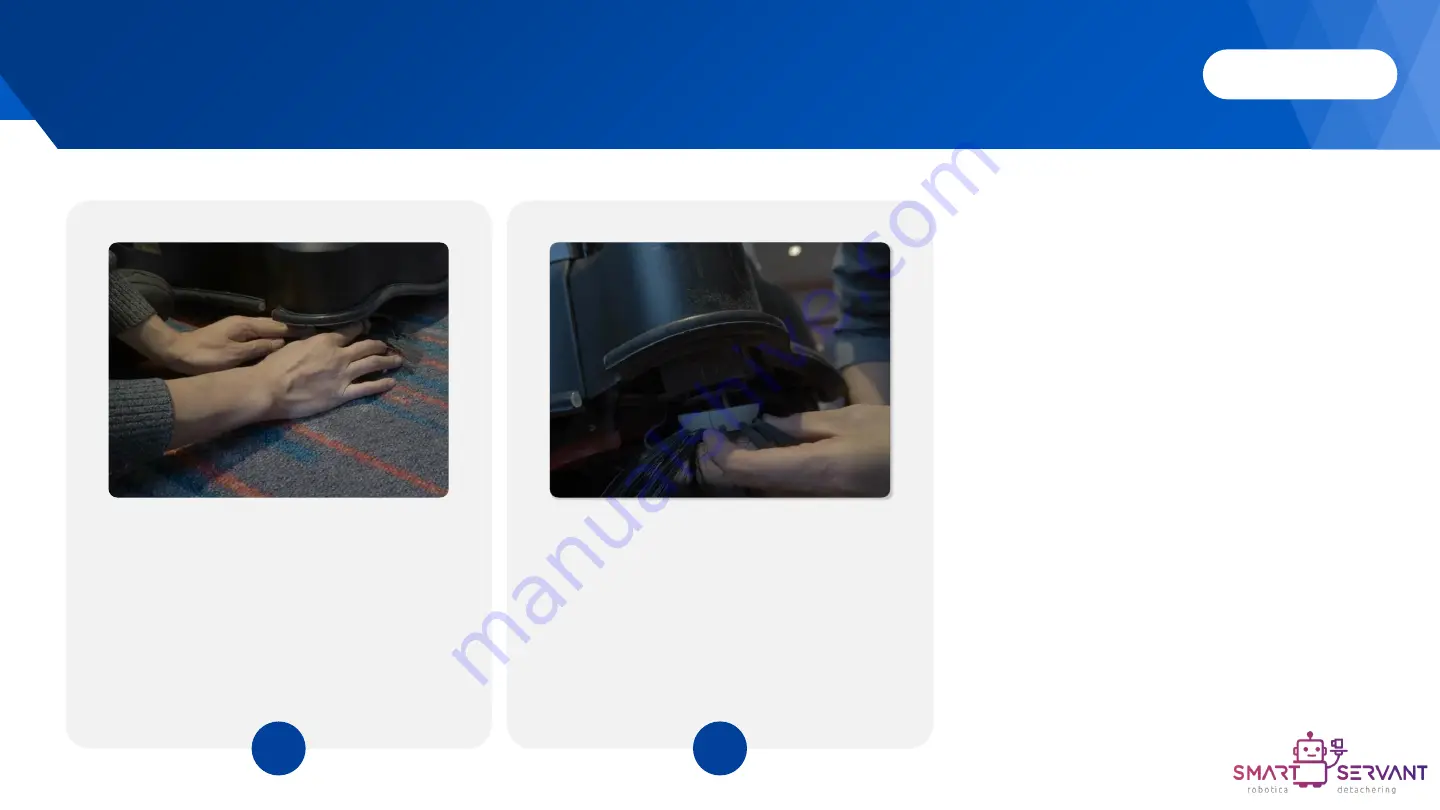
[Take off the side brush]

Push robot to maintenance site. Press side
brush down by both two hands to take it off.
Take the other one off in the same way.

[Clean side brush]

Clean hair or debris on side brush by
hands. When to install it back, align it to the
positioning pin and push it upward (it will be
locked by magnet).

1

2

Maintenance guide 

– Side brush cleaning

Содержание Vacuum 40

Страница 1: ...Technical support operation center Maintenance Guide Vacuum 40...

Страница 2: ...cleaning Dust box and guide plate cleaning Roller brush cleaning Side brush cleaning Charging pile cleaning Dust mop cloth replacement Air filter replacement Dust bag replacement Roller brush replacem...

Страница 3: ...e the appearance Use wet and lint free wipe to clean the appearance of robot do not touch cameras and sensors 3 Switch robot to manual mode Click the float button in the lower right corner and select...

Страница 4: ...lint free wipe to clean top view camera Press screen off button and clean the touch screen 6 Clean front horizontal laser 5 Clean the sensors outside Use soft clean and lint free wipe to clean the la...

Страница 5: ...2 Take off dust mop plate Open the rear shell and take off the dust mop plate and cloth 3 Switch robot to manual mode Click the float button in the lower right corner and select manual operation 1 Ma...

Страница 6: ...the dust mop cloth Wash the dust mop cloth Airing and dry it 4 Assemble the cloth back Prepare a clean cloth and assemble it to the plate then put the plate back to robot 5 Maintenance guide Dust mop...

Страница 7: ...trash the garbage Take off the guide plate just by pushing it down then clean it 3 1 2 Maintenance guide Dust box and guide plate cleaning Switch robot to manual mode Click the float button in the low...

Страница 8: ...e into robot and push it upward to finish the install 4 Dust box Insert the dust box close the lower shell and lock the buckle 5 Maintenance guide Dust box guide plate driving wheel cleaning Driving w...

Страница 9: ...nscrewed Press it once and remove the side cover of roller brush and then take out roller brush 2 Clean roller brush Clean the side cover of roller brush Clean the debris wrapping on the roller brush...

Страница 10: ...down by both two hands to take it off Take the other one off in the same way Clean side brush Clean hair or debris on side brush by hands When to install it back align it to the positioning pin and pu...

Страница 11: ...e push it away from charging pile Clean the appearance Unplug the power socket of charging pile and use clean and wet wipe to clean the appearance Do not touch the charging port when wiping Plug the p...

Страница 12: ...put the dust bag back and close cover of dust tank and close top lid 3 Open the top lid and cover of dust tank Open the top lid and open the cover of dust tank Then take the dust bag and the air filt...

Страница 13: ...st tank and top lid 3 2 1 Maintenance guide Dust bag replacement Push robot to maintenance site Switch robot to manual mode and push it to maintenance site Open the top lid and cover of dust tank Open...

Страница 14: ...and screw the bolt Then close the side lower shell and the buckle 3 Open buckle and side lower shell 1 Maintenance guide Roller brush replacement Take roller brush out Unscrew the bolt of roller brus...

Страница 15: ...Push side brush down with both two hands to take it off Take the other one off in the same way Replace side brush Prepare new side brush Align it to the positioning pin and push it forward It will be...

Страница 16: ...maintenance site 1 Take dust mop plate off Open rear lower shell and take off dust mop plate and cloth 2 Install clean cloth Prepare clean cloth Assemble it to the plate and put the plate back to rob...

Страница 17: ...h Roller brush has not exceeded its service life No abnormal wear no deformation No obvious dirty no abnormal noise Dust Bag Dust bag has not exceeded its service life No obvious dirty no damage Hepa...

Отзывы: