background image

toilet taps

art. rt010

ASSEMbLAGGIO rubINETTO 

- TAP ASSEMBLY 

IT

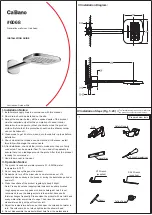
  Nell’ambito della configurazione desiderata installare a parete nell’apposito scasso ricavato nella muratura, il  

  corpo del rubinetto 

(1)

 rispettando le  indicazioni riportate nella figura. Verificare le tenute dei collegamenti.

EN 

For the required configuration, install on the wall in the specific slot made in the wall, the body 

(1) 

of the tap  

  fitted with protection and connect it as indicate on the cover. 

Check the tightness of connections.

1

A

Содержание RT010

Страница 1: ...INSTALLAZIONE E MONTAGGIO INSTALLATION AND ASSEMBLY art RT010 Miscelatore incasso con doccetta shut off a pulsante Built in mixer with shut off handshower...

Страница 2: ...cteur de pression l entr e de l installation Temp rature eau chaude non sup rieure 65 C Application de filtres l entr e de l installation Surtout en cas de nouvelles installations afin d viter que des...

Страница 3: ...10 Product maintenance 11 Claim 12 FR SOMMAIRE Montage du robinet 4 Remplacement de la cartouche 9 Dimensions 10 Entretien du produit 11 R clamation 12 DE INHALTSVERZEICHNIS Zusammenbau des Hahns 4 Ka...

Страница 4: ...cavato nella muratura il corpo del rubinetto 1 rispettando le indicazioni riportate nella figura Verificare le tenute dei collegamenti EN For the required configuration install on the wall in the spec...

Страница 5: ...stallazione calcolando anche lo spessore del rivestimento Terminato il rivestimento della parete rimuovere la protezione temporanea in ottone 2 svitando le tre viti 3 e rimuovere la guarnizione 4 EN O...

Страница 6: ...izioni 5 negli appositi alloggiamenti del corpo e utilizzando una chiave a brugola da 3 mm avvitare le tre viti 6 EN Insert the gaskets 5 in the body and screw the three screws using a 3 mm Allen wren...

Страница 7: ...e 7 alla presa d acqua e alla doccetta inserendo le guarnizioni 8 N 2 valvole di non ritorno all interno del corpo 9 EN Screw the flex 7 to the water inlet and to the handshower inserting the gaskets...

Страница 8: ...ua calda a destra e dell acqua fredda a sinistra Terminato l utilizzo della doccetta shut off chiudere l acqua e posizionare la doccetta nel supporto 3 EN Mode of operation remove the handshower from...

Страница 9: ...iera di fermo 3 con l apposita riduzione in dotazione 4 per la chiave da 20 mm ed estrarre manualmente la cartuccia 5 dal rubinetto Effettuare la manutenzione o sostituzione EN Before performing this...

Страница 10: ...ssibile e conseguente perdita d acqua EN Make sure to always close the water after using the shut off because a break in the flexible may occur and consequently water loss art RT010 CONSEGuENZE DOVuTE...

Страница 11: ...edene Desinfektionsmittel enthalten l sst die Garantie des Herstellers verfallen ES Cuidado del producto Limpiar peri dicamente el filtro aireador e inmediatamente tras su primer uso Limpiar el grifo...

Страница 12: ...ontrollo EN By claim please indicate the following control number FR En cas de r clamation svp veuillez citer le num ro suivant DE Bei Reklamation bitte folgende Kontrolnummer angeben ES En caso de re...

Отзывы: