Gator HDVR400L Скачать руководство пользователя страница 9

Menu Settings 

Press the Menu button to get into the menu settings. You can navigate the settings menu by using 

the Up/Down buttons. To change or edit a selected setting, press the OK button. 

Press the menu button again to get out of the menu settings. 


USB Mode 

When connecting a USB cable with the PC, the DVR will automatically go into USB mode. This 

allows you to transfer your videos to your PC. 


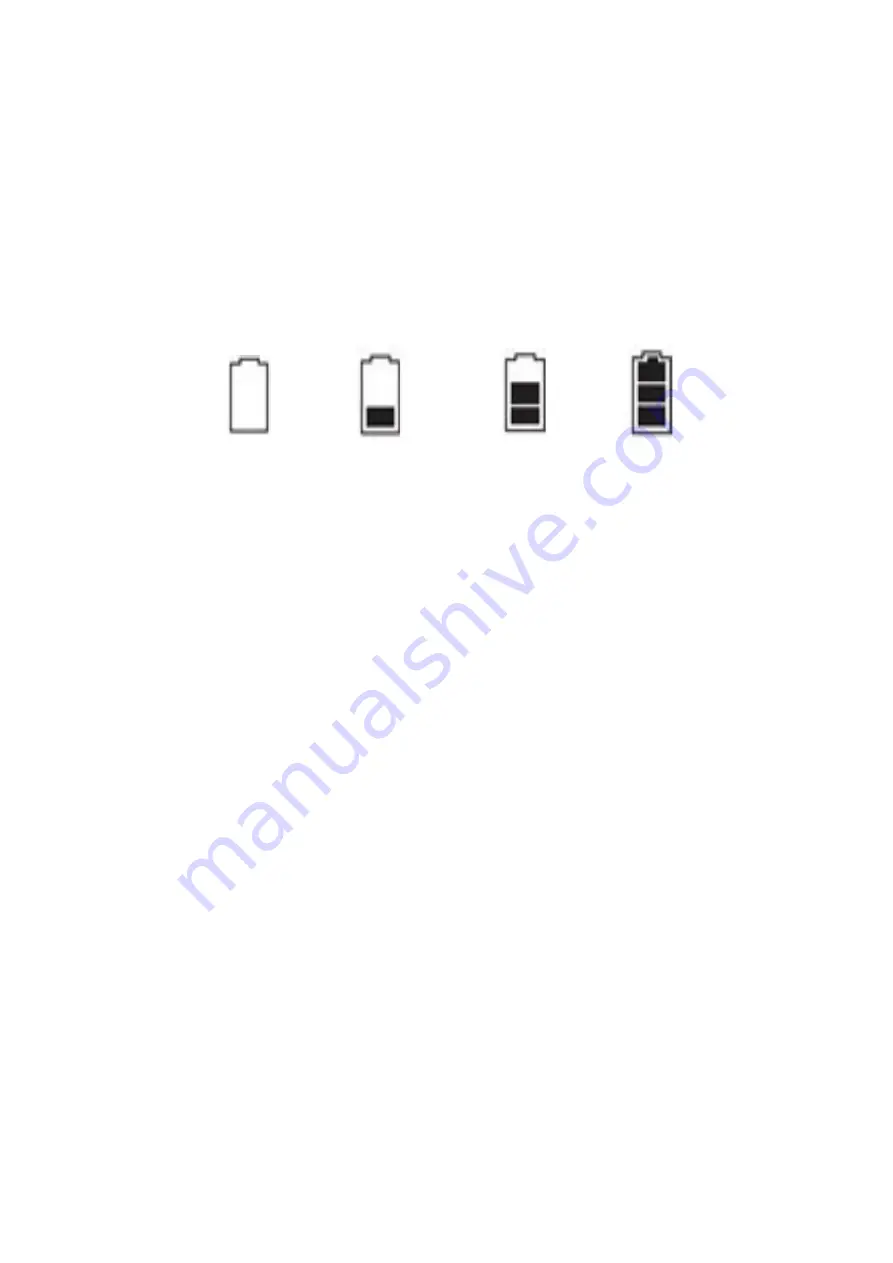
Battery Instructions 

Please see below illustration for battery the capacity indications. 


When the DVR is charging, a red indicator on the DVR glows red. The DVR takes about 3 hours to 

fully charge. When the DVR hits full charge, the red indicator will turn off. 

The DVR can be charged multiple ways: 

1.  Using the power adapter for charging. 

2.  Using the provided micro USB cable to connect to a USB interface for charging. 

3.  Using the provided car charger 


Menu setting features explained 

Before we begin, firstly there are two things that must be done before using the DVR. 


Go into the first menu 

(Video menu)

 and scroll down using the up/left and down/right arrow buttons 

on the bottom of the DVR until you get to the ‘Motion Detection’ setting, now highlighted in blue. 

When setting is highlighted, press the OK button, on the bottom of your DVR, and select motion 

detection to 

‘OFF’

. This feature must be set to ‘off’ if you wish to use your DVR as a loop 

recorder/crash DVR.  


Second, press the menu button again until the cog in the top right is highlighted in blue 

(SETUP 

MENU)

. Scroll down using the up/down arrow keys until 

‘Auto Power Off Setting’

 is highlighted in 

blue. Then press the OK button to select this setting to ‘

OFF’

. This feature must be set to off if you 

wish to use your DVR as a loop recorder/crash DVR as the 

Auto Power Off Setting

 will turn the 

DVR off completely and this setting is only meant to work with the motion detect feature. 


Your DVR is now in loop record mode and we can go ahead and setup the rest of the menu 

selections. 


Video Resolution:  

The recommended resolution should be set at ‘HDR 1920x1080 30P 16:9’ in 

order to get the best quality footage. 


Image Quality:  

The recommended setting is S.Fine (Super Fine) in order to get the best quality. 


Full Power 

Medium Power 

Low Power 

Critical Power 

Содержание HDVR400L

Страница 1: ...USER GUIDE HDVR400L...

Страница 2: ...The DVR can also use the HDMI interface to transmit your media directly to a high definition LCD TV for high resolution playback Product Features 170 degree ultra high definition wide angle lens 2560...

Страница 3: ...Package Components HD DVR 400L Mounting Bracket with Charger USB to Mini USB Car Charger 4G Micro SD Card HD DVR 400L User Guide...

Страница 4: ...Bracket Connection 4 HDMI Out Port 5 HD Camera Lens 6 Power Button 7 Up Left Button 8 Menu Button 9 OK Button 10 Mode Button 11 Down Right Button 12 Reset 13 Indication Light 14 SOS Emergency Button 1...

Страница 5: ...on can also be used to mute the MIC on the fly either during standby or recording Down Right Button The down button is used while in the menu to move the highlighted area for selecting MODE Button Mod...

Страница 6: ...tivates in the case of a car accident by determining the gravitational acceleration 1g 9 8 meters second 2 When this function activates the DVR will save the accident footage in a non delectable file...

Страница 7: ...eo mode if not already To start recording in video mode press the OK button to start the recording You know it is recording by the red circle indicator on the top right corner of the LCD To stop the r...

Страница 8: ...The locked files column only shows files that have been locked The normal files column shows all files Press the OK button to select a column To select a file for playback use the arrow buttons to se...

Страница 9: ...scroll down using the up left and down right arrow buttons on the bottom of the DVR until you get to the Motion Detection setting now highlighted in blue When setting is highlighted press the OK butto...

Страница 10: ...r in an unprotected area NOTE When this feature is activated your DVR will not loop record and your card will ll up until your DVR says CARD FULL Mic This Feature will allow you to turn the DVRs recor...

Страница 11: ...Power Off Setting This feature will turn you DVR off after 1 3 or 5 minutes and will turn your DVR off completely so we suggest this feature always be set to OFF BackLight Off Setting This feature wi...

Страница 12: ...30P 16 9 2304x1296 25 30P 16 9 1920x1080 25 30P 16 9 1280x720 50 60P 16 9 1280x720p 25 30P Video Codec H 264 Audio AAC Loop Recording Recording with seamless Auto turn on off while car power on off S...

Страница 13: ...wrong setting of light frequency error please set the frequency to 50HZ as it is the Australian standard frequency The DVR is jammed or not responding Please reset the device by pushing in the reset...

Страница 14: ...e If you need assistance setting up or using your Gator product now or in the future call Gator Support Australia TEL 03 8587 8898 FAX 03 8587 8866 Mon Fri 9am 5pm AEST Please retain this user guide f...

Отзывы: