background image

Recalibrating the battery

35

Recalibrating the battery

Important

Do not interrupt the

battery recalibration

process. If

recalibration is

interrupted, you must

start the process over

again.

If your notebook unexpectedly goes into 
Standby mode while you are using it but the 
battery charge is not low, you may need to 
recalibrate your battery. You should also 
recalibrate the battery periodically to maintain 
the accuracy of the battery gauge.

To recalibrate the battery:


1

Connect the AC adapter, then turn on your 
notebook.

2

As soon as it starts and you see a startup 
screen, press 

F2

. The BIOS Setup utility 

opens.

3

Open the 

Advanced

 menu.

4

Highlight 

Battery Auto Learning

, then 

select 

Enabled

 by pressing the spacebar.

5

Open the 

Exit

 menu, then highlight 

Exit 

Saving Changes

 and press 

E

NTER

.

6

Select 

Yes

, then press 

E

NTER

.

The battery recalibration process begins 
and a screen opens showing you the 
progress. The entire process will take 
several hours.

When the recalibration has finished, the 
message “Press [Esc] key to exit” appears.

7

Press 

E

SC

. The battery charge indicator 

now displays an accurate battery charge. If 
the battery charge indicator does not show 
an accurate charge, contact Gateway 
Customer Care at 

support.gateway.com

.

Содержание MX6450

Страница 1: ...H a r d w a r e R e f e r e n c e G u i d e P L A T I N U M E D I T I O N ...

Страница 2: ......

Страница 3: ...ecting the AC adapter 12 Protecting from power source problems 13 Connecting the dial up modem 14 Connecting to a cable or DSL modem or to an Ethernet net work 15 Starting your notebook 16 Waking up your notebook 16 Turning off your notebook 16 Restarting rebooting your notebook 17 Using the status indicators 18 Using the keyboard 19 Key types 20 System key combinations 22 Using the EZ Pad touchpa...

Страница 4: ...removing a PC Card 32 Changing batteries 33 Recalibrating the battery 35 Ordering accessories 36 Chapter 3 Upgrading Your Notebook 37 Preventing static electricity discharge 38 Adding or replacing memory 39 Replacing the DVD drive 42 Replacing the hard drive kit 45 Replacing the keyboard 48 Removing the keyboard 48 Installing the keyboard 52 Appendix A Safety Regulatory and Legal 55 Index 75 ...

Страница 5: ...CHAPTER 1 1 Aboutthisreference About this guide About the User Guide Gateway contact information Microsoft Certificate of Authenticity ...

Страница 6: ...About the User Guide In addition to this guide the UserGuide has been included on your hard drive The User Guide is an in depth easy to read manual that includes information on the following topics Help and technical support Using and customizingWindowsand other software Controlling audio and video settings Using the Internet Protecting your files Playing and recording media Networking Maintenance...

Страница 7: ...ation The label on the bottom of your notebook contains information that identifies your notebook model and its features Gateway Customer Care will need this information if you call for assistance Microsoft Certificate of Authenticity The Microsoft Certificate of Authenticity label found on the bottom of your notebook includes the product key code for your operating system Online Support Tech Supp...

Страница 8: ...ormation For more information about your notebook visit Gateway s Support page at support gateway com or the Web address shown on your notebook s label The Support page also has links to additional Gateway documentation and detailed specifications ...

Страница 9: ...Turning off your notebook Using the status indicators Using the keyboard Using the EZ Pad touchpad Turning your wireless radio on or off Using the DVD drive Using the memory card reader Adding and removing a PC Card Changing batteries Recalibrating the battery Ordering accessories ...

Страница 10: ...h Slide to open the LCD panel Battery charge indicator LED blue battery is fully charged LED purple battery is charging LED blinking red battery charge is very low LED solid red battery is malfunctioning Power indicator LED on notebook is on LED blinking notebook is in Standby mode LED off notebook is off Microphone jack Plug a microphone into this jack Headphone jack Plug amplified speakers or he...

Страница 11: ...ok resting on your lap If the air vents are blocked your notebook may become hot enough to harm your skin Caution Do not block or insert objects into these slots If these slots are blocked your notebook may overheat resulting in unexpected shutdown or permanent damage to your notebook Caution Provide adequate space around your notebook so air vents are not obstructed Do not use your notebook on a ...

Страница 12: ...hone into the memory card reader For more information see Using the memory card reader on page 30 The memory card reader supports Memory Stick Memory Stick Pro Mini Secure Digital MultiMediaCard RS MultiMediaCard and Secure Digital cards USB ports Plug USB devices such as a diskette drive flash drive printer scanner camera keyboard or mouse into these ports Ethernet jack Plug an Ethernet network c...

Страница 13: ...nector Component Icon Description Power connector Plug the AC adapter cable into this connector Monitor port Plug an analog VGA monitor or projector into this port For more information see Viewing the display on a projector or monitor in the User Guide ...

Страница 14: ...r notebook is not plugged into AC power Memory bay Install a memory module into this bay For more information see Adding or replacing memory on page 39 Battery lock Slide to unlock the battery For more information see Changing batteries on page 33 System label Includes the product model number For more information see Gateway model and serial number on page 3 Hard drive bay The hard drive is locat...

Страница 15: ...ode see Changing Power Saving Settings in the User Guide Keyboard Provides all the features of a full sized computer keyboard For more information see Using the keyboard on page 19 Touchpad Provides all the functionality of a mouse For more information see Using the EZ Pad touchpad on page 25 Status indicators Inform you when a drive is in use or when a button has been pressed that affects how the...

Страница 16: ...he power cord if it becomes damaged The replacement cord must be of the same type and voltage rating as the original cord or your notebook may be damaged Important If the battery charge indicator does not turn blue after three hours contact Gateway Customer Care at support gateway com You can run your notebook using an AC adapter or your notebook s battery The battery was shipped to you partially ...

Страница 17: ...d off 4 When you finish using your notebook for the first time turn off your notebook and leave your notebook connected to AC power until the battery charge indicator turns blue Protecting from power source problems Warning High voltages can enter your notebook through both the power cord and the modem connection To protect your notebook and avoid electrical shock use a surge protector If you have...

Страница 18: ...has a built in 56K modem that you can use to connect to a standard telephone line To connect the modem 1 Insertoneendofthemodem cableinto the modem jack on the right side of your notebook 2 Insert the other end of the modem cable into a telephone wall jack The modem will not work with digital or PBX telephone lines 3 Start your notebook then start your communications program ...

Страница 19: ... network jack that you can use to connect to a cable or DSL modem or to an Ethernet network To connect to a cable or DSL modem or to an Ethernet network 1 Insert one end of the network cable into the network jack on the right side of your notebook 2 Insert the other end of the network cable into a cable modem DSL modem or Ethernet network jack ...

Страница 20: ... notebook for the first time follow the on screen instructions to set up your notebook Waking up your notebook Tips Tricks For more information about Standby mode see Changing power modes in the User Guide When you have not used your notebook for several minutes or if you close the LCD panel without turning off your notebook it may enter a power saving mode called Standby While in Standby the powe...

Страница 21: ...closing unresponsive programs does not restore your notebook to normal operation you may have to restart reboot your notebook To close unresponsive programs and restart your notebook 1 Press CTRL ALT DEL The Windows Security dialog box opens 2 Click Task Manager The Windows Task Manager dialog box opens 3 Click the program that is not responding 4 Click End Task 5 Click X in the top right corner o...

Страница 22: ... has been pressed that affects how the keyboard is used The status indicators are located below the touchpad Indicator Icon Description Wireless network optional LED on Wireless radio is turned on LED off Wireless radio is turned off Caps lock LED on Caps lock is turned on LED off Caps lock is turned off Num lock LED on Numeric keypad is turned on LED off Numeric keypad is turned off Hard drive Ca...

Страница 23: ...oard Many of the keys have been assigned alternate functions including shortcut keys for Windows function keys for specific system operations and the Num Lock keys for the numeric keypad Disc drive LED blinking The disc drive is in use LED off The disc drive is not in use Hard drive LED blinking The hard drive is in use LED off The hard drive is not in use Indicator Icon Description Function keys ...

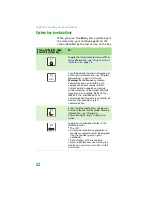
Страница 24: ...r different purposes See the program documentation to find out more about the function key actions System keys Press these colored keys in combination with the FN key to perform specific actions For more information see System key combinations on page 22 Navigation keys Press these keys to move the cursor to the beginning of a line to the end of a line up the page down the page to the beginning of...

Страница 25: ...er keys to open utilities like F Search utility R Run utility and E Explorer utility FN key Press the FN key in combination with a colored system key to perform a specific action Numeric keypad Use these keys to type numbers when the numeric keypad is turned on Press FN to turn on the numeric keypad Key type Icon Description 1 ...

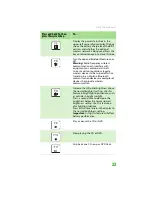
Страница 26: ...can interfere with equipment on commercial aircraft Current aviation regulations require wireless devices to be turned off while traveling in an airplane IEEE 802 11g IEEE 802 11b and IEEE 802 11a communication devices are examples of devices that provide wireless communication Enter Standby mode Press the power button to leave Standby mode For more information see Changing Power Saving Settings i...

Страница 27: ...ing in an airplane Bluetooth communication devices are examples of devices that provide wireless communication Increase the LCD panel brightness above the normal brightest setting Use this feature in bright lighting situations such as outside in bright sunlight Press a second time to decrease the brightness below the normal lowest brightness setting Use this feature in dim lighting situations Pres...

Страница 28: ...of the display Mute the sound Press the key combination again to restore the sound For more information see Adjusting the volume on page 27 Increase the volume For more information see Adjusting the volume on page 27 Decrease the volume For more information see Adjusting the volume on page 27 Press and hold FN then press this system key To ...

Страница 29: ...s You can change this feature to allow tapping on the touchpad to simulate clicking the leftbutton For more information see Changing the mouse or touchpad settings in the User Guide The EZ Pad consists of a touchpad two buttons and a scroll zone When you move your finger on the touchpad the pointer arrow on the screen moves in the same direction You can use the scroll zone to scroll through docume...

Страница 30: ...the screen Position the pointer over the object Quickly press and release the left button once This action is called clicking Start a program or open a file or folder Position the pointer over the object Press the left button twice in rapid succession This action is called double clicking Access a shortcut menu or find more information about an object on the screen Position the pointer over the ob...

Страница 31: ...sing hardware controls If you are using external speakers turn the knob on the front of the speakers OR Use the mute and volume control buttons onthekeyboard Formoreinformation see System key combinations on page 22 Move an object on the screen Position the pointer over the object Press the left button and hold it down then use the touchpad to move drag the object to the appropriate part of the sc...

Страница 32: ...r eliminated Airports hospitals and oxygen or flammable gas laden atmospheres are limited examples where use of wireless devices may be restricted or eliminated When in environments where you are uncertain of the sanction to use wireless devices ask the applicable authority for authorization prior to using or turning on the wireless device Tips Tricks For more information about using your notebook...

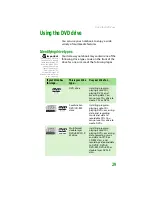
Страница 33: ... or more of the following logos If your drive has this logo Thisisyourdrive type Use your drive for DVD drive Installing programs playing audio CDs playing DVDs and accessing data You cannot use this drive to create CDs or DVDs Combination DVD CD RW drive Installing programs playing audio CDs playing DVDs accessing data and recording music and data to recordable CDs You cannot use this drive to cr...

Страница 34: ...disc in the tray with the label facing up then press down carefully on the disc until it snaps into place 3 Push the tray in until it is closed Using the memory card reader You can use memory cards to transfer pictures from a digital camera to your notebook You can also use the memory card reader to transfer data between your notebook and a device that uses memory cards such as a PDA MP3 player or...

Страница 35: ...n click My Computer 2 Double click the drive letter for example the E drive then double click the file name Removing a memory card Important Do not use the remove hardware icon in the taskbar to remove the memory card If you use the remove hardware icon your notebook may not recognize your memory card reader until you restart your notebook To remove a memory card 1 Push the memory card into your n...

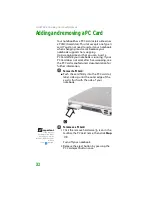
Страница 36: ...f your PC Card does not work after hot swapping see the PC Card manufacturer s documentation for further information To insert a PCCard Push the card firmly into the PC Card slot label side up until the outer edge of the card is flush with the side of your notebook To remove a PCCard Important If the remove hardware icon does not appear on the taskbar click the show hidden icons button 1 Click the...

Страница 37: ...ed Do not disassemble heat above 212 F 100 C or incinerate Dispose of used battery promptly Keep away from children If your notebook is connected to AC power you can change the battery while your notebook is turned on If your notebook is not plugged into an AC outlet you must turn your notebook off while changing the battery To change the battery 1 If your notebook is on and is connected to AC pow...

Страница 38: ... the unlocked position 5 Slide the battery release latch then slide the battery out of your notebook 6 Slide a recharged battery into your notebook until it snaps into place 7 Slide the battery lock to the locked position 8 Turn your notebook over 9 Open the LCD panel ...

Страница 39: ... notebook 2 As soon as it starts and you see a startup screen press F2 The BIOS Setup utility opens 3 Open the Advanced menu 4 Highlight Battery Auto Learning then select Enabled by pressing the spacebar 5 Open the Exit menu then highlight Exit Saving Changes and press ENTER 6 Select Yes then press ENTER The battery recalibration process begins and a screen opens showing you the progress The entir...

Страница 40: ...our programs are running more slowly than you think they should try adding more memory See Adding or replacing memory on page 39 for more information Printers You can attach almost any type of printer to your notebook The most common types are inkjet and laser printers which print in color or black and white Inkjet printers and cartridges are relatively inexpensive but they are slower than laser p...

Страница 41: ...CHAPTER 3 37 UpgradingYourNotebook Preventing static electricity discharge Adding or replacing memory Replacing the DVD drive Replacing the hard drive kit Replacing the keyboard ...

Страница 42: ...o static electricity also known as electrostatic discharge ESD Before installing or replacing components follow these guidelines Avoid static causing surfaces such as carpeted floors plastic and packing foam Remove components from their antistatic bags only when you are ready to use them Do not lay components on the outside of antistatic bags because only the inside of the bags provide electrostat...

Страница 43: ... Modules The modules are available in various capacities and any module can be placed in any slot To add or replace memory modules 1 Follow the guidelines under Preventing static electricity discharge on page 38 2 Turn off your notebook 3 Disconnect the AC adapter modem cable and network cable 4 Disconnect all peripheral devices and remove any PC cards 5 Turn your notebook over so the bottom is fa...

Страница 44: ...6 Remove the keyboard screw shown in the following picture then loosen the remaining six captive screws these screws cannot be removed 7 Use the thumb notch to lift the memory bay cover then remove it Be careful not to break off the tabs located on the end of the cover opposite of the thumb notch Screw Screw Keyboard screw Screw Screw Screw Screw ...

Страница 45: ...Adding or replacing memory 41 8 If you are removing a module gently press outward on the clip at each end of the memory module until the module tilts upward 9 Pull the memory module out of the slot ...

Страница 46: ...nect the power adapter modem cable and network cable then turn on your notebook Replacing the DVD drive If your DVD drive becomes damaged you can replace it with a similar drive obtained from Gateway Important Replace the DVD drive only with a similar drive provided by Gateway Tools Required You need a small Phillips screwdriver to replace the DVD drive To replace the DVD drive 1 Make sure that th...

Страница 47: ...ining six captive screws these screws cannot be removed 8 Use the thumb notch to lift the memory bay cover then remove it Be careful not to break off the tabs located on the end of the cover opposite of the thumb notch 9 With a small Phillips screwdriver remove the DVD drive screw then put it in a safe place 10 Turn your notebook over so the top is facing up Screw Screw Keyboard screw Screw Screw ...

Страница 48: ...y 13 Slide the new DVD drive into the drive bay Make sure that the drive fits securely in the bay 14 Turn your notebook over so the bottom is facing up 15 Secure the DVD drive with the screw removed in Step 9 16 Replace the memory bay cover then tighten the captive screws 17 Replace the keyboard screw 18 Insert the battery then turn your notebook over 19 Connect the power adapter modem cable and n...

Страница 49: ...ady installed Contact Gateway Customer Care at the Web address or telephone number shown on the label on the bottom of your notebook for more information 1 Create a Drivers and Applications Recovery disc using the procedure found in the User Guide 2 Print the Recovering Your System chapter from the User Guide for use in Step 18 3 Back up any data you want to transfer to the new hard drive For more...

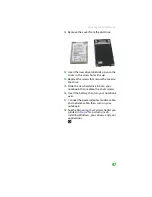
Страница 50: ... it The hard drive is attached to the back of the cover 10 If your new hard drive already includes the hard drive cover go to Step 15 OR If you need to move the hard drive cover from your old hard drive to your new hard drive go to Step 11 11 Remove the screws that secure the hard drive to the hard drive cover Screws Screws ...

Страница 51: ...ecure the cover to the drive 15 Slide the new hard drive kit into your notebook then replace the cover screws 16 Insert the battery then turn your notebook over 17 Connect the power adapter modem cable and network cable then turn on your notebook 18 See theRecoveringYourSystem chapter you printed in Step 2 for instructions on installing Windows your drivers and your applications ...

Страница 52: ...rom Gateway Removing the keyboard To remove the keyboard 1 Follow the guidelines under Preventing static electricity discharge on page 38 2 Turn off your notebook 3 Disconnect the AC adapter modem cable and network cable 4 Disconnect all peripheral devices and remove any PC Cards 5 Turn your notebook over so the bottom is facing up then remove the battery For more information see Changing batterie...

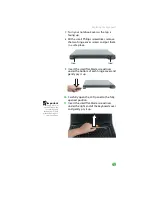
Страница 53: ...the small flat blade screwdriver under the bottom of each hinge cover and gently pry it up 10 Carefully open the LCD panel to the fully opened position Important Inserting a piece of cloth between the screwdriver and keyboard will help prevent damage to your notebook 11 Insert the small flat blade screwdriver under the right end of the keyboard cover and gently pry it up Screw Screw ...

Страница 54: ... to Step 19 Tips Tricks Depending on your model not all screws may be captive 14 Close the LCD panel turn your notebook over so the bottom is facing up then loosen the six memory bay cover screws these screws cannot be removed 15 Use the thumb notch to lift the memory bay cover then remove it Be careful not to break off the tabs located on the end of the cover opposite of the thumb notch Screw Scr...

Страница 55: ...atures one of both of these screws may be absent 17 Remove the two optional keyboard screws 18 Turn your notebook over so the top is facing up then open the LCD panel to the fully opened position 19 With the back edge of the keyboard raised carefully push it toward the LCD panel to release the keyboard retaining tabs Be careful not to damage the LCD panel Screw Screw ...

Страница 56: ...eful not to touch or damage any other components Installing the keyboard To install the keyboard 1 Place the new keyboard keys down on your notebook with the space bar away from you Important The keyboard cable is correctly orientedifit is not twisted 2 Make sure the black keyboard connector clip is fully moved toward the front of your notebook insert the cable into the connector then slide the bl...

Страница 57: ...e cover is not correctly replaced your notebook could be damaged whenyou try to close the LCD panel 6 Replacethe keyboard cover Press downon the cover in several places until it clicks in place The cover is correctly mounted when you can run your finger along the cover and find no loose spots The cover should be flat all the way across 7 Close the LCD panel then replace the two hinge cover screws ...

Страница 58: ...CHAPTER 3 Upgrading Your Notebook 54 13 Insert the battery then turn your notebook over 14 Connect the power adapter the modem cable and the network cable then turn on your notebook ...

Страница 59: ...APPENDIX A 55 Safety Regulatory andLegal Important safety information Regulatory compliance statements Environmental information Notices ...

Страница 60: ...he documentation are followed Setting up your system Read and follow all instructions marked on your notebook and in the documentation before you operate your notebook Retain all safety and operating instructions for future use Do not use this notebook near water or a heat source such as a radiator Set up your notebook on a stable work surface Your notebook should be operated only from thetypeofpo...

Страница 61: ...em is electrically grounded to provide some protection against voltage surges and buildup of static charges Care during use Do not walk on the power cord or allow anything to rest on it Do not spill anything on the notebook The best way to avoid spills is to avoid eating and drinking near your notebook Some notebooks have a replaceable CMOS battery on the system board There is a danger of explosio...

Страница 62: ...wer cord or plug is damaged Liquid has been spilled into the notebook The notebook does not operate properly when the operating instructions are followed The notebook was dropped or the cabinet is damaged The notebook performance changes Replacement parts and accessories Use only replacement parts and accessories recommended by Gateway ...

Страница 63: ... your notebook system These devices may operate in the 2 4 GHz such as 802 11b g LAN and Bluetooth 5 2 GHz such as 802 11a LAN and traditional cellular or PCS cellular bands i e Cellular data modem The following section is a general overview of considerations while operating a wireless device Additional limitations cautions and concerns for specific countries are listed in the specific country sec...

Страница 64: ...notebook is equipped with a wireless device when traveling between countries with your notebook check with the local Radio Approval authoritiesprior toany move or trip for any restrictions on the use of a wireless device in the destination country Measurements have been performed to show that the RF exposure is below what is considered safe limits however care should be taken to make sure the user...

Страница 65: ...ese devices are present Refer to the system label to verify the presence of wireless devices Wireless devices that may be in your system are only qualified for use in the United States of America if an FCC ID number is on the system label The FCC has set a general guideline of 20 cm 8 inches separation between the device and the body for use of a wireless device near the body this does not include...

Страница 66: ...e will not occur in a particular installation If this equipment does cause interference to radio and television reception which can be determined by turning the equipment off and on the user is encouraged to try to correct the interference by one or more of the following measures Reorient or relocate the receiving antenna Increase the separation between the equipment and receiver Connect the equip...

Страница 67: ...ause harmful interference and 2 this device must accept any interferencereceived including interference that may cause undesired operation Warning California Proposition 65 Warning This product contains chemicals including lead known to the State of California to cause cancer birth defects or reproductive harm Mercury Warning The lamp in this display contains mercury Do not put in trash Recycle or...

Страница 68: ... the telephone network the telephone company will notify you in advance that temporary discontinuance of service may be required The telephone company may request that you disconnect the equipment until the problem is resolved The telephone company may make changes in its facilities equipment operations or procedures that could affect the operation of this equipment If this happens the telephone c...

Страница 69: ...ins in a margin at the top or bottom of each transmitted page or on the first page of the transmission the date and time it is sent an identification of the business other entity or other individual sending the message and the telephone number of the sending machine or suchbusiness otherentity orindividual Referto your fax communication software documentation for details on how to comply with the ...

Страница 70: ...n the 2 4 GHz band and or 5 15 5 35 GHz band may be present embedded in your notebook system This section is only applicable if these devices are present Refer to the system label to verify the presence of wireless devices Wireless devices that may be in your system are only qualified for use in Canada if an Industry Canada ID number is on the system label As a general guideline a separation of 20...

Страница 71: ...ion In some cases the inside wiring associated with a single line individual service may be extended by means of a certified connector assembly The customer should be aware that compliance with the above conditions may not prevent degradation of service in some situations Repairs to certified equipment should be made by an authorized Canadian maintenance facility designated by the supplier Any rep...

Страница 72: ...s an indication of the maximum number of terminals allowed to be connected to a telephone interface The termination on an interface may consist of any combination of devices subject only to the requirement that the sum of the Ringer Equivalence Numbers of all the devices does not exceed 5 Japan Japanese Modem Notice ...

Страница 73: ...ply with the appropriate safety standards including IEC 825 The laser devices in these components are classified as Class 1 Laser Products under a US Department of Health and Human Services DHHS Radiation Performance Standard Should the unit ever need servicing contact an authorized service location EPA ENERGY STAR As an ENERGY STAR Partner Gateway has determined that this product meets the ENERGY...

Страница 74: ...age collection The Crossed Out Waste Bin label affixed to this product is your reminder to dispose of your end of life product properly Substances such as glass plastics and certain chemical compounds are highly recoverable recyclable and reusable Youcandoyourpartfor the environment by following these simple steps When your electrical or electronic equipment is no longer useful to you take it back...

Страница 75: ...rs this product was delivered in and by disposing of or recycling used batteries properly With your help we can reduce the amount of natural resources needed to produce electrical and electronic equipment minimize the use of landfills for the disposal of end of life products and generally improve our quality of life by ensuring that potentially hazardous substances are not released into the enviro...

Страница 76: ...n newer publication editions Gateway may improve and or change products described in this publication at any time Due to continuing system improvements Gateway is not responsible for inaccurate information which may appear in this manual For the latest product updates consult the Gateway Web site at www gateway com In no event will Gateway be liable for direct indirect special exemplary incidental...

Страница 77: ...names mentioned herein are used for identification purposes only and may be the trademarks or registered trademarks of their respective companies Macrovision statement If your notebook has a DVD drive and an analog TV Out port the following paragraph applies This product incorporates copyright protection technology that is protected by U S patents and other intellectual property rights Use of this...

Страница 78: ...APPENDIX A Safety Regulatory and Legal 74 ...

Страница 79: ...lacing 33 bays battery 33 hard drive 10 memory 10 39 BIOS Setup utility 35 Bluetooth 23 brightness adjusting 23 brightness keys 24 C cable lock 7 cable modem 15 Caps Lock indicator 18 cards inserting memory card 31 inserting PC Card 32 memory card slot 8 PC Card slot 8 removing memory card 31 removing PC Card 32 slots 30 32 types of memory cards supported 30 carrying case 36 CD inserting 30 CD dri...

Страница 80: ...gital camera USB port 8 digital video camera IEEE 1394 port 8 directional keys 20 display switching 22 double clicking 26 dragging 27 drives DVD 29 42 DVD CD RW 7 29 DVD RW 7 29 hard drive 10 45 identifying drive types 29 multi format DVD RW 7 29 replacing hard drive 45 types 29 DSL modem 15 DVD drive 29 inserting 30 DVD drive identifying 29 installing 42 locating 7 replacing 42 using 29 DVD CD RW...

Страница 81: ...keyboard buttons 19 connecting 19 features 19 locating 11 replacing 48 USB port 8 keys application 20 arrow 20 battery status 23 brightness 24 directional 20 Fn 21 22 function 20 LCD brightness 24 LCD CRT 22 navigation 20 numeric keypad 21 power status 23 Standby 22 Status 23 system 20 system key combinations 22 toggle display 22 Windows 21 L label model number 10 labels 3 laser printer 36 latch b...

Страница 82: ...rning on wireless network 28 Num Lock status indicator 18 numeric keypad status indicator 18 using 21 O opening files 26 folders 26 LCD panel 6 notebook 6 programs 26 shortcut menu 26 P PC Card adding 32 eject button 32 inserting 32 installing 32 removing 32 slot 32 PCMCIA card See PC Card PDA memory cards 30 pointer identifying 25 moving 26 power AC adapter 12 battery 33 35 button 11 22 connector...

Страница 83: ...s built in 6 jack 6 specifications 4 Standby mode 16 22 system key 22 starting notebook 16 programs 26 static electricity 38 status indicators battery charge 6 Caps Lock 18 drive activity 19 hard drive 19 location 11 numeric keypad 18 Pad Lock 18 power 6 toggle on or off 22 Support getting specifications 4 surge protector 13 Suspend 22 S Video TV out jack 7 system identification label 3 10 system ...

Страница 84: ...ireless network 22 28 TV out S Video out jack 7 U upgrading 37 USB port 8 V VGA port 9 video S Video out jack 7 volume adjusting 24 27 controls 27 muting 24 27 system keys 24 W waking up notebook 16 Windows key 21 Product Key Code 3 wireless network button 22 turning off 28 turning on 28 ...

Страница 85: ......

Страница 86: ...MAN BLADE PLATINUM HW REF R0 02 06 ...

Отзывы: