background image

Gateway Notebook

User Guide

Содержание M210

Страница 1: ...Gateway Notebook User Guide ...

Страница 2: ......

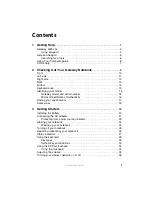
Страница 3: ...ber 16 Microsoft Certificate of Authenticity 16 Finding your specifications 17 Accessories 18 3 Getting Started 19 Installing the battery 20 Connecting the AC adapter 21 Protecting from power source problems 23 Starting your notebook 24 Waking up your notebook 25 Turning off your notebook 25 Restarting rebooting your notebook 26 Status indicators 27 Using the keyboard 28 Key types 29 System key co...

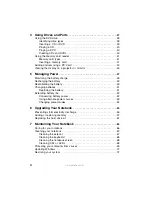
Страница 4: ...e battery 49 Recalibrating the battery 49 Changing batteries 51 Replacing the battery 51 Extending battery life 52 Conserving battery power 52 Using alternate power sources 53 Changing power modes 54 6 Upgrading Your Notebook 55 Preventing static electricity discharge 56 Adding or replacing memory 57 Replacing the hard drive kit 61 7 Maintaining Your Notebook 65 Caring for your notebook 66 Cleanin...

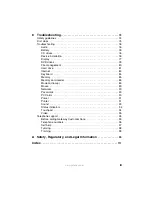
Страница 5: ...gement 80 Hard drive 81 Internet 83 Keyboard 84 Memory 85 Memory card reader 85 Modem dial up 85 Mouse 89 Networks 90 Passwords 90 PC Cards 90 Power 91 Printer 91 Sound 93 Status indicators 94 Touchpad 94 Video 95 Telephone support 95 Before calling Gateway Customer Care 95 Telephone numbers 96 Self help 97 Tutoring 98 Training 98 A Safety Regulatory and Legal Information 99 Index 111 ...

Страница 6: ...iv www gateway com ...

Страница 7: ...Chapter 1 1 Getting Help Using the Gateway Web site Using Help and Support Using Your Computer guide Using online help ...

Страница 8: ... a greater battery life experience This design provides you with maximum performance when plugged into AC power balanced with optimized battery life when on battery power Please read this manual carefully to familiarize yourself with our range of services and support We have highlighted some basic care and safety information to help you keep your notebook in good operating condition Gateway stands...

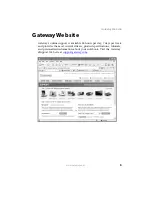
Страница 9: ...e Gateway s online support is available 24 hours per day 7 days per week and provides the most current drivers product specifications tutorials and personalized information about your notebook Visit the Gateway eSupport Web site at support gateway com ...

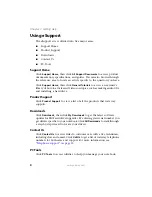
Страница 10: ... audio CDs and installing a hard drive Product Support Click Product Support to view a list of all the products that Gateway supports Downloads Click Downloads then click My Downloads to get the latest software updates for BIOS and driver upgrades By entering your serial number you get drivers specific to your notebook Click All Downloads to walk through a step by step wizard to locate your driver...

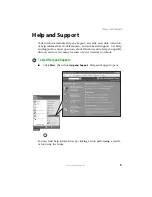
Страница 11: ...leshooters and automated support Use Help and Support to answer questions about Windows and to help you quickly discover and use the many features of your Gateway notebook To start Help and Support Click Start then click Help and Support Help and Support opens You can find help information by clicking a link performing a search or browsing the index ...

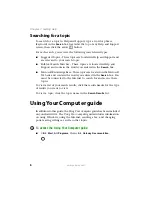
Страница 12: ...dge Base These topics are located on the Microsoft Web site and contain the words you entered in the Search box You must be connected to the Internet to search for and access these topics To view a list of your search results click the results header for the type of results you want to view To view a topic click the topic name in the Search Results list Using Your Computer guide In addition to thi...

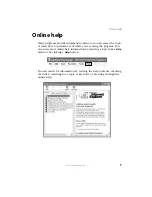
Страница 13: ...earn how to perform a task while you are using the program You can access most online help information by selecting a topic from a Help menu or by clicking a Help button You can search for information by viewing the help contents checking the index searching for a topic or keyword or browsing through the online help ...

Страница 14: ...8 www gateway com Chapter 1 Getting Help ...

Страница 15: ...ing Out Your Gateway Notebook Identifying features Locating your notebook s model and serial number Locating the Microsoft Certificate of Authenticity Locating the specifications for your notebook Purchasing accessories ...

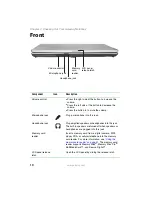
Страница 16: ...phones into this jack The built in speakers are turned off when speakers or headphones are plugged into this jack Memory card reader Insert a memory card from a digital camera MP3 player PDA or cellular telephone into the memory card reader For more information see Using the memory card reader on page 41 The memory card reader supports Memory Stick Memory Stick Pro MultiMediaCard and Secure Digita...

Страница 17: ...ert objects into these slots If these slots are blocked your notebook may overheat resulting in unexpected shutdown or permanent damage to the notebook Caution Provide adequate space around your notebook so air vents are not obstructed Do not use the notebook on a bed sofa rug or other similar surface Monitor port Plug an analog VGA monitor or projector into this port PC Card slot Insert one Type ...

Страница 18: ...tion DVD CD RW or recordable DVD drive To determine the type of drive in the notebook examine the drive tray s plastic cover and compare the logo to those listed in Identifying drive types on page 38 Power battery charge indicator LED solid blue notebook is on and if the notebook is connected to AC power the battery is fully charged LED blinking blue notebook is in Standby mode LED solid purple ba...

Страница 19: ... this connector Component Icon Description Kensington lock slot Secure your notebook to an object by connecting a Kensington cable lock to this slot Ethernet jack Plug a 10 100 Ethernet network cable into this jack Component Icon Description Ethernet jack Kensington lock slot ...

Страница 20: ...oduct model number For more information see Identifying your model on page 16 Hard drive bay The hard drive is located in this bay For more information see Replacing the hard drive kit on page 61 Memory bay Install as many as two memory modules into this bay For more information see Adding or replacing memory on page 57 Battery lock Slide to unlock the battery For more information see Changing bat...

Страница 21: ...ve To access this guide click Start All Programs then click Gateway Documentation Keyboard Provides all the features of a full sized 86 key keyboard For more information see Using the keyboard on page 28 Touchpad Provides all the functionality of a mouse For more information see Using the EZ Pad touchpad on page 32 Status indicators Inform you when a drive is in use or when a button has been press...

Страница 22: ...d this information if you call for assistance Microsoft Certificate of Authenticity The Microsoft Certificate of Authenticity label found on the bottom of your notebook includes the product key code for your operating system Important The labels shown in this section are for informational purposes only Label information varies by model features ordered and location Website www gateway com Online S...

Страница 23: ... information about your notebook such as memory size memory type and hard drive size visit Gateway s eSupport page at support gateway com The eSupport page also has links to additional Gateway documentation and detailed specifications For more information see Using eSupport on page 4 ...

Страница 24: ...ry If your programs are running more slowly than you think they should try adding more memory See Adding or replacing memory on page 57 for more information Printers You can attach almost any type of printer to your notebook The most common types are inkjet and laser printers which print in color or black and white Inkjet printers and cartridges are relatively inexpensive but they are slower than ...

Страница 25: ...Chapter 3 19 Getting Started Installing the battery Connecting the AC adapter Turning your notebook on and off Using the status indicators keyboard and the EZ Pad touchpad Adjusting the volume ...

Страница 26: ...attery To install the battery 1 Close the LCD panel 2 Turn your notebook over so the bottom is facing up 3 Hold the battery label side down and slide it into the open battery slot until the battery clicks into place 4 Slide the battery lock to the locked position ...

Страница 27: ...fully charged before you use your notebook on battery power for the first time the battery life may be much shorter than you expect If the battery life seems short even after being charged for three hours the battery may need to be recalibrated For information on recalibrating the battery see Recalibrating the battery on page 49 Caution Make sure that you use the AC adapter that came with your not...

Страница 28: ...ck in b Press FN F1 to toggle the status lights on and off 4 When you finish using your notebook for the first time turn off your notebook and leave your notebook connected to AC power until the power battery charge indicator turns blue Warning Do not attempt to disassemble the AC adapter The AC adapter has no user replaceable or user serviceable parts inside The AC adapter has dangerous voltages ...

Страница 29: ...hem to a surge protector which absorbs voltage surges and prevents them from reaching your notebook Warning High voltages can enter your notebook through both the power cord and the modem connection To protect your notebook and avoid electrical shock use a surge protector If you have a telephone modem use a surge protector that has a modem jack If you have a cable modem use a surge protector that ...

Страница 30: ...t to On Off mode However you can also set it to function in Standby Resume mode 3 If you are starting your notebook for the first time follow the on screen instructions to set up your notebook Tips Tricks For more information about changing the power button mode see Changing Power Saving Settings in Using Your Computer which has been included on your hard drive To access this guide click Start All...

Страница 31: ...notebook Warning Do not work for long periods with the notebook resting on your lap If the air vents are blocked the notebook may become hot enough to harm your skin Caution Provide adequate space around your notebook so air vents are not obstructed Do not use the notebook on a bed sofa rug or other similar surface Tips Tricks For more information about changing the power button mode see Changing ...

Страница 32: ...ger The Windows Task Manager dialog box opens 3 Click the program that is not responding 4 Click End Task 5 Click X in the top right corner of the Windows Task Manager dialog box 6 If your notebook does not respond turn it off wait ten seconds then turn it on again As a part of the regular startup process a program to check the disk status runs automatically When the checks are finished Windows st...

Страница 33: ...ork optional LED on Wireless network is turned on LED off Wireless network is turned off Caps lock LED on Caps lock is turned on LED off Caps lock is turned off Num lock LED on Numeric keypad is turned on LED off Numeric keypad is turned off Hard drive or disc drive LED blinking The drive is in use LED off The drive is not in use Important If none of the indicators are on you may need to press FN ...

Страница 34: ...ssigned alternate functions including shortcut keys for Windows function keys for specific system operations and the Num Lock keys for the numeric keypad You can attach an external keyboard to the notebook using a USB port You do not need to shut down the notebook to connect a USB keyboard Function keys System keys Navigation keys FN key Windows key Numeric keypad Application key Arrow keys ...

Страница 35: ...mation see System key combinations on page 30 Navigation keys Press these keys to move the cursor to the beginning of a line to the end of a line up the page down the page to the beginning of a document or to the end of a document Arrow keys Press these keys to move the cursor up down right or left Application key Press this key for quick access to shortcut menus and help assistants in Windows Win...

Страница 36: ...ed off while traveling in an airplane 802 11G also known as wireless Ethernet or Wifi communication devices are examples of devices that provide wireless communication Important Your notebook came to you with the optional wireless network turned off Enter Standby mode Press the power button to leave Standby mode For more information see Changing Power Saving Settings in Using Your Computer which h...

Страница 37: ...aying the CD or DVD Skip back one CD song or DVD track Skip ahead one CD song or DVD track Turn on Num Lock so you can use the numeric keypad Press this key combination again to turn off Num Lock The Num Lock status indicator appears when this function is turned on Press and hold FN then press this system key To ...

Страница 38: ...consists of a touchpad two buttons and a scroll zone When you move your finger on the touchpad the pointer arrow on the screen moves in the same direction You can use the EZ Pad left and right buttons below the touchpad to select objects Touchpad Left button Right button Scroll zone ...

Страница 39: ...hen click Gateway Documentation To Do this Move the pointer on the screen Move your finger around on the touchpad If you run out of space and need to move the pointer farther lift your finger move it to the middle of the touchpad then continue movingyour finger Select an object on the screen Position the pointer over the object Quickly press and release the left button once This action is called c...

Страница 40: ...the object Quickly press and release the right button once This action is called right clicking Move an object on the screen Position the pointer over the object Press the left button and hold it down then use the touchpad to move drag the object to the appropriate part of the screen Release the button to drop the object where you want it To Do this ...

Страница 41: ...you are using external speakers turn the knob on the front of the speakers OR Press the volume control on the notebook For more information see Front on page 10 Tips Tricks For instructions on how to adjust the volume in Windows see Adjusting the Volume in Using Your Computer which has been included on your hard drive To access this guide click Start All Programs then click Gateway Documentation ...

Страница 42: ...n an airplane IEEE 802 11a IEEE 802 11b and IEEE 802 11g communication devices are examples of devices that provide wireless communication Warning In environments where the risk of interference to other devices or services is harmful or perceived as harmful the option to use a wireless device may be restricted or eliminated Airports Hospitals and Oxygen or flammable gas laden atmospheres are limit...

Страница 43: ...Chapter 4 37 Using Drives and Ports Using DVD drives Using the media card reader Using a PC Card Viewing the display on a monitor or projector ...

Страница 44: ...for one or more of the following logos If your drive has this logo This is your drive type Use your drive for Combination DVD CD RW drive Installing programs playing audio CDs playing DVDs accessing data and recording music and data to recordable CDs You cannot use this drive to create DVDs Recordable DVD Drive Installing programs playing audio CDs playing DVDs accessing data recording music and d...

Страница 45: ...then press down carefully on the disc until it snaps into place 3 Push the tray in until it is closed Important Some music CDs have copy protection software You may not be able to play these CDs on your notebook Important When you place a single sided disc in the tray make sure that the label side is facing up If the disc has two playable sides place the disc so the name of the side you want to pl...

Страница 46: ...CD and DVD burning program Windows XP Windows Media Player or Windows Movie Maker to copy or create data CDs and DVDs create music CDs create video DVDs and more Tips Tricks For more information about playing CDs see Playing CDs in Using Your Computer which has been included on your hard drive To access this guide click Start All Programs then click Gateway Documentation Tips Tricks For more infor...

Страница 47: ...The memory card reader supports Memory Stick Memory Stick Pro MultiMediaCard and Secure Digital Inserting a memory card To use a memory card 1 Remove the protector from the memory card slot For the location of the memory card slot see Front on page 10 2 Insert the memory card into the memory card slot with the label facing up and the arrow on the label pointing towards the notebook 3 To access a f...

Страница 48: ...y card pops out slightly 2 Pull the memory card out of the notebook 3 Insert the protector into the memory card slot Important Do not use the remove hardware icon in the taskbar to remove the memory card If you use the remove hardware icon your notebook may not recognize your memory card reader until you restart your notebook ...

Страница 49: ...ok when changing most cards because your notebook supports hot swapping Hot swapping means that you can insert a PC Card while your notebook is running If your PC Card does not work after hot swapping see the PC Card manufacturer s documentation for further information To insert a PC Card Push the card firmly into the PC Card slot label side up until the outer edge of the card is flush with the si...

Страница 50: ...on in the taskbar the PC Card name then click Stop OR Turn off your notebook 2 Release the eject button by pressing the PC Card eject button once 3 Eject the PC Card by pressing the eject button again Important If the remove hardware icon does not appear on the taskbar click the show hidden icons button ...

Страница 51: ...r or external monitor 1 Turn off your notebook 2 Plug the projector or monitor cable into the VGA port on your notebook For the location of the VGA port see Left side on page 11 3 Turn on your notebook 4 Plug the projector s or monitor s power cord into an AC power source and turn it on Windows recognizes the new hardware and searches for its driver You may need to install the driver from the disc...

Страница 52: ... properties such as Screen Resolution or Color Quality if necessary 10 Click OK Important Press FN F4 to switch between viewing the display on the LCD panel and viewing the display on the projector or monitor Important If an external monitor or projector is connected and you close the LCD panel your notebook may turn off the LCD panel but will not enter Standby mode ...

Страница 53: ...Chapter 5 47 Managing Power Checking and recharging the battery Recalibrating the battery Changing batteries Extending the life of the battery ...

Страница 54: ...log box opens Look at the power battery charge indicator see Right side on page 12 LED solid blue notebook is on and if the notebook is connected to AC power the battery is fully charged LED blinking blue notebook is in Standby mode LED solid purple battery is charging LED blinking purple battery is charging and notebook is in standby LED blinking red battery charge is very low and has insufficien...

Страница 55: ...rge is not low you may need to recalibrate your battery You should also recalibrate the battery periodically to maintain the accuracy of the battery gauge To recalibrate the battery 1 Close all open files and programs 2 Connect your notebook to AC power and allow the battery to completely charge 3 Disconnect the AC power and restart your notebook Important If the power cord or battery icon does no...

Страница 56: ...drained reconnect your notebook to AC power 6 Charge the battery completely until the yellow battery status indicator goes out 7 When you are ready to use your notebook again do the following a From the desktop right click the power icon then select Adjust Power Properties b Click the Power Schemes tab c Click the arrow button to open the Power Schemes list then click Portable Laptop d Click the A...

Страница 57: ... off your notebook 2 Close the LCD panel 3 Turn your notebook over so the bottom is facing up 4 Slide the battery lock to the unlock position Warning Danger of explosion if battery is incorrectly replaced Replace only with a battery specifically manufactured for your Gateway notebook Discard used batteries according to the manufacturer s instructions The battery used in this device may present a f...

Страница 58: ...power To conserve power while using the battery to power your notebook Dim the display as low as is comfortable Remove PC Cards when you do not need them Many PC Cards use a small amount of power while inserted even if they are not being used Modify the power management settings for maximum power savings Tips Tricks For more information about using power management settings see Changing Power Savi...

Страница 59: ...er sources whenever possible If traveling internationally take electrical adapters Save the battery for times when you cannot use a power adapter If you plan on taking your AC power adapter also take a single plug surge protector If you will have access to an EmPower in flight power receptacle or an automobile cigarette lighter use a power inverter Save the battery for times when you cannot use a ...

Страница 60: ...ocuments that were open when you activated Hibernate mode Using power saving modes Always save your work before using Standby mode In Standby mode your notebook reduces or turns off the power to most devices except memory However the information in memory is not saved to the hard drive If power is interrupted the information is lost When in Hibernate mode your notebook saves all memory information...

Страница 61: ...Chapter 6 55 Upgrading Your Notebook Adding and replacing memory Replacing the hard drive ...

Страница 62: ...trostatic protection Always hold components by their edges Avoid touching the edge connectors Never slide components over any surface Wear a grounding wrist strap available at most electronics stores and attach it to a bare metal part of your workbench or other grounded connection Touch a bare metal surface on your workbench or other grounded object Important Before installing memory or replacing ...

Страница 63: ...ties and any module can be placed in any available slot Use only memory modules designed for your Gateway notebook for upgrading your memory To add or replace memory modules 1 Follow the guidelines under Preventing static electricity discharge on page 56 2 Turn off your notebook 3 Disconnect the AC adapter modem cable and network cable 4 Disconnect all peripheral devices and remove any PC cards Me...

Страница 64: ...n your notebook over so the bottom is facing up 6 Remove the battery For more information see Changing batteries on page 51 7 Remove the memory bay cover screw For the location of the memory bay see Bottom on page 14 8 Slide the memory bay cover then remove it ...

Страница 65: ... gateway com Adding or replacing memory 9 If you are removing a module gently press outward on the clip at each end of the memory module until the module tilts upward 10 Pull the memory module out of the slot ...

Страница 66: ...e module does not fit make sure that the notch in the module lines up with the tab in the memory bay 12 Gently push the module down until it clicks in place 13 Replace the memory bay cover then replace the cover screw 14 Insert the battery then turn your notebook over 15 Connect the power adapter modem cable and network cable then turn on your notebook Important Use only memory modules designed fo...

Страница 67: ...e For more information see Backing up files in Using Your Computer which has been included on your hard drive To access this guide click Start All Programs then click Gateway Documentation 2 Follow the guidelines under Preventing static electricity discharge on page 56 3 Turn off your notebook 4 Disconnect the AC adapter modem cable and network cable 5 Disconnect all peripheral devices and remove ...

Страница 68: ...m the hard drive connector then lift the hard drive kit out of your notebook 10 If your new hard drive already includes the hard drive kit bracket go to Step 15 OR If you need to move the hard drive kit bracket from your old hard drive kit to your new hard drive go to Step 11 11 Remove the screws that secure the hard drive to the hard drive kit bracket 12 Remove the bracket from the old drive 13 I...

Страница 69: ...to the notebook 16 Replace the hard drive bay cover and replace the cover screw 17 Insert the battery then turn your notebook over 18 Connect the power adapter modem cable and network cable then turn on your notebook 19 For instructions on installing Windows your drivers and your applications see the instructions that were included with the restore discs ...

Страница 70: ...64 www gateway com Chapter 6 Upgrading Your Notebook ...

Страница 71: ...Chapter 7 65 Maintaining Your Notebook Caring for your notebook Cleaning your notebook Protecting your notebook from viruses Updating Windows Restoring your system ...

Страница 72: ...come brittle and easy to break in cold temperatures and can melt or warp in high temperatures Damage due to either extreme is not covered by your warranty As a general rule your notebook is safest at temperatures that are comfortable for you Keep all liquids away from your notebook When spilled onto computer components almost any liquid can result in extremely expensive repairs that are not covere...

Страница 73: ...e a damp lint free cloth to clean your notebook and other parts of your system Do not use household abrasive or solvent cleaners because they can damage the finish on components Your notebook is cooled by air circulated through the vents on the case so keep the vents free of dust With your notebook turned off and unplugged brush the dust away from the vents with a damp cloth Be careful not to drip...

Страница 74: ...efore trying to use it again If the keyboard does not work after it dries you may need to replace it Cleaning the notebook screen To clean a notebook LCD screen use a soft cloth and water to clean the LCD screen Squirt a little water on the cloth never directly on the screen and wipe the screen with the cloth Cleaning CDs or DVDs Wipe from the center to the edge not around in a circle using a prod...

Страница 75: ...l messages or downloaded from the Internet Checking all programs for viruses before installing them Disabling macros on suspicious Microsoft Word and Excel files These programs will warn you if a document that you are opening contains a macro that might have a virus Periodically updating the Norton AntiVirus program to protect against the latest viruses Making sure the Windows Security Center is c...

Страница 76: ...an for viruses 1 Click Start All Programs Norton AntiVirus then click Norton AntiVirus 2004 Norton AntiVirus opens 2 Click Scan for Viruses 3 Click the type of scan you want to make in the Scan for Viruses area then under Actions click Scan Scan for viruses Scan ...

Страница 77: ...t you are connected to the Internet 2 Click Start All Programs Norton AntiVirus then click LiveUpdate Norton AntiVirus The LiveUpdate wizard opens 3 Follow the on screen instructions to update your Norton AntiVirus program with the latest virus protection files 4 When the program has finished click Finish Important You received a free limited time subscription to the Norton AntiVirus service when ...

Страница 78: ...k Start All Programs then click Windows Update 3 Follow the on screen instructions Restoring your system All programs that were preinstalled on your computer are available on the backup restore discs that you created with the recovery media program on the hard drive or on restore discs that were included with your computer If you need to restore your computer to the original configuration you can ...

Страница 79: ...Chapter 8 73 Troubleshooting Troubleshooting typical hardware and software problems Getting telephone support Using automated troubleshooting systems ...

Страница 80: ...efore accessing internal components For more information about preventing damage from static electricity see Preventing static electricity discharge on page 56 After you complete any maintenance tasks where you remove the memory bay or hard drive bay cover make sure that you replace the cover reinstall any screws then replace the battery before you start your notebook Warning Do not try to trouble...

Страница 81: ...e secure Make sure that your hard drive is not full If an error message appears on the screen write down the exact message The message may help Gateway Customer Care in diagnosing and fixing the problem If you added or removed peripheral devices review the installation procedures you performed and make sure that you followed each instruction If an error occurs in a program see the program s printe...

Страница 82: ...fter adding a new device Sometimes a new device such as a PC Card can cause a system resource IRQ conflict Check IRQ usage to determine if there is an IRQ conflict To check IRQ usage 1 Click Start then click Control Panel The Control Panel window opens If your Control Panel is in Category View click Performance and Maintenance 2 Click Double click System click the Hardware tab then click Device Ma...

Страница 83: ... For more information see System key combinations on page 30 The screen resolution is not correct Change the screen resolution from the Display Properties dialog box The text on the display is dim or difficult to read Adjust the brightness and contrast using the system keys For more information see System key combinations on page 30 Help and Support For more information about IRQs click Start then...

Страница 84: ...ombinations on page 30 Make sure the notebook is not in standby or hibernate mode For more information see Changing power modes on page 54 The notebook may be sending its display to an external monitor or television Press FN F4 several time to toggle through the attached display an external monitor or television or both DVD drives Your notebook does not recognize a disc The disc may not be seated ...

Страница 85: ...ke sure that the Windows volume control is turned up Make sure that Mute controls are turned off For more information about the mute setting see Front on page 10 Make sure that headphones are not plugged into the headphone jack If you are using powered speakers make sure that they are plugged in and turned on Clean the disc For more information see Cleaning CDs or DVDs on page 68 Your notebook may...

Страница 86: ...our DVD drive s regional code must match the regional code of the disc The regional code for the disc is on the disc disc documentation or packaging If the DVD movie does not play the disc s regional code and your DVD drive s regional code may not match Make sure that a DVD player program has been installed on your notebook You cannot eject a CD or DVD Your notebook must be turned on to remove CDs...

Страница 87: ... from the hard drive using Disk Cleanup Empty the Recycle Bin by right clicking the Recycle Bin icon then clicking Empty Recycle Bin Help and Support For more information about restoring deleted files click Start then click Help and Support Type the keyword System Restore in the Search box then click the arrow Tips Tricks For instructions on deleting unnecessary files see Using Disk Cleanup in Usi...

Страница 88: ...led correctly Remove it firmly reinsert it then restart your notebook For more information see Replacing the hard drive kit on page 61 If your notebook has been subjected to static electricity or physical shock you may need to reinstall the operating system Help and Support For more information about file management click Start then click Help and Support Type the keyword file management in the Se...

Страница 89: ...ake sure that your account with your Internet service provider ISP is set up correctly Contact your ISP technical support for help You see an Unable to locate host message and are unable to browse the Internet This problem can occur when you have typed a URL Web address incorrectly you have lost your Internet connection or your ISP is having technical difficulties Double check the URL or try a dif...

Страница 90: ...tly Contact your ISP for technical support Keyboard The external keyboard does not work Make sure that the keyboard cable is plugged in correctly Remove all extension cables and switchboxes Clean the keyboard by using an aerosol can of air with a narrow straw like extension to remove dust and lint trapped under the keys Try a keyboard that you know works to make sure that the keyboard port works I...

Страница 91: ...on page 57 You see a Not enough memory error message Close all programs then restart your notebook Memory card reader Drive letter for the memory card slot does not appear in the My Computer window Reboot your notebook Modem dial up Your modem does not dial or does not connect Make sure that the modem cable is plugged into the modem jack and not the Ethernet network jack See Left side on page 11 t...

Страница 92: ... is in Category View click Printers and Other Hardware 2 Click Double click the Phone and Modem Options icon then click the Dialing Rules tab 3 Click the location from which you are dialing then click Edit 4 Make sure that all settings are correct Disconnect any answering machine fax machine or printer that is on the same line as the modem Do not connect these devices to the same telephone line as...

Страница 93: ... be too noisy You cannot connect to the Internet The ISP may be having technical difficulties Contact your ISP for technical support See if the modem works with a different communications program The problem may be with just one program Review the troubleshooting information under Internet on page 83 Your 56K modem does not connect at 56K Current FCC regulations restrict actual data transfer rates...

Страница 94: ...modem diagnostics To run modem diagnostics 1 Close all open programs 2 Click Start then click Control Panel The Control Panel window opens If your Control Panel is in Category View click Printers and Other Hardware 3 Click Double click the Phone and Modem Options icon then click the Modems tab 4 Click your modem then click Properties The Modem Properties dialog box opens 5 Click the Diagnostic tab...

Страница 95: ...dow opens If your Control Panel is in Category View click Printers and Other Hardware 2 Click Double click the Phone and Modem Options icon then click the Modems tab 3 Click the modem you want to adjust then click Properties 4 Click the Modem tab then adjust the Speaker volume control 5 Click OK twice to close the Phone and Modem Options dialog box Mouse The external mouse does not work Make sure ...

Страница 96: ... BIOS Setup utility is very secure with no easy way to recover a forgotten password You must return your notebook for repair Call Gateway Customer Care for instructions PC Cards You installed a PC Card and now your notebook is having problems Make sure that you have correctly installed required software for the PC Card For more information see your PC Card s documentation Make sure that the PC Car...

Страница 97: ... to room temperature Check the power management settings Make sure that the battery is installed correctly For more information see Installing the battery on page 20 Make sure that the battery is fully recharged For more information see Recharging the battery on page 49 Make sure that the battery is calibrated correctly For more information see Recalibrating the battery on page 49 Printer The prin...

Страница 98: ...The Control Panel window opens If your Control Panel is in Category View click Printers and Other Hardware 2 Click Double click the Printers and Faxes icon The Printers and Faxes window opens 3 Right click the name of the printer you want to be the default printer then click Set as Default Printer Reinstall the printer driver See the guide that came with your printer for instructions on installing...

Страница 99: ...an online offline button that you need to press after adding paper Sound You are not getting sound from the built in speakers Make sure that headphones are not plugged into the headphone jack Make sure that the volume control on your notebook is turned up For more information see Front on page 10 Make sure that the Windows volume control is turned up Help and Support For more information about pri...

Страница 100: ...settings Help and Support For more information about troubleshooting sound issues click Start then click Help and Support Type the keyword sound troubleshooter in the Search box then click the arrow Tips Tricks For instructions on how to adjust the touchpad settings see Changing the mouse or touchpad settings in Using Your Computer which has been included on your hard drive To access this guide cl...

Страница 101: ...ted correctly to a grounded AC outlet that is supplying power If you use a surge protector make sure that it is turned on If a peripheral device such as a keyboard or mouse does not appear to work make sure that all cables are plugged in securely If you have recently installed hardware or software make sure that you have installed it according to the instructions provided with it If you did not pu...

Страница 102: ...w troubleshooting steps Telephone numbers Gateway offers a wide range of customer service customer care and information services Automated troubleshooting system Warning To avoid bodily injury do not attempt to troubleshoot your notebook problem if Power cords or plugs are damaged Liquid has been spilled into your notebook Your notebook was dropped The case was damaged Instead unplug your notebook...

Страница 103: ...rial service Get tutorial assistance for software issues billed by the minute 800 229 1103 charged to your credit card 900 555 4695 charged to your telephone bill Gateway Customer Care Talk to a Gateway Customer Care representative about a non tutorial technical support question See Before calling Gateway Customer Care on page 95 before calling Gateway Customer Care telephone numbers vary by count...

Страница 104: ...owing computer based training Resource Service description For more information Gateway Learning Libraries A variety of courses and tutorials are available on CD Select from several easy to use learning libraries www gateway com training Online Training from Learn With Gateway More than 450 online courses are available from Learn With Gateway All you have to do is go online and log in You select t...

Страница 105: ...Appendix A 99 Safety Regulatory and Legal Information Safety information Regulatory statements Notices ...

Страница 106: ... insert objects of any kind into the notebook ventilation openings Some products are equipped with a three wire power cord to make sure that the product is properly grounded when in use The plug on this cord will fit only into a grounding type outlet This is a safety feature If you are unable to insert the plug into an outlet contact an electrician to install the appropriate outlet If you use an e...

Страница 107: ...nce statements Wireless Guidance Low power Radio transmitting type devices radio frequency RF wireless communication devices may be present embedded in your notebook system These devices may operate in the 2 4 GHz i e 802 11B G LAN Bluetooth 5 2 GHz i e 802 11A LAN and traditional cellular or PCS cellular bands i e Cellular data modem The following section is a general overview of considerations w...

Страница 108: ... on wireless devices Examples of common restrictions are listed below Warning Radio frequency wireless communication can interfere with equipment on commercial aircraft Current aviation regulations require wireless devices to be turned off while traveling in an airplane 802 11B also known as wireless Ethernet or Wifi and Bluetooth communication devices are examples of devices that provide wireless...

Страница 109: ... by the FCC The wireless devices installed in this system are intended to be used indoors In some areas use of these devices outdoors is prohibited Operation of this device is subject to the following two conditions 1 This device may not cause harmful interference and 2 this device must accept any interference received including interference that may cause undesired operation of the device Caution...

Страница 110: ...t different from that to which the receiver is connected Consult the dealer or an experienced radio TV technician for help Compliance Accessories The accessories associated with this equipment are shielded video cable when an external monitor is connected These accessories are required to be used in order to ensure compliance with FCC rules FCC declaration of conformity Responsible party Gateway C...

Страница 111: ...be required The telephone company may request that you disconnect the equipment until the problem is resolved The telephone company may make changes in its facilities equipment operations or procedures that could affect the operation of this equipment If this happens the telephone company will provide advance notice in order for you to make necessary modifications to maintain uninterrupted service...

Страница 112: ...dy when wireless devices are on The power output of the wireless device or devices which may be embedded in your notebook is well below the RF exposure limits as set by Industry Canada Operation of this device is subject to the following two conditions 1 This device may not cause harmful interference and 2 this device must accept any interference received including interference that may cause unde...

Страница 113: ...ngle line individual service may be extended by means of a certified connector assembly The customer should be aware that compliance with the above conditions may not prevent degradation of service in some situations Repairs to certified equipment should be made by an authorized Canadian maintenance facility designated by the supplier Any repairs or alterations made by the user to this equipment o...

Страница 114: ... DHHS Radiation Performance Standard Should the unit ever need servicing contact an authorized service location EPA ENERGY STAR As an ENERGY STAR Partner Gateway has determined that this product meets the ENERGY STAR guidelines for energy efficiency when used with a computer equipped with a Display Power Management System Warning Use of controls or adjustments or performance of procedures other th...

Страница 115: ...s the right to make improvements in this manual and the products it describes at any time without notices or obligation Trademark Acknowledgments Gateway and the Black and White Spot Design are trademarks or registered trademarks of Gateway Inc in the U S and other countries SpotShop Spotshop com and Your Ware are trademarks of Gateway Inc Intel Intel Inside logo and Pentium are registered tradema...

Страница 116: ...110 www gateway com Appendix A Safety Regulatory and Legal Information ...

Страница 117: ...1 49 conserving power 52 icons 48 installing 51 latch 14 locating 14 managing power 52 monitoring charge 48 purchasing 18 recalibrating 49 recharging 21 49 release latch 14 replacing 51 bays battery 51 hard drive 14 memory 14 57 brightness system keys 30 31 C cable lock 13 Caps Lock indicator 27 cards inserting memory card 41 inserting PC Card 43 memory card slot 10 PC Card slot 11 removing memory...

Страница 118: ...GA 11 45 mouse 12 network 13 power 13 21 printer 12 projector 45 scanner 12 speaker 10 USB 12 VGA 11 45 video camera 12 copyright notice 109 customer service sales 97 CyberLink PowerDVD 40 D default printer 92 digital camera USB port 12 digital video camera IEEE 1394 port 12 directional keys 29 display properties 45 switching 30 troubleshooting 77 documentation Gateway Web site 3 help 5 Help and S...

Страница 119: ... topics 6 specifications 17 Firewire port 12 Fn key 29 30 folders opening 33 function keys 29 G Gateway eSupport 17 model number 14 16 serial number 16 17 Web address 3 Web site 3 H hard drive bay 14 indicator 27 installing 61 replacing 61 troubleshooting 81 headphone jack 10 help online 7 using 5 Help and Support 5 searching 6 starting 5 Using your computer link 5 Hibernate mode 54 hot swapping 4...

Страница 120: ...y 14 LCD panel release 10 LCD panel cleaning 68 release latch 10 switching display 30 troubleshooting 77 LCD CRT system key 30 lock Kensington cable 13 M maintenance cleaning 67 68 virus protection 69 Windows Update 72 memory bay 14 installing 57 purchasing 18 removing 57 replacing 57 troubleshooting 85 memory card reader locating 10 memory card types supported 41 using 41 microphone jack 10 Micro...

Страница 121: ...ard adding 43 eject button 43 inserting 43 installing 43 removing 43 slot 43 troubleshooting 90 PCMCIA card See PC Card PDA memory cards 41 playing audio CD 40 DVD 40 pointer identifying 32 moving 33 power AC adapter 21 53 automobile airplane adapter 53 battery 26 48 49 51 52 button 15 30 changing modes 54 connector 13 21 conserving battery power 52 EmPower adapter 53 extending battery life 52 Hib...

Страница 122: ...g 33 searching in Help and Support 6 security features Kensington cable lock 13 serial number 16 17 setting up safety precautions 100 shortcut menus accessing 34 shortcuts opening menu 34 shutting down notebook 25 26 SO DIMM See memory sound adjusting 35 controls 35 muting 35 troubleshooting 93 speakers jack 10 specifications 17 Standby mode 25 30 54 system key 30 starting notebook 24 programs 33 ...

Страница 123: ...mated system 96 device installation 76 display 77 DVD drive 78 faxes 87 files 80 general guidelines 75 hard drive 81 Internet connection 83 87 IRQ conflict 76 keyboard 84 LCD panel 77 memory 85 memory card reader 85 modem 85 mouse 89 network 90 passwords 90 PC Cards 90 power 91 printer 91 safety guidelines 74 screen 77 95 screen area 77 screen resolution 77 sound 93 status indicators 94 technical ...

Страница 124: ...djusting modem 89 controls 10 35 muting 10 35 troubleshooting 93 W waking up notebook 25 Web site Gateway 3 Windows key 29 Product Key Code 16 restoring 72 updating 72 Windows Media Player 40 Windows Security Center using 69 wireless network button 30 turning off 36 turning on 36 ...

Страница 125: ......

Страница 126: ...MAN 3000 SER M210 USR GDE R0 10 04 ...

Отзывы: