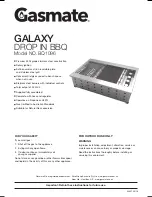
Gasmate GALAXY BQ1096 Скачать руководство пользователя страница 7

6

WARNING

• Improper installation, adjustment, alteration, service or maintenance can cause injury  

or property damage.

• Read the instructions thoroughly before installing or servicing this equipment.
• THIS APPLIANCE MUST NOT BE INSTALLED OR USED INDOORS.
• NATURAL GAS APPLIANCE. TO BE INSTALLED ONLY BY AN AUTHORISED PERSON.
• THE AUTHORISED PERSON WILL PROVIDE A CERTIFICATE OF COMPLIANCE.
• A Gasmate NGC30 or NGC40 AGA approved natural gas pressure regulator must be installed in the pipeline and 

be set at 1 kPa.

NATURAL GAS CONVERSION

TO BE INSTALLED ONLY ON OR IN A NON-
COMBUSTIBLE ENCLOSURE

Note: Recommended clearances must be maintained.

Tools Required: 

Screw driver, adjustable spanner, Phillips head screw 
driver.

GAS PIPING 

1.   This appliance is only to be installed by an authorised 

person.

2.   Check with local and state plumbing and heating 

codes regarding sizing of the gas lines.

3.   All gas pipe connections must be sealed with a gas 

pipe compound resistant to Natural Gas.

4.   Installation of a drip leg if required in the gas supply 

line must conform to AS5601.

5.   When checking for gas leaks, do not use an open 

flame.  Use a soap and water solution and check for 
bubbles indicating gas leakage.

6.   Installation of 1/8” NPT plugged tapping, accessible 

for test gauge connections, is required upstream of 
the gas supply connection.

Warning 

Improper installation, adjustment, alteration, service or 
maintenance can cause injury or property damage. Read 
the instructions thoroughly before installing or servicing 
this equipment.

SERVICING INSTRUCTIONS

Appliances should be serviced at least annually and 
servicing must only be carried out by a Licensed Plumber 
or Authorised Person.
Clean the Burner Ports and top with a Soft Brush. 
Inspect and clean all combustion air inlets, then replace 
the Burner ensuring it is firmly secured.

Minimum Clearance for Ventilation:

Rear - 50mm         Side - 50mm

NOTE TO THE INSTALLER:

The injector size is increased by removing the Propane 
Nozzle (outer brass cap) and leaving the Natural Gas 
Nozzle in place.  Ensure the Natural gas nozzle is still 
tight and in the correct position and the hole size is 
correct.  
To adjust the turndown/low remove the control knobs 
to allow access to the “LOW” adjustment screw. With a 
small blade screwdriver turn the brass screw fully anti-
clockwise.

TEST OPERATION OF APPLIANCE  
BEFORE LEAVING.

Conversion ONLY to be done by an authorised person.

Overall Dimensions

Length

Width

Height

BQ1096

933mm

609mm

253mm

Содержание GALAXY BQ1096

Страница 1: ...ng this equipment 03497 09 16 Important Retain these instructions for future use Gasmate is a registered trademark of Sitro Group Australia Pty Ltd www gasmate com au Aber Ltd Hamilton N Z www gasmate co nz Premium 304 grade stainless steel construction Rotary ignition Satin enamel cast iron reversible plate and stainless steel grill Convenient lid gives you extra bench space when not in use Stain...

Страница 2: ... attached to the barbecue body Hose connection thread at gas inlet is 1 4 BSP GENERAL INFORMATION Gas Cylinder Use Safety This is a low pressure barbecue and must only be used with the hose and regulator supplied Your barbecue is designed for use with 9Kg propane gas cylinders certified to AS 2469 The cylinder should be filled by a reputable gas supplier and visually inspected and re qualified at ...

Страница 3: ...d gas cylinder to your barbecue Read carefully before assembling and operating your barbecue FOR YOUR SAFETY Do not store or use petrol or other flammable liquids in the vicinity of this or any other appliance Keep the gas hose away from hot surfaces and protect from dripping grease Avoid unnecessary twisting of hose Visually inspect the hose prior to each use for cracks excessive wear or other da...

Страница 4: ...knob and keep pressing whilst turning anti clockwise to the HIGH position a clicking sound is heard this will light the burner If the burner does not light repeat this process 4 If the burner still does not light turn the control knob to OFF wait 5 minutes and repeat step 3 5 Adjust the heat by turning the knob to the High Low position 6 To turn the barbecue OFF turn the cylinder valve to the OFF ...

Страница 5: ...clean the burner tubes and burner ports Cleaning the Drip Tray To avoid fat or grease dripping from the barbecue remove and empty the drip tray after each use Wait until the drip tray is cool to touch before disposing of contents The drip tray should be washed periodically in a mild detergent and warm water solution Abnormal Operation Any of the following are considered to be abnormal operation an...

Страница 6: ...ch as an open paper clip 8 Check burner for damage due to normal wear and corrosion some holes may become enlarged If any large cracks or holes are found replace burner 9 Carefully re attach the igniter electrode then refit burners ensuring they are located on the gas valve 10 Replace clips at the end of burner 11 Replace cooking grates WARNING Beware of spiders and wasps Burner tube should be ins...

Страница 7: ...and water solution and check for bubbles indicating gas leakage 6 Installation of 1 8 NPT plugged tapping accessible for test gauge connections is required upstream of the gas supply connection Warning Improper installation adjustment alteration service or maintenance can cause injury or property damage Read the instructions thoroughly before installing or servicing this equipment SERVICING INSTRU...

Страница 8: ...IC REPRESENTATIONS OF OUTDOOR AREAS The following figures are diagrammatic representations of outdoor areas Rectangular areas have been used in these figures the same principles apply to any other shaped area Within a partial enclosure that includes an overhead cover and no more than two walls see Example 2 3 Within a partial enclosure that includes an overhead cover and more than two walls the fo...

Отзывы: