background image

14 Garrett Metal Detectors

EuroACE™  15


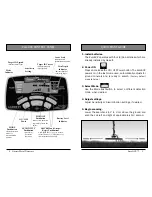
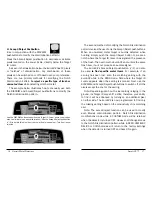
PINPOINT Pushbutton

Press and hold the Pinpoint
pushbutton to determine the exact location of a target.
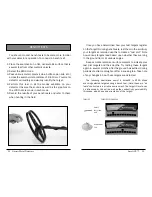
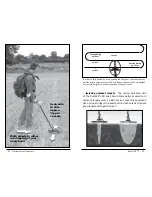
  To use the pinpoint function, position the searchcoil to the 
side of the target's suspected location at a fixed height above 
the ground (e.g. 2cm). Press and hold the Pinpoint button and 
sweep the searchcoil over the target area while maintaining 
the same fixed height above the ground (e.g. 2cm). Sweep 
the searchcoil side-to-side and front-to-back in a crosshair 
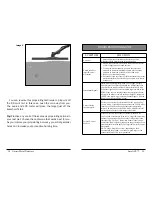
pattern to locate the peak signal. Note: it is important to 
maintain a constant height during the entire Pinpointing 
process to prevent ground mineralization from producing 
false signals or masking the target's signal.
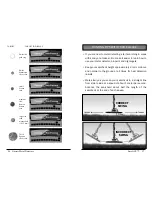
  The bar graph on the LCD can also aid in locating a peak 
signal. When pinpointing, the Upper Scale on the LCD Screen 
indicates signal strength. When the greatest number of LCD 
segments (increasing left to right on the scale) is shown, the 
center of the searchcoil is directly over the target with the 
depth of a coin-sized target shown on the depth scale.
  With practice, you will be able to pinpoint objects quickly 
and accurately.


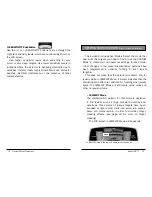
DISCRIM Pushbutton

(Use in conjunction with the Accept/Reject pushbutton to 
modify the discrimination pattern.)
Use the (+) or (-) DISCRIM pushbuttons to move the Target 
ID cursor to the left or right. Next, use the Accept/Reject 
pushbutton to modify the Lower Scale discrimination pattern.


ON/OFF Power Pushbutton


Press and release to switch the unit ON and resume hunting 
with the same settings used prior to turning the unit OFF. To 
restore the factory settings, press and hold the power button 
for 5 to 10 seconds (until the detector produces a fast double 
beep).


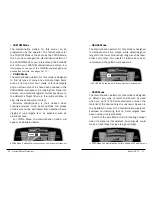
MODE Pushbutton

Push the MODE button to select 
one of five discrimination modes (Zero, Jewely, Custom, 
Relics or Coins). See the next section ("Selecting Modes") for 
details on each 

EuroACE

 Mode.

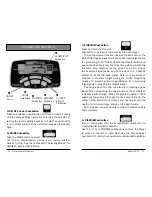
PUSHBUTTON CONTROLS

 

ON/OFF 

Power

MODE 

Pushbutton

PINPOINT 

Pushbutton

ACCEPT/

REjECT 

Pushbutton

SENSITIVITY 

Pushbutton

DISCRIM 

Pushbutton

Содержание EURO ACE

Страница 1: ...Euro ACE Owner s Manual Owner s Manual...

Страница 2: ...notches for separating desirable targets from iron junk in cluttered areas and a standard 22x28cm elliptical Double D searchcoil engineered for optimum performance in Europe s more challenging mineral...

Страница 3: ...10 Audio Features 13 Pushbutton Controls 14 Setting Custom Modes Discrim Patterns 19 Enhanced Iron Resolution 22 Bench Tests 24 Hunting Tips With Your EuroACE Detector 27 Target Pinpointing Methods 31...

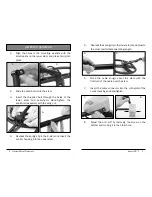
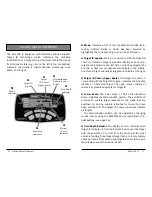
Страница 4: ...sired 5 Begin scanning Lower the searchcoil to 2 to 3 cm above the ground and scan the coil left and right at approximately 1m second Battery Level Indicator DISCRIM and Accept Reject Pushbuttons Use...

Страница 5: ...al Detectors EuroACE 7 EuroACE COMPONENTS Control Housing S shaped Stem Upper Stem Lower Stem Search coil Handle Grip Padded Arm Cuff LCD Screen Detector Stand Pushbutton Controls Arm strap Spring Cli...

Страница 6: ...hcoil assembly with the wing nut 4 Depress the spring clip in the S stem and insert the control housing into the upper stem 1 2 3 4 5 Depress the spring clip in the lower stem and adjust to the most c...

Страница 7: ...switched on and no audible response for those that have been switched off The Target ID Cursor will always indicate all targets The discrimination pattern can be adjusted by changing modes and or usi...

Страница 8: ...ery type and quality Access and replace the batteries by sliding the cover off the control housing Remove batteries when the EuroACE will be stored for longer than 30 days Sensitivity Indicator The Eu...

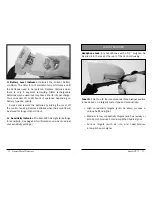
Страница 9: ...ng left to right on the scale is shown the center of the searchcoil is directly over the target with the depth of a coin sized target shown on the depth scale With practice you will be able to pinpoin...

Страница 10: ...t is audibly detected while hunting simply push the Accept Reject button to create a notch where the Target ID Cursor has signaled the presence of the trash The next time the EuroACE encounters the sa...

Страница 11: ...nation pattern for this mode is designed to find jewelry such as rings bracelets watches and necklaces Three pixels of ferrous targets have been excluded to ignore most nails and small iron pieces Som...

Страница 12: ...tabs may not be eliminated from detection Some digging of junk targets is to be expected such as aluminum cans For COINS Mode the discrimination pattern will appear as illustrated below In COINS Mode...

Страница 13: ...et If too much iron discrimination is applied the good target can be missed Read page 23 to learn how to apply the proper amount of iron discrimination to eliminate the nail shown in Illustration 1 an...

Страница 14: ...Once you have determined how your test targets register on the Target ID during bench tests test them in the soil Bury your targets at recorded depths to create a test plot Note how various targets re...

Страница 15: ...easier to learn how to use your metal detector pinpoint and dig targets Keep your searchcoil height approximately 2 to 3 cm above and parallel to the ground at all times for best detection results Wa...

Страница 16: ...the swings of your searchcoil by half the length of the coil about 14 cm Sweep the searchcoil in a straight line or with a slight arc at a sweep speed of about 1m sec Isolating adjacent targets The n...

Страница 17: ...coil to the side of the target s suspected location Press and hold the Pinpoint button then sweep the searchcoil side to side and front to back in a crosshair pattern to locate the peak signal You wil...

Страница 18: ...inpointing technique using Pinpoint pushbutton Note It is important to maintain a constant searchcoil height above the ground e g 2cm during the entire Pinpointing process to prevent ground mineraliza...

Страница 19: ...lly mean you ve found a deeply buried target or one that is positioned at a difficult angle for your detector to read Scan from different directions to help define the signal In the case of multiple t...

Страница 20: ...ch search area I will observe the Golden Rule using good outdoor manners and conducting myself at all times in a manner which will add to the stature and public image of all people engaged in the fiel...

Страница 21: ...performance CARING FOR YOUR EuroACE DETECTOR Your EuroACE detector is warranted for 24 months limited parts and labor but does not cover damage caused by alteration modification neglect accident or mi...

Страница 22: ...ssory products are available from your local or dealer or by calling the Garrett factory at 1 800 527 4011 4 5 11 5cm ACE Super Sniper Searchcoil Part No 221800 EuroACE ACCESSORIES Use when searching...

Страница 23: ...roportional audio vibration pulse rate target indicators and 360 side scan detection area Water resistant with LED light for low light uses Includes woven belt holster and 9 volt battery ToseeGarrett...

Страница 24: ...M Books a division of Garrett Metal Detectors publishes new titles each year related to treasure hunting gold pros pecting coin hunting and relic recovery Suggested Reading European Metal Detecting Gu...

Страница 25: ...46 Garrett Metal Detectors 1881 W State Street Garland Texas 75042 Toll Free 800 527 4011 Tel 972 494 6151 Fax 972 494 1881 Email sales garrett com 2010 Garrett Electronics Inc PN 1533100 A 0710...

Отзывы: