GARNET GeForce2 MX
7
2. Installation
¢ Ñ
The pictures shown in this manual are based on Windows 98 SE
and Windows 2000.
2.1 Installing Graphic Card into PC
Please read carefully and follow the instructions as below in order to
install GARNET GeForce2 MX Twin View.
¨ ç
Turn off power of your computer.
¨ è
Undress the cover of your computer by unleashing bolts.
¨ é
Check whether AGP Bus Slot is in place or not. If not, it is
impossible to install. Remove and save the screw on the slot cover.
You will need it to secure the card in place.
¨ ê
Hold the card upright by the metal edge, and carefully slide it
into the expansion slot. Gently apply pressure to the upper metal
edge only, making sure it snaps into AGP Bus Slot.
¨ ë
Fasten securely the card into place with the screw that fits into the
top notch of the metal bracket.
¨ ì
Dress the cover of your computer by leashing bolts.
¨ í
Connect the Monitor with GARNET TNT2 Ultra Video Connector
¨ î
Turn power on and check whether display is O.K.
2.2 Driver Installation
This section is the explanation on driver installation. Minimum
requirements for GARNET GeForce2 MX Twin View be Windows95
OSR2.1 or higher, Windows98, Windows NT4.0 (Service Pack 4),
Windows 2000, as O/S. And also, after installing driver, DirectX 7.0a is
recommended for correct display. (for DirectX installation, see page
#24.)
2.2.1 Driver Installation in Windows 9x
GARNET GeForce2 MX Windows 9x driver is operate-able in both
Windows 95 and 98. When operating system in your computer is
Windows 95 or 98 and you would like to replace only graphic card with
our Graphic Card, please review
¡ ¸
2.2.1.1
¡ ¹
for driver installation. And
when you would like to change O/S into Windows 9x after installing
Содержание GeForce 2 MX
Страница 1: ...1 Garnet GeForce 2 MX Twin View Model No GV 4400 User s Manual GARNET SYSTEMS CO LTD ...
Страница 11: ...GARNET GeForce2 MX 11 8 Click Next in the following picture 9 Click Finish in the following picture ...
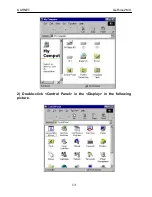
Страница 13: ...GARNET GeForce2 MX 13 2 Double click Control Panel in the Display in the following picture ...
Страница 18: ...GARNET GeForce2 MX 18 12 Click next in the following picture 14 Click Finish in the following picture ...
Страница 19: ...GARNET GeForce2 MX 19 15 Click Close in the following picture ...
Страница 23: ...GARNET GeForce2 MX 23 6 Please click Yes in the following picture 7 Click Finish in the following picture ...
Страница 25: ...GARNET GeForce2 MX 25 2 Click Change in the following picture 3 Click Have disk in the following picture ...
Страница 29: ...GARNET GeForce2 MX 29 11 Click OK in the following picture 12 Click Open in the following picture ...
Страница 30: ...GARNET GeForce2 MX 30 13 Click OK in the following picture 14 Click Close in the following picture ...


