


your rounds of golf. To sign up for a free account, go to
Store your activities
: After you complete and save an activity
with your device, you can upload that activity to Garmin
Connect and keep it as long as you want.
Analyze your data
: You can view more detailed information
about your fitness and outdoor activities, including time,
distance, heart rate, calories burned, cadence, an overhead
map view, and pace and speed charts. You can view more
detailed information about your golf games, including
scorecards, statistics, and course information. You can also
view customizable reports.
NOTE:
Some data requires an optional accessory such as a
heart rate monitor.
Track your progress
: You can track your daily steps, join a
friendly competition with your connections, and meet your
goals.
Share your activities
: You can connect with friends to follow
each other's activities or post links to your activities on your
favorite social networking sites.
Manage your settings
: You can customize your device and
user settings on your Garmin Connect account.
Using Garmin Connect Mobile
You can upload all of your activity data to your Garmin Connect
account for comprehensive analysis. With your Garmin Connect
account, you can view a map of your activity, and share your
activities with friends. You can turn on auto upload in the Garmin
Connect Mobile app.
1
From the Garmin Connect Mobile app, select
>
Devices
.
2
Select your vívoactive device, and select
Device Settings
.
3
Select the toggle switch to turn on auto upload.
Using Garmin Connect on Your Computer
If you have not paired your vívoactive device with your
smartphone, you can upload all of your activity data to your
Garmin Connect account using your computer.
1
Connect the device to your computer using the USB cable.
2
Go to
3
Follow the on-screen instructions.
ANT+ Sensors
Your device can be used with wireless ANT+ sensors. For more
information about compatibility and purchasing optional sensors,
go to
Pairing ANT+ Sensors
The first time you connect a sensor to your device using ANT+
wireless technology, you must pair the device and sensor. After
they are paired, the device connects to the sensor automatically
when you start an activity and the sensor is active and within
range.
NOTE:
If a heart rate monitor was bundled with your device, the
included heart rate monitor is already paired with your device.
1
If you are pairing a heart rate monitor, put on the heart rate
monitor (
Putting On the Heart Rate Monitor
).
The heart rate monitor does not send or receive data until
you put it on.
2
Bring the device within 3 m (10 ft.) of the sensor.
NOTE:
Stay 10 m (33 ft.) away from other ANT+ sensors
while pairing.
3
Select the action key.
4
Select
System
>
Sensors
>
Add New
.
5
Select an option:
• Select
Search All
.
• Select your sensor type.
After the sensor is paired with your device, the sensor status
changes from Searching to Connected. Sensor data appears
in the data page loop or a custom data field.
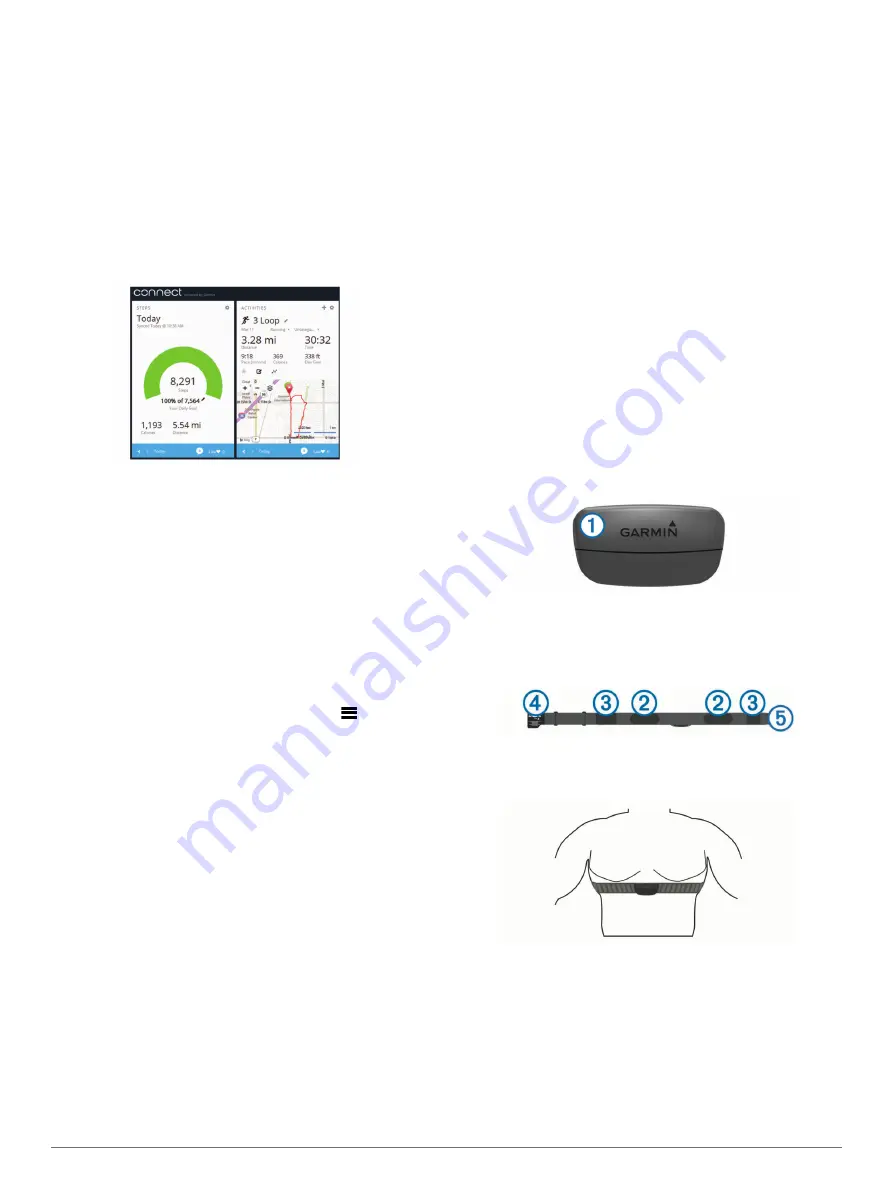
Putting On the Heart Rate Monitor
NOTE:
If you do not have a heart rate monitor, you can skip this
task.
You should wear the heart rate monitor directly on your skin, just
below your sternum. It should be snug enough to stay in place
during your activity.
1
Snap the heart rate monitor module
À
onto the strap.
The Garmin logos on the module and the strap should be
right-side up.
2
Wet the electrodes
Á
and the contact patches
Â
on the back
of the strap to create a strong connection between your chest
and the transmitter.
3
Wrap the strap around your chest, and connect the strap
hook
Ã
to the loop
Ä
.
NOTE:
The care tag should not fold over.
The Garmin logos should be right-side up.
4
Bring the device within 3 m (10 ft.) of the heart rate monitor.
After you put on the heart rate monitor, it is active and sending
data.
TIP:
If the heart rate data is erratic or does not appear, see the
troubleshooting tips (
Tips for Erratic Heart Rate Data
).
Setting Your Heart Rate Zones
The device uses your user profile information from the initial
setup to determine your default heart rate zones. The device
has separate heart rate zones for running and cycling. For the
6
ANT+ Sensors
Содержание vivoactive
Страница 1: ...vívoactive Owner s Manual February 2015 Printed in Taiwan 190 01749 00_0A ...
Страница 4: ......
Страница 19: ......