keeping GPX interchange files on your hard drive
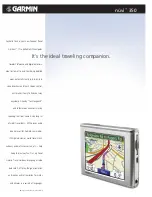
1. On the back, the Nuvi has a mini-USB port. Use any standard USB-mini cable to connect the
Nuvi to your computer
2. The Nuvi will appear in Windows Explorer (PC) or Finder (Mac) as an external disk drive, and
will behave pretty much like a flash (“thumb”) drive.
3. One or two drives may appear. The “Garmin” drive will be the internal flash memory of the
Nuvi, and will be where the GPS coordinate files are to be found. The second drive, if present,
is the SD card that optionally can be inserted into the Nuvi. It will have whatever name has
been assigned (possibly “NONAME”). It is only of interest if you are using alternate maps;
GPS tracks are not normally stored there.
4. In the Garmin flash drive, navigate to the directory Garmin\GPX
5. if you have been on a relatively short trip, there will be only one file, current.gpx. If the trip is
longer, there may be gpx files in the archive directory and files with other names.
6. Copy these files into a directory on your hard drive. I suggest adapting a scheme involving
subdirectories with good mnemonic names, locales, dates, or some combination of them.
7. Once the files are copied, find the Windows Explorer or Finder window and eject all the
Garmin drives (one or two). Then disconnect the Garmin. Depending on the Garmin, it may
restart automatically. Don't worry about this, go on to “Cleaning data from the Nuvi afterwards”
Loading GPX files into Google Earth later
1. Start Google Earth on your computer
2. select GPS from the tools menu
3. select Import From File
4. navigate to the GPX file you wish to load into Google Earth
Cleaning data from the Nuvi afterwards
1. Once you have copied the data off the Garmin, you should remove it so that you will get clean,
distinct tracks for your next trip.
2. In the top menu screen, select Tools
3. in the Tools screen, select My Data
4. select Clear Trip Log, then select yes
5. select Delete Favorites, then select “Select All”
6. if you have any you do not wish to delete, then scroll down and uncheck them.
7. Select Delete, then select yes
8. your Garmin is now clean and ready for its next expedition


